GE JRP20WJWW Owner's manual

Type
Owner's manual
Write the model and serial
numbers here:
Model # ____________________
Serial # ____________________
You can find them on a label on
the front of the oven behind the
door.
GE is a trademark of the General Electric Company. Manufactured under trademark license.
OWNER’S MANUAL
WALL OVEN
Built-In Electric
49-80715 Rev. 1 08-19 GEA
JRP20
JRP28
JRS06
SAFETY INFORMATION ..........3
USING THE OVEN
Oven Controls ..........................6
Clock and Timer ........................7
Special Features ........................8
Sabbath ..............................10
Baking ............................... 11
Baking and Roasting ...................12
Oven Thermostat ......................13
Broiling ...............................14
CARE AND CLEANING
Self-Cleaning ..........................15
Oven Door ............................16
Racks, Elements, Panels ................17
Oven Light ............................18
TROUBLESHOOTING TIPS .......19
LIMITED WARRANTY ............22
ACCESSORIES ....................23
CONSUMER SUPPORT ...........24
2 49-80715 Rev. 1
THANK YOU FOR MAKING GE APPLIANCES A PART OF YOUR HOME.
Whether you grew up with GE Appliances, or this is your first, we’re happy to have you in the family.
We take pride in the craftsmanship, innovation and design that goes into every GE Appliances
product, and we think you will too. Among other things, registration of your appliance ensures that we
can deliver important product information and warranty details when you need them.
Register your GE appliance now online. Helpful websites and phone numbers are available in the
Consumer Support section of this Owner’s Manual. You may also mail in the pre-printed registration
card included in the packing material.
49-80715 Rev. 1 3
READ AND SAVE THESE INSTRUCTIONS
SAFETY INFORMATION
IMPORTANT SAFETY INFORMATION
READ ALL INSTRUCTIONS BEFORE USING THE APPLIANCE
WARNING
GENERAL SAFETY INSTRUCTIONS
Ŷ 8VHWKLVDSSOLDQFHRQO\IRULWVLQWHQGHGSXUSRVHDV
described in this Owner’s Manual.
Ŷ%HVXUH\RXUDSSOLDQFHLVSURSHUO\LQVWDOOHGDQG
grounded by a qualified installer in accordance with
the provided installation instructions.
Ŷ'RQRWDWWHPSWWRUHSDLURUUHSODFHDQ\SDUWRI\RXU
oven unless it is specifically recommended in this
manual. All other servicing should be performed by a
qualified technician.
Ŷ%HIRUHSHUIRUPLQJDQ\VHUYLFHGLVFRQQHFWWKH
power supply at the household distribution panel by
removing the fuse or switching off the circuit breaker.
Ŷ'RQRWOHDYHFKLOGUHQDORQH²FKLOGUHQVKRXOGQRW
be left alone or unattended in an area where an
appliance is in use. They should never be allowed to
climb, sit or stand on any part of the appliance.
Ŷ
CAUTION
'RQRWVWRUHLWHPVRILQWHUHVW
to children in cabinets above an oven - children
climbing on the oven to reach items could be
seriously injured.
Ŷ8VHRQO\GU\SRWKROGHUV²PRLVWRUGDPSSRWKROGHUV
RQKRWVXUIDFHVPD\UHVXOWLQEXUQVIURPVWHDP'R
QRWOHWSRWKROGHUVWRXFKKRWKHDWLQJHOHPHQWV'R
not use a towel or other bulky cloth in place of pot
holders.
Ŷ 1HYHUXVH\RXUDSSOLDQFHIRUZDUPLQJRUKHDWLQJ
the room.
Ŷ 'RQRWWRXFKWKHKHDWLQJHOHPHQWVRUWKHLQWHULRU
surface of the oven. These surfaces may be hot
enough to burn even though they are dark in color.
'XULQJDQGDIWHUXVHGRQRWWRXFKRUOHWFORWKLQJ
or other flammable materials contact any interior
area of the oven; allow sufficient time for cooling
first. Other surfaces of the appliance may become
hot enough to cause burns. Potentially hot surfaces
include the oven vent opening, surfaces near the
opening and crevices around the oven door.
Ŷ 'RQRWKHDWXQRSHQHGIRRGFRQWDLQHUV3UHVVXUH
could build up and the container could burst,
causing an injury.
Ŷ 'RQRWXVHDQ\W\SHRIIRLORUOLQHUWRFRYHUWKH
oven bottom or anywhere in the oven, except as
described in this manual. Oven liners can trap heat
or melt, resulting in damage to the product and risk
of shock, smoke or fire.
Ŷ $YRLGVFUDWFKLQJRULPSDFWLQJJODVVGRRUVRUFRQWURO
SDQHOV'RLQJVRPD\OHDGWRJODVVEUHDNDJH'R
not cook on a product with broken glass. Shock, fire
or cuts may occur.
Ŷ &RRNPHDWDQGSRXOWU\WKRURXJKO\²PHDWWRDWOHDVW
an internal temperature of 160°F and poultry to at
least an internal temperature of 180°F. Cooking
to these temperatures usually protects against
foodborne illness.
WARNING
Read all safety instructions before using the product. Failure to follow these instructions may result
in fire, electrical shock, serious injury or death.
WARNING
KEEP FLAMMABLE MATERIALS AWAY FROM THE OVEN
Failure to do so may result in fire or personal injury.
Ŷ 'RQRWVWRUHRUXVHIODPPDEOHPDWHULDOVLQRUQHDU
an oven, including paper, plastic, pot holders,
linens, wall coverings, curtains, drapes and gasoline
or other flammable vapors and liquids.
Ŷ 1HYHUZHDUORRVHILWWLQJRUKDQJLQJJDUPHQWVZKLOH
using the appliance. These garments may ignite if
they contact hot surfaces, causing severe burns.
Ŷ 'RQRWOHWFRRNLQJJUHDVHRURWKHUIODPPDEOH
materials accumulate in or near the oven. Grease in
the oven or near the oven may ignite.
4 49-80715 Rev. 1
READ AND SAVE THESE INSTRUCTIONS
SAFETY INFORMATION
WARNING
IN THE EVENT OF A FIRE, TAKE THE FOLLOWING
STEPS TO PREVENT INJURY AND FIRE SPREADING
Ŷ 'RQRWXVHZDWHURQJUHDVHILUHV1HYHUSLFNXSD
flaming pan.
Ŷ ,IWKHUHLVDILUHLQWKHRYHQGXULQJEDNLQJVPRWKHU
the fire by closing the oven door and turning the
oven off or by using a multi-purpose dry chemical or
foam-type fire extinguisher.
Ŷ ,IWKHUHLVDILUHLQWKHRYHQGXULQJVHOIFOHDQWXUQ
the oven off and wait for the fire to go out. 'RQRW
force the door open,QWURGXFWLRQRIIUHVKDLUDW
self-clean temperatures may lead to a burst of flame
from the oven. Failure to follow this instruction may
result in severe burns.
IMPORTANT SAFETY INFORMATION
READ ALL INSTRUCTIONS BEFORE USING THE APPLIANCE
WARNING
OVEN SAFETY INSTRUCTIONS
Ŷ 6WDQGDZD\IURPWKHRYHQZKHQRSHQLQJWKHRYHQ
door. Hot air or steam which escapes can cause
burns to hands, face and/or eyes.
Ŷ .HHSWKHRYHQYHQWXQREVWUXFWHG
Ŷ .HHSWKHRYHQIUHHIURPJUHDVHEXLOGXS*UHDVHLQ
the oven may ignite.
Ŷ 3ODFHRYHQUDFNVLQGHVLUHGORFDWLRQZKLOHRYHQLV
FRRO,IUDFNPXVWEHPRYHGZKLOHRYHQLVKRWGRQRW
let pot holder contact hot heating element in oven.
Ŷ :KHQXVLQJFRRNLQJRUURDVWLQJEDJVLQWKHRYHQ
follow the manufacturer’s directions.
Ŷ 3XOOLQJRXWWKHVWDQGDUGUDFNVWRWKHLUVWRSORFNV
or the extension rack to its fully open position is
DFRQYHQLHQFHLQOLIWLQJKHDY\IRRGV,WLVDOVRD
precaution against burns from touching hot surfaces
of the door or oven walls.
Ŷ 'RQRWOHDYHLWHPVVXFKDVSDSHUFRRNLQJXWHQVLOV
RUIRRGLQWKHRYHQZKHQQRWLQXVH,WHPVVWRUHGLQ
an oven can ignite.
Ŷ 1HYHUSODFHFRRNLQJXWHQVLOVSL]]DRUEDNLQJVWRQHV
or any type of foil or liner on the oven floor. These
items can trap heat or melt, resulting in damage to
the product and risk of shock, smoke or fire.
WARNING
SELF-CLEANING OVEN SAFETY INSTRUCTIONS
The self-cleaning feature operates the oven at temperatures high enough to burn away food soils in the oven.
Follow these instructions for safe operation.
Ŷ 'RQRWWRXFKRYHQVXUIDFHVGXULQJVHOIFOHDQ
RSHUDWLRQ.HHSFKLOGUHQDZD\IURPWKHRYHQGXULQJ
self-cleaning. Failure to follow these instructions
may cause burns.
Ŷ %HIRUHVHOIFOHDQLQJWKHRYHQUHPRYHVKLQ\VLOYHU
colored oven racks (on some models), the probe,
any aluminum foil, and any broiler pan, grid, and
other cookware. Only porcelain coated oven racks
may be left in the oven.
Ŷ %HIRUHRSHUDWLQJWKHVHOIFOHDQF\FOHZLSHJUHDVH
and food soils from the oven. Excessive amount
of grease may ignite, leading to smoke damage to
your home.
49-80715 Rev. 1 5
READ AND SAVE THESE INSTRUCTIONS
SAFETY INFORMATION
IMPORTANT SAFETY INFORMATION
READ ALL INSTRUCTIONS BEFORE USING THE APPLIANCE
WARNING
SELF-CLEANING OVEN SAFETY INSTRUCTIONS (Cont.)
Ŷ ,IWKHVHOIFOHDQLQJPRGHPDOIXQFWLRQVWXUQWKH
oven off and disconnect the power supply. Have it
serviced by a qualified technician.
Ŷ 'RQRWFOHDQWKHGRRUJDVNHW7KHGRRUJDVNHWLV
essential for a good seal. Care should be taken not
to rub, damage or move the gasket.
Ŷ 'RQRWXVHRYHQFOHDQHUV1RFRPPHUFLDORYHQ
cleaner or oven liner protective coating of any kind
should be used in or around any part of the oven.
How to Remove Protective Shipping Film and Packaging Tape
Carefully grasp a corner of the protective shipping film
with your fingers and slowly peel it from the appliance
VXUIDFH'RQRWXVHDQ\VKDUSLWHPVWRUHPRYHWKHILOP
Remove all of the film before using the appliance for the
first time.
To assure no damage is done to the finish of the
product, the safest way to remove the adhesive from
packaging tape on new appliances is an application of
a household liquid dishwashing detergent. Apply with a
soft cloth and allow to soak.
NOTE:7KHDGKHVLYHPXVWEHUHPRYHGIURPDOOSDUWV,W
cannot be removed if it is baked on.
6 49-80715 Rev. 1
Oven Controls
USING THE OVEN: Oven Controls
1. BAKE: Touch this pad to select the bake function.
Bake Light:)ODVKHVZKLOHLQHGLWPRGH²\RXFDQ
change the oven temperature at this point. Glows
when the oven is in bake mode.
2. BROIL HI/LO: Touch this pad to select the broil
function. See the Cooking Modes section for more
information.
Broil Light: )ODVKHVZKLOHLQHGLWPRGH²\RXFDQ
VZLWFKIURP+,WR/2%52,/DWWKLVSRLQW*ORZV
when the oven is in bake mode.
3. DISPLAY: Shows the operations you have
selected, the time of day and the cooking status.
4. COOKING TIME: Touch this pad and then
touch the + or – pad to set the amount of time you
want your food to cook. The oven will shut off when
the cooking time has run ou
5. DELAY START:8VHDORQJZLWKWKH&22.,1*
7,0(RU6(/)&/($1SDGWRVHWWKHRYHQWRVWDUW
and stop automatically at a time you set.
6. OVEN LIGHT ON/OFF: Touch this pad to
turn the oven light on or off.
7. TIMER/CLOCK: Touch this pad to select the
timer feature. Then touch + and – pads to adjust
time. To set the clock, touch this pad twice and hold
3 seconds and then touch the + and pads. The
time of day will flash in the display when the oven is
first turned on.
8. START: Must be touched to start any cooking
function.
9. Pad: Short taps to this pad will decrease the
time or temperature by small amounts. Touch and
hold the pad to decrease the time or temperature by
larger amounts.
10. + Pad: Short taps to this pad will increase the time
or temperature by small amounts. Touch and hold
the pad to increase the time or temperature by larger
amounts.
11. CLEAR/OFF: 7RXFKWKLVSDGWRFDQFHO$//RYHQ
operations except the clock and timer.
12. SELF CLEAN: Touch this pad to select the self-
FOHDQLQJIXQFWLRQ6HHWKH8VLQJWKHVHOIFOHDQLQJ
oven section.
13. CLEAN LIGHT: )ODVKHVZKLOHLQHGLWPRGH²
you can change the length of time for the self-clean
cycle at this point. Glows when the oven is in the
self-clean cycle. After the self-clean cycle, the light
ZLOOWXUQRII8QODWFKWKHGRRU
,I³)±´DQGDQXPEHURUOHWWHUIODVKLQWKHGLVSOD\DQGWKH
oven control signals, this indicates a function error code.
7RXFKWKH&/($52))SDG$OORZWKHRYHQWRFRROIRU
one hour. Put the oven back into operation.
,IIXQFWLRQHUURUFRGHUHSHDWVGLVFRQQHFWSRZHUWRWKH
oven and call for service.
Lower Oven Control (on some models)
OVEN TEMP.QRE7XUQWKLVNQREWRWKHWHPSHUDWXUH
setting you want.
The OVEN CYCLE light glows until the oven reaches
your selected temperature, then goes off and on with the
oven element(s) during cooking.
49-80715 Rev. 1 7
1RWDOOIHDWXUHVDUHRQDOOPRGHOV
To Set the Clock
The clock must be set to the correct time of day for the
automatic oven timing functions to work properly. The
time of day cannot be changed during a delayed cooking
or a delayed self-cleaning cycle.
1. Touch the TIMER/CLOCK pad twice.
2. Touch the + or pad.
,IWKHRU±SDGLVQRWWRXFKHGZLWKLQRQHPLQXWHDIWHU
you touch the TIMER/CLOCK pad, the display reverts
WRWKHRULJLQDOVHWWLQJ,IWKLVKDSSHQVWRXFKWKHTIMER/
CLOCK pad twice and reenter the time of day.
3. Touch the START pad until the time of day shows in
the display. This enters the time and starts the clock.
To check the time of day when the display is showing
other information, simply touch the CLOCK pad. The
time of day shows until another pad is touched.
To Set the Timer
The timer does not control oven operations. The
maximum setting on the timer is 9 hours and 59 minutes.
1. Touch the TIMER/CLOCK pad.
2. Touch the + or pad until the amount of time you
want shows in the display. The maximum time that
can be entered in minutes is 59. Times more than 59
minutes should be changed to hours and minutes.
,I\RXPDNHDPLVWDNHWRXFKWKHTIMER/CLOCK pad
and begin again.
3. Touch the START pad. The time will start counting
down, although the display does not change until one
minute has passed.
:KHQWKHWLPHUUHDFKHVWKHFRQWUROZLOOEHHS
times followed by one beep every 6 seconds until the
TIMER/CLOCK pad is touched.
To Reset the Timer
,IWKHGLVSOD\LVVWLOOVKRZLQJWKHWLPHUHPDLQLQJ\RX
may change it by touching the TIMER/CLOCK pad, then
touching the + or pad until the time you want appears
in the display.
,IWKHUHPDLQLQJWLPHLVQRWLQWKHGLVSOD\FORFNVWDUW
time or cooking time are in the display), recall the
remaining time by touching the TIMER/CLOCK pad and
then touching the + or pad to enter the new time you
want.
To Cancel the Timer
Touch the TIMER/CLOCK pad twice.
To Turn Off the Clock Display
,I\RXKDYHVHYHUDOFORFNVLQ\RXUNLWFKHQ\RXPD\ZLVK
to turn off the time of day clock display on your oven.
1. Touch the TIMER/CLOCK pad once to turn off the
time of day display. Although you will not be able to
see it, the clock maintains the correct time of day.
2. Touch the TIMER/CLOCK pad twice to recall the
clock display.
Clock and Timer
USING THE OVEN: Clock and Timer
8 49-80715 Rev. 1
Special Features
USING THE OVEN: Special Features
12-Hour Shut-Off
With this feature, should you forget and leave the oven
on, the control will automatically turn off the oven after
12 hours during baking functions or after 3 hours during
a broil function.
,I\RXZLVKWRWXUQRIIWKLVIHDWXUHIROORZWKHVWHSVEHORZ
1.
Touch the BAKE and BROIL HI/LO pads at the same
time for 3 seconds until the display shows SF.
2. Touch the DELAY START pad until no shdn (no
shut-off) appears in the display
.
3.
Touch the START pad to lock in the no shdn (no
shut-off ) feature and leave the control set in this
special features mode.
NOTE: This feature is not available for the lower oven.
Control Lockout
Your control will allow you to lock out the touch pads so
they cannot be activated when touched.
7RORFNWKHFRQWUROV
1. Touch the BAKE and BROIL HI/LO pads at the same
time for 3 seconds until the display shows SF.
2. Touch the SELF CLEAN pad. The display will show
LOC OFF.
Touch the SELF CLEAN pad again. The display will
show LOC ON.
3. Touch the START pad to activate the control lockout
feature and leave the control set in this special
features mode.
When this feature is on and the touch pads are touched,
WKHFRQWUROZLOOEHHSDQGWKHGLVSOD\ZLOOVKRZ/2&
To unlock the control, repeat steps 1 and 2. Touch the
STARTSDGZKHQWKHGLVSOD\VKRZV/2&2))
NOTE:
Ŷ7KHFRQWUROORFNRXWPRGHZLOOQRWDIIHFWWKHTIMER/
CLOCK and OVEN LIGHT ON/OFF touch pads.
Ŷ7KLVIHDWXUHLVQRWDYDLODEOHIRUWKHORZHURYHQ
Fahrenheit or Celsius Temperature Selection
Your oven control is set to use the Fahrenheit
temperature selections but you may change this to use
the Celsius selections.
1. Touch the BAKE and BROIL HI/LO pads at the same
time for 3 seconds until the display shows SF.
2. Touch the BROIL HI/LO and COOKING TIME pads
at the same time for 2 seconds. The display will show
F (Fahrenheit).
3. Touch the BROIL HI/LO and COOKING TIME pads
again at the same time for 2 seconds. The display will
show C (Celsius).
4. Touch the START pad.
NOTE: This feature is not available for the lower oven
Your new touch pad control has additional features that you may choose to use. The following are the features and
how you may activate them.
The special feature modes can only be activated while the display is showing the time of day clock. They remain in
the control’s memory until the steps are repeated.
When the display shows your choice, touch the START pad. The special features will remain in memory after a
power failure, except for the Sabbath feature, which will have to be reset.
49-80715 Rev. 1 9
Special Features
Cook and Hold
Your new control has a cook and hold feature that keeps
FRRNHGIRRGVZDUPIRUXSWRKRXUVDIWHU7LPHG%DNLQJ
or Roasting is finished.
NOTE: This feature can only be programmed to work
ZLWK7LPHG%DNLQJRU5RDVWLQJ6HHWKH8VLQJWKH
timed baking and roasting features section.) After Timed
%DNLQJRU5RDVWLQJKDVDXWRPDWLFDOO\VWRSSHGWKH
programmed Cook and Hold will automatically start.
7RDFWLYDWHWKLVIHDWXUHIRUXVHDIWHU7LPHG%DNLQJRU
5RDVWLQJIROORZWKHVWHSV
1. Touch the BAKE and BROIL HI/LO pads at the same
time for 3 seconds until the display shows SF.
2. Touch the COOKING TIME pad. The display will
show Hld OFF.
Touch the COOKING TIME pad again to activate the
feature. The display will show Hld ON.
3. Touch the START pad to activate the cook and
hold feature and leave the control set in this special
features mode.
Changing the Speed of the +/– Pads
As you use the +/– pads when setting a time or
temperature, you may notice the display changes slowly.
This special feature allows you to change the speed.
7RVHWWKHVSHHG\RXSUHIHUIROORZWKHVWHSVEHORZ
1. Touch the BAKE and BROIL HI/LO pads at the same
time for 3 seconds until the display shows SF.
2. Touch the + pad. The display will show you a set
speed between 1 and 5.
3. Touch the + pad to increase the speed up to the
number 5.
Touch the pad to decrease the speed down to the
number 1.
4. Touch the START pad to activate the setting and
leave the control set in this special features mode.
12-Hour, 24-Hour or Clock Black-Out
Your control is set to use a 12-hour clock.
,I\RXZRXOGSUHIHUWRKDYHDKRXUPLOLWDU\WLPHFORFN
RUEODFNRXWWKHFORFNGLVSOD\IROORZWKHVWHSVEHORZ
1. Touch the BAKE and BROIL HI/LO pads at the same
time for 3 seconds until the display shows SF.
2. Touch the TIMER/CLOCK pad once. The display will
show 12 hr.
Touch the TIMER/CLOCK pad again to change to the
24-hour military time clock. The display will show 24 hr.
Touch the TIMER/CLOCK pad again to black-out the
clock display. The display will show OFF.
3. Touch the START pad to activate your choice and
leave the control set in this special features mode.
NOTE:,IWKHFORFNLVLQWKHEODFNRXWPRGH\RXZLOOQRW
EHDEOHWRXVHWKH'HOD\6WDUWIXQFWLRQ
USING THE OVEN: Special Features
Tones at the End of a Timed Cycle
At the end of a timed cycle, 3 short beeps will sound
followed by one beep every 6 seconds, until the CLEAR/
OFF pad is touched. This continuous 6-second beep may
be canceled.
7RFDQFHOWKHVHFRQGEHHS
1. Touch the BAKE and BROIL HI/LO pads at the same
time for 3 seconds until the display shows SF.
2. Touch the BROIL HI/LO pad. The display shows CON
BEEP (continuous beep). Touch the BROIL HI/LO pad
again. The display shows BEEP. (This cancels the one
beep every 6 seconds.)
3. Touch the START pa
restored.
NOTE: This feature is not available for the lower oven..
10 49-80715 Rev. 1
Sabbath Feature (This feature is not available for the lower oven. Designed for use on the
Jewish Sabbath and Holidays.) (on some models)
USING THE OVEN: Sabbath Feature
7KH6DEEDWKIHDWXUHFDQEHXVHGIRUEDNLQJURDVWLQJRQO\,WFDQQRWEHXVHGIRUEURLOLQJVHOIFOHDQLQJRU'HOD\6WDUW
cooking.
NOTE: The oven light comes on automatically (on some models) when the door is opened and goes off when the
GRRULVFORVHG7KHEXOEPD\EHUHPRYHG6HHWKH2YHQ/LJKW%XOEVHFWLRQ2QPRGHOVZLWKDOLJKWVZLWFKRQWKH
control panel, the oven light may be turned on and left on.
How to Set Sabbath Feature for Regular Baking/Roasting
NOTE: To understand how the oven control works,
practice using regular baking (non-Sabbath) before
entering Sabbath mode.
Make sure the clock shows the correct time of day.
1. Touch and hold both the BAKE and BROIL HI/LO
pads, at the same time, until the display shows SF.
2. Tap the DELAY START pad until SAb bAtH appears
in the display.
3. Touch the START pad and will appear in the
display.
4. Touch the BAKESDG1RVLJQDOZLOOEHJLYHQ
5 The preset starting temperature will automatically
be set to 350°. Tap the + or pad to increase or
decrease the temperature in 5° increments. The
WHPSHUDWXUHFDQEHVHWEHWZHHQDQG1R
signal or temperature will be given.
6. Touch the START pad.
7. After a random delay period of approximately 30
seconds to 1 minute,  will appear in the display
LQGLFDWLQJWKDWWKHRYHQLVEDNLQJURDVWLQJ,I
does not appear in the display, start again at step 4.
To adjust the oven temperature, touch the BAKE pad
and tap the + or pad to increase or decrease the
temperature in 5° increments. Touch the START pad.
NOTE: The CLEAR/OFF and COOKING TIME pads are
active during the Sabbath feature.
How to Set Sabbath Feature for Timed Baking/Roasting -
Immediate Start and Automatic Stop
NOTE: To understand how the oven control works,
SUDFWLFHXVLQJUHJXODUQRQ6DEEDWK,PPHGLDWH6WDUW
and Automatic Stop before entering the Sabbath mode.
Make sure the clock shows the correct time of day.
1. Touch and hold both the BAKE and BROIL HI/LO
pads, at the same time, until the display shows SF.
2. Tap the DELAY START pad until SAb bAtH appears
in the display.
3. Touch the START pad and will appear in the display.
4. Touch the COOKING TIME pad.
5.
Touch the + or – pad to set the desired length of cooking
time between 1 minute and 9 hours and 59 minutes. The
cooking time that you entered will be displayed.
6. Touch the START pad.
7. Touch the BAKESDG1RVLJQDOZLOOEHJLYHQ
8. The preset starting temperature will automatically
be set to 350°. Tap the + or pad to increase or
decrease the temperature in 5° increments. The
WHPSHUDWXUHFDQEHVHWEHWZHHQDQG1R
signal or temperature will be given.
9 Touch the START pad.
10 After a random delay period of approximately 30
seconds to 1 minute,  will appear in the display
LQGLFDWLQJWKDWWKHRYHQLVEDNLQJURDVWLQJ,I
does not appear in the display, start again at step 7.
To adjust the oven temperature, touch the BAKE pad
and tap the + or pad to increase or decrease the
temperature in 5° increments. Touch the START pad.
When cooking is finished, the display will change from
 to DQGZLOODSSHDULQGLFDWLQJWKDWWKHRYHQ
has turned OFF but is still set in Sabbath. Remove the
cooked food.
How to Exit the Sabbath Feature
1. Touch the CLEAR/OFF pad.
,IWKHRYHQLVFRRNLQJZDLWIRUDUDQGRPGHOD\SHULRG
of approximately 30 seconds to 1 minute, until only
is in the display.
3. Touch and hold both the BAKE and BROIL HI/LO
pads, at the same time, until the display shows SF.
4. Tap the DELAY START pad until 12 shdn or no shdn
appears in the display. 12 shdn indicates that the
oven will automatically turn off after 12 hours. no shdn
indicates that the oven will not automatically turn off.
5. Touch the START pad.
NOTE: ,IDSRZHURXWDJHRFFXUUHGZKLOHWKHRYHQZDV
in Sabbath mode, the oven will automatically turn off and
the oven control must be reset.
49-80715 Rev. 1 11
Before you begin:
1. The racks have stop-locks, so that when placed
correctly on the supports, they will stop before coming
completely out, and will not tilt.
2. When placing and removing cookware, pull the rack
out to the bump on the rack support.
3. To remove a rack, pull it toward you, tilt the front end
up and pull it out.
4. To replace, place the end of the rack (stop-locks) on
the support, tilt up the front and push the rack in.
Baking Feature
USING THE OVEN: %DNLQJ)HDWXUH
The oven has 4 rack positions.
To avoid possible burns, place the racks in the desired position before you turn the oven on.
Type of Food Rack Position
)UR]HQSLHVRQFRRNLHVKHHW %RU&
Angel food cake,
bundt or pound cakes
A
%LVFXLWVPXIILQVEURZQLHV
cookies, cupcakes, layer
cakes, pies
%RU&
Casseroles %RU&
Roasting $RU%
NOTE: A cooling fan may
automatically turn on and
off to cool internal parts.
This is normal, and the fan
may continue to run even
after the oven is turned off.
Preheating and Pan Placement
1. Preheat the oven if the recipe calls for it. To preheat,
set the oven at the correct temperature. Preheating
is necessary for good results when baking cakes,
cookies, pastry and breads.
2. For ovens without a preheat indicator light or tone,
preheat 10 minutes.
%DNLQJUHVXOWVZLOOEHEHWWHULIEDNLQJSDQVDUH
centered in the oven as much as possible. Pans
VKRXOGQRWWRXFKHDFKRWKHURUWKHZDOOVRIWKHRYHQ,I
you need to use two racks, stagger the pans so one is
not directly above the other, and leave approximately
»ƎEHWZHHQSDQVIURPWKHIURQWEDFNDQGVLGHVRI
the wall.
Aluminum Foil and Oven Liners
CAUTION
'RQRWXVHDQ\W\SHRIIRLORURYHQOLQHU
to cover the oven bottom. These items can trap heat or
melt, resulting in damage to the product and risk of
VKRFNVPRNHRUILUH'DPDJHIURPLPSURSHUXVHRI
these items is not covered by the product warranty.
Foil may be used to catch spills by placing a sheet on
DORZHUUDFNVHYHUDOLQFKHVEHORZWKHIRRG'RQRWXVH
more foil than necessary and never entirely cover an
RYHQUDFNZLWKDOXPLQXPIRLO.HHSIRLODWOHDVW´
from oven walls to prevent poor heat circulation.
How to Set the Oven for Baking or
Roasting:
1. Touch the BAKE pad.
2. Touch the + or pad to set the desired temperature.
3. Touch the START pad.
4. Check food for doneness at minimum time on recipe.
Cook longer if necessary.
5. Touch the CLEAR/OFF pad when cooking is complete.
NOTE: The lower oven is controlled with a knob. To set
the oven for baking turn the knob to the desired setting
or temperature. Turn the knob to OFF when baking is
complete.
12 49-80715 Rev. 1
Baking and Roasting Feature (These features are not available for the lower
oven.)(on some models)
USING THE OVEN: %DNLQJDQG5RDVWLQJ)HDWXUH
NOTE:)RRGVWKDWVSRLOHDVLO\²VXFKDVPLONHJJVILVKVWXIILQJVSRXOWU\DQGSRUN²VKRXOGQRWEHDOORZHGWRVLWIRU
PRUHWKDQKRXUEHIRUHRUDIWHUFRRNLQJ5RRPWHPSHUDWXUHSURPRWHVWKHJURZWKRIKDUPIXOEDFWHULD%HVXUHWKDW
the oven light is off because heat from the bulb will speed harmful bacteria growth.
How to Set an Immediate Start and Automatic Stop:
The oven will turn on immediately and cook for a
selected length of time. At the end of the cooking time
the oven will turn off automatically.
Make sure the clock shows the correct time of day.
1. Touch the BAKE pad.
8VLQJWKH+ or pad, enter the desired temperature.
3. Touch the COOKING TIME pad.
NOTE:,I\RXUUHFLSHUHTXLUHVSUHKHDWLQJ\RXPD\QHHG
to add additional time to the length of the cooking time.
8VLQJWKH+ or pad, enter the desired baking
time. The maximum time you can enter in minutes
is 59. Cooking times more than 59 minutes should
be changed to hours and minutes. For example,
enter 90 minutes as 1 hour, 30 minutes. The oven
temperature and the cooking time that you entered will
be displayed.
5. Touch the START pad.
The display shows the oven temperature that you set and
the cooking time countdown. The display starts changing
once the temperature reaches 100°F.
The oven will continue to cook for the programmed amount
of time, then shut off automatically, unless the Cook and
Hold feature was set. See the Special features of your oven
control section.
Touch the CLEAR/OFF pad to clear the display.
How to Set an Delayed Start and Automatic Stop:
You can set the oven control to delay-start the oven,
cook for a specific length of time and then turn off
automatically.
Make sure the clock shows the correct time of day.
1. Touch the BAKE pad.
8VLQJWKH+ or pad, enter the desired temperature.
3. Touch the COOKING TIME pad.
NOTE:,I\RXUUHFLSHUHTXLUHVSUHKHDWLQJ\RXPD\QHHG
to add additional time to the length of the cooking time.
8VLQJWKH+ or pad, enter the desired baking
time. The maximum time you can enter in minutes
is 59. Cooking times more than 59 minutes should
be changed to hours and minutes. For example,
enter 90 minutes as 1 hour, 30 minutes. The oven
temperature and the cooking time that you entered will
be displayed.
5. Touch the DELAY START pad.
8VLQJWKH+ or pad, enter the time of day you want
the oven to turn on and start cooking.
7. Touch the START pad.
NOTE: An attention tone will sound if you are using timed
baking and do not touch the START pad after entering the
baking temperature.
,I\RXZRXOGOLNHWRFKHFNWKHWLPHV\RXKDYHVHWWRXFKWKH
DELAY START pad to check the start time you have set,
or touch the COOKING TIME pad to check the length of
cooking time you have set.
When the oven turns on at the time of day you have set,
the display will show the changing temperature (starting at
100°F) and the cooking time countdown.
The oven will continue to cook for the programmed amount
of time, then shut off automatically, unless the Cook and
Hold feature was set. See the Special features of your oven
control section.
At the end of timed baking, the oven
will turn off. The end of cycle tone will sound.
Touch the CLEAR/OFF pad to clear the display.
49-80715 Rev. 1 13
Oven Thermostat - Do It Yourself!
USING THE OVEN: Oven Thermostat
<RXPD\ILQGWKDW\RXUQHZRYHQFRRNVGLIIHUHQWO\WKDQWKHRQHLWUHSODFHG8VH\RXUQHZRYHQIRUDIHZZHHNVWR
EHFRPHPRUHIDPLOLDUZLWKLW,I\RXVWLOOWKLQN\RXUQHZRYHQLVWRRKRWRUWRRFROG\RXFDQDGMXVWWKHWKHUPRVWDW
yourself.
'RQRWXVHWKHUPRPHWHUVVXFKDVWKRVHIRXQGLQJURFHU\VWRUHVWRFKHFNWKHWHPSHUDWXUHVHWWLQJRI\RXURYHQ
These thermometers may vary 20–40 degrees.
NOTE: This adjustment will not affect the broiling or the self-cleaning temperatures. The adjustment will be retained in
memory after a power failure.
To Adjust the Oven Thermostat (on the upper oven):
1. Touch the BAKE and BROIL HI/LO pads at the same
time for 3 seconds until the display shows SF.
2. Touch the BAKE pad. A two digit number shows in
the display.
3. The oven temperature can be adjusted up to (+) 35°F
hotter or (-) 35°F cooler. Touch the + pad to increase
the temperature in 1 degree increments. Touch
the pad to decrease the temperature in 1 degree
increments.
4. When you have made the adjustment, touch the
STARTSDGWRJREDFNWRWKHWLPHRIGD\GLVSOD\8VH
your oven as you would normally.
To Adjust the Oven Thermostat (on the lower oven) on some
models:
3XOOWKH29(1NQRERIIWKHVKDIWORRNDW
the back of the knob and note the current
setting before making any adjustment.
The knob is factory set with the top screw
directly under the pointer.
1. Pull off the OVEN knob.
/RRVHQERWKVFUHZVRQEDFNRIWKH
knob.
3. Hold both parts of the knob as shown in
the illustration of the back of the OVEN
knob and turn so the lower screw
moves in the desired direction.
You will hear and feel the notches as
you turn the knob. Each notch changes
temperature about 10° Fahrenheit.
4. Tighten the screws.
5. Return the OVEN knob to the oven.
Re-check oven performance before making
any additional adjustments.
Turn the disk counterclockwise
to increase the oven
temperature.
Turn the disk clockwise to
decrease the oven temperature.
The type of margarine will affect baking performance!
0RVWUHFLSHVIRUEDNLQJKDYHEHHQGHYHORSHGXVLQJKLJKIDWSURGXFWVVXFKDVEXWWHURUPDUJDULQHIDW,I\RX
decrease the fat, the recipe may not give the same results as with a higher fat product.
Recipe failure can result if cakes, pies, pastries, cookies or candies are made with low fat spreads. The lower the fat
content of a spread product, the more noticeable these differences become.
)HGHUDOVWDQGDUGVUHTXLUHSURGXFWVODEHOHG³PDUJDULQH´WRFRQWDLQDWOHDVWIDWE\ZHLJKW/RZIDWVSUHDGVRQWKH
other hand, contain less fat and more water. The high moisture content of these spreads affect the texture and flavor
of baked goods. For best results with your old favorite recipes, use margarine, butter or stick spreads containing
at least 70% vegetable oil.
14 49-80715 Rev. 1
USING THE OVEN: %URLOLQJ)HDWXUH
How to Set the Oven for Broiling:
1. Place the meat or fish on a broiler grid
in a broiler pan designed for broiling.
2. Follow suggested rack positions in the
%URLOLQJ*XLGH
,I\RXURYHQLVFRQQHFWHGWR
volts, rare steaks may be broiled by
preheating the broiler and positioning
the oven rack one position higher
3. Touch the BROIL HI/LO pad once for
+,%URLO
7RFKDQJHWR/2%URLOWRXFKWKH
BROIL HI/LO pad again
4. Touch the START pad.
5. When broiling is finished, touch the
CLEAR/OFF pad.
NOTE: The lower oven is controlled with a
knob. To set the oven for broiling turn the
NQREWR%52,/7XUQWKHNQREWR2))ZKHQ
broiling is complete.
Broiling Feature
/HDYHWKHGRRURSHQWRWKHEURLO
stop position. The door stays
open by itself, yet the proper
temperature is maintained in the
oven.
Food
Quality and/or
Thickness
Rack
Position
First Side
Time (min.)
Second Side
Time (min.) Comments
Ground Beef
:HOO'RQH
OESDWWLHVWR´
thick
C107
6SDFHHYHQO\8SWRSDWWLHV
take about the same time.
Beef Steaks
Rare
´WKLFNWROEV
C65
6WHDNVOHVVWKDQ´WKLFNFRRN
through before browning. Pan
frying is recommended. Slash
fat..
Medium C 8 6
:HOO'RQH C1211
Rare
´WKLFNWROEV
C107-8
Medium C 15 14-16
:HOO'RQH C 25 20-25
Chicken
1 Whole, 2 to 2 1/2 lbs.,
split lengthwise
A 35 10-15
Reduce time about 5 to 10
PLQXWHVIRUFXWXSFKLFNHQ%UXVK
HDFKVLGHZLWKPHOWHGEXWWHU%URLO
skin-side down first.
Lobster Tails WRR]HDFK % 13-16 'RQRWWXUQRYHU
Cut through back of shell. Spread
RSHQ%UXVKZLWKPHOWHGEXWWHUEHIRUH
brtoiling and after half of broiling time.
Fish Fillets WR´WKLFN C55
Handle and turn very carefully.
%UXVKZLWKOHPRQEXWWHUEHIRUH
and during cooking, if desired.
Preheat broiler to increase
browning.
Ham Slices
(precooked)
´WKLFN % 88
,QFUHDVHWLPHWRPLQXWHVSHU
VLGHIRU´WKLFNRUKRPH
curred ham.
Pork Chops
:HOO'RQH
´WKLFN C1010
Slash Fat.
´WKLFNDERXWOE % 13 13
Lamb Chops
Medium
´WKLFNDERXWR]
C109
Slash Fat.
:HOO'RQH C1210
Medium
´WKLFNDERXWOE
C1412
:HOO'RQH % 14 12-14
49-80715 Rev. 1 15
How to Set the Oven for Cleaning:
1. Touch the SELF CLEAN pad.
8VLQJWKH+ or pad, enter the desired clean time, if a
time other than 4 hours is needed.
Clean cycle time is normally 4 hours. You can change
the clean time to any time between 3 hours and 5
hours, depending on how dirty your oven is.
3. Touch the START pad.
The door locks automatically. The display will show
WKHFOHDQWLPHUHPDLQLQJ,WZLOOQRWEHSRVVLEOHWR
open the oven door until the temperature drops below
WKHORFNWHPSHUDWXUHDQGWKH/2&.('OLJKWJRHVRII
:KHQWKH/2&.('OLJKWLVRIIRSHQWKHGRRU
Ŷ7KHZRUG/2&.ZLOOIODVKDQGWKHRYHQFRQWUROZLOOVLJQDO
if you set the clean cycle and forget to close the oven
door.
Ŷ7RVWRSDFOHDQF\FOHWRXFKWKH&/($52))SDG:KHQ
WKH/2&.('OLJKWJRHVRIILQGLFDWLQJWKHRYHQKDVFRROHG
below the locking temperature, open the door.
How to Delay the Start of Cleaning:
1. Touch the SELF CLEAN pad.
8VLQJWKH+ or pad, enter the desired clean time.
Clean cycle time is normally 4 hours. You can change
the clean time to any time between 3 hours and 5
hours, depending on how dirty your oven is.
3. Touch the DELAY START pad.
8VLQJWKH+ or pad, enter the time of day you want
the clean cycle to start.
5. Touch the START pad.
The door locks automatically. The display will show the
VWDUWWLPH,WZLOOQRWEHSRVVLEOHWRRSHQWKHRYHQGRRU
until the temperature drops below the lock temperature
and the LOCKED light goes off.
When the LOCKED light is off, open the door.
After a Clean Cycle:
You may notice some white ash in the oven. Wipe it up with
a damp cloth after the oven cools.
,IZKLWHVSRWVUHPDLQUHPRYHWKHPZLWKDVRDSILOOHG
scouring pad and rinse thoroughly with a vinegar and water
mixture.
These deposits are usually a salt residue that cannot be
removed by the clean cycle.
,IWKHRYHQLVQRWFOHDQDIWHURQHFOHDQF\FOHUHSHDWWKH
cycle.
Ŷ<RXFDQQRWVHWWKHRYHQIRUFRRNLQJXQWLOWKHRYHQLVFRRO
enough for the door to unlock.
Ŷ5DFNVPD\EHFRPHGLIILFXOWWRVOLGHHVSHFLDOO\DIWHUD
self-clean. Put some vegetable oil on a soft cloth or paper
towel and rub onto the left and right edges.
NOTE:8VLQJRWKHUFRRNLQJRLOVZLOOFDXVHDGLVFRORULQJRU
a rust like color residue on the racks and cavity sides. To
clean this residue, use a soap and water or a vinegar and
water solution. Rinse with clean water and dry with a soft
cloth.
Before a Clean Cycle:
The oven must be cool in order to set the
self-clean cycle.
We recommend venting your kitchen with
an open window or using a ventilation fan
or hood during the first self-clean cycle.
Remove broiler pan, broiler grid, all
cookware and any aluminum foil from the
oven.
The shiny, silver-colored oven racks (on
some models) can be self-cleaned, but
they will darken, lose their luster and
become hard to slide.
'RQRWXVHDEUDVLYHVRURYHQFOHDQHUV
Clean the top, sides and outside of the
oven door with soap and water.
Make sure the oven lightbulb cover (on
some models) is in place and the oven
light is off.
IMPORTANT: The health of some birds is
extremely sensitive to the fumes given off
during the self-cleaning cycle of any oven.
Move birds to another well ventilated
room.
Self-Cleaning (This feature is not available for the lower oven.)(on some models)
The oven door must be closed and all controls must be set correctly for the cycle to work properly.
Wipe up heavy soil on the oven
bottom. (appearance may vary)
CARE AND CLEANING: Self-Cleaning
16 49-80715 Rev. 1
Oven Door
CARE AND CLEANING: 2YHQ'RRU
%HVXUHHOHFWULFDOSRZHULVRIIDQGDOOVXUIDFHVDUHFRROEHIRUHFOHDQLQJDQ\SDUWRIWKHRYHQ
How to Remove Protective Shipping Film and Packaging Tape
Carefully grasp a corner of the protective shipping film
with your fingers and slowly peel it from the appliance
VXUIDFH'RQRWXVHDQ\VKDUSLWHPVWRUHPRYHWKHILOP
Remove all of the film before using the appliance for the
first time.
To assure no damage is done to the finish of the
product, the safest way to remove the adhesive from
packaging tape on new appliances is an application of
a household liquid dishwashing detergent. Apply with a
soft cloth and allow to soak.
NOTE: 7KHDGKHVLYHPXVWEHUHPRYHGIURPDOOSDUWV,W
cannot be removed if it is baked on.
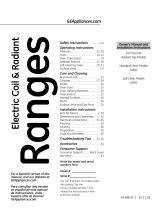
Lift the door straight up and
off the hinges.
Lift-Off Oven Door
The oven door is removable for easier
access to the light bulb.
'RQRWOLIWWKHGRRUE\WKHKDQGOH
To remove the door, open it to the broil
stop position. Grasp firmly on each side
and lift the door straight up and off the
hinges.
'RQRWSODFHKDQGVEHWZHHQWKHKLQJH
and the oven door frame.
To replace the door, make sure the
hinges are in the broil stop position.
Position the slots in the bottom of the door
squarely over the hinges and slowly lower
it over both hinges.
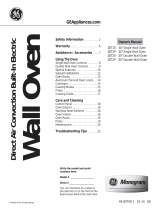
The gasket is designed with a gap
at the bottom to allow for proper air
circulation.
Do not rub or clean the door
gasket²LWKDVDQH[WUHPHO\ORZ
resistance to abrasion.
,I\RXQRWLFHWKHJDVNHWEHFRPLQJ
worn, frayed or damaged in any way
or if it has become displaced on the
door, you should have it replaced.
Door (on the upper oven and/or self clean model)
To clean the inside of the door:
Ŷ%HFDXVHWKHDUHDLQVLGHWKHJDVNHWLV
cleaned during the self-clean cycle, you
do not need to clean this by hand.
Ŷ7KHDUHDRXWVLGHWKHJDVNHWDQG
the door liner can be cleaned with a
soap-filled or plastic scouring pad, hot
water and detergent. Rinse well with a
vinegar and water solution.
To clean the outside of the door:
Ŷ8VHVRDSDQGZDWHUWRWKRURXJKO\FOHDQ
the top, sides and front of the oven door.
Rinse well. You may also use a glass
cleaner to clean the glass on the outside
RIWKHGRRU'RQRWOHWZDWHUGULSLQWRWKH
vent openings.
Ŷ,IDQ\VWDLQRQWKHGRRUYHQWWULPLV
persistent, use a soft abrasive cleaner
and a sponge-scrubber for best results.
Ŷ6SLOODJHRIPDULQDGHVIUXLWMXLFHV
tomato sauces and basting materials
containing acids may cause
discoloration and should be wiped up
immediately. When surface is cool,
clean and rinse.
Ŷ'RQRWXVHRYHQFOHDQHUVFOHDQLQJ
powders or harsh abrasives on the
outside of the door.
Lift-Off Oven Door
To clean the inside of the door:
Ŷ%HFDXVHWKHDUHDLQVLGHWKHJDVNHWLV
cleaned during the self-clean cycle, you
do not need to clean this by hand.
Ŷ7KHDUHDRXWVLGHWKHJDVNHWDQG
the door liner can be cleaned with a
soap-filled or plastic scouring pad, hot
water and detergent. Rinse well with a
vinegar and water solution.
To clean the outside of the door:
Ŷ8VHVRDSDQGZDWHUWRWKRURXJKO\FOHDQ
the top, sides and front of the oven door.
Rinse well. You may also use a glass
cleaner to clean the glass on the outside
RIWKHGRRU'RQRWOHWZDWHUGULSLQWRWKH
vent openings.
Ŷ,IDQ\VWDLQRQWKHGRRUYHQWWULPLV
persistent, use a soft abrasive cleaner
and a sponge-scrubber for best results.
Ŷ6SLOODJHRIPDULQDGHVIUXLWMXLFHV
tomato sauces and basting materials
containing acids may cause
discoloration and should be wiped up
immediately. When surface is cool,
clean and rinse.
Ŷ'RQRWXVHRYHQFOHDQHUVFOHDQLQJ
powders or harsh abrasives on the
outside of the door.
'RQRWDOORZIRRGVSLOOVZLWKD
high sugar or acid content (such
as tomatoes, sauerkraut, fruit
juices or pie filling) to remain on
the surface. They may cause a
dull spot even after cleaning.
49-80715 Rev. 1 17
Racks, Elements, Panels
%HVXUHHOHFWULFDOSRZHULVRIIDQGDOOVXUIDFHVDUHFRROEHIRUHFOHDQLQJDQ\SDUWRIWKHRYHQ
Oven Racks
Clean the oven racks with an abrasive
cleanser or steel wool. After cleaning,
rinse the racks with clean water and dry
with a clean cloth.
NOTE: The shiny, silver-colored oven
racks (on some models) may be cleaned
in the self-cleaning oven. However, the
racks will darken in color, lose their luster
and become hard to slide if cleaned during
the self-cleaning cycle.
Racks may become difficult to slide,
especially after a self-clean. Put some
vegetable oil on a soft cloth or paper towel
and rub onto the left and right edges.
NOTE:8VLQJRWKHUFRRNLQJRLOVZLOOFDXVH
a discoloring or a rust like color residue
on the racks and cavity sides. To clean
this residue, use a soap and water or a
vinegar and water solution. Rinse with
clean water and dry with a soft cloth.
CARE AND CLEANING5DFNV(OHPHQWV3DQHOV
Spring clip
Clear groove
in stem
Molded rib
Oven Heating Elements
'RQRWFOHDQWKHEDNHHOHPHQWRUWKHEURLO
element. Any soil will burn off when the
elements are heated.
To clean the oven floor, gently lift the bake
element. Clean with warm soapy water.
Control Panel
,W¶VDJRRGLGHDWRZLSHWKHFRQWUROSDQHODIWHUHDFKXVH
Clean with mild soap and water or vinegar and water,
rinse with clean water and polish dry with a soft cloth.
'RQRWXVHDEUDVLYHFOHDQVHUVVWURQJOLTXLGFOHDQVHUV
plastic scouring pads or oven cleansers on the control
SDQHO²WKH\ZLOOGDPDJHWKHILQLVK$VROXWLRQRI
vinegar and hot water works well.
Control Knob (on some models)
The control knobs may be removed for
easier cleaning.
Make sure the knobs are in the OFF
positions and pull them straight off the
stems for cleaning.
The knobs can be cleaned in a dishwasher
or they may also be washed with soap and
water. Make sure the inside of the knobs
are dry before replacing.
Replace the knobs in the OFF position to
ensure proper placement.
Painted Surfaces
Clean with soap and water or a vinegar and water
solution.
'RQRWXVHFRPPHUFLDORYHQFOHDQHUVFOHDQVLQJ
powders, steel wool or harsh abrasives on any painted
surface.
Glass Surfaces
To clean the outside glass finish, use a glass cleaner.
Rinse and polish with a dry cloth.
'RQRWDOORZWKHZDWHURUFOHDQHUWRUXQGRZQLQVLGHWKH
oven door while cleaning.
Stainless Steel Surfaces (on some models)
'RQRWXVHDVWHHOZRROSDGLWZLOOVFUDWFKWKHVXUIDFH
To clean the stainless steel surface, use warm sudsy
water or a stainless steel cleaner or polish. Always
wipe the surface in the direction of the grain. Follow
the cleaner instructions for cleaning the stainless steel
surface.
To inquire about purchasing stainless steel appliance
cleaner or polish, or to find the location of a dealer
QHDUHVW\RXSOHDVHFDOORXUWROOIUHHQXPEHU
1DWLRQDO3DUWV&HQWHU 
GEAppliances.com
18 49-80715 Rev. 1
Oven Light
CARE AND CLEANING: 2YHQ/LJKW
Wire cover holder
%XOE
Socket
Tab
Max
length
3
1
»2
Glass cover
Non-Self-Clean Oven Interior (on standard clean models or on lower oven)
With proper care, the porcelain enamel finish on the
LQVLGHRIWKHRYHQ²WRSERWWRPVLGHVEDFNDQGLQVLGH
RIWKHGRRU²ZLOOVWD\QHZORRNLQJIRU\HDUV
/HWWKHRYHQFRROEHIRUHFOHDQLQJ:HUHFRPPHQGWKDW
you wear rubber gloves when cleaning the oven.
Soap and water will normally do the job. Heavy
spattering or spillovers may require cleaning with a mild
abrasive cleaner. Soap-filled scouring pads may also be
used.
'RQRWDOORZIRRGVSLOOVZLWKDKLJKVXJDURUDFLGFRQWHQW
(such as tomatoes, sauerkraut, fruit juices or pie filling)
to remain on the surface. They may cause a dull spot
even after cleaning.
Household ammonia may make the cleaning job easier.
Place 1/2 cup in a shallow glass or pottery container
in a cold oven overnight. The ammonia fumes will help
loosen the burned-on grease and food.
,IQHFHVVDU\\RXPD\XVHDQRYHQFOHDQHU)ROORZWKH
package directions.
Ŷ'RQRWVSUD\RYHQFOHDQHURQWKHHOHFWULFDOFRQWUROV
and switches because it could cause a short circuit
and result in sparking or fire.
Ŷ'RQRWDOORZDILOPIURPWKHFOHDQHUWREXLOGXSRQWKH
WHPSHUDWXUHVHQVRU²LWFRXOGFDXVHWKHRYHQWRKHDW
improperly. (The sensor is located at the top of the
oven.) Carefully wipe the sensor clean after each oven
cleaning, being careful not to move the sensor as a
change in its position could affect how the oven bakes.
Ŷ'RQRWVSUD\DQ\RYHQFOHDQHURQWKHRYHQGRRU
handles or any exterior surface of the oven, cabinets
or painted surfaces. The cleaner can damage these
surfaces.
Oven Light Bulb (on some models)
CAUTION
%HIRUHUHSODFLQJ\RXU
oven light bulb, disconnect the electrical
power to the oven at the main fuse or
circuit breaker panel.
%HVXUHWROHWWKHOLJKWFRYHUDQGEXOEFRRO
completely.
To remove the cover:
1. Hold a hand under the cover so it
doesn’t fall when released. With fingers of
the same hand, firmly push back the wire
FRYHUKROGHU/LIWRIIWKHFRYHU
'RQRWUHPRYHDQ\VFUHZVWRUHPRYHWKH
cover.
2. Replace bulb with a 40-watt appliance
bulb.
To replace the cover:
1. Place it into grooves of the light
receptacle. Pull wire forward to the center
of the cover until it snaps into place.
2. Connect electrical power to the oven.
Oven Light Bulb (on some models)
NOTE: The glass cover (on some models)
should be removed only when cold.
Wearing latex gloves may offer a better
grip.
%HIRUHUHSODFLQJWKHEXOEGLVFRQQHFW
electrical power to the oven at the main
IXVHRUFLUFXLWEUHDNHUSDQHO/HWWKHEXOE
cool completely before removing it. For
your safety, do not touch a hot bulb with a
GDPSFORWK,I\RXGRWKHEXOEZLOOEUHDN
To remove:
Turn the glass cover counterclockwise 1/4
turn until the tabs of the glass cover clear
the grooves of the socket. Remove the
bulb.
To replace:
Put in a new 40-watt appliance bulb.
Place the tabs of the glass cover into the
grooves of the socket. Turn the glass
cover clockwise 1/4 turn.
Note:
Ŷ$ZDWWDSSOLDQFHEXOELVVPDOOHUWKDQ
a standard 40-watt household bulb.
Ŷ,QVWDOODQGWLJKWHQWKHFRYHUFORFNZLVH
Ŷ5HFRQQHFWHOHFWULFDOSRZHUWRWKHRYHQ
Ŷ)RULPSURYHGOLJKWLQJLQVLGHWKHRYHQ
clean the glass cover frequently using a
wet cloth. This should be done when the
oven is completely cool.
49-80715 Rev. 1 19
Save time and money! Review the charts on the following pages first and you may not need to call for service.
TROUBLESHOOTING TIPS
Troubleshooting tips ... %HIRUH\RXFDOOIRUVHUYLFH
Problem Possible Cause What To Do
Control signals after
entering cooking time or
delay start
You forgot to enter a bake temperature or
cleaning time
Touch the BAKE pad and desired temperature or
the SELF CLEAN pad and desired clean time.
Food does not bake or
roast properly
Oven controls improperly set. 6HHWKH8VLQJWKHRYHQVHFWLRQ
Rack position is incorrect or the rack is not
level.
6HHWKH8VLQJWKHRYHQVHFWLRQ
,QFRUUHFWFRRNZDUHRUFRRNZDUHRI
LPSURSHUVL]HEHLQJXVHG
6HHWKH8VLQJWKHRYHQVHFWLRQ
Oven thermostat needs adjustment. 6HHWKH$GMXVWWKH2YHQ7KHUPRVWDW'R,W
Yourself! section.
Food does not broil
properly
'RRUQRWRSHQWRWKHEURLOVWRSSRVLWLRQDV
recommended.
6HHWKH8VLQJWKHRYHQVHFWLRQ
Oven controls improperly set.
Make sure you touch the BROIL HI/LO pad
.
,PSURSHUUDFNSRVLWLRQEHLQJXVHG 6HHWKH%URLOLQJ*XLGH
Food being cooked in a hot pan. For best results, use a pan designed for broiling.
Make sure it is cool.
Cookware not suited for broiling. For best results, use a pan designed for broiling.
,QVRPHDUHDVWKHSRZHUYROWDJHPD\EH
low.
Preheat the broil element for 10 minutes.
%URLOIRUWKHORQJHVWSHULRGRIWLPHUHFRPPHQGHGLQ
WKH%URLOLQJ*XLGH
Clock and timer do not
work
A fuse in your home may be blown or the
circuit breaker tripped.
Replace the fuse or reset the circuit breaker.
Oven controls improperly set. See the Clock and Timer section.
Oven light does not
work
/LJKWEXOELVORRVHRUGHIHFWLYH Tighten or replace the bulb.
The pad operating the oven light is broken. Call for service.
Oven temperature too hot
or too cold
Oven thermostat needs adjustment. 6HHWKH$GMXVWWKHRYHQWKHUPRVWDW'R,W<RXUVHOI
section.
Oven will not work A fuse in your home may be blown or the
circuit breaker tripped.
Replace the fuse or reset the circuit breaker.
Oven controls improperly set. 6HHWKH8VLQJWKHRYHQVHFWLRQ
Oven will not self clean The oven temperature is too high to set a
self-clean operation.
Allow the oven to cool to room temperature and
reset the controls.
Oven controls improperly set. See the Self-cleaning oven section.
"Cracking" or "Popping"
sound
This is the sound of the metal heating
and cooling during both the cooking and
cleaning functions.
This is normal.
Excessive smoking during
clean cycle
Excessive soil. Touch the CLEAR/OFF pad. Open the windows
to rid the room of smoke. Wait until the LOCKED
light goes off. Wipe up the excess soil and reset the
clean cycle.
Oven door will not open
after a clean cycle
Oven too hot. Allow the oven to cool below locking temperature.
20 49-80715 Rev. 1
Problem Possible Cause What To Do
Oven not clean after a
clean cycle
Oven controls improperly set. See the Self-cleaning oven section.
Oven was heavily soiled. Clean up heavy spillovers before starting the clean cycle.
Heavily soiled ovens may need to self-clean again or for a
longer period of time.
"LOCK DOOR" flashes
in the display
The self-clean cycle has been selected
but the door is not closed.
Close the oven door.
LOCKED light is on
when you want to cook
The oven door is locked because the
temperature inside the oven has not
dropped below the locking temperature.
Touch the CLEAR/OFF pad. Allow the oven to cool.
"F---- and a number
or letter" flash in the
display
You have a function error code. Touch the CLEAR/OFF pad. Allow the oven to cool for
one hour. Put the oven back into operation.
,IWKHIXQFWLRQFRGHUHSHDWV 'LVFRQQHFWDOOSRZHUWRWKHRYHQIRUDWOHDVWVHFRQGV
DQGWKHQUHFRQQHFWSRZHU,IWKHIXQFWLRQHUURUFRGH
repeats, call for service.
Display goes blank A fuse in your home may be blown or
the circuit breaker tripped.
Replace the fuse or reset the circuit breaker.
The clock is in the black-out mode. See the Special features of your oven control section.
Display flashes Power failure. Reset the clock.
Unable to get the
display to show "SF"
Oven control pads were not pressed
properly
The BAKE and BROIL HI/LO pads must be touched at
the same time and held for 3 seconds.
Power outage, clock
flashes
Power outage or surge. 5HVHWWKHFORFN,IWKHRYHQZDVLQXVH\RXPXVWUHVHWLW
E\WRXFKLQJWKH&/($52))SDGVHWWLQJWKHFORFNDQG
resetting any cooking function.
"Burning" or "oily"
oder emitting from the
vent
This is normal in a new oven and will
disappear in time.
To speed the process, set a self-clean cycle for a
minimum of 3 hours. See the Self-cleaning oven section.
Strong odor An odor from the insulation around the
inside of the oven is normal for the first
few times the oven is used
This is temporary.
Fan noise A cooling fan may automatically turn
on.
This is normal. The cooling fan will turn on to cool internal
SDUWV,WPD\UXQIRUXSWRKRXUVDIWHUWKHRYHQLVWXUQHG
off.
TROUBLESHOOTING TIPS
Troubleshooting tips ... %HIRUH\RXFDOOIRUVHUYLFH
  • Page 1 1
  • Page 2 2
  • Page 3 3
  • Page 4 4
  • Page 5 5
  • Page 6 6
  • Page 7 7
  • Page 8 8
  • Page 9 9
  • Page 10 10
  • Page 11 11
  • Page 12 12
  • Page 13 13
  • Page 14 14
  • Page 15 15
  • Page 16 16
  • Page 17 17
  • Page 18 18
  • Page 19 19
  • Page 20 20
  • Page 21 21
  • Page 22 22
  • Page 23 23
  • Page 24 24

GE JRP20WJWW Owner's manual

Type
Owner's manual

Ask a question and I''ll find the answer in the document

Finding information in a document is now easier with AI