Page is loading ...

1
Steel Mass
®
640S
Insertion Mass Flow Meter
Instruction Manual
Part Number:
IM-64S
Version U, November 2020

2
Global Support Locations: We Are Here To Help!
Corporate Headquarters
5 Harris Court, Building L Monterey, CA 93940
Phone (831) 373-0200 (800) 866-0200 Fax (831) 373-4402
info@sierrainstruments.com
www.sierrainstruments.com
Europe Headquarters
Bijlmansweid 2 1934RE Egmond aan den Hoef
The Netherlands
Phone +31 72 5071400 Fax +31 72 5071401
sales@sierrainstruments.nl
Asia Headquarters
Second Floor Building 5, Senpu Industrial Park
25 Hangdu Road Hangtou Town
Pu Dong New District, Shanghai, P.R. China
Postal Code 201316
Phone: + 8621 5879 8521 Fax: +8621 5879 8586
Important Customer Notice- Oxygen Service
Unless you have specifically ordered Sierra’s optional O
2
cleaning, this flow meter may not be fit for
oxygen service. Sierra Instruments, Inc., is not liable for any damage or personal injury, whatsoever,
resulting from the use of Sierra Instruments standard mass flow meters for oxygen gas. You are
responsible for cleaning the mass flow meter to the degree required for your oxygen flow application.
However, some models can only be properly cleaned during the manufacturing process.
© Copyright Sierra Instruments 2018
No part of this publication may be copied or distributed, transmitted, transcribed, stored in a retrieval
system, or translated into any human or computer language, in any form or by any means, electronic,
mechanical, manual, or otherwise, or disclosed to third parties without the express written permission
of Sierra Instruments. The information contained in this manual is subject to change without notice.
Trademarks
SteelTrak
®
and Smart Interface™ software are trademarks of Sierra Instruments, Inc. Other product and
company names listed in this manual are trademarks or trade names of their respective manufacturers.

3
Table of Contents
Chapter 1 | Introduction .................................................................................................. 8
Instrument Validation ........................................................................................................... 9
Dual Range or Dual Gas Calibration (Optional) ..................................................................... 9
User Full Scale Flow Rate ...................................................................................................... 9
Alarms ................................................................................................................................... 9
K-Factor Correction ............................................................................................................... 9
Dual Output Signals ............................................................................................................. 10
Totalizer .............................................................................................................................. 10
Zero and Span Outputs ....................................................................................................... 10
Chapter 2 | Installation .................................................................................................. 11
Unobstructed Flow Requirements ...................................................................................... 12
Cold Tap Installation ........................................................................................................... 14
Hot Tap Installation ............................................................................................................. 14
Calculating Insertion Depth for a Low Pressure Tap ........................................................... 16
Calculating Insertion Depth for a High Pressure Tap .......................................................... 17
Changing Display Orientation (Hazardous-Area Enclosures Only)…………………………………….18
Wiring Connections- Protection of Your Meter………………………………………………………………..18
AC Power Wiring ................................................................................................................. 20
DC Power Wiring ................................................................................................................. 22
DC Output Wiring ................................................................................................................ 23
4-20 mA Output Wiring ....................................................................................................... 24
Chapter 3 | Operation .................................................................................................... 30
Flow Meter Start Up………………………………………………………………………………………………………..30
Entering Alarms using the LCD Display ............................................................................... 34
Entering Alarms using the Single-Digit LED ......................................................................... 34
K-Factor Adjustment………………………………………………………………………………………………………..34
Entering a K-factor using the LCD Display ........................................................................... 35
Entering K-factor using the Single-Digit LED ....................................................................... 35
User Full Scale Adjustment……………………………………………………………………………………………….35
Changing the User Full Scale using the LCD Display............................................................ 35
Changing the Time Response Delay using the Single-Digit LED .......................................... 36
Totalizer Reset………………………………………………………………………………………………………….………37
Reset the Totalizer using the LCD Display ........................................................................... 37
Reset the Totalizer without Opening the Enclosure ........................................................... 37
Using the Smart Electronics Advanced Features………………………………………………………………37
Voltage Zero Adjustments .................................................................................................. 38
Voltage Span Adjustment ................................................................................................... 38
Current Zero Adjustment .................................................................................................... 39
Instrument Validation……………………………………………………………………………………………….……..41
Electronics Validation Procedure……………………………………………………………………………………..42
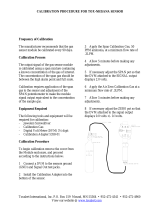
Sensor Validation Procedure…………………………………………………………………………………………….43
Chapter 4 | Troubleshooting and Repair ......................................................................... 45
Returning Equipment to Factory………………………………………………………………………………………47
Factory Calibration—All Models ......................................................................................... 47
Instructions for Returning Your Instrument for Service ..................................................... 47

4
Please follow these easy steps to return your instrument for factory service: .................. 47
Appendix A | Product Specifications ............................................................................... 48
Appendix B | Warranty Policy ........................................................................................ 54

5
Warnings and Cautions
General Safety Information
We use caution and warning statements throughout this book to draw
your attention to
important information.
Symbol Key
Symbol
Symbol
Meaning
Descripition
Warning
This statement appears with information that is important
to protect people and equipment from damage. Pay very
close attention to all warnings that apply to your
application.
Caution
This statement appears with information that is important
for protecting your equipment’s performance. Read and
follow all cautions that apply to your application.
Warning!
•
Warning!
Agency approval for hazardous location installations varies between flow
meter models. Consult the flow meter nameplate for specific flow meter approvals
before any hazardous location installation.
•
Warning!
Hot tapping must be performed by a trained professional. U.S. regulations often
require a hot tap permit. The manufacturer of the hot tap equipment and/or the contractor
performing the hot tap is responsible for providing proof of such a permit
•
Warning!
All wiring procedures must be performed with the power Off.
•
Warning!
To avoid potential electric shock, follow National Electric Code safety practices
or your local code when wiring this unit to a power source and to peripheral devices. Failure
to do so could result in injury or death. All AC power connections must be in accordance
with published CE directives.
•
Warning!
Do not power the flow meter with the sensor jumper wires disconnected. This
could cause over-heating of the sensors and/or damage to the electronics.
•
Warning!
Before attempting any flow meter repair, verify that the line is de-pressurized.
•
Warning!
Always remove main power before disassembling any part of the mass flow meter.

6
Caution!
•
Caution!
Before making adjustments to the Smart Electronics device, verify the flow meter
is not actively monitoring or reporting to any master control system. Adjustments to the
electronics will cause direct changes to flow control settings.
•
Caution!
All flow meter connections, isolation valves and fittings for hot tapping must
have the same or higher pressure rating as the main pipeline.
•
Caution!
Changing the length of cables or interchanging sensors or sensor wiring will
affect the accuracy of the flow meter. You cannot add or subtract wire length with-out
returning the meter to the factory for re-calibration.
•
Caution!
When using toxic or corrosive gases, purge the line with inert gas for a
minimum of four hours at full gas flow before installing the meter.
•
Caution!
The AC wire insulation temperature rating must meet or exceed 71°C
(158°F).
•
Caution!
Printed circuit boards are sensitive to electrostatic discharge. To avoid
damaging the board, follow these precautions to minimize the risk of damage:
• before handling the assembly, discharge your body by touching a grounded,
metal object
• handle all cards by their edges unless otherwise required
• when possible, use grounded electrostatic discharge wrist straps when handling sensitive
components
Receipt of System Components
When receiving a Sierra mass flow meter, carefully check the outside
packing
carton for
damage incurred in shipment. If the carton is damaged, notify the local carrier and submit a
report to the factory or distributor. Remove the packing slip and check that all ordered
components are present. Make sure any spare parts or accessories are not
discarded with
the packing material. Do not return any equipment to
the factory without first contacting
Sierra Customer Service.
Technical Assistance
If you encounter a problem with your flow meter, review the configuration information for
each step of the installation, operation, and
setup procedures. Verify that your settings
and adjustments are consistent with factory recommendations. Installation and
troubleshooting information can be found in the Chapter 2 (Installation) and Chapter 4
(Troubleshooting) of this manual.

7
If the problem persists after following the troubleshooting procedures
outlined in Chapter 4 of
this manual, contact Sierra Instruments by fax or by e-mail
(see inside front cover). For
urgent phone support you may call (800)
866-0200 or (831) 373-0200 between 8:00 a.m. and
5:00 p.m. PST. In
Europe, contact Sierra Instruments Europe at
+31 72 5071400
. In the Asia-
Pacific region, contact Sierra Instruments Asia at +
8621 5879 8521.
When contacting
Technical Support, make sure to include this information:
•
The flow range, serial number, and Sierra order number (all
marked on the
meter nameplate)
•
The software version (visible at start up)
•
The problem you are encountering and any corrective action
taken
•
Application information (gas, pressure, temperature and piping
configuration)
Using This Manual
This manual provides information needed to install and operate the
Series 640S Smart Insertion Mass
Flow Meter. The four chapters of
this manual cover these areas:
Chapter 1 includes the introduction and product description
Chapter 2 provides installation and wiring instructions
Chapter 3 describes system operation and programming
Chapter 4 covers troubleshooting and repair
Appendix A covers product specification
Appendix B describes product warranty
Additional Resources
Visit
Sierrainstruments.com
for additional resources. Note: the most current versions of the iSeries
documents can be found at
http://www.sierrainstruments.com/products/downloads/Insertion-Gas-Mass-
Flow-Meter-SteelMass-640S
.

8
Chapter 1 | Introduction
Series 640S SteelMass Mass Flow Meters
Sierra’s Series 640S Smart Insertion Mass Flow Meter provides a
reliable solution for gas flow
measurement applications. Low-flow
sensitivity, fast response and outstanding rangeability have
made
this model the instrument of choice for many critical gas flow applications. For stable and
reliable mass flow reading, the meter’s
rugged SteelTrak
TM
sensor automatically corrects for changes
in
gas temperature and pressure which eliminates the need for separate temperature and pressure
transducers.
The versatile microprocessor-based transmitter integrates the functions of flow-range adjustment,
meter validation and diagnostics in a
probe-mounted or remotely-mounted housing. Mass flow rate
and
totalized flow, as well as other configuration variables are displayed
on the meter’s optional 2 x
12 LCD display. The meter provides an
optical/galvanic isolated flow output, two alarm outputs and
one
contact input for range or gas selection. The programmable transmitter is easily configured via
RS-232 and Sierra’s Smart Interface
software or through three push buttons built into the device.
The Series 640S is suitable for insertion into pipes or ducts from 1 inch up to 144 inches. The Series 640S
Mass Flow Meter’s simple installation combines with an easy-to-use interface that provides quick
set
up, long term reliability and accurate mass flow measurement over
a wide range of flows and
conditions.
The Series 640S Flow Sensing Principle
Sierra’s unique SteelTrak
TM
sensor probe is responsible for the unsurpassed accuracy, ruggedness and
reliability of Sierra industrial flow meters. The immersible SteelTrak sensor consists of two sensing ele-
ments–a velocity sensor and a temperature sensor that automatically corrects for changes in gas
temperature.
When power is applied to the flow meter, the transducer electronics
heats the velocity sensor to a
constant temperature differential above
the gas temperature and measures the cooling effect of the
gas flow.
The electrical power required to maintain a constant temperature differential is directly
proportional to the gas mass flow rate.
Both sensors are reference-grade platinum resistance temperature detectors (RTDs). The platinum RTD
wire is wound on a rugged ceramic
mandrel for strength and stability. SteelTrak sensors are clad in a
rugged, sealed 316 stainless steel encasement.

9
Figure 1.1 Series 640S Sensor Assembly
Instrument Validation
Two simple tests offer full “field-validation” of your Smart mass flow
meter. The first test checks the
system electronics, linearization and
microprocessor functionality and is performed by injecting a
known
input value and confirming that the flow meter outputs the expected
value. The second test
verifies that the instrument’s primary sensing
elements have not drifted or shifted from their
original calibration
and is accomplished by measuring the resistance of the velocity and
temperature
sensors and comparing the results to the NIST-traceable
calibration data provided with the flow
meter. Together, these tests
confirm that your meter is working correctly and the calibration vari-
ables did not drift, shift or change values.
Dual Range or Dual Gas Calibration (Optional)
Select one of two factory calibrated flow ranges using a simple external customer-supplied single
contact closure.
User Full Scale Flow Rate
Field-configure from 50% to 100% of the factory full scale setting (factory full scale is normally set
to 125% of the user-specified maximum
flow rate). This adjustment can be made for each flow
range.
Alarms
Program high and low or window alarm limits independently for each flow range. The solid
state contacts are isolated with one common
.
K-Factor Correction
Change the calibration correction factor to compensate for flow profile disturbances or
specific application conditions. The K-factor is a
multiplication factor applied to the linearized
flow signal. You may set
the K-factor individually for each flow range.

10
Dual Output Signals
Smart flow meters offer two separate linear output signals proportional to flow, 0-5 VDC
(0-10 VDC optional) and 4-20 mA. The 4- 20 mA output can be field-configured as an active
loop powered by
the flow meter or an optically isolated passive loop requiring an external
power supply.
Totalizer
With the optional LCD display, actual mass flow appears on line 1
and the totalized flow on line 2
both in the user-specified engineering
units. The totalizer counts only the selected range and when
ranges
are switched, the value of the non-selected range is stored in memory.
You may reset the
totalizer using the device buttons or by using a
hand-held magnet.
Zero and Span Outputs
Validate and adjust the settings to ensure output circuits are correct.
Time Response Delay
Select from a low response for faster tracking to a high response
for a smoother output.
Enclosure Options
Flow meter electronics are available mounted directly to the flow
body, or remotely mounted up
to 200 feet (60 meters) away. The
electronics housing may be used indoors or outdoors.
Display options include a 2 x 12 character LCD display of mass flow
rate including totalized mass, or
a single-digit LED located on the device printed circuit board. Local operation and reconfiguration is
accomplished using the magnetic switches on the display or push buttons
on the device. Smart
electronics include nonvolatile memory that
stores all configuration information. The memory
allows the flow
meter to function immediately upon power up, or after an interruption in power.
Smart Interface™ Software
Sierra’s Smart Interface Windows
TM
-based software is available for
connecting your PC directly to the
mass flow meter. An RS-232 serial
cable along with floppy disks containing the program and system
files
are available from the factory. See the Smart Interface User Guide included with the software for
operating instructions.

11
Chapter 2 | Installation
The Series 640S flow meter is factory calibrated to the specific pipe size shown on the meter’s Certificate
of Calibration. The factory calibration eliminates the task of calculating the average flow across the pipe
to determine the correct insertion depth. Simply insert the flow meter sensor to the centerline
position of the pipe. (If the pipe size differs from the meter’s calibrated size, return the meter to the
factory for re-calibration.)
Agency approval for hazardous location installations varies between flow
meter models. Consult the flow meter nameplate for specific flow meter
approvals before any hazardous location installation.
When selecting an installation site, make sure that:
1.
Line pressure and temperature will not exceed the flow meter rating. Temperature should not
vary more than 200°F (100°C) around the calibration temperature. Line pressure should not
vary more than 50 psi (3.4 bar) around the calibrated pressure.
2.
The gas temperature and the ambient temperature added together do not equal more than
392°F (200°C). If it does, use a remote sensor probe.
3.
The location meets the required minimum number of pipe diameters upstream and
downstream of the sensor head (see Figure 2-1 on the next page).
4.
Safe and convenient access with adequate clearance
.
Also, verify the meter is located where the
gas is clean and dry and the meter is calibrated for the gas to be measured.
5.
When using a CSA, FM or EEx approved flow meter, verify that the cable entry into the
instrument meets the specific standard required for that approval.
6.
For remote installations, verify the supplied cable length is sufficient to connect the flow meter
sensor to the remote electronics. (Do not extend or shorten the supplied cable between the
probe and the electronics.)
Also, before installation check your flow system for anomalies such as:
• leaks
• valves or restrictions in the flow path that could create
disturbances in the flow profile that
might cause unexpected flow rate indications
•
heaters that might cause rapid excursions in the measured temperature

12
Unobstructed Flow Requirements
Select an installation site that will minimize possible distortion in the flow profile. Valves, elbows,
control valves and other piping components may cause flow disturbances. Check your specific piping
condition against the examples shown below. In order to achieve accurate and repeatable performance
install the flow meter using the recommended number of straight run pipe diameters upstream and
downstream of the sensor.
Example
A-Upstream
(1)
Requirements
B-Downstream
(2)
Requirements
Example
A
B
1
15 D
5 D
2
20 D
5 D
3
40 D
10 D
4
15 D
5 D
5
30 D
10 D
6
40 D
5 D
(1) Number of diameters (D) of straight pipe required between upstream disturbance
and the flow meter.
(2) Number of diameters (D) of straight pipe required downstream of the flow meter.
Figure 2.1 Recommended Pipe Length Requirements for Installation

13
Installing The Flow Meter
When positioning the flow meter, refer to the flow direction indicator attached to the probe. For proper
operation, install the meter with the flow direction indicator pointing downstream in the direction of
flow. Installing the meter opposite this direction will result in inaccurate flow measurement
When using toxic or corrosive gases, purge the line with inert gas for a minimum
of four hours at full gas before installing the flow meter.
Probe may enter the pipe from any direction as long as the tips are in the center.
Pipe centerline
Flow

14
Cold Tap Installation
1.
Confirm that the installation site meets the minimum upstream and downstream pipe
diameter requirements shown in Figure 2-1.
2.
Turn off the flow process gas. Verify that the line is no pressurized.
3.
Use a cutting torch or sharp cutting tool to tap into the pipe. The pipe opening must be at least
0.78 inches in diameter. (Do not attempt to insert the sensor probe through a smaller hole.)
4.
Remove all burrs from the tap. Rough edges may cause flow profile distortions that could affect
flow meter accuracy. Also, obstructions could damage the sensor assembly when inserting
into the pipe.
5.
Mount the compression or flange fitting on the pipe. Make sure this connection is within ±5°
perpendicular to the pipe centerline as shown at left.
6.
When installed, cap the fitting. Run a static pressure check on the connection. If pressure
loss or leaks are detected, repair the connection and re-test.
7.
Insert the sensor probe through the compression or flange fitting into the pipe. The correct
insertion depth places the centerline of the sensor access hole in the probe at the pipe’s
centerline.
8.
Align the sensor head using the flow direction indicator. Adjust the indicator parallel to the pipe
pointing downstream in the direction of flow.
9.
Tighten the fitting to lock the flow meter in position. (When a compression fitting is tightened,
the position is permanent unless using Teflon ferrules.)
10.
If needed, adjust the optional display to the desired orientation. See page 17.
Hot Tap Installation
When positioning the flow meter, refer to the flow direction indicator attached to the probe. For proper
operation, install the meter with the flow direction indicator pointing downstream in the direction of flow.
Installing the meter opposite this direction will result in inaccurate flow measurement. Low pressure hot
taps cannot exceed 150 psig (10 barg) maximum. High pressure hot taps max pressure is flange
dependent up to 400 psig (27.6 barg). Make sure the pipe pressure does not exceed these limits before
beginning this procedure.

15
Hot tapping must be performed by a trained professional. U.S. regulations
often require a hot tap permit. The manufacturer of the hot tap equipment
and/or the contractor performing the hot tap is responsible for providing
proof of such a permit.
All flow meter connections, isolation valves and fittings for hot tapping
must have the same or higher pressure rating as the main pipeline.
1.
Confirm that the installation site meets the minimum upstream and downstream pipe diameter
requirements shown in Figure 2-1.
2.
Calculate the flow meter insertion depth as shown in Figure 2-2 for a low pressure tap or Figure
2-3 for a high pressure tap.
3.
Weld the process connection on the pipe. Make sure the process connection is within ± 5°
perpendicular to the pipe centerline (see previous page). The pipe opening must be at least 0.88
inches (22 mm) in diameter.
4.
Bolt an isolation valve on the process connection. The valve’s full open bore must be at least
0.88 inches (22 mm) in diameter.
5.
Hot tap the pipe.
6.
Close the isolation valve. Run a static pressure. If pressure loss or leaks are detected, repair the
connection and re-test.
7.
Insert the sensor probe through the isolation valve into the pipe with the flow direction indicator
parallel to the pipe pointing downstream in the direction of flow. The correct insertion depth
places the sensor at the pipe’s centerline. Do not force into the pipe.
8.
Tighten the fittings to lock the flow meter in position. If needed, adjust the optional display to
the desired orientation. See page 17.

16
Calculating Insertion Depth for a Low Pressure Tap
Variables
L= Nominal probe length
D= Duct O.D.
C= Duct I.D.
T= Height of “Threadolet” or customer provided “Weldolet”
Formula
L ≥ 12 + D/2 + T
L must be equal to greater than 12 inches plus the height of the “Threadolet” plus half of the
duct O.D. (All dimensions in inches).
P = D/
Figure 2-2. Low Pressure Tap Insertion Depth

17
Calculating Insertion Depth for a High Pressure Tap
Variables
S = Distance from face of mounting flange to outside of duct D = Duct O.D.
P = Minimum probe length
T = Minimum probe travel
R = Allowable probe travel
IN = Inserted position (marker location)
RE = Retracted position (marker location)
Formulas
P = D/2 + S + 6.75 (minimum probe length–use next longer whole number length probe)
T = D/2 + 0.54
R = 28.2 – [actual probe length – S – (D/2)] (must be greater than or equal to T)
IN = (actual probe length + 2) – (5.5 + S + D/2)
RE = IN + T (All dimensions in inches.)
Figure 2-3. High Pressure Tap Insertion Depth

18
Changing Display Orientation (Hazardous-Area Enclosures Only)
Depending on installation requirements, you may want to change the orientation of the
optional display.
1.
Use a 1/16-inch hex key to loosen the set screw securing the larger end of the
enclosure. Turn cover counterclockwise and remove.
2.
Remove 4 screws and standoffs from the display. Release the latch securing the
display ribbon cable connector from the display board.
3.
Rotate the display board to the desired position. Re-connect the ribbon cable to
the display board.
4.
Replace the 4 screws and standoffs. Replace the enclosure cover. Tighten
set screw.
Wiring Connections- Protection of Your Meter
To protect your investment and be certain of a long reliable service life, we have compiled some
guidelines (from experience) that will aid your installation team in properly protecting the electronics
from the application environment. These instruments have been designed for and proven reliable in
some of the most extreme process conditions in industry: Mining, Oil and Gas, Water, Wastewater etc.
The key however is to follow best practices to insure a proper seal to protect the internal components of
this precision instrument.
Failure to adhere to these guidelines may result in water damage that is
not covered under Sierra’s Warranty Policy.
Water penetration can lead to a damaged flow meter. Sierra’s "E" HALE ex-proof enclosures are rated to
a NEMA4X, IP66 rating. This provides protection against, rain, sleet, snow and splashing water, but
water can damage the sensor, electronics or wiring terminals if the meter is not properly installed and
maintained.
To minimize the potential for water damage, Sierra Instruments recommends the following:
• Install conduit seals near the enclosures on all ports.
• Use a cable gland design that provides shielded cable termination and an environmental seal
against dirt and water.
• Do not bend, kink, or otherwise distort the cable at the entry points to the cable glands.
• Route conduit or cable using a drip loop or drain as close as possible to the enclosure ports
unless the cable slopes directly down.

19
• If the factory cable glands are replaced to install other adapter fittings, conduit fittings, cable
glands, or any other modification to the cable entry points be sure to use a good quality thread
sealant on all NPT threads as well as verifying they are all tightened and sealed appropriately so
as not to leak.
• Be certain to use NPT threads when connecting to the housing. Some electrical fittings are not
tapered but will fit in the NPT ports of the enclosure. Sufficient Teflon tape and pipe dope is
recommended to insure a leak tight seal.
• If you are uncertain of the conditions the interior of the housing is subjected to over time, a
small temporary datalogger can be placed in the housing to record temperature and humidity to
establish a baseline. Corrective action can be made based on this data before instrument
degradation sets in. Contact Sierra Instruments for suggested sources of small dataloggers.
• Keep the enclosure lids sealed tight using the supplied o-rings.
• As part of the lid o-ring inspections look for any signs of condensation inside of the enclosure. If
condensation or signs of condensation/corrosion are found be sure all fittings/seals are securely
tightened as well as a desiccant bag can be used and replaced as needed. This can be
particularly important if the temperature is cycled.
Wiring Connections - General
For NEMA 4X enclosures, use TB2 for power and signal connections, TB 1 is for sensor connections.
Figure 2.4. Wiring Access NEMA 4X
NEMA 4X enclosure
terminal blocks
Wiring
connections
inside cover
To access components:
1. Loosen 4 screws.
2. Remove cover.
Power (-)
Alarm common
Low alarm
BV (-)
4–20 loop power
0–5 (-)
Range (-)
2
4
6
8
10
12
14
16
1
3
5
7
9
11
13
15
Power (+)
Aux 11-30 pwr
High alarm
BV (+)
4-20 mA
0-5 (+)
Range (+)
5
3
1
6
4
2
TB1
TB2

20
To avoid potential electric show, follow National Electric Code safety
practices or your local code when wiring this unit to a power source and
to peripheral devices. Failure to do so could result in injury or death. All
AC power connections must be in accordance with published CE
directives.
For Hazardous-Area enclosures, use the terminal blocks located inside the smaller end of the flow
meter enclosure for all wiring connections. Make sure to observe all CE compliance requirements for
AC wiring connections given on the next page
.
Figure 2-5. Wiring Access Hazardous-Area Enclosures
Input Wiring
AC Power Wiring
All wiring procedures must be performed with the power Off.
The AC wire insulation temperature rating must meet or exceed 71 °C
(158°F).
The AC power wire size must be 26 to 16 AWG with the wire stripped 1/4 inch (6 mm). Connect 100 to
240 VAC (300 mA load, maximum) to the Neutral and Line terminals on the small, two-position terminal
Hazardous-Area enclosure
terminal blocks
Set screw
Wiring
connections
To access components:
1. Use 1/16 inch hex key to loosen set screw.
2. Turn cover counterclockwise to remove.
1
2
3
4
5
6
7
8
9
10
20
19
18
17
16
15
14
13
12
11
/