Page is loading ...

4001125-13
Note: Valor models 530 may
be installed in an aftermar-
ket permanently located
manufactured (mobile) home,
where not prohibited by local
codes.
Valor models 530 are only for
use with the type of gas in-
dicated on their rating plate.
They are not convertible for
use with other gases, unless
a certifi ed kit is used.
Valor models 530 are suitable for installation in a bedroom
or bed sitting room.
Note: This kit must be installed or serviced by a qualifi ed
installer, service agency or gas supplier. These instructions
are to be used in conjunction with the main installation
instructions for the above listed heater model.
WARNING: If the information in these instructions is not
followed exactly, a fi re or explosion may result causing
property damage, personal injury or loss of life.
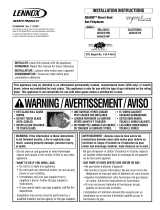
PORTRAIT
Cast Arch Fronts
539, 549 & 550 Series
Approved for use with Valor heater models 530 only
Installation and Owner’s Manual
©2015, Miles Industries Ltd.
FOR INSTALLATION WITH A VALOR 530 ENGINE READ THE
FOLLOWING INSTRUCTIONS.
FOR 530 ENGINE CONFIGURATIONS AND VENTING, REFER TO MAIN
INSTALLATION BOOKLET SUPPLIED WITH THE ENGINE.
INSTALLER
Leave this manual
with the appliance.
CONSUMER
Retain this manual
for future reference.
HOT GLASS WILL
CAUSE BURNS.
DO NOT TOUCH GLASS
UNTIL COOLED.
NEVER ALLOW CHILDREN
TO TOUCH GLASS.
DANGER
!
A barrier designed to reduce the risk of burns from the hot
viewing glass is provided with this appliance and shall be
installed for the protection of children and other at-risk
individuals.

2
Casting Tolerances
Due to the nature of cast iron, dimensional consistency
may vary from one unit to the next and some variation
in surface fi nish and fl atness is to be expected. We
have done our best to control and make allowance for
this; however some variation is inevitable.
Insulation Blanket
(2 layers)
Top Bae
Air Deector
Outer Cast Plate
Barrier Screen
Hearth Fender
Inner Cast Arch
Model 530 Heater
(sold separately)
Side Mounting Brackets (2)
Spacers (2)
Stand-o Spacers (2)
(LH & RH)
Top Bae
Air Deector
Model 530 Heater
(sold separately)
Inner Cast Arch
Hearth Fender
Barrier Screen
Spacers (2)
Side Mounting Brackets (2)
Outer Cast Arch
Kit Contents
539AFB/P Windsor Arch &
550CPA Classic Arch (with plate)
1 Outer cast iron arch (w/plate)
1 Barrier screen
1 Inner cast iron arch
1 Hearth fender, cast iron
2 Side mounting brackets, sheet metal
2 Spacers, sheet metal
1 Top baffl e, sheet metal
1 Top air defl ector, sheet metal
2 Stand-off spacers, sheet metal
(supplied fl at)
2 Insulation Pads
1 Pack of screws
549AFB/P Windsor Arch Front
(without plate)
1 Outer cast iron arch
1 Inner cast iron arch fi tted with a Barrier
screen
1 Hearth fender, cast iron
2 Side mounting brackets, sheet metal
2 Spacers, sheet metal
1 Top baffl e, sheet metal
1 Top air defl ector, sheet metal
1 Pack of screws
(Note: The 549 version of
the Windsor Arch Front
[without plate] does not
come with zero clearance
items and is intended for
insert applications only).

3
Applications
The Valor model 530 heater with the 539 or 550 Cast
Arch Fronts comes ready for installation as a zero
clearance unit into combustible type framing, without
need for a separate zero clearance kit. The 530
installed without the standard zero clearance stand-off
spacers may also be installed into existing solid-fuel
burning fi replaces provided space and local codes
permit.
Hearth Requirements
All installations will require a hearth or fl oor, fl ush with
the bottom of the heater, to support the weight of the
cast iron plate and to ensure the removable hearth
fender rests at the proper height.
A non-combustible hearth is not required in front of this
appliance.
ARCH FRONT INSTALLATION WITH 530 (539AFB, 539AFP, 549AFB, 549AFP, 550CPA)
Min. 36” to
combustible
materials
4-1/2”
11-1/8”
4”
‘Y’
‘X’
26”
6-5/8”
dia.
Top
Outlet
Top
Outlet
Max 8” deep mantle leg
at edge of protruding arch
Side Mounting Brackets
Outer
Cast Plate
ZC Stand-os
24”
20”
4”
1”
2”
2-1/8”
13-1/8”
39”
38”
Wall
21-5/8”
25-1/4”
37”
9”
11-1/8”
13-1/8”
Fixing Points (4)
Mantel
Dimensions & Clearances—539 and 550 Arch
fronts (539 Windsor Arch shown here)
Floor Requirements
The 530 heater is approved for installation directly
on any combustible material other than soft fl ooring
material such as carpet or vinyl.
Mantel Requirements
The Arch Fronts series is designed to install with
combustible mantels provided clearances are
maintained as indicated in the Dimensions and
Clearances, and Framing diagrams below and on
the following page. The 539 and the 550 back plate
may also be installed without a mantel provided listed
clearances are maintained. Be aware that although
safe, some combustible materials and fi nishes at the
listed clearances may, over time, discolor, warp, or
show cracks. Care should be taken when choosing
materials—consult your fi replace dealer.
Mantel Clearances
‘X’ ‘Y’
1” - 6” 34”
7” - 8” 36”
9” - 12” 38”
12” +
38” + 1” for every
inch beyond 12”

4
Framing
• The framing dimensions for installation
of the 530 heater with the models 539
or 550 Arch Fronts are shown in the
Framing Diagram.
• A non-combustible hearth is not
necessary in front of the 530 heater.
• The 530 is approved for installation
directly on any combustible material
other than soft fl ooring material such
as carpet or vinyl.
• Any framing construction must be clear
of the standoffs—see Dimensions &
Clearances and Framing Diagram.
• A hearth, fl ush with the bottom of the
heater, will be required to support the
removable hearth fender.
21”
20”
Note:
556CLA Adapter
(top or rear outlet)
Required
Side Mounting Brackets
Max. 8” deep mantel leg
at edge of arch
Min. 4”
Wall
9”
11-1/2”
2-1/2”
‘X’
Mantel
Top or Rear
Outlet
6”
556CLA
Adapter
Required
25-1/4”
24-1/2”
‘Y’
4-1/8” 11-1/2”
31”
34”
Min. 36” to
combustible
materials
Note: The 549 Windsor Arch front is intended for
insert applications only and does not include the
stand-offs and insulation pads required for zero
clearance applications. Most recessed 530 insert
applications will also require a 556CLA Co-linear
Adapter.
(Note that the spacers fi tted to the side brackets
can be removed for a 21” wide insert opening—
see no. 3. in the Installation section.)
38” center-center
stud spacing
Recommended for fastening
cast plate to wall
26-1/4”
13-1/8”
37”
Minimum depth
some installations
may require more
Dimensions & Clearances—
549 Windsor Arch front (without back plate)
Framing Diagram
Mantel Clearances
‘X’ ‘Y’
1” - 6” 34”
7” - 8” 36”
9” - 12” 38”
12” +
38” + 1” for every
inch beyond 12”

5
Installation
1. Fit Top Baffl e under the top panel of the appliance
case. Secure with 2 thread forming screws. Fit the
top air defl ector to the top baffl e as shown using the
2 screws provided.
2. Mount Stand-off Spacers. The stand-off spacers
are supplied fl at and are left and right handed.
a) Remove the 2 screws near each of the rear top
corners of the appliance and the 2 screws near
the rear top of each side.
b) Bend the spacers as shown.
c) Screw the spacers to the rear of the appliance
using the screws just removed.
d) Bend the side wings of the spacers to align the 2
holes in each spacer with those in the appliance
sides.
e) Secure the spacers using the screws just
removed.
! Warning: Failure to install the stand-off spacers
may result in a fi re hazard.
3. Fit Side Spacers to Side
Mounting Brackets as shown.
Secure the spacers to side
mounting brackets the screws
provided—2 screws per side.
4. Locate Side Mounting Brackets
as shown and line up the mounting
holes in the side of the heater
body. Secure the side brackets
to the heater using the screws
provided —2 per side.
(Note that the spacer brackets
are to remain on for ZC
application of 26”. For insert
application, spacers can be
removed for 21” openings.)
5. Locate Top Insulation Pad. For top vent outlet
appliances, cut out a circle at the center of the
insulation layers for the vent collar. Place both
the insulation layers on top of the appliance case
inboard of the stand-off spacers.
! Warning: Failure to install both the insulation
layers may cause a fi re hazard.

6
6. Secure the Outer Cast Plate to the appliance with
self-tapping screws provided as shown. Tighten the
screws enough to ensure a tight fi t between casting
and sheet metal parts.
(It may be necessary to re-drill 1/8” pilot holes for
the self-tapping screws due to misalignment caused
by shifting tolerances with the cast iron arch.)
Note: The weight of the cast plate must not be
carried by the connection to the heater. It must sit
on a hearth or be securely screwed to the wall.
7. Hang the Inner Cast Arch. Insert the mounting
hooks into the notches in the outer cast plate
as shown. The fi t or gap between the inner cast
arch and the outer cast plate may be tightened by
bending the mounting hooks slightly inwards.
Do not bend the hooks too far or the inner arch
will be diffi cult to remove!
If this happens, a screwdriver inserted through the
gap between the back of the inner arch and the
heater should be able to pry the hook away from
the backing plate. Do not hit the hooks with a
hammer as this may break the welds holding
them.
Slide the hearth fender up to the front of the casting.
Note: It is important that the hearth in front of
heater be fl ush with the bottom of the heater;
otherwise the hearth fender will not rest at the
proper height.
8. With the 550 Arch front, the hearth fender hooks
into place on the inner cast arch.
9. Install the barrier screen by snapping the barrier
screen’s top part to the inner arch. Then slide the
screen up slightly under the hood, snap the bottom of
the barrier to the inner arch and slide the screen back
down so it rests on the cast fender’s upper edge.
3 screws
into
top bae
top bae
4 screws into
mounting
side brackets
mounting
side brackets

7
Cleaning
To clean the barrier screen and the matte black cast
iron surfaces use a soft brush. To clean the polished
cast iron surfaces use mild soap and water.
If the barrier becomes damaged, the barrier shall
be replaced with the manufacturer’s barrier for this
appliance.
To clean the fi replace glass window, refer to the
owner’s manual supplied with the appliance.
DO NOT clean the glass with ammonia.
Removing the front unit
1. Remove the barrier screen by pushing it up and
pulling out the bottom then the top.
2. Pull away the hearth fender at the bottom.
3. Unhook the inner cast arch as shown.
Always securely replace the window, the front
and the barrier screen before lighting.
WARNING
FOR YOUR SAFETY, ensure the barrier
FOR YOUR SAFETY, ensure the barrier
screen is reinstalled on the fireplace
screen is reinstalled on the fireplace
after maintenance.
after maintenance.
WARNING
DO NOT TOUCH THE BARRIER SCREEN,
DO NOT TOUCH THE BARRIER SCREEN,
THE CAST FRONT OR THE GLASS WHILE
THE CAST FRONT OR THE GLASS WHILE
THEY ARE HOT!
THEY ARE HOT!
Let the fireplace cool first
Let the fireplace cool first
before cleaning it.
before cleaning it.

8
# Description 539 Series 549 Series 550 Series
Black Polished Black Polished
1 Hearth Fender 4000241AH 4000241 4000241AH 4000241 4001104
2 Inner Cast Arch 4000240AH 4000240 4000240AH 4000240 4001094
3 Hearth Baffl e 4000347 4000347 4000347 4000347 4001100AH
4 Outer Cast Arch 4000225AH 4000225 4000414AH 4000414 4001093
5 Side Mounting Brackets (2) 4005074AH 4005074AH 4005074AH 4005074AH 4005074AH
6 Spacers (2) 4005076 4005076 4005076 4005076 4005076
7 Air Defl ector 4000205 4000205 4000205 4000205 4001101AH
8 Top Baffl e 4005075AH 4005075AH 4005075AH 4005075AH 4005075AH
9 Stand Off Spacer RH 4000209AH 4000209 n/a n/a 4000209AH
10 Stand Off Spacer LH 4000210AH 4000210 n/a n/a 4000210AH
11 Insulation Blanket (2) 4000206 4000206 n/a n/a 4000206
12 Barrier Screen 4003290 4003290 4003290 4003290 4003290
Hardware Kit 4001208 4001208 4001208 4001208 4001208
REPAIRS PARTS LIST (539AFB, 539AFP, 549AFB, 549AFP, 550CPA)
Designed and Manufactured by / for
Miles Industries Ltd.
190 – 2255 Dollarton Highway, North Vancouver, B.C., CANADA V7H 3B1
Tel. 604-984-3496 Fax 604-984-0246
www.valorfi replaces.com
Because our policy is one of constant development and improvement, details may vary slightly from those given in this publication.
1
2
3
4
5
5
6
6
7
8
9
10
11
12
/