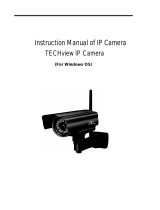
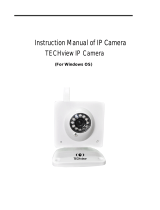
NTI E-IPCAM-HNPO-P IP Surveillance Camera User guide

Category
Security device components
Type
User guide

NTI E-IPCAM-HNPO-P IP Surveillance Camera is a high-definition security camera designed for indoor monitoring with pan and tilt functions for remote viewing and recording. With its 1920x1080 resolution and built-in infrared LED lights, it provides clear images and videos even in low-light conditions. It supports motion detection and alerts, allowing you to stay informed of any suspicious activity in your home or office. The camera can be easily accessed and controlled through a mobile app or web interface, making it convenient for remote monitoring.

NTI E-IPCAM-HNPO-P IP Surveillance Camera is a high-definition security camera designed for indoor monitoring with pan and tilt functions for remote viewing and recording. With its 1920x1080 resolution and built-in infrared LED lights, it provides clear images and videos even in low-light conditions. It supports motion detection and alerts, allowing you to stay informed of any suspicious activity in your home or office. The camera can be easily accessed and controlled through a mobile app or web interface, making it convenient for remote monitoring.

1
IP CAMERA CONFIGURATION IN ENVIROMUX WEB INTERFACE
The IP cameras in the chart below can be monitored by the E-16D/5D/2D and be used to take snapshots and attach them to
alert messages sent to users in the E-16D/5D/2D.
The images that are attached will be at the default resolution for each camera:
Model
Default Resolution
Current Firmware Version
E-IPCAM-HNPO-P
1920x1080
v2.800.00AC001.0.R, Build Date: 2020-09-04
E-IPCAM-DHNPO-V2P
1920X1080
v5.4.5 build 170124
E-IPCAM-WHNPT-V4
1920x1080
v2.800.0000000.1.R, Build Date: 2019-09-27
Materials Included:
Model
Power Supply
E-IPCAM-HNPO-P
100-240V @ 50/60Hz Input/ 12VDC 1A Output w/ country specific line cord
E-IPCAM-DHNPO-V2P
100-240V @ 50/60Hz Input/ 12VDC 1A Output w/ country specific adapter
E-IPCAM-WHNPT-V4
100-240V @ 50/60Hz Input/ 5VDC 1.5A Output w/ country specific adapter
To configure the IP camera to capture this image, enter the indicated text in theImage URL box on the “Configure IP
Cameraspage of the ENVIROMUX Web Interface. Also add the URL Type, IP address, Username and Password as
indicated.
For E-IPCAM-HNPO-P:
Image URL: <IP ADDRESS>/onvifsnapshot/media_service/snapshot?channel=1&subtype=0
URL Type: JPEG
Default IP Address: see instruction on page 6
Default Username: admin
Default Password: admin (if you change settings in the camera, you will have to change this.)
For E-IPCAM-DHNPO-V2P
Image URL: <IP ADDRESS>/streaming/channels/1/picture
URL Type: JPEG
Default IP Address: 192.168.1.64
Default Username: admin
Default Password: none- enter the password you assigned when you setup the camera
For E-IPCAM-WHNPT-V4:
Image URL: <IP ADDRESS>/onvifsnapshot/media_service/snapshot?channel=1&subtype=0
URL Type: JPEG
Default IP Address: see instruction on page 6
Default Username: admin
Default Password: admin (if you change settings in the camera, you will have to change this.)
For all models, be sure to put a checkmark in “Enable HTTP Auth”..
Other ENVIROMUX Support
The IP cameras listed can all be monitored only (no snapshots) using the E-MICRO-TRHP. (The E-MICRO-TRHP requires
firmware version 3.11 or newer).
The E-IPCAM-WHNPT-V4 and E-IPCAM-HNPO-P can be used with the E-MINI-LXO and it can be monitored and take
snapshots to attach to alert messages.
Only the E-IPCAM-WHNPT-V4 and E-IPCAM-HNPO-P can be used with the E-1W model and it can only be monitored (no
snapshots).
See compatibility table on next page.
2
Note: To use the E-IPCAM-WHNPT-V4 or E-IPCAM-HNPO-P with the E-MINI-LXO, E-1W,
E-MICRO-TRHP and for E-mailing snapshots on the E-xD, you must first disable ONVIF Authentication in the
camera's software. See page 7.
ENVIROMUX Model Compatiblity
Model
Monitoring
Snapshots for alerts
E-IPCAM-HNPO-P
All Models
E-xD, E-MINI-LXO
E-IPCAM-DHNPO-V2P
E-xD, E-MICRO-TRHP
E-xD Only
E-IPCAM-WHNPT-V4
All Models
E-xD, E-MINI-LXO
Figure 1- E-xD IP Camera configuration page
Figure 2- E-MICRO-TRHP IP Camera configuration page
The E-MICRO-TRHP will work
with cameras that have
authentication, but does not
include the ability to take
snapshots that can be added to
email.
Note: At present, the E-xD
supports JPEG and MJPEG
type images taken by the IP
cameras we offer. The
RTSP protocol option is not
supported at this time.
3
Figure 3- E-MINI-LXO IP Camera configuration page
Figure 4- E-1W IP Camera configuration page
The E-MINI-LXO and E-1W do not support authentication. Only the E-IPCAM-WHNPT-V4 or E-IPCAM-HNPO-P can be
used with them provided you first disable ONVIF Authentication in the camera's software.
4
Access Individual Camera Settings
E-IPCAM-DHNPO-V2P
To access the E-IPCAM-DHNPO-V2P web interface to change its settings:
1. Connect the camera to a POE connected Ethernet cable to power it ON, or connect the supplied 12VDC
power supply. The Ethernet cable must be connected to the same local network your PC is connected to.
Note: By default, this camera obtains an IP address from a DHCP server on the local network. To find
the IP address of the camera, consult the DHCP client list on the DHCP server of your wireless router or
use the search tool (SADP.exe available from our website) and follow the instructions. (See image at
bottom of page.)
2. Open a browser (Internet Explorer, Firefox, etc) on that PC and enter the IP address found with the search
tool. If no DHCP server exists, the default IP will be 192.168.1.64.
3. The first time you do this, the Activation window will pop up. Assign a password. The password must contain
a minimum of 8 characters, including upper case letters, lower case letters, and numbers. Note: No special
characters can be used. Be sure to make note of it after entering it. Then click "OK".
If you are using the SADP discovery tool to identify the IP address of the E-IPCAM-DHNPO-V2P, you will be
able to assign the password from the discovery tool window (below).
5
4. After the initial login and password assignment, the login screen will look like this.
5. Enter the username and assigned password. Then clickLogin”.
You now have access to all internal settings of the camera.
Note: In order to attach camera images to email or save them on a USB flash drive, either upgrade the
E-xD firmware to version 4.18 and above OR a change to this IP cameras default settings will be needed
(below).
In the IP cameras default settings, the camera will have the RTSP Authentication and Web Authentication
configured for digest.
In this configuration, the IP Camera image will not be able to be attached to email or saved on USB flash drive
on the E-xD unit with older E-xD firmware.
Under Security Configuration, change RTSP Authentication and Web Authentication to digest/basic (as
shown below). Then be sure to press Save.
Once complete, the E-xD will be able to attach an IP camera image to email and save it to a USB flash drive.
6
E-IPCAM-WHNPT-V4 and E-IPCAM-HNPO-P
To access the E-IPCAM-WHNPT-V4 or E-IPCAM-HNPO-P web interface to change its settings:
1. Connect the AC adapter to the camera to power it ON. Wait 30 seconds.
2. Connect an Ethernet cable between the camera and an available port on a router (connected to your
network), or directly to a PC.
Note: By default, this camera obtains an IP address from a DHCP server on the local network. To find
the IP address of the camera, consult the DHCP client list on the DHCP server of your wireless router or
use the IP Config tool found in the e-ipcam-whnpt-v4.zip available on our website.
However, if there is no DHCP server available, or if you are connecting the camera directly with your PC
without another device in-between, use the IP Config tool to discover the IP address.
3. Open a browser (Internet Explorer, Firefox, etc) on that PC and enter the IP found in the client list or in the IP
Config tool. (If you are not going to change the IP address, you can use that IP address on the
ENVIROMUX "Configure IP Camera" page.)
4. The login window will pop up.
5. Enter the default user name "admin" and default password "admin"
(all lowercase letters).
6. Click Login”.
You now have access to all internal settings of the camera.
If you make changes to the network settings, you will have to reset
the IP camera and you will be forced to change the password. Please
select a password that is at least 8 characters long, and include a
combination of uppercase letters, lowercase letters, and numbers. Be
sure to make note of the new password.
7
Note: To use the E-IPCAM-WHNPT-V4 or the E-IPCAM-HNPO-P with the E-MINI-LXO, E-1W,
E-MICRO-TRHP and for E-mailing snapshots on the E-xD, you must first disable ONVIF Authentication
in the camera's software. (ONVIF Authentication is enabled by default.) After changing the setting,
click "Save".
Figure 5- ONVIF Authentication is disabled
MAN285 REV 6/2/22
  • Page 1 1
  • Page 2 2
  • Page 3 3
  • Page 4 4
  • Page 5 5
  • Page 6 6
  • Page 7 7

NTI E-IPCAM-HNPO-P IP Surveillance Camera User guide

Category
Security device components
Type
User guide

NTI E-IPCAM-HNPO-P IP Surveillance Camera is a high-definition security camera designed for indoor monitoring with pan and tilt functions for remote viewing and recording. With its 1920x1080 resolution and built-in infrared LED lights, it provides clear images and videos even in low-light conditions. It supports motion detection and alerts, allowing you to stay informed of any suspicious activity in your home or office. The camera can be easily accessed and controlled through a mobile app or web interface, making it convenient for remote monitoring.

Ask a question and I''ll find the answer in the document

Finding information in a document is now easier with AI