Page is loading ...

34443
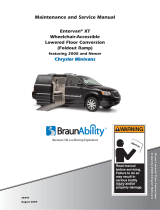
2008 & Up Chrysler
Foldout Entervan
®

Congratulations
We at The Braun Corporation wish to express our fullest apprecia-
tion on your new purchase. With you in mind, our skilled craftsmen
have designed and assembled the finest lowered floor vehicle available.
This manual includes safety precautions, operating instructions,
manual operating instructions, and instructions for maintenance and
lubrication procedures.
Your Entervan
®
is built for dependability, and will bring you years
of pleasure and independence, as long as the maintenance is performed
regularly and the Entervan
®
is operated by an instructed person.
Sincerely,
THE BRAUN CORPORATION
Ralph W. Braun
Chief Executive Officer
W
A
RNING
Read manual
before operating.
Failure to do
so may result in
serious bodily
injury and/or
property damage.
Keep manual in
Rampvan.
Oper
ual
Man
ator's

Page 1
CONTENTS
Ramp Safety .................................................. 22-24
Wheelchair and Occupant Restraint ................ 25-33
Seat Removal and Installation
Front Seats (General Information) ................ 34, 35
Seat Base Rear Covers ...................................... 35
Seat Electrical Harnesses ............................. 37-39
Front Seat Removal ...................................... 40, 41
Front Seat Installation ................................... 42, 43
Third Row Seats ........................................... 44, 45
Warranty .............................................................. 46-49
Return Authorization Procedure ............................ 49
Preventive Maintenance ................................... 50, 51
Auxiliary Power Supply / Below
Floor Obstructions ............................................. 52-55
Jacking and Tire Changing .................................... 56
Reporting Safety Defects ....................................... 57
Towing ...................................................................... 58
Warranty and Registration
Instructions ................................................................ 2
Introduction ................................................................ 3
Entervan Operation Quick
Reference Guide .................................................... 4, 5
Features ................................................................. 6, 7
Safety Precautions .................................................... 8
Operation
Terminology .......................................................... 9
One-Touch Control System ................................... 9
Control Switches ............................................ 10-14
Ramp Access Sliding Door ........................... 14, 15
Kneel System ................................................ 16, 17
Power Ramp Operation ...................................... 18
Power Ramp Safety ........................................... 19
Power Ramp Manual Operation ......................... 20
Ramp Electrical Override .................................... 21

Page 2
WARRANTY AND REGISTRATION INSTRUCTIONS
Vehicle Identification Number (VIN)
Examine your Entervan
®
for any damage. Should
any damage have occurred during delivery, notify
the carrier at once with any claims.
The warranty/registration card shown
here is supplied with each Entervan.
Review the delivery checklist and fill
out the warranty/registration informa-
tion with your sales representative
and mail it to The Braun Corporation
®
.
A detailed Warranty section is provid-
ed within this manual. The warranty
card must be processed to activate
the warranty.
Record the last eight digits of the vehicle identifica-
tion number (VIN) in the space provided for future
reference. This information must be provided
when filing a warranty claim or ordering parts.
Vehicle Delivery Checklist
& Warranty Registra
tion
C
ustomer
Name ________________________________________________________
W
eb
R
ef
e
rral Code _____________________
Add
ress
____________________________________________ Ci
ty
_________________________ Sta
te ________
ZIP __________
Phone ________________________________
Email
________________________________________________________________
VIN:
________________________________________________________________
Da
t
e
of
Pu
r
chase
_______
/ _______ / _______
B
r
aun
Dealer #:
_____________ S
ales
Person:____________________________C
i
ty
______________________________ St
a
t
e_____
P
r
e-Deliver
y(T
o
be completed b
ySales Consultant prior to Cust
omer being p
r
ese
nt)
❑ V
ehicle is equipped as indic
a
t
ed in the sales
c
on
tract
❑ V
ehicle in
t
erior/
e
xte
rior clean
❑
❑ V
ehicle and cus
t
omer pape
r
work prepared
❑ OEM and Br
aun
owne
r’s manuals and other materials in gl
o
ve bo
x
Deli
ver
y(T
o
b
e
r
evi
e
wed and
e
xplained
b
y
S
ales C
onsultant with Customer prese
n
t)
E
xterior
❑ I
nspect e
xterior
t
o ensur
e it’s clean and damag
e-f
r
ee
❑
Spar
e ti
re and jack loc
a
tion
❑ Oper
a
tion of
r
emote
c
on
tr
ol
❑ Magnetic e
n
try (if applicable)
❑
Ex
t
e
r
ior oper
a
tion and activation of p
o
w
er doo
r
, kneeling and
r
amp
❑ Manual ope
r
a
tion of door and ramp f
r
om e
xterior
I
n
t
erior
❑
Gauges and instrumen
t
a
tion
❑ Loca
tion of i
n
t
e
rior switches t
o oper
at
e a
c
c
essible f
eatu
r
es
❑ Manual ope
r
a
tion of door and
r
amp f
r
om i
nt
e
rior
❑
Oper
a
tion of ti
e
-d
o
wns
❑ Oper
a
tion of r
oll & tumble sea
ting (if applicable)
❑ Oper
a
tion of sea
t belts
❑
L
oc
a
tion of Braun c
on
troller
Additional
❑ R
eview both OEM and B
r
aun owne
r’s manual
s.
❑
Explain the
T
o
yota Servi
c
e E
xchange I
nf
orm
a
tion
P
rogram (
T
o
yota Chassis Only)
❑ Explain r
ec
ommended pr
e
ventive mai
n
tenance and ser
vi
c
e schedules
❑
❑
I
nf
orm C
ust
omer of dealership se
rvic
e hours
❑ A
dvise
C
ustomer t
o
r
e
c
ei
v
e and maintain a si
gned r
e
c
or
d of all se
r
vi
c
e
wo
r
k pe
rf
ormed
❑ Complete and r
eturn warran
ty
r
e
g
ist
r
ation
t
o a
ctivat
e
warran
ty
❑ List all a
fterma
rket equipme
nt. U
se b
r
and names and model numbers wher
e possible
____________________________________________________________________________________________________
____________________________________________________________________________________________________
I
h
ereby
ack
n
o
wl
ed
ge th
a
tth
emo
b
i
l
i
t
y
d
evi
ces applicab
l
e
t
o
my
v
eh
ic
l
eh
av
e been
demonst
ra
t
ed for me
, and
I fully understand and
can
ope
r
a
t
e this equipme
nt
.
Ih
av
e
been a
dvis
ed tha
t
wh
ee
lchairs
may not
maintain
th
e
ir
i
nte
gri
t
y
in th
e
ev
ent
o
f
a
collision.
I
he
reb
y release and hold ha
rmless
the
Ori
ginal Vehicle
M
an
ufa
cturer
,
T
h
e
B
ra
u
n
C
o
rp
o
ra
tion
,
and its ind
epe
ndent d
eal
ers
from an
y liab
ilit
y ass
o
ci
a
t
ed
wi
t
h inju
ry
t
o
my
person
and
p
rope
rt
y
as a resultof
my
use
of
a wheelch
a
ir
du
ri
n
g
a collision.
I have
r
ead a
nd
unde
rstand
t
h
i
s
e
nti
re
f
o
r
m,
includin
g
all
disclaime
rs
an
d th
e Br
aun fa
c
t
o
ry Limi
t
ed
Wa
rran
t
y
.
A
ll of the inf
o
rmation I h
ave provided is co
rre
ct
.
S
ales Consulta
nt:
A
ll i
t
ems checked h
ave been
r
evie
w
ed with the cust
omer.
______________________________________________
Consulta
n
t Si
gna
tu
r
e / D
a
t
e
Cus
t
ome
r:
I ack
nowledge th
a
t all it
ems checked h
a
v
e been
r
evie
wed with me.
______________________________________________
C
ust
omer Signatu
r
e / D
a
t
e
Please FAX
c
omple
t
ed
f
orm to 1-800-946-6305 • P
.
O
.
B
o
x 310 •
W
inama
c, IN 46996 •
ref
er
rals@b
raunlift.
com • 34550 • 2/08
P
ho
VIN:
B
r
au
P
r
e
-D
Deli
v
e
r
y
E
x
t
erior
❑
❑
❑
❑
M
❑
E
❑
M
I
n
t
erior
❑
G
a
❑
L
oc
❑
M
an
❑
Ope
❑
Ope
r
❑
Ope
r
a
❑
L
oc
a
ti
A
dditional
❑
R
eview
❑
Explain
❑
Explain
Vehicle Delivery Checklist
& Warranty Registration
34550 • 2/08

Page 3
INTRODUCTION
Operation Quick Reference Guide
The Braun Entervan
®
lowered floor
conversion is designed to provide
years of pleasure and mobility
independence. Familiarity with
proper operation and maintenance
procedures will help ensure safe,
trouble free operation.
The Braun Corporation encour-
ages wheelchair passengers and
their attendant(s) to review the
material contained in this manual
with your Entervan sales repre-
sentative, before attempting
operation. Any questions or con-
cerns can be answered by your
sales representative at that time.
This manual addresses Enter-
van standard features as well as
options. Refer to the instructions
applicable for your package, and
disregard the information that
does not apply. Contact The
Braun Corporation at 1-800-THE
LIFT
®
if any of this information is
not understood.
The Entervan
®
Operation Quick
Reference Guide hanging on
the mirror provides a condensed
explanation of Entervan operation
(shown at right). Read the guide
and then insert it in this manual
for future reference. Note: An
Operation Quick Reference Guide
(overview) section is provided on
pages 4 and 5 of this manual also.
Store this manual in the vehicle
along with your Chrysler owner’s
manual.
If you experience an operation
problem or there is any sign of
wear, damage, or other abnormal
condition, contact your sales rep-
resentative or call The Braun Cor-
poration at 1-800-THE LIFT
®
. One
of our national Product Support
representatives will direct you to a
Braun authorized service center.

Page 4
ENTERVAN OPERATION QUICK REFERENCE GUIDE
Interior mounted control switches
display one of these graphics.
One-Touch Control Activation
Entervan power door, kneel and ramp functions are
activated by pressing and releasing a control switch
(press and release remote entry transmitter button
twice).
Open Functions: When activating the Open func-
tions, the power door opens, the kneel system lowers
the rear of the vehicle and the ramp deploys.
Close Functions: When activating the Close func-
tions, the ramp stows, the kneel system raises the
rear of the vehicle and the power door closes.
Manual Operation
The passenger side power sliding door and power
ramp can be manually operated. Read this manual
for further details.
OEM Remote
Keyless Entry
Transmitter
Press and
release this
switch two
times (
x
2)
Entervan Operation Overview
This overview provides a simplified explanation
of Entervan operation. Read the entire owner’s
(operator’s) manual for complete details. Contact
The Braun Corporation at 1-800-THE LIFT
®
if any
of this information is not understood.
Power Operation
Entervan power functions are managed by the
electronic control system. The control system can
be activated
using the
OEM remote
keyless entry
transmitter
or one of the
interior control
switches
detailed on
pages 10-13.
or

Page 5
Just press any one
of the buttons like
the one pictured above
or those shown on page
4 (press twice on the key
transmitter). . .
Operating Your New
Entervan Couldn’t
Be Simpler . . .
The rear suspension lowers
The ramp deploys Allowing easy entrance!
ENTERVAN OPERATION QUICK REFERENCE GUIDE
1
And the sliding door opens
2 3
4
A

Page 6
One-Touch Electronic Con-
trol System: The electronic
control system provides simple
one-touch activation of Enter-
van power functions. For your
convenience, the power features
can be activated using the OEM
remote keyless entry transmitter
or one of the interior switches
detailed on pages 10-13.
Passenger Side Power Slide
Door: The electronic control
system activates the passen-
ger side power slide door for
ramp access. The slide door
and lowered floor configuration
provides 52-1/2" clear vertical
passageway. Note: The driver-
side sliding door is lowered to
provide clear passage also.
Ramp: The fully automatic
power ramp provides 29-1/4"
usable width. The power ramp
can be manually operated.
Electromechanical Power
Kneeling Rear Suspension:
“Kneeling” is the lowering mo-
tion of the electromechanical
rear suspension. The kneel
feature reduces the slope of the
ramp when deployed.
Lowered Floor from Rear
Axle to Firewall: This feature
provides additional headroom
(57-1/4" floor-to-ceiling at center
of van), and further reduces
the slope of the ramp when
deployed. Note: The floor-
to-ceiling height is reduced by
2-1/2" with OEM interior DVD/
rail system installed. Ground
Clearance: The lowered floor
results in reduced ground clear-
ance. Be aware of limited ground
clearance.
Ground Effects: Exterior color-
matched ground effect panels
conceal the lowered floor and
lowered sliding doors.
Floor Track for Wheelchair
and Occupant Securement in
Midpoint Lowered Floor Area:
Floor track provided in the mid-
point lowered floor area (Position
C) can be utilized for restraint of
wheelchair passenger(s). Wheel-
chair capacity at midpoint may
have limitations based on the di-
mensions of specific wheelchairs.
Forward-Facing Wheelchair
and Occupant Belt/Track
System: One Forward-Facing
FEATURES

Page 7
Wheelchair and Occupant Belt
Kit is supplied for the restraint of
one wheelchair and occupant.
The belt kit is used in conjunc-
tion with the floor track. Note:
Additional belt kits can be pur-
chased (option).
Quick-Release Front Passen-
ger Seat with Floor Track for
Wheelchair and Occupant Se-
curement: The passenger seat
(Position B) is equipped with
“step & roll” quick-release seat
base attachments (making seat
removal and installation proce-
dures simple). The seat can be
removed and the seat location
can be utilized by a wheelchair
occupant (floor track provided).
Driver Seat: For the wheelchair
occupant who chooses to drive,
this seat (Position A) can be
removed and adaptive driving
systems custom tailored for the
individual can be purchased
from and installed by your local
mobility dealer. The driver’s
seat is equipped with “step &
roll” quick-release seat base
attachments. 56-1/4" floor-to-
ceiling headroom is provided
at both front seating positions.
Auxiliary Power Supply for
Dealer-Installed Power Seat
or Electric Tie-Downs: This
power source is available to
accommodate adaptive driving
systems custom tailored for
the individual (purchased from
and installed by your local
mobility sales representative).
See pages 52-55.
Available Wheelchair Positions
FEATURES
A
C
B
Midpoint
“L” Track
Midpoint
“L”
Track
Front
Seat
“L”
Track
Front Seat
“L” Track

Page 8
Safety Symbols
SAFETY FIRST! Know That....
C
CAUTION
This symbol indicates
important informa-
tion regarding how to
avoid a hazard-
ous situation that
could result in minor
personal injury or
property damage.
A
supplements (if included), is pro-
vided for your safety. Familiarity
with proper operation instructions
as well as proper maintenance
procedures are necessary to en-
sure safe, trouble free operation.
Safety precautions are provided
to identify potentially hazardous
situations and provide instruction
on how to avoid them.
All information contained
in this manual and
B
W
A
RNING
This symbol indicates
important safety in-
formation regarding a
potentially hazardous
situation that could
result in serious
bodily injury and/or
property damage.
D
Note: Additional information provided to help clarify or detail a specific subject.
These symbols will appear throughout this manual and may appear on labels posted on your Entervan.
Recognize the seriousness of this information.
SAFETY PRECAUTIONS

Page 9
Whenever parking your Entervan
and before utilizing Entervan
power features, always engage
the vehicle transmission in Park
“P” and engage the vehicle
parking brake. Entervan power
function control switches can
be activated only if the vehicle
transmission is in Park or Neutral.
Terminology
“Kneeling” is the lowering motion
of the Entervan electromechani-
cal rear suspension. The term
“deploy” (unfold) indicates the
lowering motion of the ramp to
the deployed position. “Stow”
(fold) is the raising motion of the
ramp to the vertical (stowed)
position.
The terms “Open” and “Close”
refer to sequences of power
functions that will occur when
activated by the One-Touch
electronic control system. When
activating the Open functions,
the power door opens, the kneel
system lowers the rear of the
vehicle and the ramp deploys.
When activating Close functions,
the ramp stows, the kneel sys-
tem raises the rear of the vehicle
and the power door closes.
One-Touch Control System
Entervan power functions are
managed by the electronic
control system. The control
system can be activated using
the remote keyless entry trans-
mitter or any one of the controls
addressed on pages 10-13.
Do not attempt to interface
aftermarket control systems.
OPERATION
Braun Corporation
Aftermarket Control
Systems Policy:
The Braun Corporation manufac-
tures dedicated control systems
for its products. These control
systems have been designed
and tested for use in conjunction
with specific Braun products.
Braun control systems are the
only control systems authorized
for use with Braun products.
Do not attempt to interface after-
market control systems without
authorization from The Braun
Corporation. To do so may
result in serious bodily injury
and/or property damage.

Page 10
Switches that activate Entervan
power functions at all times:
• Keyless Entry Transmitter
• Overhead Console Passenger
Power Sliding Door Switch
• All Other Switches
The passenger side power slide
door must be unlocked and the
Master Lock Out switch must be
in the ON position before power
functions can be activated.
Control Switches
Control Switches
For your convenience, Entervan
power features can be activated
using the OEM remote keyless
entry transmitter or one of the
interior control switches identified
on pages 11-13.
The passenger power sliding door
switches provided on the remote
keyless entry transmitter and in
the overhead console will unlock
the passenger side slide door and
activate the Entervan power door,
kneel and ramp functions.
The power sliding door switches
provided in the center console and
on the wall panels to the front and
rear of the passenger side sliding
door (B-pillar and C-pillar respec-
tively), are accessible to rear
seat passengers including small
children. These control switches
OPERATION
will activate Entervan power
functions only if the passenger
side power slide door is unlocked
and the overhead console Master
Lock Out switch is in the ON posi-
tion. Master Lock Out details are
provided on page 13.
Braun minivan conversions are
designed with safety and simplic-
ity in mind for ease of operation.
If a power function has been
activated that was not intended,
simply press a control switch to
stop or reverse the function. If
the desired function has not been
activated, press the switch again.
Entervan power function control
switches can be activated only
if the vehicle transmission is in
Park or Neutral.

Page 11
OPERATION
Press and
release this
switch twice
(
x
2)
One-Touch Control Activation
Entervan power door, kneel and
ramp functions will be activated
by pressing and releasing
either control switch shown on
this page. Press and release
the remote entry transmitter but-
ton twice within five seconds.
Power Sliding Door Lock and
Master Lock Out
The keyless entry and overhead
console switches will activate
Entervan power functions
whether the passenger sliding
door is locked or unlocked. The
Master Lock Out switch does
not prohibit use of these control
switches
.
Remote Keyless Entry
Transmitter
Using the Chrysler remote entry
transmitter eliminates the need
for an additional remote control.
Overhead Console Switch
A control switch is located on
the overhead console.
Press and release
switch twice (
x
2)
within five seconds.
Press and release
switch displaying
slide door graphic.
Press and release this switch

Page 12
Center Console Switch
For front seat passengers, a
switch is located in the center
console (dashboard).
B-Pillar Switch
A switch is located on the wall
panel ahead of the passenger
slide door (B-Pillar).
OPERATION
Power Sliding Door Lock and
Master Lock Out
The passenger side power
sliding door must be unlocked
and the overhead console
Master Lock Out switch must
be in the ON position before
the three power sliding door
switches identified here can
activate Entervan power func-
tions.
One-Touch Control Activation
When the above conditions are
met - power door, kneel and
ramp functions will be activated
by pressing and releasing any
of the control switches.
Press and release this switch
Press and release
switch displaying
slide door graphic.
Press and release this switch
Press and release
switch displaying
slide door graphic.

Page 13
OPERATION
C-Pillar Switch
A switch is located on the wall
panel behind the passenger
slide door (C-Pillar).
Press and release this switch
Press and release
switch displaying
slide door graphic.
Power Sliding Door Master
Lock Out Switch
The Master Lock Out switch
is located in the overhead
console. If the Master Lock
Out switch is in the OFF
position, this OEM feature
will disable the three power
sliding door switches identi-
fied at left. Press the switch
to the ON position to enable
the control switches.
Press switch to ON to
enable control switches.
Press switch
displaying
this graphic.
ON
OFF
Press switch to OFF to
disable control switches.
ON
OFF

Page 14
OPERATION
Kneel On/Off Switch
The Kneel On/Off switch is
located on the driver side of
the center console. The Kneel
On/Off switch turns the kneel
system on and off only. See
page 16 for further details.
Press this switch to ON
to activate kneel feature.
Press this switch to OFF
to disable kneel feature.
Note: If a control switch is ac-
tivated while the power sliding
door is opening or closing, the
door will reverse direction.
Note: If the power door is
obstructed while opening or
closing, the door will reverse
direction to the fully closed or
fully open position, provided it
meets sufficient resistance.
Note: If the inside or outside
door handles are used while the
power sliding door is activated,
the power sliding door feature
will be cancelled. Simply press
a control switch and the door
will open fully. The power door
can also be opened or closed
manually as detailed at right.
Ramp Access Sliding Door
Press and release the remote
keyless entry transmitter
or one of the interior con-
trol switches to activate the
power sliding door (control
switches detailed on pages
10-13). When a control
switch is activated, the door
will open and the Open se-
quence of functions will con-
tinue (rear of vehicle kneels
and ramp deploys).
Once the Open sequence
of functions is complete,
press and release a control
switch to close the door.
The door will close after the
ramp stows and the vehicle
raises (completing the Close
sequence of functions).

Page 15
W
A
RNING
Keep clear of area
in which power door
operates. Failure to
do so may result in
bodily injury and/or
property damage.
Keep clear of the area in
which the power door oper-
ates. Ensure door travel path
is clear. Personal injury or
property damage may occur
during power door operation.
Be sure the door is fully closed
and latched before driving.
OPERATION
Power Door Manual Operation
The passenger side power
sliding door can be operated
manually. Unlock the pas-
senger sliding door. Open the
slide door from inside or outside
using the OEM door handles.
Always open the door smoothly.
Avoid using excessive force
when opening and closing the
door.
Note: The ramp obstructs ac-
cess to the inside door handle.
The OEM handle has been
equipped with an extension
strap.
Ramp
Extension Strap

Page 16
OPERATION
Automatic Kneel System
Kneeling is the lowering motion
of the Entervan electrome-
chanical rear suspension. The
kneel system lowers the rear of
the vehicle. Lowering the rear
of the vehicle reduces the slope
of the ramp.
When the electronic control
system is activated to start
the Open functions, the kneel
system starts to lower the rear
of the vehicle at the same time
the power sliding door starts to
open. When the Close func-
tions are activated, the rear of
the vehicle starts to raise at the
same time the ramp begins to
stow.
Kneel On/Off Feature
A Kneel On/Off feature is incor-
porated in the electronic control
system. This feature provides
the option of kneeling the vehicle
when operating the power door
and power ramp. The Kneel
switch is located on the driver
side of the center console (see
page 14). The Kneel On/Off
switch turns the kneel system on
and off only. The Kneel switch
must be in the On position in
order for the kneeling system to
be activated.
Note: If the Entervan is in the
kneeled position and the Close
functions are activated, the ve-
hicle will raise whether the Kneel
On/Off switch is On or Off.
Note: If the Kneel On/Off
switch is switched from Off to
On during the Open sequence
of functions or within 60
seconds of ramp deployment,
the vehicle will kneel after the
ramp is fully deployed.
Kneel On/Off Switch
Press this switch to ON
to activate kneel feature.
Press this switch to OFF
to disable kneel feature.

Page 17
OPERATION
Note: If the Entervan is in the
kneeled position (with ramp
deployed) and the transmission
is disengaged from Park “P,” the
ramp will stow and the vehicle
will raise.
Note: Do not leave your En-
tervan in the kneeled (lowered)
position for extended periods of
time. Doing so may result in bat-
tery drain.
In the event the kneel system is
not functioning properly, have
the kneel system repaired im-
mediately. Do not drive with the
rear of the vehicle in the lowered
position. Attempting to do so will
result in an extremely rough and
unstable ride.
Contact your sales representa-
tive or call The Braun Corpora-
tion at 1-800-THE LIFT. One
of our national Product Support
representatives will direct you to
an authorized service center.
Kneel Electrical Override
An electrical override feature is
incorporated in the kneel system.
The override by-passes the elec-
tronic control system to electri-
cally power the kneel actuator.
The override is available to raise
the rear of the vehicle only.
The Kneel Override Switch is
located under the driver side
rear bench seat. Press and hold
the switch to release the kneel
system (raise vehicle). Release
the switch when the rear of the
vehicle has raised fully. The
kneel actuator motor will ratchet
(make clicking sound).
Press and hold this switch to
release kneel (raise vehicle).
Kneel
Override
Switch
Switch is located under driver side
rear bench seat (viewed from rear
with seat in raised position).

Page 18
OPERATION
Power Ramp Operation
The power ramp is activated by
the electronic control system
using any of the control switches
identified on pages 11-13. When
a control switch is activated to
start the Open functions, the
ramp deploys after the power
sliding door reaches the fully
open position. When the Close
functions are activated, the ramp
stow function begins immediately
(simultaneously with the kneel
system).
If a control switch is activated
while the ramp is in motion
(deploying or stowing), the ramp
motor will stop running. Activat-
ing a control switch again will
start the Close functions (ramp
will stow, vehicle will raise and
the door will close).
Note: The power sliding door
must travel from the full closed
position to the full open position in
order for the ramp to deploy.
Note: If the vehicle transmission
is disengaged from Park “P” while
the ramp is deploying (in motion)
or when the ramp is in the fully
deployed position, the ramp will
stow immediately.
Note: If the power ramp is ob-
structed while deploying or stow-
ing, the ramp motor will stop run-
ning, provided it meets sufficient
resistance. Press a control switch
again and the ramp will stow and
the door will close.
Note: When deploying the ramp,
the ramp motor stops running
when the ramp reaches the nearly
horizontal position (approximately
CAUTION
Allow ramp to deploy
fully before boarding.
Failure to do so may
result in damage.
6"- 8" above ground level). The
ramp continues to slowly lower
the remaining distance by the
force of gravity.
Forcing the Ramp: Allow the
power ramp to deploy (unfold
and lower) fully before boarding
the ramp. Forcing the ramp out
or down during the deploy/stow
functions, or boarding onto the
ramp before it is fully-deployed
may result in damage to the
ramp, motor assembly and/or
electronic controller.
/