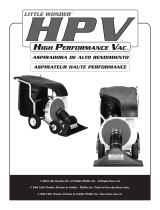
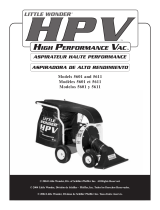
Little Wonder HPV 5611 User manual
- Category
- Garden tools
- Type
- User manual
This manual is also suitable for

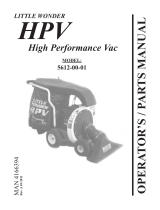
TECHNICAL MANUAL
MAN 4163122
Rev. A 8-2007
LITTLE WONDER
HPV
High Performance Vac
MODEL:
5611
EN
FR
ES

CALIFORNIA
Proposition 65 Warning
Diesel engine exhaust and some of its
constituents are known to the State of
California to cause cancer, birth defects and
other reproductive harm.
CALIFORNIA
Proposition 65 Warning
Battery posts, terminals, wiring insulation, and
related accessories contain lead and lead
compounds, chemicals known to the State of
California to cause cancer and birth defects
or other reproductive harm. WASH HANDS
AFTER HANDLING.
Californie
Avertissement Proposition 65
L’échappement d’un moteur diesel et certains
de ses constituants sont déclarés par
l’État de la Californie responsables de
cancer, malformations congénitales et autres
anomalies de la reproduction.
California
Advertencia sobre la Proposición 65
Los gases de escape de los motores diesel
y sus constituyentes son considerados en el
estado de California como sustancias que
causan cáncer, defectos congénitos y daños
en el sistema reproductivo.
WARNING
The engine exhaust from this product
contains chemicals known to the State of
California to cause cancer, birth defects
or other reproductive harm.
AVERTISSEMENT
L’échappement du moteur de ce produit
contient des produits chimiques déclarés
par l’État de la Californie responsables de
cancer, malformations congénitales ou
autres anomalies de la reproduction.
ADVERTENCIA
El escape del humo emanado por este
producto es considerado en el estado
de California como una mezcla de
sustancias químicas que causan cáncer,
defectos congénitos y daños en el sistema
reproductivo.de reproducción humana.
CALIFORNIE
Avertissement Proposition 65
Les bornes de batterie, raccords, gaines de
ls et accessoires associés contiennent du
plomb et des composés de plomb déclarés
par l’État de la Californie responsables de
cancer, malformations congénitales ou autres
anomalies de la reproduction. SE LAVER
LES MAINS APRÈS MANIPULATION.
CALIFORNIA
Advertencia sobre la Proposición 65
Los bornes, terminales, material de aislamiento de los
cables de las baterías y los accesorios relacionados
contienen plomo y compuestos del plomo, que son
sustancias químicas que el estado de California
considera que causan cáncer, defectos congénitos u
otros daños en el sistema reproductivo. LÁVESE LAS
MANOS DESPUÉS DE MANEJAR EL PRODUCTO.

1
LITTLE
WONDER
HPV
EN
8-2007
IMPORTANT MESSAGE
Thank you for purchasing this Schiller-Pfeiffer product. You have purchased a world class product, one of the
best designed and built anywhere.
This machine comes with a Technical Manual. The useful life and good service you receive from this machine
depends to a large extent on how well you read and understand this manual. Treat your machine properly,
lubricate and adjust it as instructed, and it will give you many years of reliable service.
Your safe use of this Schiller-Pfeiffer product is one of our prime design objectives. Many safety features are
built in, but we also rely on your good sense and care to achieve accident-free operation. For best protection,
study the manual thoroughly. Learn the proper operation of all controls. Observe all safety precautions. Follow
all instructions and warnings completely. Do not remove or defeat any safety features. Make sure those who
operate this machine are as well informed and careful in its use as you are.
See a Schiller-Pfeiffer dealer for any service or parts needed. Schiller-Pfeiffer service ensures that you continue
to receive the best results possible from Schiller-Pfeiffer products. You can trust Schiller-Pfeiffer replacement
parts because they are manufactured with the same high precision and quality as the original parts.
Schiller-Pfeiffer designs and builds its equipment to serve many years in a safe and productive manner. For
longest life, use this machine only as directed in the manual, keep it in good repair and follow safety warnings
and instructions. You'll always be glad you did.
LITTLE WONDER
Division of Schiller-Pfeiffer, Incorporated
1028 Street Road, P.O. Box 38
Southampton, PA 18966
TABLE OF CONTENTS FIGURES PAGE
SAFETY .........................................................................................................................................................2-7
ASSEMBLY .................................................................................................................................................8-10
OPERATION .............................................................................................................................................11, 12
STORAGE & MAINTENANCE .......................................................................................................................13
SERVICE ..................................................................................................................................................14, 15
PARTS ASSEMBLY .............................................FIGURE 1 ...................................................................16, 17
COLLECTOR ASSEMBLY ...................................FIGURE 2 ...................................................................18, 19
LINER ASSEMBLY ..............................................FIGURE 3 ...................................................................20, 21
NOZZLE ASSEMBLY .........................................FIGURE 4 ...................................................................22, 23

2
LITTLE
WONDER
HPV
SAFETY
NOTICE !!!
Unauthorized modications may present extreme
safety hazards to operators and bystanders and
could also result in product damage.
Schiller-Pfeiffer strongly warns against, rejects and
disclaims any modications, add-on accessories or
product alterations that are not designed, developed,
tested and approved by Schiller-Pfeiffer Engineering
Department. Any Schiller-Pfeiffer product that is
altered, modied or changed in any manner not
specically authorized after original manufacture–
including the addition of “after-market” accessories
or component parts not specically approved by
Schiller-Pfeiffer–will result in the Schiller-Pfeiffer
Warranty being voided.
Any and all liability for personal injury and/or property
damage caused by any unauthorized modications,
add-on accessories or products not approved by
Schiller-Pfeiffer will be considered the responsibility
of the individual(s) or company designing and/or
making such changes. Schiller-Pfeiffer will vigorously
pursue full indemnication and costs from any party
responsible for such unauthorized post-manufacture
modications and/or accessories should personal
injury and/or property damage result.
This symbol means:
ATTENTION!
BECOME ALERT!
Your safety and the safety of others is involved.
Signal word denitions:
The signal words below are used to identify levels
of hazard seriousness. These words appear in
this manual and on the safety labels attached to
Schiller-Pfeiffer machines. For your safety and the
safety of others, read and follow the information
given with these signal words and/or the symbol
shown above.
DANGER indicates an imminently hazardous
situation which, if not avoided, WILL result in death
or serious injury.
WARNING indicates a potentially hazardous
situation which, if not avoided, COULD result in
death or serious injury.
CAUTION indicates a potentially hazardous situation
which, if not avoided, MAY result in minor or moderate
injury. It may also be used to alert against unsafe
practices or property damage.
CAUTION used without the safety alert symbol
indicates a potentially hazardous situation which, if
not avoided, MAY result in property damage

3
LITTLE
WONDER
HPV
EN
Unpacking
1. Remove Collector assembly, Nozzle assembly,
and Debris bag from the top section of the
package.
2. Remove cardboard insert.
3. Cut away short side of box and fold down.
4. Roll HPV base unit out of box.
Safety and Warnings
Safety Decals
An important part of the safety system incorporated
in this High Performance Vac are the warnings and
informational decals (labels) found on various parts
of the unit.
These decals (labels) must be replaced if they
become illegible due to abrasion, etc.
It is your responsibility to replace the decals (labels)
when they become hard to read. The location of
these decals and their part numbers for ordering are
shown below.
SAFETY
Page is loading ...

5
LITTLE
WONDER
HPV
EN
SAFETY
1. Read and understand manual.
2. Wear eye, hearing, and
breathing protection, proper
clothing and footwear.
3. While operating the machine
always be sure of a safe and
secure operating position, maintain a rm footing
and good balance at all times.
4. Keep area clear of children, pets, and
bystanders.
5. Never attempt to use an incomplete machine or
one tted with an unauthorized modication.
6. Avoid contact with and inhalation of harmful
uids, gases, mists, fumes, and dust.
7. Do not allow children to operate machine.
8. Do not override or remove any safety devices.
9.
10.
11.
FAN COASTS AFTER THE ENGINE HAS BEEN
TURNED OFF.
12. Keep hands away from hose inlet and discharge
chute.
13. Disconnect spark plug wire before doing any
cleaning or maintenance.
14. Wear gloves to protect your hands.
15. Beware that the machine is loud and, during
normal operation; may interfere with speech
communication.
A. WARNINGS - "DON'TS"
Don’t attempt to remove materials from intake or
discharge when High Performance Vac is running, or
fan is rotating.
Don’t install or remove components while High
Performance Vac is running. Turn off engine to make
changeover. Be sure throttle is in the stop position,
and the High Performance Vac has come to a
complete stop. Remove the spark plug wire from the
spark plug before removing material.
Don’t attempt to repair High Performance Vac.
Have repairs made by qualied Little Wonder dealer
or repairman. See that only Little Wonder and
recommended engine manufacturers replacement
parts are used.
Don’t leave the engine running while the High
Performance Vac is unattended.
Don’t store, spill, or use gasoline near ames or
spark.
ROTATING FAN. DON'T ATTEMPT TO REMOVE
MATERIALS FROM INTAKE OR DISCHARGE
WHEN UNIT IS RUNNING, OR FAN IS
ROTATING.
DO NOT OPERATE UNIT IF EXCESSIVE
VIBRATION OCCURS; SHUT ENGINE OFF
IMMEDIATELY! REMOVE SPARK PLUG
WIRES AND CHECK FOR DAMAGED
IMPELLER, LOOSE IMPELLER BOLT, LOOSE
IMPELLER KEY, OR LODGED FOREIGN
OBJECTS.
DO NOT SMOKE WHEN FILLING FUEL TANK.

6
LITTLE
WONDER
HPV
B. WARNINGS - "DO'S"
Always dress properly. Do not wear loose clothing
or jewelry. They can be caught in moving parts.
Use of sturdy gloves, non-skid footwear and safety
glasses are recommended.
Always wear ear protectors where possible. Use
face lter to avoid breathing dust.
Always stay alert. Watch what you are doing
and use common sense. Do not operate High
Performance Vac when fatigued.
Always keep hands away from air intake and air
outlet chute. Keep both hands on handles when
power is on.
Always maintain and examine High Performance
Vac with care. Follow maintenance instructions given
in manual.
Always store High Performance Vac indoors. When
not in use, store High Performance Vac indoors in a
sheltered area (a dry place) where it's not accessible
to children. The High Performance Vac, as well as
fuel, should not be stored in a house. Keep throttle in
the stop position.
Always be sure High Performance Vac is fully
assembled. Never operate High Performance Vac
without all guards and deectors in place. Ensure
that all nuts, bolts, screws are installed and properly
tightened.
Always keep the throttle in the “stop” position when
not in use.
Always keep a safe distance between two or more
operators when working together simultaneously.
SAFETY
DO NOT USE THE HIGH PERFORMANCE VAC IF
THE MUFFLER IS DEFECTIVE OR MISSING.
IF THE HIGH PERFORMANCE VAC IS USED
IMPROPERLY OR SAFETY PRECAUTIONS
ARE NOT FOLLOWED, THE USER RISKS
SERIOUS INJURY TO THEMSELVES AND
OTHERS.
READ AND UNDERSTAND THE FOLLOWING
BEFORE ATTEMPTION TO OPERATE THIS
HIGH PERFORMANCE VAC.
HANDLE FUEL WITH CARE. IT IS HIGHLY
FLAMMABLE. FUELING A HOT ENGINE OR
NEAR AN IGNITION SOURCE CAN CAUSE A
FIRE AND RESULT IN SERIOUS PERSONAL
INJURY AND/OR PROPERTY DAMAGE.
C. Engine/ Fuel Warnings - “Don’ts”
Don’t fuel, refuel or check fuel while smoking or near
an open ame or other ignition source. Stop engine
and be sure it is cool before refueling.
Don’t leave the engine running while the High
Performance Vac is unattended. Stop engine before
transporting High Performance Vac from one place to
another.
Don’t start or run this High Performance Vac indoors,
or in an improperly ventilated area as poisonous
carbon monoxide and other gasses are emitted.
Don’t run engine when electrical system causes
spark outside the cylinder. During periodic checks
of the spark plug, keep plug a safe distance from
cylinder to avoid burning of evaporated fuel from
cylinder.
Don’t check for spark with spark plug or plug wire
removed and grounded. Use an approved tester.
Sparks can ignite fumes.
Don’t run engine when the odor of gasoline is
present or other explosive conditions exist.

7
LITTLE
WONDER
HPV
EN
SAFETY
C. Engine/ Fuel Warnings - “Don’ts”(continued)
Don’t operate the unit if gasoline is spilled. Clean up
spill completely before starting engine.
Don’t refuel indoors or in an improperly ventilated
area.
Don’t operate your High Performance Vac if there
is an accumulation of debris around the mufer or
cooling ns.
Don’t touch hot mufers, cylinders or cooling ns as
contact may cause serious burns.
D. Engine/ Fuel Warnings - “Do’s”
Always use fresh gasoline. Stale gasoline can cause
difcult starting, poor performance and leakage.
Always pull starter cord slowly until resistance is
felt. Then pull cord rapidly to avoid kickback and
prevent arm or hand injury. The use of spark arrestor
mufers is required by law in the state of California
(Section 4442 of the California Public Resources
Code), as well as in other states or municipalities.
Federal laws apply on federal lands.
Always handle fuel with care; it is highly ammable.
Never add fuel to a machine with a running or hot
engine. Do not inhale fuel fumes as they are toxic.
The spark ignition system meets all requirements
of the Canadian Interference Causing Equipment
Regulations.

8
LITTLE
WONDER
HPV
ASSEMBLY
ASSEMBLY
1. Attach the collector assembly to the base unit:
• Bolt the collector assembly to the frame with
4 sets of bolts, washer, and nuts
• Slide the rectangular end of the collector
over the housing and mount the ange with 2
sets of washers and nuts
2. Attach the throttle control cable to the handle
on the collector assembly:
• Bolt throttle control lever to handle with
washer and nut
• Secure throttle cable to handle with cable
ties in 2 places
3. Install the band clamp into the debris bag (wear
gloves when handling band clamp):
• Slide the bracket end of the band clamp
through the left side opening of the sleeve on
the debris bag until it emerges from the right
side
• Feed the tail end of the band (on the clasp
side) behind the bracket in the sleeve
• Pinch the wire form on the clasp together and
connect it through 2 holes in the adjustment
bracket such that it will close tightly over the
collector
4. Connect the debris bag by placing it over the
bottom lip of the collector and closing the clasp
to secure the bag. Adjust the clasp wire form to
the appropriate hole position on the bracket to
insure a tight t. If the bag will not t tight within
the range of the 3 adjustment holes, insert the
bag seal strap:
• Unhook the wire form from the bracket
• Pull the tail end of the band back out from
behind the bracket
• Feed one end of the seal strap behind the
metal band and through the channel to the
other side
• Tuck the other end of the seal strap behind
the bracket (overlapping the lead end of the
seal strap)
• Feed the tail end of the band clamp behind
the bracket (overlap the seal strap)
• Connect the wire form to the appropriate
holes in the bracket and secure the debris
bag to the collector
5. Attach nozzle assembly to base unit:
• Attach one end of the hose to the nozzle
assembly with the bridge clamp Assembly
• Slide the other end of the hose over the
edge of the inlet on the front plate
• Hook one side of the nozzle bracket over
the front axle
• Bend the other end of the nozzle bracket
inward to hook it over the axle and engage
the pins on the wheel bracket with the slots
on the nozzle bracket
• Secure the hose to front plate inlet with the
bridge clamp
• Attach the nozzle cable end tting through
the hole in the nozzle bracket
6. To remove nozzle assembly (for purposes of
storage, or clearing blockages):
• Turn engine off and disconnect spark plug
• Loosen hose clamp on the front plate with
athead screwdriver or 5/16 wrench
• Slide hose off of front plate inlet
• Bend one side of nozzle bracket inward and
twist the assembly to remove the hook from
the axle
• Twist back and lift to remove the other side of
nozzle bracket from the axle
NEVER RUN OR OPERATE YOUR MACHINE
UNLESS DISCHARGE BAG IS ATTACHED,
AND THE INTAKE NOZZLE IS INSTALLED.
Page is loading ...

10
LITTLE
WONDER
HPV
OPERATION
HANDLE FUEL WITH CARE. IT IS HIGHLY
FLAMMABLE. FUELING A HOT ENGINE OR
NEAR AN IGNITION SOURCE CAN CAUSE A
FIRE AND RESULT IN SERIOUS PERSONAL
INJURY AND/OR PROPERTY DAMAGE.
PUT OIL AND GASOLINE IN ENGINE
BEFORE STARTING
CGC, Inc. recommends using SAE 30 Oil. The use
of multi-viscosity oil will result in high oil consumption
and possible engine damage.
Add gasoline to the fuel tank, and you are ready to
start.
See Engine Operating & Maintenance instructions for
a more detailed description of type and amount of oil
and gasoline used.
USE OF LIFTING LUG
CGC, Inc.'s High Performance Vac is supplied with
a convenient Lifting Lug that can be used when you
need to move or tie down the unit.
DO NOT USE OR SERVICE THE UNIT WHEN IT'S
SUSPENDED FROM THE LIFTING LUG.
OPERATION
THE OPERATOR OF THIS HIGH PERFORMANCE
VAC IS RESPONSIBLE FOR ACCIDENTS OR
HAZARDS OCCURRING TO HIMSELF, OTHER
PEOPLE OR THEIR PROPERTY.
STARTING INSTRUCTIONS
FUEL IS EXTREMELY FLAMMABLE. HANDLE IT
WITH CARE. KEEP AWAY FROM IGNITION
SOURCES. DO NOT SMOKE WHILE FUELING
YOUR EQUIPMENT.
Perform pre-starting checks (engine oil and gas
level, all safety inspections, etc. Read entire Owners’
Manual for all pre-starting information.)
Release the Transaxle Engagement Lever.
Make sure Gas Supply Knob (located above Recoil
Starter) is turned to the On position.
Move Choke Lever (located above and to the left of
the Recoil Starter) to Choke position.
Move Throttle Control Lever (located on Left
Handlebar) to Middle Position or Full Position (toward
Rabbit symbol.)
Pull Recoil Starter Handle slowly until resistance is
felt, then pull rmly to start engine.
When engine starts, slowly move Choke Lever to the
Open position.
Increase Throttle Control Lever to Full Speed if
desired.
NOTE: If engine is difcult to start: Press Belt
Tension Lever down with your left foot before pulling
Recoil Starter Handle. (This disengages the belt for
easier starting). When engine starts, slowly release
your foot from the Belt Tension Lever.
ENGINE EMITS CARBON MONOXIDE. DO NOT
OPERATE OR REFUEL IN ENCLOSED AREA.

11
LITTLE
WONDER
HPV
EN
OPERATION
VACUUMING
Adjust nozzle to desired height by turning the nozzle
control knob, secure position with wing nut.
Vacuum debris from lawn or paved surfaces. Vacuum
the following: leaves, small twigs and sticks, acorns,
thistles, seed pods, grass clippings, straw, wood
chips, dry mulch, litter, small cans & bottles, paper
products, styrofoam products.
Avoid the following: excessively wet surfaces and
debris, gravel surfaces, large hard objects, rocks,
long brous materials (vines, rope, string etc). Do not
force anything into vacuum.
EMPTY DEBRIS BAG
Turn off engine and let it come to a complete stop
before removing the debris bag.
Roll vacuum to the desired unloading location
(compost pile, curb-side, wooded area, tarp, etc.).
Open clasp on band clamp to release bag to the
ground. Avoid dragging bag on surface to prolong
bag life.
Empty contents of debris bag (handle straps are
provided on the under side of the bag for aid in
dumping contents).
Reconnect bag to collector.
REFUELING THE ENGINE
Stop engine and allow it to cool for a few minutes
before refueling.
KEEP RECOIL STARTER SCREEN AND ENTIRE
ENGINE CLEAR OF ALL DEBRIS. DO NOT
OPERATE ENGINE WITH AN ACCUMULATION
OF GRASS, DIRT, LEAVES OR OTHER
COMBUSTIBLE MATERIAL NEAR MUFFLER.
DO NOT OPERATE UNIT IF EXCESSIVE
VIBRATION OCCURS; SHUT ENGINE OFF
IMMEDIATELY! REMOVE SPARK PLUG
WIRES AND CHECK FOR DAMAGED
IMPELLER, LOOSE IMPELLER BOLT, LOOSE
IMPELLER KEY, OR LODGED FOREIGN
OBJECTS.

12
LITTLE
WONDER
HPV
STORAGE & MAINTENANCE
STORAGE
After each use, run HPV with the empty bag attached
to help clear out any loose material in the housing.
When not in use store High Performance Vac
in sheltered area (a dry place) not accessible to
children. Keep throttle in the “Stop” position.
The High Performance Vac, as well as fuel, should
not be stored in a house or poorly ventilated areas.
Do not store fuel in the engine’s gas tank longer than
30 days.
MAINTENANCE
* See Engine Operating & Maintenance instructions for mor detail maintenance and service schedule.
** Change oil every 25 Hrs if operating under heavy load or high ambient temperatures.
Area Every
Use
Every
5 Hrs
After rst
8 Hrs of use
Every
25 Hours
Every
50 Hours
*Engine See Engine Manual
Check mufer area
for accumulation of
debirs
X
Check for Excessive
vibration
X
Inspect for loose or
damange parts
X
Inspect for clean
intake nozzle
X
Inspect labels condi-
tion
X
Check oil level
X
**Oil change
X X
Service air cleaner
X
Clean and inspect
spark plug arrester
X

13
LITTLE
WONDER
HPV
EN
SERVICE
IMPORTANT INFORMATION
A. Introduction
On behalf of everyone at Little Wonder, we would
like to thank you for your purchase of a Little
Wonder High Performance Vac. This professional
debris handling machine was designed to the highest
standards to ensure you many hours of uninterrupted
service.
This manual provides the information necessary for
safe and efcient operation and service. For your
safety, it is critically important that you read and
understand this entire manual before operating your
High Performance Vac.
Specications:
Model Dry Weight Max Rpm
5611 .............................. 184lbs. ................3400
B. Service Information
High Performance Vac Unit
Contact your local Little Wonder dealer.
Engine:
Contact an authorized Briggs & Stratton dealer.
Dealers are listed in the Yellow Pages under
“Lawn and Garden Equipment Supplies”, “Lawn
maintenance” or “Lawn Mowers”. Your dealer
will need to know the model and serial number of
your engine. For their location, please consult the
operator’s manual provided with your engine.
REMOVING BLOCKAGE IN MOVING
PARTS
Support the housing with 2x4 lumber so that the front
wheels are 1” above the ground.
Chock the rear wheels with blocks.
Remove the nozzle assembly from the front plate.
(See Assembly Instruction 6.)
Remove the front wheel assembly.
Remove the front plate.
Wear gloves and clear out debris from around the
impeller and housing.
TURN OFF ENGINE BEFORE YOU DISCONNECT
HOSE, AND MAKE SURE ALL MOVING PARTS
COME TO A COMPLETE STOP.
BE SURE THROTTLE IS IN "STOP" POSITION,
AND FAN HAS COME TO A COMPLETE STOP.
DISCONNECT THE SPARK PLUG WIRES BEFORE
ANY CLEANING OR MAINTENANCE!
WEAR GLOVES, THE CLOG MAY CONTAIN
SHARP MATERIALS.

14
LITTLE
WONDER
HPV
SERVICE
REMOVING THE FAN AND
REINSTALLATION
Remove spark plug wire from spark plug.
Remove nozzle assembly.
Remove front plate assembly.
Remove the bolt that secures the fan to the
engine crankshaft.
The fan has a 3/4-16 nut welded on the fan hub.
Insert a 3/4-16 x 5" long grade 5 (or better) bolt and
jack or push the fan off the engine. (CGC, Inc. P/N
910505 pressure screw is recommended.)
Replace damaged or worn fan with a new one.
If during fan removal the key (#64164-13) was
removed from the keyway, reinstall it by applying a
few drops of the Loctite 380 instant adhesive (“Black
Max” P/N 38050) on the key, and load the key in the
keyway of the shaft. (Cure time is approx. 1 min.)
Use a new bolt (#64123-127) (add Loctite 242 to
new bolt) and washer (#910527) and complete fan
installation. Insure a secure t upon re-assembling.
Torque bolt to 39-51 Ft. lbs.
CHANGING V-BELT
Turn off engine. Remove Spark Plug Wire from
spark Plug. Chock or block wheels of vacuum to
prevent it from rolling.
Remove Debris Bag from vacuum.
Remove 3 hex head bolts that attach Belt Guard to
Deck. (Use 7/16” wrench or socket.) Set Belt Guard
aside.
Note how V Belt goes around each of 4 pulleys
and how it “twists.”
Remove 4 hex head bolts that attach Recoil Starter
Cover to Engine Standoffs. (Use 8 millimeter nut
driver, socket or wrench.) Remove Recoil Starter
Cover.
Loosen (but do not remove) 2 hex head bolts that
attach Fixed Idler Bracket to Deck. (Use 7/16”
wrench or socket.) This allows clearance for belt to
be removed.
Press down on Belt Tension Lever and lift V Belt off
its pulley. Release Belt Tension Lever. Remove V
Belt from Engine Pulley.
Remove V Belt from large horizontal pulley of
transaxle (under Deck.) Pushing V Belt forward
with both hands, then lifting V Belt up, then pulling V
Belt backwards should remove it from large pulley.
Remove V Belt from under Deck.
Reverse above steps to replace V Belt. Install V
Belt with the same “twists” that the old V Belt made
around the pulleys. Make sure the “V” side of the
V Belt goes into each pulley. Before replacing Belt
Guard or starting engine, pull Recoil Starter Handle
several times to make sure V Belt rides in the
grooves of each pulley.
Make sure Belt Tension Lever and return spring
operate smoothly. If it sticks or does not operate
smoothly, lubricate the Belt Tension Lever and its
mounting bracket with a few drops of Motor Oil, or
other medium weight oil. Push Belt Tension Lever
down and release it several times to allow lubrication
to penetrate between lever and mounting bracket.
Proper operation of the Belt Tension Lever and its
return spring will insure that your V Belt will operate
properly and last many hours of use.
Page is loading ...
Page is loading ...

17
ITEM PART NO. DESCRIPTION QTY
ITEM PART NO. DESCRIPTION QTY
LITTLE
WONDER
HPV
EN
PARTS ASSEMBLY
FIGURE 1
1-1 910914 ENGINE-6HP INTEK 1
1-2 600180.17 DECK-HPV, 6HP 1
1-3 600184.17 HANDLE MOUNT 1
1-4 600187.10 HOUSING-W/LINER HOLE 1
1-5 600114 IMPELLER-BALANCED 1
1-6 600198 PLATE-FRONT 1
1-7 600182.17 BRACKET-FRONT WHEELS 1
1-8 600297 AXLE-FRONT 1
1-9 600298 AXLE-REAR 1
1-10 600137 SPACER-WHEEL 4
1-11 934 WHEEL-10" 2
1-12 920300 WHEEL-12" 2
1-13 600562 RETAINING RING E 5/8 4
1-14 600102 HOSE-NOZZLE 1
1-15 720420 BRIDGE CLAMP-HOSE 2
1-16 600162 KNOB-NOZZLE CNTRL 1
1-17 600104 CABLE-NOZZLE CNTRL 1
1-18 600103 CABLE-THROTTLE CNTRL 1
1-19 600176 CLAMP-BAND 1
1-20 600196 BAG-SEAL STRAP 1
1-21 600177 DEBRIS BAG 1
1-22 64164-13 KEY-1/4" SQ X 2" LG 1
1-23 64123-127 BOLT-3/8-24 X 1-3/4 1
1-24 600504 BOLT-CRG 3/8-16 X 2-1/4 4
1-25 64018-18 BOLT-CRG 3/8-16 X 2 4
1-26 64262-009 BOLT-FLGHD 5/16-18 X 1-1/2 4
1-27 910503 BOLT-5/16-24 X 3/4 4
1-28 64123-113 BOLT-HEX,1/4-20 X 2-1/4 1
1-29 64229-03 LOCKNUT-3/8-16 4
1-30 64141-4 NUT-FLANGE 3/8-16 4
1-31 64229-02 LOCKNUT-5/16-18 9
1-32 64141-6 NUT-FL 5/16-18 6
1-33 64214-01 NUT-WING 5/16-18 1
1-34 64229-01 LOCKNUT-1/4-20 1
1-35 910527 WASHER-FAN 1
1-36 64163--46 WASHER-3/8 ID X 3/16 TH 4
1-37 64163-31 WASHER-3/8 4
1-38 64163-29 WASHER-25/64x1x12GA 8
1-39 64163-55 WASHER-1/4 3
1-40 720411 CABLE TIE-11-5/8 BLK 2
1-41 64268-02 NUT-NYLON LOCK 5/16-18 4
1-42 600604 LABEL-INTAKE WARNING 1
1-43 600602 LABEL-WARNING,HOUSING 1
1-44 600101 ASSY-COLLECTOR 1
1-45 600100 ASSY-NOZZLE 1

18
LITTLE
WONDER
HPV
COLLECTOR ASSEMBLY
FIGURE 2

19
ITEM PART NO. DESCRIPTION QTY
ITEM PART NO. DESCRIPTION QTY
LITTLE
WONDER
HPV
EN
COLLECTOR ASSEMBLY
FIGURE 2
4-1 600130.10 HANDLE 1
4-2 600142.7 FLANGE CLAMP PLATE 1
4-3 64141-6 NUT-5/16-18 2
4-4 600138.7 FLANGE ANGLE COLECTR 1
4-5 64163-34 WASHER-1/4 COLECTR 7
4-6 600101 DISCHARGE COLECTR 1
4-7 600153 GRIP 2
4-8 600509 BOLT-BUTTON1/4-20 X 2 2
4-9 644229-01 LOCKNUT-1/4-20 6
4-10 600161 HOOK STRIP 1
4-11 600605 LABEL-DEBRIS BAG 1
Page is loading ...

21
ITEM PART NO. DESCRIPTION QTY
ITEM PART NO. DESCRIPTION QTY
LITTLE
WONDER
HPV
EN
LINER ASSEMBLY
FIGURE 3
5-1 600187.10 ASSY-HOUSING 1
5-2 600175 LINER 1
5-3 720592 BOLT-5/16-18 X 1 10
5-4 64163-29 WASHER-25/64 X 1 X 12GA 10
5-5 64229-02 LOCKNUT-5/16-18 10

22
LITTLE
WONDER
HPV
NOZZLE ASSEMBLY
FIGURE 4

23
ITEM PART NO. DESCRIPTION QTY
ITEM PART NO. DESCRIPTION QTY
LITTLE
WONDER
HPV
EN
NOZZLE ASSEMBLY
FIGURE 4
6-1 600100 NOZZLE 1
6-2 600133.7 ASSY-NOZZLE CLMP PLATE 1
6-3 600183.17 BRKT-NOZZLE VER. 2" 1
6-4 64141-6 NUT-FL 5/16-18 3
Page is loading ...
Page is loading ...
Page is loading ...
Page is loading ...
Page is loading ...
Page is loading ...
Page is loading ...
Page is loading ...
Page is loading ...
Page is loading ...
Page is loading ...
Page is loading ...
Page is loading ...
Page is loading ...
Page is loading ...
Page is loading ...
Page is loading ...
Page is loading ...
Page is loading ...
Page is loading ...
Page is loading ...
Page is loading ...
Page is loading ...
Page is loading ...
Page is loading ...
Page is loading ...
Page is loading ...
Page is loading ...
Page is loading ...
Page is loading ...
Page is loading ...
Page is loading ...
Page is loading ...
Page is loading ...
Page is loading ...
Page is loading ...
Page is loading ...
Page is loading ...
Page is loading ...
Page is loading ...
Page is loading ...
Page is loading ...
Page is loading ...
Page is loading ...
Page is loading ...
Page is loading ...
Page is loading ...
Page is loading ...
Page is loading ...
Page is loading ...
Page is loading ...
Page is loading ...
Page is loading ...
-
 1
1
-
 2
2
-
 3
3
-
 4
4
-
 5
5
-
 6
6
-
 7
7
-
 8
8
-
 9
9
-
 10
10
-
 11
11
-
 12
12
-
 13
13
-
 14
14
-
 15
15
-
 16
16
-
 17
17
-
 18
18
-
 19
19
-
 20
20
-
 21
21
-
 22
22
-
 23
23
-
 24
24
-
 25
25
-
 26
26
-
 27
27
-
 28
28
-
 29
29
-
 30
30
-
 31
31
-
 32
32
-
 33
33
-
 34
34
-
 35
35
-
 36
36
-
 37
37
-
 38
38
-
 39
39
-
 40
40
-
 41
41
-
 42
42
-
 43
43
-
 44
44
-
 45
45
-
 46
46
-
 47
47
-
 48
48
-
 49
49
-
 50
50
-
 51
51
-
 52
52
-
 53
53
-
 54
54
-
 55
55
-
 56
56
-
 57
57
-
 58
58
-
 59
59
-
 60
60
-
 61
61
-
 62
62
-
 63
63
-
 64
64
-
 65
65
-
 66
66
-
 67
67
-
 68
68
-
 69
69
-
 70
70
-
 71
71
-
 72
72
-
 73
73
-
 74
74
-
 75
75
-
 76
76
-
 77
77
-
 78
78
Little Wonder HPV 5611 User manual
- Category
- Garden tools
- Type
- User manual
- This manual is also suitable for
Ask a question and I''ll find the answer in the document
Finding information in a document is now easier with AI
in other languages
Related papers
-
 Little Wonder Little Wonder User manual
-
 Little Wonder 5612-00-01 User manual
-
 Little Wonder 5612-00-01 Owner's manual
-
 Little Wonder 5612-00-59 Owner's manual
-
 Little Wonder HPV 5621 User manual
-
 Little Wonder 600035 Owner's manual
-
 Little Wonder 5612-12-01 Owner's manual
-
 Little Wonder 5612-12-01 Owner's manual
-
 Little Wonder 5621 User manual
-
 Little Wonder 6236-00-01 Owner's manual
Other documents
-
 WONDER WORLD V8 User manual
-
All-Power APE7210 User manual
-
Mantis 7222 SV4A Owner's manual
-
VeriFone HPV-20 Installation guide
-
Eurotherm California Proposition 65 Owner's manual
-
 Classen TA18H User manual
-
 Twist Wonder Core User manual
-
Mantis SV2A, SV2-AE Owner's manual
-
 RTS Home Accents 55110001004281 Installation guide
-
KNOVA KN 7421 Owner's manual


