Page is loading ...

Start Guide
Welcome
BC
Microsoft Lumia 640
71707th_NOK_TMO640UserGuide.indd 1 2/16/15 1:40 PM

TABLE OF CONTENTS
Support ............................................. 1
Service Activation ............................. 2
Phone Overview ............................... 3
Micro SIM Card ................................ 4
Battery .............................................. 6
Power................................................ 7
Setup Wizard ................................... 7
Start Screen ...................................... 9
Action Center .................................. 10
Cortana ........................................... 11
Calls................................................ 13
Voicemail ........................................ 13
Contacts ......................................... 14
Volume............................................ 15
Ringtones ....................................... 15
Email ............................................... 16
Texting ............................................ 18
Wi-Fi Calling ................................... 19
Bluetooth
®
..................................... 21
Settings .......................................... 22
Internet Sharing .............................. 23
Approved Firmware Versions ......... 23
Caring For Your Phone ................... 23
Safety Tips ...................................... 25
Emergency Dialing ......................... 26
Additional Information .................... 27
1
SuppOrT
This guide provides you with the
information you need to get started.
For more information and additional
support, please visit www.t-mobile.com/
support where you can:
n
Register at my.t-mobile.com
to check your minutes, pay
your bill, upgrade your phone,
and change your rate plan.
n
Review your phone’s User Manual
and troubleshooting FAQs.
n
View the latest troubleshooting
solutions in the Support Forums
or ask a question of your own.
You can also access Help information on
your phone:
1. Right on the start screen...just tap
the Getting Started tile
for the
fastest way to get up and running.
2. The My Account app on your
start screen can help you with
many account related questions.
3. Lumia Help+Tips is located by
scrolling down on the start screen.
Videos, FAQ’s and many other
resources is just a tap away.
71707r1th_NOK_TMO640UserGuide.indd 2-1 2/18/15 5:04 PM

3
2
SErviCE ACTivATiON
If you are a new T-Mobile
®
customer and
your service has not yet been activated,
simply call Customer Care at
1-800-937-8997 and a T-Mobile
Activations representative will assist you.
You will need the following information
when activating service:
n
Your Service Agreement and the
agent code on your Agreement
n
Your name, home address, home
phone number, and billing address
Note: For business and government
accounts, please provide the organization’s
name, address, and tax ID.
n
Your Social Security number, current
driver’s license number, and date
of birth for credit check purposes
n
Your choice of T-Mobile rate plan
and services (see www.t-mobile.
com for latest plan information)
n
Your SIM serial number and
IMEI number (located on
the box barcode label)
By activating service, you acknowledge that you have
read, understand, and agree to be bound by each of
T-Mobile’s Terms and Conditions, and by your Service
Agreement.
phONE OvErviEw
Headphone
Jack
Ear Piece
Back Key
Press to
return to the
previous
screen. Press
and hold to
access the
multitasking
menu.
Volume Keys
Search Key
Press to access
Cortana. Press
and hold to use
voice commands
with Cortana.
Micro-USB/
Charging Port
Status
bar
Power/Lock Key
Press to put the
display to sleep
or hold to turn
on/off.
Start Key
Press to
return to
the Start
screen.
71707th_NOK_TMO640UserGuide.indd 2-3 2/16/15 1:40 PM

3. Lift up the battery.
4. Insert the Micro SIM card completely
into the slot with the gold contacts
facing down. An optional MicroSD
memory card may also be inserted.
5. Line up the battery contacts
on the battery with the ones in
the battery compartment and
lower the battery into place.
6. Replace the back cover.
5
4
miCrO Sim CArd
The Micro SIM (Subscriber Identity
Module) card identi es your phone to
the wireless network. You cannot make
or receive phone calls or browse
the Internet without activating and
installing the Micro SIM card that came
with your phone.
Install the Micro SIM card
1. Detach the
Micro SIM
card from its
packaging.
2. At the top
corner of
the phone, put your index nger
in the seam between the screen
frame and the back cover. Do not
use any sharp tools, as they may
damage the phone. Press the
middle of the back cover, bend
the cover open, and remove it.
71707th_NOK_TMO640UserGuide.indd 4-5 2/16/15 1:40 PM

7
6
BATTEry
To optimize battery performance, fully
charge your phone before using it for the
rst time.
Charge the battery
1. Insert the small
end of the
charging cable
into the charging
port on the
phone, as shown.
2. Plug the other
end of the
charging cable
into a wall outlet.
Conserve battery life
1. From the Start
screen, swipe left
to view the Applications screen.
2. Tap Settings.
3. Tap battery saver.
4. Tap the desired option to
conserve battery life.
pOwEr
To turn the power on,
press and hold the
Power/Lock key.
To turn the power off,
press and hold the
Power/Lock key and
then swipe your nger
down the screen.
SETup wizArd
To setup your phone
you’ll need to sign into your Microsoft
account. If you are unsure whether or not
you already have one, or if you have more
than one and need to choose between
them, go to WindowsPhone.com to learn
more.
1. Select Language
2. Let’s start
3. Accept terms of use
4. Connect to Wi-Fi or skip
5. Wi-Fi Sense selection
6. Choose Phone settings.
Tap recommended
7. Enter your date and time zone, if
necessary.
71707th_NOK_TMO640UserGuide.indd 6-7 2/16/15 1:40 PM

People
News
Skype Sports
Cortana
Store
6
2
1
Lumia Camera
OneDrive
Lumia Selfie
Getting Started
Games
7
MixRadio
3
My Account
6:40
LTE
9
8
8. Keep your life in sync
sign in:
1. Enter the Microsoft ID
and password to the
account you want to use.
2. Tap sign in.
create one
:
1. Enter the Microsoft ID
you want to use.
2. Tap next.
3. Enter a password.
4. Re-enter your password
5. Tap next.
6. Enter a secondary email
address and tap next.
Sign in later
: To skip setting up
your Microsoft account. Tap next.
Note: If you do not sign in with a Microsoft
ID, you will not be able to do some things
like get apps, add Twitter™ to your People
hub, or nd your phone if it’s lost.
9. Review Microsoft Mobile service
terms and privacy policy and tap
next.
You can also go to https:signup.live.
com/ to sign up for a Microsoft account
online.
STArT SCrEEN
Your Lumia 635 is a different
kind of phone. It has
tile icons,
making it easy to get the latest
information with just a quick tap.
Swipe left to view
the Applications
screen.
Tap the tiles
to open
applications.
View the live tiles
to see what’s
happening right
now.
71707th_NOK_TMO640UserGuide.indd 8-9 2/16/15 1:40 PM

11
10
ACTiON CENTEr
From the start
screen pull down
from the top
1. Check latest
social updates
and email
2. Access settings
3. Choose top
tiles from
notifi cations
and actions
in settings.
Add tiles to the
Start screen
1. From the Start screen, swipe left
to view the Applications screen.
2. Touch and hold the application
you want to add.
3. Tap pin to start.
Move tiles on the Start screen
1. To move, remove, or resize a
Tile, just tap and hold it, then
arrange it however you’d like.
2. Drag the tile to the desired position
and lift your nger from the screen.
3. Tap the tile to set it in place.
CLEAR ALL
ALL SETTINGS
X
CAMERA WIFI BLUETOOTH AIRPLANE
Messaging
Microsoft account
George
Sure, how about you come to mine
Priya
Store
You better!
Bob Williams
Meeting
Mary Smith
1 app needs your attention
Vacation
7:30a
8:05a
8:05a
8:05a
12:06a
6:40
LTE
Resize tiles from the Start Screen.
1. From the Start screen, touch and
hold the tile you want to resize.
2. Tap the arrow to resize.
Remove tiles from the Start screen
1. From the Start screen, touch
and hold the tile you want to
remove. A Tack icon appears
on the right corner of the tile.
2. Tap the Tack icon to remove.
Start+Theme
1. From the Start screen, swipe left.
2. Tap Settings.
3. Tap theme.
4. Tap to set the background
and accent color.
5. Set background image for your
start screen from your photos
COrTANA
Your personal assistant
Cortana is like a personal assistant,
there to help you add something to your
calendar, make a call, take a note, set
alarms, nd things and more.
Search
To nd something with Cortana—just tap
Search .
71707th_NOK_TMO640UserGuide.indd 10-11 2/16/15 1:40 PM

13
12
Talk to Cortana
To talk to Cortana hands-free, tap and
hold from anywhere, then just say what
you need. Not sure where to start? Say
“What can I say” to see some ideas.
Cortana Notebook
To see what Cortana knows about you
such as interests, reminders, quiet hours,
inner circle, and more, tap and then
tap .
Music
Listening to a
song, but can’t
remember who
sings it? While
the music is
playing, tap
and Cortana will
identify the song
for you.
Note: You need a
Microsoft account
to use Cortana.
This feature is not
available in all
languages. For info
on the supported
languages, go to
www.windowsphone.com.
CALLS
Make and end calls
1. From the Start screen, tap Phone .
2. Tap the at the bottom
of the screen.
3. Enter the phone number.
4. Tap call.
5. Tap end call when nished.
Answer calls
When you receive a call, tap answer.
If the screen is locked, touch the screen
and swipe up then tap answer.
vOiCEmAiL
Set up voicemail
1. From the Start screen, tap Phone .
2. Tap the at the bottom
of the screen.
3. Touch and hold 1 to call voicemail.
4. Follow the tutorial to set up
your voicemail account.
Reset voicemail password
You can reset your voicemail password to
the last four digits of your phone number.
1. From the Start screen, tap Phone
.
2. Tap the at the bottom
of the screen.
Listening for music...
71707th_NOK_TMO640UserGuide.indd 12-13 2/16/15 1:40 PM

15
14
3. Tap #793#.
4. Tap call.
5. Tap ok.
CONTACTS
Transfer contacts from your old
device
Use the app Transfer My Data for a quick
and easy way to copy contacts from
almost any device to your new Nokia
Windows Phone.
Add a new contact
1. From the Start screen, tap People.
2. At the Contacts screen, tap
icon at the bottom of the screen.
3. Select Account.
4. Tap name.
5. Enter the contact’s rst
and last name.
6. Enter the phone number.
7. Continue on to add more contact
information if you want.
8. Tap the Save icon when done.
Call a contact from your phone
book
1. From the Start screen, tap People.
2. Scroll or use the search icon to
nd the contact you want to call,
tap the contact you want to call.
3. Tap the phone number
you want to call.
Pin a contact to the Start screen
1. From the Start screen, tap People.
2. Touch and hold the desired contact.
3. Tap pin to start.
vOLumE
Adjust call volume
While on a call, press the Volume key up
or down.
Adjust ringer volume
From the Start screen, press the Volume
key up or down.
riNgTONES
Set call and notification ringtones
1. From the Start screen, swipe left
to view the Applications screen.
2. Tap Settings.
3. Tap ringtones+sounds.
4. Tap the following items to adjust:
N
Ringtone
N
Reminders
N
Manage app sounds
5. Select if a sound is played for:
N
Key press
71707th_NOK_TMO640UserGuide.indd 14-15 2/16/15 1:40 PM

17
16
N
Lock and unlock
N
Camera shutter
N
System alerts
6. Tap the ringtone you want to use.
EmAiL
Access your work and personal email
from your phone.
Set up personal email
1. From the Start screen, swipe left
to view the Applications screen.
2. Tap Settings.
3. Tap email+accounts.
4. Tap add an account.
5. Tap the account you want to add.
6. Enter your email address
and password.
7. Tap sign in.
Set up corporate email
1. From the Start screen, swipe left
to view the Applications screen.
2. Tap Settings.
3. Tap email+accounts.
4. Tap add an account.
5. Tap Exchange.
6. Enter your Exchange email
address and password.
7. Tap sign in.
8. Enter additional account
information, if necessary,
and tap sign in.
Note: Contact your company’s IT
department if you need more help. This
feature works with Microsoft Exchange
email servers only.
Read email
From the Start screen, tap the tile for the
email account you want to access then
tap the email message you want to read.
Send email
1. From the Start screen,
tap the tile for the email
account you want to use.
2. Tap the
icon.
3. At To , begin to enter the
name of the contact.
4. Either type using the keyboard
on the screen or use the Word
ow keyboard. Just spell the word
by sliding from letter to letter.
5. Tap the contact in the list or enter
the desired email address.
6. Tap Subject and enter your subject.
7. Tap the body of the email message
and enter your message.
71707th_NOK_TMO640UserGuide.indd 16-17 2/16/15 1:40 PM

19
18
8. Tap the icon on the bottom
of the screen to send.
Delete email
1. From the Start screen, tap
the tile for the email account
you want to access.
2. Touch and hold the email
you want to delete.
3. Tap delete.
TExTiNg
From the start screen select the text
icon . Tap to create a text.
Use the on-screen keyboard.
Writing with the on-screen keyboard is
easy in portrait or landscape mode. You
can write your messages by tapping the
letters or by swiping through them - Swipe
from the rst letter of the word, and draw
a path from letter to letter.
wi-Fi
Your phone can connect to the Internet
using Wi-Fi. It also supports Wi-Fi sense
(if enabled) that may automatically
connect to public and friends networks.
Turn on Wi-Fi and connect to a
network
1. From the Start screen, swipe left
to view the Applications screen.
2. Tap Settings.
3. Tap Wi-Fi.
4. Tap the bar to turn on
Wi-Fi, if necessary.
5. Tap the network you want to use.
6. Enter the password, if
prompted, and tap done.
7. To allow Wi-Fi access to others
in your contact list scroll down
and choose Wi-Fi sense.
wi-Fi CALLiNg
You can use a Wi-Fi network connection
to make calls using Wi-Fi Calling. To use
Wi-Fi Calling please use the SIM card
shipped with your device. A different
SIM card may not work with the Wi-Fi
Calling feature. You must also have a
911 emergency address registered with
your account. Log into your account at
www.t-mobile.com Go to your prole and
click Customer Info and follow the menu
options to register your address.
Nßote: Corporate accounts may require
administrator assistance for 911 Address
registration.
71707th_NOK_TMO640UserGuide.indd 18-19 2/16/15 1:40 PM

21
20
To enable Wi-Fi Calling
Wi-Fi Calling is on by default out of the
box. If you are connected to a Wi-Fi
network you should be able to use Wi-Fi
Calling immediately. If Wi-Fi Calling has
been turned off or you would like to
change your calling preferences follow the
steps below.
1. Ensure you are connected
to a Wi-Fi network (See W-Fi
above for instructions)
2. On the start screen, swipe left
to reach the Settings page.
3. Scroll down to Wi-Fi
Calling and select.
4. Toggle Wi-Fi Calling to
the On position.
5. Wi-Fi Calling is now enabled.
To disable Wi-Fi Calling
1. On the start screen, swipe left
to reach the Settings page.
2. Scroll down to Wi-Fi Calling and tap.
3. Toggle Wi-Fi Calling to
the Off position.
4. Wi-Fi Calling is now disabled.
To change the connection
preference for Wi-Fi Calling
1. On the start screen, swipe left
to reach the Settings page.
2. Scroll down to Wi-Fi Calling and tap.
3. Swipe left to reach Preference
4. Select your Calling Preference
About Wi-Fi Calling
Wi-Fi Calling can improve your coverage
and allows you to make phone calls and
send messages over a Wi-Fi network
(when a Wi-Fi network is available).
Unless your rate plan provides otherwise,
Wi-Fi Calling minutes count the same as
T-Mobile cellular calling minutes on your
phone bill.
BLuETOOTh
®
Your phone comes with Bluetooth
connectivity, a wireless technology that
enables a data connection between your
phone and a Bluetooth headset or other
Bluetooth device (sold separately).
Prepare Bluetooth headset
Make sure your Bluetooth headset is fully
charged and in pairing mode. Refer to the
headset’s user manual for more information.
Turn on Bluetooth and pair with
headset
1. From the Start screen, swipe left
to view the Applications screen.
71707th_NOK_TMO640UserGuide.indd 20-21 2/16/15 1:40 PM

23
22
2. Tap Settings.
3. Tap Bluetooth.
4. Tap the bar to turn on Bluetooth,
if necessary. A list of available
Bluetooth devices displays.
5. From the list, tap the headset you
want to pair with your phone.
6. If necessary, enter a
PIN or passcode.
7. Tap done.
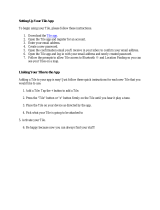
SETTiNgS
Storage Sense
To see what is taking up space on your
phone, use the Storage Sense app.
1. From App list, tap Storage Sense.
2. Tap phone to check the
details of the memory on your
phone or tap SD card.
3. Provide options to change
where you store music,
photos, apps, and more.
Data Sense
To nd more efcient ways to use mobile
data and track your usage, use the Data
Sense app. The Overview provides a
status on data usage using cellular versus
Wi-Fi.
1. From the App list, tap Data Sense.
2. Tap set limit and choose
the values you want.
3. Provide options to change
where you store music,
photos, apps, and more.
iNTErNET ShAriNg
Use your device as a mobile hotspot.
Log on and surf the web with any internet
capable device.
Note: Activation and data charges may apply.
1. From the apps list, tap Settings.
2. Scroll down and tap Internet sharing.
3. Turn on and use provided
Broadcast name and Password.
ApprOvEd FirmwArE
vErSiONS
This device will only operate with rmware
versions that have been approved for use
by T-Mobile and the device manufacturer.
If unauthorized rmware is placed on the
device it will not function.
CAriNg FOr yOur phONE
Make it last
Your phone is a complex electronic
device; think of it as a mini-computer.
71707th_NOK_TMO640UserGuide.indd 22-23 2/16/15 1:40 PM

25
24
Here are some tips to help you extend the
life of your new phone.
Do not get your phone wet. Even a small
amount of moisture can damage your
phone and accessories.
Protect your phone’s touch screen. Your
phone’s touch screen is delicate. Guard
against scratches by using a screen
protector or a protective case.
Use the original manufacturer’s
batteries and accessories. Non-
approved batteries and accessories can
harm you and damage your phone.
Do not use damaged accessories.
If your charger or any other accessory
is damaged, replace it or take it to a
qualied service dealer. Do not attempt
to charge your phone if the charger has
been dropped, received a sharp blow, or
has been otherwise damaged; doing so
may harm your phone.
Information About Safeguarding
Handsets
T-Mobile encourages customers to
take appropriate measures to secure
their handsets and invites them to take
advantage of the features available on
this handset to help secure it from theft
and/or other unauthorized access and
use. This handset has a locking function
(e.g., user-dened codes or patterns)
that can serve as a rst line of defense
against unauthorized use or access to
stored information. Preloaded security
applications that allow customers to
track or locate misplaced devices can
be found on several T-Mobile devices.
Lost or stolen devices should be
immediately reported to T-Mobile so that
proper measures can be taken to protect
accounts. For additional information, visit:
www.t-mobile.com/devicesecurity and
http://www.t-mobile.com/Company/
PrivacyResources.aspx
SAFETy TipS
Consider device compatibility
If you have a pacemaker or a hearing
aid, check with your doctor to make sure
it’s safe for you to use a cell phone. In
some cases, cellular radio frequencies
can disrupt the performance of other
electronic equipment. If you have
questions about the interaction between
your phone and any other piece of
electronic equipment, ask the equipment
manufacturer.
71707th_NOK_TMO640UserGuide.indd 24-25 2/16/15 1:40 PM

27
26
Drive safely
T-Mobile encourages you to use your
phone in a safe and sensible manner
while driving.
Here are a few safety tips:
n
Assess road conditions before
answering your phone. Your safety
is more important than any call.
n
Prepare your hands-free headset,
if you have one, or turn on your
speakerphone, before you
start moving.
n Pre-program frequently used
numbers into your phone for
easy, one-touch dialing.
n Keep your phone close. If it rings
and you discover it’s in the back
seat, do NOT crawl over the
seat to answer it while driving.
n Remember that laws prohibiting or
restricting the use of a cell phone
while driving may apply in your area.
EmErgENCy diALiNg
Although all phones are equipped with
9-1-1 emergency calling, this phone
may or may not permit its location to be
approximated during a 9-1-1 call.*
* Availability of this feature depends on upgrades
to the (a) wireless network and (b) 9-1-1 calling
system that are required to be installed by the local
9-1-1 response agency or public safety answering
point (PSAP); these upgrades may not be available
everywhere within our wireless coverage area or your
roaming area. This approximation of the phone’s
location and the transmittal of location information
are subject to emergency situations, transmission
limits, network problems/limitations, interconnecting
carrier problems, your phone, buildings/tunnels, signal
strength and atmospheric/topographical conditions,
and may be curtailed, interrupted, dropped, or refused.
The phone’s approximate location is transmitted to the
local 9-1-1 response agency or PSAP while the call is
in progress; this approximation is intended solely to
aid the PSAP in dispatching emergency assistance
or to limit the search area for emergency services
personnel. You should not rely solely on a mobile phone
for essential communications (such as a medical or
other emergency). Please see T-Mobile’s Terms and
Conditions, and Privacy Policy for additional service
restrictions and details.
AddiTiONAL iNFOrmATiON
Use of some content or features may
incur separate, additional charges and/or
require qualifying service, or access to a
Wi-Fi connection.
Wi-Fi: Device will not transition between
Wi-Fi and the cellular network. Devices
using wireless connections may be
vulnerable to unauthorized attempts to
access data and software stored on the
device. Plan data allotment applies to use
71707th_NOK_TMO640UserGuide.indd 26-27 2/16/15 1:40 PM

29
28
by connected devices sharing Wi-Fi. Use
of connected devices subject to T-Mobile
Terms and Conditions.
Wi-Fi Calling: Wi-Fi connection required
for Wi-Fi Calling; may decrement plan
minutes. Most devices will not transition
between Wi-Fi and the wireless network.
See your selected service for details.
Messaging/Data: You will be charged
for all messages and data sent by or to
you through the network, regardless of
whether or not data is received. Character
length/le size of messages/attachments
may be limited. T-Mobile is not liable for
content of messages/attachments or
for any failures, delays, or errors in any
T-Mobile generated alerts or notications.
Your data session, plan, or service may
be slowed, suspended, terminated, or
restricted if you use your service in a way
that interferes with or impacts our network
or ability to provide quality service to
other users, if you roam for a signicant
portion of your usage, or if you use a
disproportionate amount of bandwidth
during a billing cycle. You may not use
your plan or device for prohibited uses.
Downloads/Applications: T-Mobile is not
responsible for any third party content
or Web site you may be able to access
using your phone. Additional charges
may apply; not all downloads available
on all phones. You obtain no rights in
downloads; duration of use may be
limited and downloads may be stored
solely for use with your phone. T-Mobile is
not responsible for any download lost due
to your error. T-Mobile is not responsible
for Apps, including download, installation,
use, transmission failure, interruption or
delay, third party advertisements you may
encounter while using an App, alterations
any App may make to the functionality of
your device, including any changes that
may affect your T-Mobile plan, service,
or billing, or any content or website you
may be able to access through an App.
Hearing Aid Compatibility: This phone
has been tested and rated for use with
hearing aids for some of the wireless
technologies that it uses. However,
there may be some newer wireless
technologies used in this phone that have
not been tested yet for use with hearing
aids. It is important to try the different
features of this phone thoroughly and in
different locations, using your hearing aid
or cochlear implant, to determine if you
hear any interfering noise. Consult your
service provider or the manufacturer of
this phone for information on hearing aid
compatibility. If you have questions about
return or exchange policies, consult your
service provider or phone retailer.
Device, accessory and screen images
simulated. See brochures and the Terms
and Conditions (including arbitration
provision) at T-Mobile.com, for rate plan
71707th_NOK_TMO640UserGuide.indd 28-29 2/16/15 1:40 PM

31
30
information, charges for features and
services, and restrictions and details,
including important limitations on
availability and reliability of 9-1-1
emergency service when using
Wi-Fi calling.
Microsoft, Windows, Windows Live
®
ID,
and the Windows logo are trademarks of
the Microsoft group of companies. ©2015
Microsoft Corporation. All rights reserved.
©2015 Nokia. All rights reserved. The
Bluetooth
®
word mark and logo are
owned by Bluetooth SIG, Inc. and are
used by T-Mobile under license. T-Mobile
and the magenta color are registered
trademarks of Deutsche Telekom AG.
©2015 T-Mobile USA, Inc.
71707th_NOK_TMO640UserGuide.indd 30-31 2/16/15 1:40 PM

33
32
Thanks for choosing T-Mobile and
Windows Phone.
For help on getting set up and getting
started visit:
http://www.microsoft.com/mobile/
support/
To get the most out of your new
Windows 8.1 visit:
http://www.trylumiaphone.com/
71707th_NOK_TMO640UserGuide.indd 32-33 2/16/15 1:41 PM

TMO6211.1
9264801
71707th_NOK_TMO640UserGuide.indd 34 2/16/15 1:41 PM
/