Page is loading ...

PR860
Two-Way Portable Radio
Basic Service Manual

ii
Foreword
This manual provides sufficient information to enable qualified service technicians to troubleshoot and repair
PR860 Series portable radios to the component level.
Product Safety and RF Exposure Compliance
ATTENTION!
This radio is restricted to occupational use only to satisfy FCC RF energy exposure requirements.
Before using this product, read the RF energy awareness information and operating instructions in
the Product Safety and RF Exposure booklet (Motorola Publication part number 68P81095C98) to
ensure compliance with RF energy exposure limits.
For a list of Motorola-approved antennas, batteries, and other accessories, visit the following web site
which lists approved accessories: http://www.motorola.com/governmentandenterprise/.
Computer Software Copyrights
The Motorola products described in this manual may include copyrighted Motorola computer programs stored
in semiconductor memories or other media. Laws in the United States and other countries preserve for
Motorola certain exclusive rights for copyrighted computer programs, including, but not limited to, the
exclusive right to copy or reproduce in any form the copyrighted computer program. Accordingly, any
copyrighted Motorola computer programs contained in the Motorola products described in this manual may
not be copied, reproduced, modified, reverse-engineered, or distributed in any manner without the express
written permission of Motorola. Furthermore, the purchase of Motorola products shall not be deemed to grant
either directly or by implication, estoppel, or otherwise, any license under the copyrights, patents or patent
applications of Motorola, except for the normal non-exclusive license to use that arises by operation of law in
the sale of a product.
Document Copyrights
No duplication or distribution of this document or any portion thereof shall take place without the express
written permission of Motorola. No part of this manual may be reproduced, distributed, or transmitted in any
form or by any means, electronic or mechanical, for any purpose without the express written permission of
Motorola.
Disclaimer
The information in this document is carefully examined, and is believed to be entirely reliable. However, no
responsibility is assumed for inaccuracies. Furthermore, Motorola reserves the right to make changes to any
products herein to improve readability, function, or design. Motorola does not assume any liability arising out
of the applications or use of any product or circuit described herein; nor does it cover any license under its
patent rights nor the rights of others.
Trademarks
MOTOROLA and the Stylized M logo are registered in the US Patent & Trademark Office. All other products
or service names are the property of their respective owners.
© Motorola, Inc. 2007.
Before using this product, read the operating instructions
for safe usage contained in the Product Safety and RF
Exposure booklet.

iii
Document History
The following major changes have been implemented in this manual since the previous edition:
Edition Description Date
6881098C42-O Original Release Feb. 2005
6881098C42-P Updated Part numbers and Descriptions in
Exploded View section.
Updated Service and Technical Support info.
Jun. 2007

iv
Notes

v
Table of Contents
Foreword.........................................................................................................ii
Product Safety and RF Exposure Compliance ............................................................... ii
Computer Software Copyrights....................................................................................... ii
Document Copyrights ..................................................................................................... ii
Disclaimer ....................................................................................................................... ii
Trademarks..................................................................................................................... ii
Document History .........................................................................................iii
Chapter 1
Introduction ................................................................................................ 1-1
1.1 Scope of Manual................................................................................................. 1-1
1.2 Warranty and Service Support............................................................................ 1-1
1.2.1 Warranty Period and Return Instructions................................................. 1-1
1.2.2 After Warranty Period .............................................................................. 1-1
1.2.3 Piece Parts Availability............................................................................. 1-2
1.2.4 Technical Support .................................................................................... 1-3
1.3 Radio Model Information..................................................................................... 1-4
Chapter 2
Maintenance ............................................................................................... 2-1
2.1 Introduction ......................................................................................................... 2-1
2.2 Preventive Maintenance ..................................................................................... 2-1
2.2.1 Inspection................................................................................................. 2-1
2.2.2 Cleaning Procedures ............................................................................... 2-1
2.3 Safe Handling of CMOS and LDMOS Devices................................................... 2-2
2.4 Repair Procedures and Techniques — General................................................. 2-2
2.5 Disassembling and Reassembling the Radio — General................................... 2-3
2.6 Detailed Radio Disassembly............................................................................... 2-4
2.6.1 Front Cover from Chassis Disassembly................................................... 2-4
2.6.2 Chassis Assembly/Disassembly .............................................................. 2-6
2.6.3 Option Board Disassembly ...................................................................... 2-6
2.6.4 Speaker, Microphone, and Universal Connector Flex Disassembly ........ 2-8

vi
2.6.5 Control Top Disassembly ......................................................................... 2-9
2.7 Detailed Radio Reassembly................................................................................ 2-9
2.7.1 Control Top Reassembly.......................................................................... 2-9
2.7.2 Speaker, Microphone, and Universal Connector Flex Reassembly ......... 2-9
2.7.3 Option Board Reassembly ..................................................................... 2-10
2.7.4 Chassis Assembly Reassembly ............................................................. 2-10
2.7.5 Chassis and Front Cover Reassembly................................................... 2-10
2.7.6 Option Board Installation ........................................................................ 2-11
2.8 PR860 Radio Exploded Mechanical View and Parts List................................. 2-13
2.9 Service Aids ...................................................................................................... 2-15
2.10 Test Equipment ................................................................................................. 2-16
2.11 Configuring and Wiring the Programming/Test Cable....................................... 2-17
Chapter 3
Transceiver Performance Testing ............................................................ 3-1
3.1 General ............................................................................................................... 3-1
3.2 RF Test Mode ..................................................................................................... 3-1
3.3 Test Frequencies ................................................................................................ 3-4
3.4 Receiver Performance Tests............................................................................... 3-5
Chapter 4
Radio Tuning, Programming, Cloning, and Lowband Antenna Cutting
Procedure ................................................................................................... 4-1
4.1 Introduction ......................................................................................................... 4-1
4.2 Global Radio Tuning Setup ................................................................................. 4-2
4.2.1 Initial Test Equipment Setup .................................................................... 4-2
4.3 CPS Programming Setup.................................................................................... 4-3
4.4 Cloning (Conventional)........................................................................................ 4-3
4.5 Lowband Molded Antenna Cut Chart .................................................................. 4-5
Chapter 5
Power Up Self-Test .................................................................................... 5-1
5.1 Error Codes - Conventional Radios .................................................................... 5-1

vii
Chapter 6
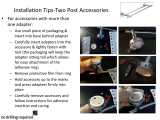
Accessories ................................................................................................ 6-1
6.1 PR860 Accessories ............................................................................................ 6-1
6.1.1 Antennas.................................................................................................. 6-1
6.1.2 Batteries................................................................................................... 6-1
6.1.3 Chargers & Charger Accessories ............................................................ 6-2
6.1.4 Carry Accessories.................................................................................... 6-3
6.1.5 Audio Accessory - Microphones .............................................................. 6-3
6.1.6 Audio Accessory - Headsets.................................................................... 6-3
6.1.7 Audio Accessory - Earpieces ................................................................... 6-4
6.1.8 Audio Accessory - Ear Mics ..................................................................... 6-5
6.1.9 Audio Accessory - CommPort.................................................................. 6-5
6.1.10 Miscellaneous .......................................................................................... 6-5
6.1.11 Service .................................................................................................... 6-5
6.1.12 Manuals .................................................................................................. 6-5
Chapter 7
Model Chart and Test Specifications ....................................................... 7-1
7.1 VHF 136–174 MHz (Conventional)..................................................................... 7-1
7.2 UHF1 403-470 MHz (Conventional) ................................................................... 7-2
7.3 UHF2 450-512 MHz (Conventional) ................................................................... 7-2
7.4 LowBand1 29.7-42 MHz (Conventional)............................................................. 7-3
7.5 LowBand2 35-50 MHz (Conventional)................................................................ 7-3
7.6 Specifications, PR860 Radio .............................................................................. 7-4
Glossary......................................................................................... Glossary-1

viii
Notes

ix
List of Figures
Figure 2-1: Battery Removal ..................................................................................... 2-4
Figure 2-2: Knob Removal ........................................................................................ 2-4
Figure 2-3: Chassis Removal ................................................................................... 2-5
Figure 2-4: Unlatch Flex Connectors ........................................................................ 2-5
Figure 2-5: Remove Main Board from Chassis......................................................... 2-6
Figure 2-6: Remove Retainer.................................................................................... 2-7
Figure 2-7: Removing the Retainer and Other Boards from the Radio..................... 2-7
Figure 2-8: Removal Speaker-Microphone Assembly .............................................. 2-9
Figure 2-9: Lock Retainer Catches to the Radio’s Body ......................................... 2-10
Figure 2-10: Fastening the Chassis .......................................................................... 2-11
Figure 2-11: Changing Option Board ........................................................................ 2-11
Figure 2-12: Programming/Test Cable AARKN4074 ................................................ 2-17
Figure 2-13: Pin Configuration of the Cable Side Connector.................................... 2-17
Figure 2-14: Programming/Test Cable Schematic.................................................... 2-18
Figure 3-1: Radio Side Button Location .................................................................... 3-2
Figure 4-1: Radio Tuning Test Equipment Setup...................................................... 4-2
Figure 4-2: CPS Programming Setup ....................................................................... 4-3
Figure 4-3: Radio Side Button Locations .................................................................. 4-4

x
List of Tables
Table 1-1: Radio Model Number (Example: AAH25KDC9AA3AN) ........................... 1-4
Table 2-1: Service Aids ........................................................................................... 2-15
Table 2-2: Recommended Test Equipment............................................................. 2-16
Table 3-1: Test Environments (Side Button 1) .......................................................... 3-3
Table 3-2: Test Channel Spacing (Side Button 2) ..................................................... 3-3
Table 3-3: Test Frequencies (Using the Channel Selector Switch)........................... 3-4
Table 3-4: Receiver Performance Checks................................................................. 3-5
Table 3-5: Transmitter Performance Checks............................................................. 3-6
Table 4-1: Software Installation Kits Radio Tuning Setup ......................................... 4-1
Table 4-2: Initial Equipment Control Settings ............................................................ 4-2
Table 5-1: Power-up Display Codes - (Conventional Radios) ................................... 5-1

1-1
Chapter 1
Introduction
1.1 Scope of Manual
This manual is intended for use by service technicians familiar with similar types of equipment. It
contains service information required for the equipment described and is current as of the printing
date. Changes which occur after the printing date may be incorporated by a complete Manual revision
or alternatively as additions.
1.2 Warranty and Service Support
Motorola offers support which includes: full exchange and/or repair of the product during the warranty
period; and service/repair or spare parts support out of warranty. Any “return for exchange” or “return
for repair” to an authorized Motorola Dealer must be accompanied by a Warranty Claim Form.
Warranty Claim Forms are obtained by contacting an Authorized Motorola Dealer. (See section 1.2.4
on page 1-3.)
1.2.1 Warranty Period and Return Instructions
The terms and conditions of warranty are defined fully in the Motorola Dealer or Distributor or Reseller
contract. These conditions may change from time to time, and the following subsections are for
guidance purposes only.
In instances where the product is covered under a “return for replacement” or “return for repair”
warranty, a check of the product should be performed prior to shipping the unit back to Motorola. This
is to ensure that the product has been correctly programmed or has not been subjected to damage
outside the terms of the warranty.
Prior to shipping any radio back to the appropriate Motorola warranty depot, please contact Customer
Resources (See page 1-2 and page 1-3.) All returns must be accompanied by a Warranty Claim
Form, available from your Customer Resources representative. Products should be shipped back in
the
original packaging, or correctly packaged to ensure that no damage occurs in transit.
1.2.2 After Warranty Period
After the Warranty period, Motorola continues to support its products in two ways:
1. Motorola's Radio Parts and Service Group offers repair service to users and dealers at
competitive prices.
2. The Motorola Radio Products and Solutions Organization (RPSO) supplies individual parts and
modules that can be purchased by dealers who are capable of performing fault analysis and
repair.

1-2 Introduction
1.2.3 Piece Parts Availability
Some replacement parts, spare parts, and/or product information can be ordered directly.
Motorola Online
Motorola Online users can access our online catalog at
https://www.motorola.com/businessonline.
To register for online access, please call 1-800-422-4210 (for U.S. and Canada Service Centers only).
International customers can obtain assistance at
http://www.motorola.com/businessonline.
Mail Orders
Mail orders are only accepted by the US Federal Government Markets Division (USFGMD).
Motorola
7031 Columbia Gateway Drive
3rd Floor - Order Processing
Columbia, MD 21046
U.S.A.
Telephone Orders
Radio Products and Solutions Organization*
(United States and Canada)
7:00 AM to 7:00 PM (Central Standard Time)
Monday through Friday (Chicago, U.S.A.)
1-800-422-4210
1-847-538-8023 (United States and Canada)
U.S. Federal Government Markets Division (USFGMD)
1-877-873-4668
8:30 AM to 5:00 PM (Eastern Standard Time)
If... It Means That...
A complete Motorola part number is
assigned to the part, and it is not identified
as Depot ONLY
The part is available from the Radio Products
and Solutions Organization (RPSO).*
No part number is assigned The part is not normally available from
Motorola.
The part number is appended with an
asterisk
The part is serviceable by a Motorola Depot
only.
A parts list is not included Generally, no user-serviceable parts are
available for that kit or assembly.
*Radio Products and Solutions Organization (RPSO) was formerly known as the Radio
Products Services Division (RPSD) and/or the Customer Care and Services Division (CCSD)
and/or the Accessories and Aftermarket Division (AAD).

Introduction 1-3
Fax Orders
Radio Products and Solutions Organization*
(United States and Canada)
1-800-622-6210
1-847-576-3023 (United States and Canada)
USFGMD
(Federal Government Orders)
1-800-526-8641 (For Parts and Equipment Purchase Orders)
Parts Identification
Radio Products and Solutions Organization*
(United States and Canada)
1-800-422-4210
Product Customer Service
Radio Products and Solutions Organization (United States and Canada)
1-800-927-2744
*The Radio Products and Solutions Organization (RPSO) was formerly known as the Radio Products
Services Division (RPSD) and/or Customer Care and Services Division (CCSD) and/or Accessories
and Aftermarket Division (AAD).
1.2.4 Technical Support
If a unit requires further complete testing, knowledge and/or details of component level
troubleshooting or service than is customarily performed at the basic level, please send the radio to a
Motorola Service Center as listed below.
Motorola Service Center
45D Butterfield Trail
El Paso, TX 79906
Tel: 1-800-227-6772
Motorola Federal Technical Center
4395 Nicole Drive
Lanham, MD 20706
Tel: 1-800-969-6680
Fax: 1-800-784-4133
Motorola Canadian Technical Logistics Center
Motorola Canada Ltd.
8133 Warden Avenue
Markham, Ontario, L6G 1B3
Tel: 1-800-543-3222
Fax: 1-888-331-9872 or 1-905-948-5970

1-4 Introduction
1.3 Radio Model Information
The model number and serial number are located on a label attached to the back of your radio. You
can determine the RF output power, frequency band, protocols, and physical packages. The example
below shows one portable radio model number and its specific characteristics.
Table 1-1:Radio Model Number (Example: AAH25KDC9AA3AN)
Type of
Unit
Model
Series
Freq.
Band
Power
Level
Physical
Packages
Channel
Spacing
Protocol
Feature
Level
Model
Revision
Model
Package
AA or
LA
H25 K
VHF
(136-174
MHz)
D
4-5W
C
PR860
(no display)
9
Programma-
ble
AA
Conventional
3
PR860
(non-keypad)
AN
R
UHF1
(403-470
MHz)
E
5.1-6W
6
25 kHz
S
UHF2
(450-512
MHz)
4
12.5 kHz
B
Low Band,
R1 (29.7-
42.0 MHz)
C
Low Band,
R2 (35.0-
50.0 MHz)
AA or LA = Motorola Internal Use
H = Portable

2-1
Chapter 2
Maintenance
2.1 Introduction
This chapter provides details about the following:
• Preventive maintenance (inspection and cleaning)
• Safe handling of CMOS and LDMOS devices
• Disassembly and reassembly of the radio
• Installation of Option Boards
2.2 Preventive Maintenance
The radios do not require a scheduled preventive maintenance program; however, periodic visual
inspection and cleaning is recommended.
2.2.1 Inspection
Check that the external surfaces of the radio are clean, and that all external controls and switches are
functional. It is not recommended to inspect the interior electronic circuitry.
2.2.2 Cleaning Procedures
The following procedures describe the recommended cleaning agents and the methods to be used
when cleaning the external and internal surfaces of the radio. External surfaces include the front
cover, housing assembly, and battery case. These surfaces should be cleaned whenever a periodic
visual inspection reveals the presence of smudges, grease, and/or grime.
The only recommended agent for cleaning the external radio surfaces is a 0.5% solution of a mild
dishwashing detergent in water. The only factory recommended liquid for cleaning the printed circuit
boards and their components is isopropyl alcohol (70% by volume).
Cleaning External Plastic Surface
Apply the 0.5% detergent-water solution sparingly with a stiff, non-metallic, short-bristled brush to
work all loose dirt away from the radio. Use a soft, absorbent, lintless cloth or tissue to remove the
solution and dry the radio. Make sure that no water remains entrapped near the connectors, cracks,
or crevices.
Cleaning Internal Circuit Boards and Components
Isopropyl alcohol (70%) may be applied with a stiff, non-metallic, short-bristled brush to dislodge
embedded or caked materials located in hard-to-reach areas.
NOTE: Internal surfaces should be cleaned only when the radio is disassembled for service
or repair.
CAUTION: Certain chemicals and their vapors can have harmful effects on certain
plastics. Avoid using aerosol sprays, tuner cleaners, and other chemicals.

2-2 Maintenance
The brush stroke should direct the dislodged material out and away from the inside of the radio. Make
sure that controls or tunable components are not soaked with alcohol. Do not use high-pressure air to
hasten the drying process since this could cause the liquid to collect in unwanted places. After
completing of the cleaning process, use a soft, absorbent, lintless cloth to dry the area. Do not brush
or apply any isopropyl alcohol to the frame, front cover, or back cover.
2.3 Safe Handling of CMOS and LDMOS Devices
Complementary metal-oxide semiconductor (CMOS) devices are used in this family of radios, and are
susceptible to damage by electrostatic or high voltage charges. Damage can be latent, resulting in
failures occurring weeks or months later. Therefore, special precautions must be taken to prevent
device damage during disassembly, troubleshooting, and repair.
Handling precautions are mandatory for CMOS circuits and are especially important in low humidity
conditions. DO NOT attempt to disassemble the radio without first referring to the following CAUTION
statement.
2.4 Repair Procedures and Techniques — General
Parts Replacement and Substitution
When damaged parts are replaced, identical parts should be used. If the identical replacement part is
not locally available, check the parts list for the proper Motorola part number and order the part from
the nearest Motorola Radio Products and Solutions Organization listed in the “Piece Parts” section of
this manual (See page 1-2).
NOTE: Always use a fresh supply of alcohol and a clean container to prevent contamination
by dissolved material (from previous usage).
CAUTION: This radio contains static-sensitive devices. Do not open the radio unless
you are properly grounded. Take the following precautions when working on this
unit:
• Store and transport all CMOS devices in conductive material so that all exposed
leads are shorted together. Do not insert CMOS devices into conventional plastic
“snow” trays used for storage and transportation of other semiconductor devices.
• Ground the working surface of the service bench to protect the CMOS device. We
recommend using the a wrist strap, two ground cords, a table mat, and a floor mat.
• Wear a conductive wrist strap in series with a 100k resistor to ground.
(Replacement wrist straps that connect to the bench top covering are Motorola
part number 4280385A59.)
• Do not wear nylon clothing while handling CMOS devices.
• Do not insert or remove CMOS devices with power applied. Check all power
supplies used for testing CMOS devices to be certain that there are no voltage
transients present.
• When straightening CMOS pins, provide ground straps for the apparatus used.
• When soldering, use a grounded soldering iron.
• If at all possible, handle CMOS devices by the package and not by the leads. Prior
to touching the unit, touch an electrical ground to remove any static charge that
you may have accumulated. The package and substrate may be electrically
common. If so, the reaction of a discharge to the case would cause the same
damage as touching the leads.

Maintenance 2-3
Rigid Circuit Boards
This family of radios uses bonded, multi-layer, printed circuit boards. Since the inner layers are not
accessible, some special considerations are required when soldering and unsoldering components.
The printed-through holes may interconnect multiple layers of the printed circuit. Therefore, exercise
care to avoid pulling the plated circuit out of the hole.
When soldering near the pin connectors:
• Avoid accidentally getting solder in the connector.
• Be careful not to form solder bridges between the connector pins.
• Examine your work closely for shorts due to solder bridges.
Flexible Circuits
The flexible circuits are made from a different material than the rigid boards, and require different
soldering techniques. Excessive prolonged heat on a flexible circuit can damage the material.
Therefore, avoid excessive heat and excessive bending.
For parts replacement, use the ST-1087 Temperature-Controlled Solder Station with a 600-700
degree tip, and use small diameter solder such as ST-633. The smaller size solder will melt faster and
require less heat to be applied to the circuit.
To replace a component on a flexible circuit:
1. Grasp with seizers (hemostats) the edge of the flexible circuit near the part to be removed.
2. Pull gently.
3. Apply the tip of the soldering iron to the component connections while pulling with the seizers.
2.5 Disassembling and Reassembling the Radio — General
Since these radios may be disassembled and reassembled with the use of only four (board to casting)
screws, it is important to pay particular attention to the snaps and tabs, and how parts align with each
other.
The following tools are required for disassembling the radio:
• 3/16” flat blade screwdriver
• Penknife-size screwdriver
• TORX™ T6 screwdriver
If a unit requires more complete testing or service than is customarily performed at the basic level,
send this unit to a Motorola Authorized Service Center. (See Chapter 1, section 1.2.4 Technical
Support on page 1-3 for a list of authorized service centers.)
The following disassembly procedures should be performed only if necessary:
• section 2.6.2 Chassis Assembly/Disassembly on page 2-6
• section 2.6.3 Option Board Disassembly on page 2-6
• section 2.6.4 Speaker, Microphone, and Universal Connector Flex Disassembly on page 2-8
• section 2.6.5 Control Top Disassembly on page 2-9
• section 2.7.6 Option Board Installation on page 2-11
NOTE: Do not attempt to puddle-out components. Prolonged application of heat may
damage the flexible circuit.

2-4 Maintenance
2.6 Detailed Radio Disassembly
2.6.1 Front Cover from Chassis Disassembly
1. Turn off the radio.
2. Remove the battery:
a. Pull down on the two battery-release buttons.
b. With the buttons pulled down, the top of the battery will fall from the radio.
c. Remove the battery completely from the radio.
Figure 2-1: Battery Removal
3. Remove the antenna.
4. Pull the volume and channel selector knobs off their shafts.
Figure 2-2: Knob Removal
NOTE: Both knobs slide on and off. However, they are supposed to fit very tightly on their
shafts.
Battery
Release
Buttons
Battery
Knobs

Maintenance 2-5
5. Separate the chassis from the internal electronics front cover assembly as follows:
a. Insert a small, 3/16” flat-blade screwdriver, or similar instrument, in between the thin
remaining wall and the chassis at the bottom of the radio. Do not mar the O-ring sealing area
on the housing.
b. Slowly pry the bottom of the chassis from the cover by pushing the 3/16” flat-blade
screwdriver down, and rotating the handle of the tool over and behind the base of the radio.
This prying action forces the thin inner plastic wall toward the base of the radio, releasing the
two chassis base tabs.
Figure 2-3: Chassis Removal
6. Lay the chassis down. Rotate the front cover backward and slightly away from the chassis.
7. Lift the latches on the main circuit board to release the flexes from their connectors.
Figure 2-4: Unlatch Flex Connectors
CAUTION: Marring the front cover O-ring sealing area will prevent the radio from
sealing properly.
NOTE: Flexible ribbon circuits (flexes) connecting the front cover assembly and the
chassis prevent you from completely separating the two units.
Radio
Flex Connector
Latches

2-6 Maintenance
2.6.2 Chassis Assembly/Disassembly
1. If disassembly of the chassis or the main board is required, then use a TORX™ screwdriver with
a T6 head to remove the four screws holding the main board to the chassis.
Figure 2-5: Remove Main Board from Chassis
2. Lift the main board from the chassis (refer to Figure 2-5).
3. Remove the small O-ring retainers from their slots in the chassis. Note the alignment of the
retainers for reassembly.
4. Remove the O-ring.
5. If required in disassembly, slide off the ground contact from the top corner boss of the radio
chassis.
2.6.3 Option Board Disassembly
1. If the disassembly of the keypad or the keypad printed circuit board, is required, lift the
microphone flex circuit up, and carefully remove the microphone and its boot from the front cover
pocket. (See Figure 2-6 on page 2-7).
2. Lay this flex circuit to one side.
CAUTION: Refer to the CMOS CAUTION in paragraph on page 2-2 before removing
the main board. Be sure to use electrostatic discharge (ESD) protection when
handling circuit boards.
Main
Board
Radio
Chassis
Screws (4)
Compliant
Ground
Contact
O-Ring
Retaining
Features
/