17
easy setup button (P1/SET)
Press within 5 seconds of pressing RESET, or applying power to the board, or while the
yellow LED is flashing, to enter the Easy Setup routine. Also used in conjunction with P2/
RADIO to set the Application Mode, that is how much maximum motor current is allowed.
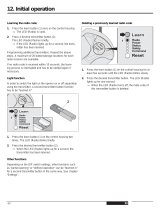
learn wireless control button (P2/RADIO)
Press and hold P2/RADIO, until the red LED is lit, to begin learning wireless remote
controls. The red LED will be lit. Press a button for 3 seconds on each wireless control to
be learned. Either wait 10 seconds, or press P2/RADIO again to exit learning. If the CH-
RADIO jumper is fitted, the wireless controls will operate the pedestrian Access mode; if it
is removed then they will operate the gates normally.
To enter the Professional Setup routine press P2/RADIO within 5 seconds of pressing
RESET, or applying power to the board, or while the yellow LED is flashing.
learn wireless pedestrian access jumper (CH-RADIO)
Place this jumper over the pins when you want to learn wireless remotes for Pedestrian
Access mode.
force/speed/voltage setting trimmer (+ FOR -)
NOTE Press RESET after adjusting the trimmer.
The energy transferred to an obstruction is determined by the motor power, and the time
that the power is applied to the obstruction. Motor power is determined by the maximum
voltage and maximum current. This FOR setting alters the motor voltage. The Application
Mode (page 7) alters the maximum allowable motor current. The OBS setting alters the
time that power is applied to an obstruction. So safety is determined by a combination of
the settings for FOR, OBS, and Application Mode.
Turn FOR clockwise to increase the voltage that is applied to the motors.
• Full clockwise: maximum voltage (less sensitive)
• Full anti-clockwise: minimum voltage, approximately 50% of the maximum (more
sensitive)
NOTE Voltage affects the speed of the motor. After any adjustment to FOR, either the
Easy Setup or the Professional Setup procedure must be completed to set the operating
time correctly.
auto-close pause setting trimmer (+ PAU -)
WARNING Photocell sensor beams must be fitted when using auto-close.
This trimmer determines the length of time that the gates pause before auto-closing.
• Full clockwise: auto-closing is disabled (that is, there is an unlimited pause when
open)
• Full anti-clockwise: pause open for 15 seconds, then auto-close (unless a photocell
is fitted)
• Other positions: adjust for pause times of between 3 seconds and 60 seconds
In auto-closing mode, any command to open or close will cause the following behaviour:
• while opening, commands are ignored;