Page is loading ...

1
QUICKSTART GUIDE
This quickstart guide provides basic instructions for setting up and using the S2
Weigh System.
Contents
Unpacking the box .................................. 1
Installing the S2 Weigh System ................ 2
Weighing an animal ................................ 6
Changing indicator settings ..................... 6
Maintenance and care ............................. 7
Warranty and servicing ............................ 7
Compliance ............................................. 8
For further information, visit
www.tru-test.com
1
Unpacking the box
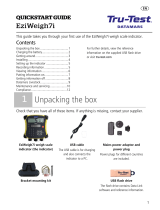
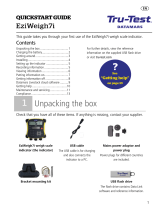
Check that you have all of these items. If anything is missing, contact your supplier.

2
2
Installing the S2 Weigh System
Before you start:
Fully charge the indicator overnight.
Step 1:
Place the load bars on a flat surfac
e
up to 2.5 m (8') apart.

3
Step 2:
Use the supplied bolts to bolt the
weigh platform onto the load bars.
Step 3:
If desired, bolt the load bar feet
onto the ground. In non-
permanent
solutions, you can use it without
bolting down, but pay attention to
movement.

4
Step 4:
Tuck the load bar cables under the
weigh platform.
Step 5:
Mount the indicator bracket onto an
appropriate support that the
indicator connector on the load bar
cable will reach. Slide the indicator
onto the bracket.

5
Step 6:
Plug the indicator connector (on the
load bar cable) into the indicator and
tighten up.
Step 7:
Press
to power on the
indicator.

6
3
Weighing an animal
Ensure that the indicator is displaying 0.0. If not, press
.
1. Move the animal onto the platform.
2. When the stable light illuminates, the indicator has locked onto the animal’s
weight.
3. Move the animal off the platform.
If the indicator is not displaying 0.0
between animals or there are problems
with inaccurate or unstable weights, make sure that the bars are firmly
secured to the concrete floor and free from stones or dirt and that the load
bars are properly connected to the indicator.
4
Changing indicator settings
Data Link enables you to change settings on the indicator such as displaying metric or
imperial measurements during weighing.
1. Ensure that your PC has internet connectivity and download the Data Link PC
Software from livestock.tru-test.com/applications/datalink
2. Connect the indicator to your PC with the supplied USB cable or via
Bluetooth
®.
3. Launch Data Link on your PC; click
, and Settings.

7
5
Maintenance and care
Caring for the Weigh System
• Keep the underside of the weigh platform and load bars free from dirt or stones.
• Do not leave the indicator, load bars or indicator connector immersed in water.
• Cables should be placed under the weigh platform to prevent damage.
• When not in use, always replace the dust cap on the indicator connector.
• Remove dust and moisture from the plugs and dust cap using methylated spirits,
ethyl alcohol, or a suitable electrical contact cleaner. Stronger spirits must not
be used, as they may react with the plastic.
Europe - Instructions for disposal of product
This symbol on the product or its packaging indicates that this product (and its
battery) must not be disposed of with other waste. Instead, it is your
responsibility to dispose of your waste equipment by handing it over to a
designated collection point for the recycling of waste electrical and electronic
equipment. The separate collection and
recycling of your waste equipment at
the time of disposal will help conserve natural resources and ensure that it is
recycled in a manner that protects human health and the environment. For
more information about where you can drop off your waste equipment for
recycling, please contact your local city recycling office or the dealer from
whom you purchased the product.
This product incorporates a lithium-ion (IFpR19/66, 4.8 Wh) rechargeable battery.
For instructions on how to dismantle this product for recycling, email
contact@trutest.co.nz.
6
Warranty and servicing
For service and warranty information, see www.tru-test.com/product-warranty

8
7
Compliance
FCC notice
This device complies with part 15 of the FCC Rules. Operation is subject to the following two conditions: (1) This device may not cause
harmful interference, and (2) this device must accept any interference received, including interference that may cause undesired
operation.
This equipment has been tested and found to comply with the limits for a Class B digital device, pursuant to part 15 of the FCC Rules.
These limits are designed to provide reasonable protection against harmful interference in a residential installation.
This equipment generates, uses and can radiate radio frequency energy and, if not installed and used in accordance with the
instructions, may cause harmful interference to radio communications. However, there is no guarantee that interference will not occur
in a particular installation. If this equipment does cause harmful interference to radio or television reception, which can be determined
by turning the equipment off and on, the user is encouraged to try to correct the interference by one or more of the following
measures:
- Reorient or relocate the receiving antenna.
- Increase the separation between the equipment and receiver.
- Connect the equipment into an outlet on a circuit different from that to which the receiver is connected.
- Consult the dealer or an experienced radio/ TV technician for help.
- Any changes or modifications not expressly approved by Datamars could void the user's authority to operate the equipment
Responsible party in the USA
This product is supplied by:
Datamars Inc
528 Grant Road
Mineral Wells
Texas 76067
UNITED STATES
Toll free: 800 874 8494
Industry Canada notice
This device complies with Industry Canada licence-exempt RSS standard(s). Operation is subject to the following two conditions:
(1) this device may not cause interference, and
(2) this device must accept any interference, including interference that may cause undesired operation of the device.
EU declaration of conformity
Datamars Limited hereby declares that the S2 indicator is in compliance with the essential requirements and other relevant
provisions of Directive 2014/53/EU. The declaration of conformity may be consulted at
livestock.tru-test.com/en/compliance
The
Bluetooth
®
word mark and logos are registered trademarks owned by Bluetooth SIG, Inc. and any use of such marks by Datamars
SA and its subsidiaries is under license. Other trademarks and trade names are those of their respective holders.
All trademarks with an * are neither owned by nor licensed to Datamars SA and belong to their respective owners.
/


