Page is loading ...

Adam Equipment
CFW SERIES
(P.N. 6162, Revision A5, May 2006)
Software Version: V1.04
@Adam Equipment Company 2006

@Adam Equipment Company 2006

CONTENTS
1.0 INTRODUCTION............................................................................................................3
2.0 SPECIFICATIONS.........................................................................................................4
3.0 INSTALLATION..............................................................................................................6
3.1 LOCATING THE SCALES..........................................................................................6
3.2 LIST OF ACCESSORIES...........................................................................................6
3.3 SETTING UP THE SCALES.......................................................................................7
4.0 KEY DESCRIPTIONS....................................................................................................8
5.0 DISPLAYS .....................................................................................................................9
6.0 OPERATION................................................................................................................10
6.1 ZEROING THE DISPLAY.........................................................................................10
6.2 TARING....................................................................................................................10
6.3 WEIGHING A SAMPLE............................................................................................11
6.4 PARTS COUNTING .................................................................................................11
6.5 CHECK-WEIGHING.................................................................................................13
6.5 ACCUMULATED TOTAL..........................................................................................14
7.0 USER PARAMETERS .................................................................................................16
8.0 BATTERY OPERATION ..............................................................................................19
9.0 RS-232 INTERFACE....................................................................................................20
9.1 INPUT COMMANDS FORMAT ................................................................................21
10.0 CALIBRATION.............................................................................................................22
11.0 SERVICE SECTION ....................................................................................................23
11.1 CFW FACTORY PROGRAMMING AND CALIBRATIONS.......................................23
12.0 ERROR CODES ..........................................................................................................26
13.0 REPLACEMENT PARTS AND ACCESSORIES..........................................................27
14.0 SERVICE INFORMATION...........................................................................................27
@Adam Equipment Company 2006
1

@Adam Equipment Company 2006
2

1.0 INTRODUCTION
• The CFW series of scales provide an accurate, fast, versatile series of
general purpose weighing scales with counting and check-weighing
functions.
• There are 2 series of scales- CFW scales are kilogram only scales and
the CFWa scales offer changeable unit from pounds to kilograms. The
scales share the same functions but special instructions will be given
for the CFWa series to be able to change the weighing units.
• There are 4 models in each series with the maximum capacities up to
600 kg /1320 lb.
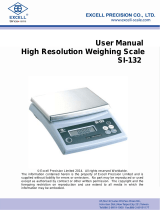
• They all have stainless steel weighing
platforms on a Steel base assembly and
a display module mounted on a pillar
attached to the base.
• All the keypads are sealed and have
colour coded membrane switches.
• The displays are large easy to read liquid
crystal type displays (LCD). The LCD’s
are supplied with a backlight.
• All units include automatic zero tracking, audible alarm for pre-set
weights, automatic tare and an accumulation facility that allows the
individual weights to be stored and recalled as an accumulated total.
• The scales have an optional bi-directional RS-232 interface for
communicating with a PC or printer.
@Adam Equipment Company 2006
3

2.0 SPECIFICATIONS
CFW SERIES
Model # CFW 60 CFW 150 CFW 300 CFW 600
Maximum
Capacity
60 kg 150 kg 300 kg 600kg
Readability 5 g 10 g 20 g 50g
Repeatability (Std
Dev)
5 g 10 g 20 g 50g
Linearity ± 10 g 20 g 40 g 100g
Tare Range -60 kg -150 kg -300 kg -600kg
Platform Size 425 mm x 525 mm 600 mm x 800 mm
Overall
Dimensions
(w x d x h)
425 mm x 700 mm x 950 mm 600 mm x 925 mm x 970 mm
Net Weight 15 kg 45 kg
Units of Measure kg, g kg
CFWa SERIES
Model # CFW 130a CFW 330a CFW 660a
CFW 1320a
Maximum
Capacity
130 lb/
60 kg
330 lb/
150 kg
660 lb/
300 kg
1320 lb/
600 kg
Readability 0.01 lb/
5 g
0.02 lb/
10 g
0.05 lb/
20 g
0.1 lb/
50 g
Repeatability (Std
Dev)
0.01 lb/
5 g
0.02 lb/
10 g
0.05 lb/
20 g
0.1 lb/
50 g
Linearity ± 0.02 lb/
10 g
0.04 lb/
20 g
0.10 lb/
40 g
0.2 lb/
100 g
Tare Range -130 lb/
-60 kg
-330 lb/
-150 kg
-660 lb/
-300 kg
-1000 lb/
-600kg
Platform Size 16.7" x 20.7" /
425mm x 525mm
23.6" x 31.5" /
600mm x 800mm
Overall
Dimensions
(w x d x h)
425mm x 700mm x 950mm /
16.7" x 27.6" x 37.4"
600mm x 925mm x 970mm /
23.6" x 36.4" x 38.2"
Net Weight 33 lb / 15 kg 99 lb / 45 kg
Units of Measure Lb / oz / kg / g
/ lb:oz
Lb / oz / kg / lb:oz
@Adam Equipment Company 2006
4

Common Specifications
Interface RS-232 bi-directional Interface (Optional)
Stabilisation Time 2 seconds typical
Operating Temperature 0°C - 40°C
32°F - 104°F
Power supply 9 VDC, 800 mA from external power supply
Internal re-chargeable battery (up to 70 hours operation)
Calibration Automatic External
Display 1 x 6 digits LCD digital display
Balance Housing Indicator: ABS Plastic
Top pan: Stainless Steel
Base: Cast Aluminium for all models except Mild Steel
for CFW 600 (CFW 1320a)
Applications General Purpose Floor Weighing Scales
Functions Weighing, Parts counting, Memory Accumulation,
Pre-set weighing with alarm
@Adam Equipment Company 2006
5

3.0 INSTALLATION
3.1 LOCATING THE SCALES
• The scales should not be placed in a location that
will reduce the accuracy.
• Avoid extremes of temperature. Do not place in
direct sunlight or near air conditioning vents.
• Avoid unsuitable tables. The table or floor must be
rigid and not vibrate.
• Avoid unstable power sources. Do not use near
large users of electricity such as welding
equipment or large motors.
• Do not place near vibrating machinery.
• Avoid high humidity that might cause
condensation. Avoid direct contact with water. Do
not spray or immerse the scales in water.
• Avoid air movement such as from fans or opening
doors. Do not place near open windows or air-
conditioning vents.
• Keep the scales clean. Do not stack material on
the scales when they are not in use.
3.2 LIST OF ACCESSORIES
Your packet contains-
9 AC adapter
9 Indicator
9 Metal base
9 Stainless Steel pan
9 Tubular pillar with top flanges
9 Bottom Bracket
9 4 Bolts and 2 set screws
9 Instruction manual
@Adam Equipment Company 2006
6

3.3 SETTING UP THE SCALES
• The pillar is attached to the base using a bracket that must be
attached to the base frame first using the 4 bolts supplied. The pillar
is secured to the bracket using 2 sets of screws. The cable from the
base to the indicator module is run through the tube and taken out
through the plastic support at the top. Excess cable can be stored
within the tube.
• The CFW Series comes with a stainless steel platform packed
separately. Place the platform in the base.
• Level the scale by adjusting the four feet. If the scale rocks re-adjust
the feet.
• Attach the indicator module to the pillar by sliding it over the bracket
with the flanges engaged in the groves on the base. Attach the
cable from the base to the connector on the rear of the indicator.
• Attach the power supply module to the connector on the side of the
indicator. Press the [On/Off] key. The software revision number will
be displayed followed by a self-test showing all digits before the zero
is displayed along with the unit of weight that was selected last.
@Adam Equipment Company 2006
7

4.0 KEY DESCRIPTIONS
[Zero] or
Sets the zero point for all subsequent weighing. The
display shows zero.
A secondary function is of "Enter" key used when
setting up the value for the Parameters.
[Tare] or
Tares the scale. Stores the weight currently on the
scale as tare value, subtracts the tare value from the
gross weight and shows the results.
A secondary function is of incrementing the active
digit when setting a value for Parameters.
[Pcs]
Selects parts counting. Used to set the sample
quantities while parts counting.
A secondary function is to move the active/flashing
digit to the left when setting values for the
Parameters.
[Unit] or [U]
Selects the weighing unit to be displayed from those
which are enabled. See parameter F2 in section 7.
@Adam Equipment Company 2006
8

A secondary function is to move the active/flashing
digit to the right when setting values for the
Parameters.
[Func] or [F]
Selects the Functions of the scale. If the scale is
weighing, it will select parts counting. If it is not in
weighing mode, it will return the user to weighing.
A secondary function (C) is to act as a clear key when
setting values for Parameters.
[Print/M+] or
Sends the results to a PC or a Printer using the RS-
232 interface. It also adds the value to the
accumulation memory if the accumulation function is
not automatic.
A secondary function (ESC) is to return to normal
operation when the scale is in a Parameter setting
mode.
[On] and [Off]
To switch on and switch off the indicator.
5.0 DISPLAYS
The LCD display will show a value and a unit to the right of the digits.
In addition there are labels for TARE, GROSS weight, ZERO, Stable
and for Low battery
@Adam Equipment Company 2006
9

6.0 OPERATION
6.1 ZEROING THE DISPLAY
• You can press the [Zero/Enter] key at any time to set the zero point.
This will usually be necessary when the platform is empty. When the
zero point is obtained the display will show an indicator for zero.
• The scale has an automatic re-zeroing function to account for minor
drifting or accumulation of material on the platform. However you
may need to press the [Zero/Enter] key to rezero the scale if small
amounts of weight are shown when the platform is empty.
6.2 TARING
• Zero the scale by pressing the [Zero/Enter] key if necessary. The
“ZERO
” indicator will be ON.
• Place a container on the platform, a value for its weight will be
displayed.
• Press the [Tare/Ï] key to tare the scale. The weight that was
displayed is stored as the tare value and that value is subtracted
from the display, leaving zero on the display. The "GROSS" indicator
will be OFF and "TARE" indicator will be ON. As a product is added
only the net weight of the product will be shown. The scale could be
@Adam Equipment Company 2006
10

tared a second time if another type of product was to be added to
the first one. Again only the weight that is added after taring will be
displayed.
• When the container is removed a negative value will be shown. If the
scale was tared just before removing the container this value is the
gross weight of the container plus all products that was removed.
The “ZERO
” indicator will be on to indicate that the platform is back
to the same condition as it was when the [Zero/Enter] key was last
pressed.
• To delete a Tare value, press [Tare/Ï] when the pan is empty.
6.3 WEIGHING A SAMPLE
To determine the weight of a sample, first tare the empty container if it is to be
used and then place the sample in the container. The display will show the net
weight of the sample and the units of weight currently in use.
6.4 PARTS COUNTING
• Before starting, tare the weight of any container that may be used,
leaving the empty container on the scale. Place a known number of
samples in the container, if used. The number should match the
options for parts counting, i.e., 10, 20, 50, 100 or 200 pieces.
• When the scale is showing weight, pressing the [Pcs] key will start
the parts counting function.
• The scale will show "P 10" asking for a sample size of 10 parts.
Change the sample size to the desired quantity by pressing the
[Tare/Ï] key. It will cycle through the options: 10, 20, 50, 100, 200
and back to 10.
@Adam Equipment Company 2006
11

• Press the [Zero/Enter] key again when the number matches the
number of parts used as the sample. As more weight is added the
display will show the number of parts (pcs).
• Pressing the [Pcs] key will display the unit weight (g/pcs), pressing it
second time will display the net weight (pcs and kg) and the third
time, it will be the count again (pcs).
• Press the [Func/C] key to return to normal weighing or to start
counting a different sample.
@Adam Equipment Company 2006
12

6.5 CHECK-WEIGHING
Check-weighing is a procedure to cause an alarm to sound when the weight on
the scale meets or exceeds values stored in memory. The memory holds
values for a high and a low limit. Either or both can be used.
See PARAMETERS Section for the procedure. To set the limits, "F0 H-L" is used.
After limits have been set the Check-weighing function is enabled.
When a weight is placed on the scale the arrows will show if the weight is above
or below the limits and the beeper will sound as described below.
BOTH LIMITS SET The display will show OK and the beeper will sound when the
weight is between the limits.
LOW LIMIT SET HIGH LIMIT is set to zero
The display will show OK and the beeper will sound when the
weight is less than the Low Limit. Above the Low Limit the
display will show HIGH and the beeper will be off.
HIGH LIMIT SET LOW LIMIT is set to zero
The display will show LOW and the beeper will be off when the
weight is less than the High Limit. Above the High Limit the
display will show OK and the beeper will be on.
BOTH LIMITS SET.
LOW IS SET GREATER
THAN HIGH
The beeper will never sound and the display will show LOW if
the weight is less that the LOW limit, and HIGH if the weight is
greater than the Low Limit.
NOTE: Weight must be more than 20 scale divisions for checkweighing to
operate.
@Adam Equipment Company 2006
13

Checkweighing facility can be set up during Weighing or Parts Counting by entering
values as Low or/and High Limits keyed in by the user. The limits are displayed in
kg or pcs respectively.
Checkweighing during Weighing
Checkweighing during Parts Counting
To disable the Check-Weighing function enter zero into both limits by pressing
the [Func/C] key when the current limits are shown then pressing [Zero/Enter]
to store the zero values.
6.5 ACCUMULATED TOTAL
• The scale can be set to accumulate manually by pressing the
[Print/M+] key. See the PARAMETER Section for details of setting
the Parameter "F5 PRT". The accumulation function is only available
when weighing. It is disabled during parts counting.
• The weight displayed will be stored in memory when the [Print/M+]
key is pressed and the weight is stable.
• The display will show "ACC 1" and then the total in memory for 2
seconds before returning to weighing. If the optional RS-232
interface is installed the weight can be output to a printer or PC.
@Adam Equipment Company 2006
14

• Remove the weight, allowing the scale to return to zero and put a
second weight on. Press the [Print/M+] key, the display will show
"ACC 2", then the new total and finally the value of the second
weight.
No. of accumulation of weights
Total weight for 3 accumulations
• Continue until all weights have been added.
• To view the total in memory press the [Print/M+] key when there is
no weight on the scale. The display will show the number of entries
and the total. See also the PARAMETER Section and use the
Parameter "F1 TOL" to select to print or to clear the memory.
@Adam Equipment Company 2006
15

7.0 USER PARAMETERS
• The scale has 7 User Parameters that can be set by the user. To set
these Parameters press the [Func] key. The display will show the
first parameter, "F0 H-L".
• Pressing the [Tare/Ï] will cycle through the other parameters.
• Pressing [Zero/Enter] will allow you to enter a parameter directly for
setting or further enter a sub-parameter. Press the [Print/Esc] key to
leave the parameter unchanged.
• For setting a new value for the parameter or a sub-parameter, first
enter the parameter or sub-parameter by pressing the [Zero/Enter]
key. Then use the [Pcs/Í] key or the [Units/Î ] key to move the
active/flashing digit to the left or to the right and use the [Tare/Ï]
key to increment the flashing digit. Press the [Zero/Enter] key to
enter the changed value.
• Use the [Print/Esc] key to leave the parameter.
For example,
When the display shows “F0 H-L”, press the [Zero/Enter] key.
The display will show “SEt Lo” (the sub-parameter). Press
[Zero/Enter] to set the low limit or press the [Tare/Ï ] to skip to “SEt
Hi” for setting the high limit. When all digits have been set, press
[Zero/Enter] to store the value. Display will go back to the sub-
parameter just set, i.e. “SEt Lo” or “SEt Hi”.
Press [Print/Esc] to return to “FO H-L”.
Advance to the next parameter (F1 toL) by pressing [Tare/Ï]
if
needed or press [Print/Esc] to return to weighing.
@Adam Equipment Company 2006
16

SETTING OF USER PARAMETERS
PARAMETER SUB-
PARAMETER
DESCRIPTION DEFAULT
VALUE
SEt Lo
Sets a value for the Low Limit used for
checkweighing.
000.000 F0 H-L
SEt HI
Sets a value for the High Limit for
checkweighing.
000.000
to CLr
Clears the Accumulation Total in the
memory without printing the results.
to P-C
Prints the Accumulation Total in the
memory and then clears the memory.
F1 toL
to Prt
Prints the Accumulation Total in the
memory but does not clear the memory.
F2 unt Ut oFF
Ut on
Enables or disables the weighing units.
Use the [Zero/Enter] key to select the
weighing unit to enable/disable. Use the
[Tare/Ï] to change the unit to ON or OFF.
SEt dA
Sets the date, Display will show the last
date set or 00.01.01. Enter the new date,
format is yy.mm.dd
F3 tI
SEt tI
Sets the time, Display will show the
current time Enter the new time, format is
hh.mm.ss
CLoCK
Sets clock to OFF or ON as screen saver.
CLK oF
CLK on
CLK oF
bL
Sets the backlight to be on, automatic or
off
EL on
EL Au
EL oFF
EL Au
F4 oFF
bEEP
Sets the beeper to-
1 (off all the time),
2 (ON when the weight is OK, i.e., in
between LO and HI limits) or
3 (ON only when the weight is outside the
limits during the check-weighing function).
This setting does not affect the beeper
during normal weighing.
bP 2
@Adam Equipment Company 2006
17

F5 Prt
Sets the RS-232 -
P bAUd-Select from the desired baud
rates. Options are 600, 1200,
2400, 4800 and 9600
P nodE - Set the printing mode to-
P Prt (Print only when [Print] is
pressed)
P Cont (Print continuously)
P Auto (Print automatically
whenever there is any weight on
the scale).
Parity – Select from the following settings-
n 8 1 -8 data bits, no parity
E 7 1 -7 data bits, even parity
o 7 1 -7 data bits, odd parity
4800
P Cont
n 8 1
ProG Pin
See the SERVICE SECTION for details.
• Use the [Print/Esc] key to leave the set-up mode of the parameter
and return to weighing.
@Adam Equipment Company 2006
18
/