Page is loading ...

Quick Setup Guide
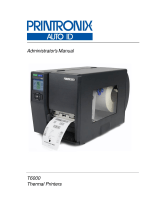
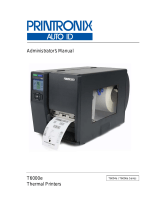
The Printronix T5000
e
series of Label Printers


This Quick Setup Guide contains a
CD-ROM with the following materials:
• The User’s Manual
• Programmer’s Reference Manuals
• Useful utility programs
The CD-ROM is located in a plastic
pocket in the back cover.
Do not discard this guide. If you move
or pack the printer in the future, you will
need to follow the instructions in this
guide.
NOTICE
174951-001E


5
Table of Contents
Unpacking And Installing The Printer....................................7
Unpacking The Printer ....................................................7
Removing The Internal Packing Material........................8
Installation.......................................................................9
Controls And Indicators.........................................................9
Power Switch ..................................................................9
Control Panel ................................................................10
Loading Media And Ribbon .................................................14
Loading Roll Media .......................................................14
Loading Ribbon.............................................................19
Printing Adjustments............................................................21
Printhead Pressure Adjustment ....................................21
Printhead Pressure Block Adjustments.........................21
Positioning The Media Sensor......................................22
Running Auto Calibrate .......................................................22
Saving The Configuration....................................................23
Run A Barcode Demo Test..................................................24
QUICK SETUP Configuration Menu....................................25
QUICK SETUP Submenus............................................26
For More Information...........................................................33

Table of Contents
6

7
Unpacking And Installing The Printer
Unpacking The Printer
The printer is shipped in a carton and protective bag. Keep all
packing material in case shipping is required.
CAUTION
Avoid touching the electrical connectors to prevent
electrostatic discharge damage while setting up the printer.
The discharge of accumulated electrostatic energy can
damage or destroy the printhead or electronic components
used in this device.
CAUTION
Do not place the printer on its backside during unpacking or
handling, because damage to the printer interface connector
may occur.

Unpacking And Installing The Printer
8
Removing The Internal Packing Material
Remove the tape strips and foam pads from the printer as indicated
below. (The top lid of the shipping carton also displays these
instructions.)
t53unpk1
June 27, 2001
Tape Strips (2)
Foam Pads (2)
Foam Pad
t53unpk2
June 27, 2001
Foam
A
B
C
Unlock

Installation
9
Installation
1. Place the printer on a flat level surface that allows easy access
to all sides of the printer.
CAUTION
Never operate the printer on its side or upside down.
2. Make sure the printer power switch is in the OFF (0) position.
WARNING
Failure to properly ground the printer may result in electric
shock to the operator.
In compliance with international safety standards, this printer
has been equipped with a three-pronged power cord. Do not
use adapter plugs or remove the grounding prong from the
cable plug. If an extension cord is required, ensure that a
three-wire cable with a properly grounded plug is used.
3. Attach the AC power cord to the AC power receptacle in the
back of the printer.
CAUTION
Verify the required voltage on the printer’s model number label
on the back of the printer.
4. Attach the AC power cord to a grounded (three prong) electrical
outlet of the proper voltage.
Controls And Indicators
Power Switch
The power switch is located on the bottom back panel of the printer.
To apply power, place the switch in the | (ON) position. When you
first power on the printer, a series of initialization messages will
appear on the Liquid Crystal Display (LCD) on the control panel.
To remove power, place the power switch in the O (OFF) position.

Controls And Indicators
10
Control Panel
The control panel is located on the front of the printer and includes
an LCD, indicators, and control keys (buttons). These are
described in the following tables.
OFFLINE
Liquid Crystal
Display (LCD)
Online Status
Indicator
Job In Process
Indicator

Control Panel
11
Status And Display Indicators
Indicator Description
Function in
Online Mode
Function in
Offline Mode
Function in
Menu Mode
Online Status Indicates when the
printer is online,
offline, or when
there is a fault
condition.
Stays lit when the
printer is online, ready
to print, and accept
data from the host.
Flashes during a fault
condition.
Off when the printer is
offline.
Flashes during a fault
condition.
Off.
Flashes during a fault
condition.
Liquid Crystal
Display (LCD)
A backlighted
liquid crystal
display with two
rows of 16
characters each.
Displays “ONLINE,” the
interface type, and
emulation in use.
During a fault condition,
displays the specific
fault message and the
corrective action.
Displays “OFFLINE.”
During a fault condition,
displays the specific
fault message and the
corrective action.
Displays “OFFLINE”
and a main menu,
submenu, or option.
During a fault condition,
displays the specific
fault message and the
corrective action.
Job In
Process
Indicates when the
printer is receiving
or processing
data.
Flashes when receiving
data.
Stays lit when data has
been processed and is
waiting to be printed.
Off when no data is
being received or when
no data remains in the
buffer.
Flashes when receiving
data.
Stays lit when data has
been processed and is
waiting to be printed.
Off when no data is
being received or when
no data remains in the
buffer.
None

Controls And Indicators
12
Control Panel Keys
Button Description
Function in
Online Mode
Function in
Offline Mode
Function in
Menu Mode
PAUSE Key
Toggles the printer
between Online and
Offline modes.
Sets printer to
Offline mode.
Sets printer to Online mode. Sets printer to Offline mode.
JOB SELECT Key None Displays the name and
number of the last loaded
configuration and allows
you to load the factory and/
or pre-stored printer
configurations.
Scrolls left through main
menus.
Decrements option values
within submenus.
-
DECREMENT Key in
Menu mode
FEED Key
UP Key in Menu mode
Advances the
media one label
length.
Advances the media one
label length.
Scrolls the current menu
selection one level up.
TEST PRINT Key
Pressing the ↵
(ENTER) key with a
Diagnostic Test
displayed initiates the
test. Pressing ↵ again
terminates the test.
None Scrolls through the Test
Print patterns.
Scrolls right through main
menus.
Increments option values
within submenus.
+
INCREMENT Key in
Menu mode

Control Panel
13
Control Panel Keys (cont.)
Button Description
Function in
Online Mode
Function in
Offline Mode
Function in
Menu Mode
CANCEL Key
When the CANCEL key is
enabled, pressing it will clear all
data in the printer buffer and
prevent printing of that data.
Note: The factory default =
Disable.
However, when the Coax/
Twinax Interface option is
installed, the factory default =
Enable.
DOWN Key in Menu mode
None Clears all data
in the printer
data buffer
when enabled.
Scrolls the current
menu selection one
level down.
MENU Key Takes the printer Offline and
selects the Menu mode.
Selects the
Menu mode.
Scrolls between main
menu selections.
ENTER Key
Pressing the ↵ (ENTER) key in
Menu mode selects the
displayed option or value. An
asterisk then appears next to
the option or value indicating it
has been selected.
Note: If the ENTER key is
locked, “ENTER SWITCH
LOCKED” displays on the LCD
for one second. Press the
(DOWN) and ↵ (ENTER) keys
at the same time to unlock the
ENTER key.
None None Selects the current
menu value and
displays an asterisk
(*) next to the value.

Loading Media And Ribbon
14
Loading Media And Ribbon
Use the sample rolls of media and ribbon shipped with the printer.
CAUTION
DO NOT TOUCH the printhead or the electronic components
under the printhead assembly.
CAUTION
Do not close the pivoting deck without label stock installed
between the printhead and the platen, because debris on the
platen may damage the printhead.
Loading Roll Media
1. Slide the media hanger guide outward to the end of the media
hanger, and flip it down into the horizontal position (as shown).
2. Open the pivoting deck by rotating the deck lock lever fully
clockwise.
3. Slide the media width guide close to the outside end of the
media damper.
Media Hanger
Media Hanger
Guide
Media Width
Guide
Deck Lock
Lever
Pivoting
Deck
Media Cover
PAUSE
Key
Liquid Crystal
Display (LCD)
Media Damper

Loading Roll Media
15
4. Slide the media roll onto and towards the back of the media
hanger.
5. Place the media hanger guide under the media hanger and
against the lower part of the label core at a 45 degree angle
(as shown). This position provides the required tension for a
new label roll and the desired drag for a partial label roll.
Media Roll
Media Hanger
Guide
Media Hanger

Loading Media And Ribbon
16
6. Route the media as illustrated on the media and ribbon loading
instructions (or refer to the arrows on the printer frame).
Media and
Ribbon Loading
Instructions

Loading Roll Media
17
7. Verify that the left edge of the media is against the fixed guide
on the bottom of the media damper.
8. Push the media width guide in until it is flush with the outer
edge of the media.
9. Check the horizontal position of the media sensor, and refer to
“Positioning The Media Sensors” on page 22.
Media
Guard
Media Sensor
Fixed Guide
Media
Damper
Media
Width Guide
Media Sensor
Handle

Loading Media And Ribbon
18
10. Align the left (inside) edge of the media with the left straight
edge of the platen (rubber drive roller).
11. Close the printhead by pressing down on both sides of the
pivoting deck and rotating the deck lock lever fully
counterclockwise.
12. Power on the printer (place the power switch in the | position).
Platen (left edge)
Media (left edge)
Deck Lock
Lever
Pivoting
Deck

Loading Ribbon
19
Loading Ribbon
1. Install the empty supply core on the take-up spindle.
2. Slide the ribbon roll onto the ribbon supply spindle until it stops
against the spindle flange.
3. Open the pivoting deck by rotating the deck lock lever fully
clockwise until the deck swings upward.
4. Thread the end of the ribbon under the rear ribbon guide roller,
then between the platen and the printhead.
Ribbon
Roll
Ribbon Supply
Spindle
Deck Lock Lever
Pivoting
Deck
Empty Supply
Core
Media
Printhead
Rear Ribbon Guide Roller

Loading Media And Ribbon
20
5. Route the ribbon using the media and ribbon loading
instructions on the media cover (or refer to the arrows on the
printer frame).
IMPORTANT
Do not attach the ribbon to the take-up spindle without a core
installed.
6. Attach the ribbon to the fiberboard core on the ribbon take-up
spindle using the adhesive on the ribbon leader.
7. Manually rotate the spindle clockwise until the clear leader has
passed the printhead.
8. Close the pivoting deck.
Take-up
Spindle
Take-up
Core
Media Cover
Media and
Ribbon Loading
Instructions
/