Page is loading ...

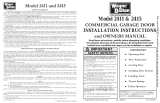
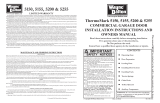
INSTALLATION INSTRUCTIONS
For-Opener Reinforcement Bracket
Things to Know Before
You Begin
Read the instructions provided with the automatic
opener prior to starting the installation. Becoming
familiar with the components
of
the openerwill
reduce the installation time.
AIWARNINGI
In
the
interest
of
safety
this
symbol
means WARNING
or
CAUTION. Personal injury
and/or
property
damage may
occur
unless
instructions
are
followed
carefully.
=ClopaV
Consumer
Hotline
1-800-225-6729
AI
WARNING!
To
avoid
risk
of
strangulation
or
personal
injury
to
children,
you
must
remove
the
pull
down
rope
when
you
install
an
automatic
garage
door
opener.
IMPORTANT: When installing
an
automatic garage
door opener, make sure
to
follow the manufacturer's
installation and safety instructions carefully.
Remove
the
pull
down
rope and
unlock
or
remove
the
lock.
If
attaching
an
operator bracket
to
the wooden anchor pad, make sure the wood
anchor pad
is
free of cracks and splits and
is
firmly
attached to the wall. Always drill pilot holes before
installing lag screws.
To avoid damage to your door, you
must
reinforce the
top section ofthe door
in
order
to
provide a mounting
point for the opener
to
be
attached. Failure
to
reinforce
the
door
as
shown
here
or
as
shown
in
the
door
installation
and maintenance
instruction
manual
will
void
your
Clopay Warranty.
Note: This opener reinforcement bracket can
only
be
used on 8 ft., 9 ft., 12
ft.,
16 ft., 17 ft., and
18
ft.
wide
doors with a
21"
high
top
section.
For other door
widths, refer to Attaching
An
Automatic Opener'
section in the door installation and maintenance
manual.
An
opener reinforcement bracket for
18"
high
sections is available as a special order item from the
retail store where you purchased your garage door.
Step 1
Preparing to install the Opener
Reinforcement Bracket
Lock your garage door in the
closed
position.
Remove the two fasteners from the top leaf of the
hinge that connects the top two door sections
together. Refer to Figure
1.
Save the fasteners for
later use.
REMOVE THESE
TWO FASTENERS
HINGE
TOP
SECTION
FIGURE 1

Step 2
Attachment
of
Opener
Reinforcement Bracket to door
Place
the
Opener Reinforcement Bracket
on
the top
section
as
shown
in
Figure
2,
with
the
bottom flange
of
the
bracket over
the top
ofthe upper leafof
the
hinge.
Align the mounting slots
in
the
bottom of
the
bracket with the slots
in
the hinge
and
predrilled
holes
in
the door section.
Use
the two fasteners
removed
in
step 1 above
to
attach the bracket.
Do
not completely tighten at this
time.
Next,
align
the
mounting holes
in
the
top
of
the
bracket with
holes
in
the
door section. Secure with
the
#14
x 5/8"
Ig.
sheet
metal
screws provided. Finish tightening
the
bottom
fasteners.
HINGE
•
o
•
> .
TOPSECTIO~
FIGURE
2
-}.'"
~
CLEVIS
PIN
FIGURE
3
":,.
",': "'"
.......
If your door has a strut across
the top
section,
place
the
strut over the
top
of
the
Opener Reinforcement
Bracket
as
shown
in
Figure
3.
The
strut
in
Figure 3
is
shown
cut away for illustration purposes
only.
Do
not
notch
orcut the strut.
-I
',.
COTTER
PIN
:::r---;---;;-7----d1~~
OPERATOR
ARM
/~
Note:
If your door
has
a lock installed, make
certain
it
'
","
is
unlocked prior
to
operating your automatic
opener.
Attach
the
operator
arm
from
the
automatic opener
to
the
Opener Reinforcement Bracket
by
placing
the
operator
arm
between the
tabs
on
the
Opener
Reinforcement Bracket
as
shown
in
Figure
4.
The
opener
arm
should
be
attached at approximately
the
same
location
as
the
top
rollers
on
the
door.
This
is
approximately
3"
-
5"
from
the
top
of
the
door.
Install
the
clevis
pin
through
the
bracket
and
arm.
Secure
the
pin
with
the
cotter
pin
provided.
Step 3
Attachment of Operator Arm
Note:
In
some cases your door may
re"Wire
horizontal punched angle
as
well
as
th~'
Opener
Reinforcement Bracket. Refer
to
Attaching
an
Automatic Opener' section
in
the
door installation
and
maintenance instruction manual.
FIGURE 4
© 1
998
Clopay Corporation
/