Page is loading ...

Handcrafted Wood Pellet Grills
(BAC236)
Digital Thermostat Kit 90v-240v
Installation Manual
Step-By-Step Instructions
for
Installing Digital Thermostat Kits
in
Traeger Wood Pellet Grills
Models
BBQ055, BBQ070, BBQ07E, BBQ075


INTRODUCTION
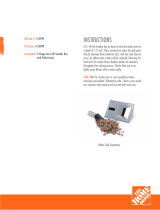
Congratulations on your purchase of this Traeger Digital Thermostat Kit, BAC236.
Once installed, the Digital Thermostat Kit will add a new level of control to your Grill and
provide you with delicious food and years of cooking enjoyment.
When you un-box the Digital Thermostat Kit, make sure you have, and can identify all of
the following parts:
(1) Digital Thermostat Control (P/N BAC283)
(1) 7” RTD - Temperature Sensor Rod (P/N BAC194)
(1) Screw (1/2” long)
(1) Lock Nut
The easy installation process includes:
1) Removing the existing 3-Speed Smoker Control.
2) Installing the RTD.
3) Wiring and Mounting the Digital Thermostat Control.
Follow these step by step instructions and you’ll be cookin’ in no time!
---------------------------------------------------------------------------------------------------------------------

NOTE: Before attempting to remove or install the Control for any reason, it is
important that the Switch/Dial is in the OFF position and the Power Cord is
disconnected from the electrical outlet. Although the Switch/Dial is off, electricity
is still present at the Control. Failure to disconnect the Power Cord from the
electrical outlet could result in personal injury from electrical shock and/or
irreparable damage to the Control.
REMOVING THE EXISTING SMOKER CONTROL:
1) Make sure the Switch/Dial is in the OFF position. Disconnect the Power Cord from
the electrical outlet.
2) Review the Digital Control Wiring Diagram to familiarize yourself with the color coding
of the wiring connections. Disconnect the wiring from the Smoker Control by
separating the 4 Molex Connectors found on the underside of the Pellet hopper.
3) Remove the two screws securing the Smoker Control to the Pellet Hopper. Save
these screws as they will be used to mount the Digital Control later.
4) Carefully remove the Smoker Control through the opening in the front of the Pellet
Hopper. You may need to adjust the angle of the Smoker Control to allow the circuit
board to pass through the opening. Save the Smoker Control in case you should
have a problem with your Digital Control. It can be reinstalled until the problem with
the Digital Control is resolved.
INSTALLING THE RTD:
1) Open the Door and remove the Porcelain Grill and Grease Drain Pan to provide
access to the left side of the Grill.
2) Carefully cut the cable tie securing the RTD Wires to the RTD. Remove the Screw
and Lock Nut from the RTD mounting bracket if they are attached.
3) Thread the RTD Wires through the center hole of the RTD Grill Filler and then
through the small hole in the left end of the Grill. Continue to feed the RTD wires
through the Grill until the lower end of the RTD can be inserted into RTD Grill Filler.
On new Grills there will be a “Digital Thermostat RTD Mounting Hole” label pointing to
the holes in the RTD Grill Filler. Refer to the RTD Installation Diagram for additional
information.
4) Mount the RTD to the RTD Grill Filler using the 1/2” long Screw and the Lock Nut as
shown in the RTD installation Diagram. Tighten to secure the RTD.
5) Run the RTD Wires down through the space between the end of the Grill and the
Pellet Hopper. Then feed the Wires up through the opening for the Control.
WIRING AND MOUNTING THE DIGITAL CONTROL:
1) Locate the Green Terminal Block on the back of the Digital Control in the upper right
corner. Using a small screwdriver, loosen the two screws to open the clamping jaws
enough to insert the RTD Wire ends.
2) Insert a bare wire end on one of the RTD Wires into the clamping jaws on one post of
the Terminal Block. Tighten the screw to securely attach the wire. Do not over
tighten. Repeat this process on the remaining wire. The RTD Wires may be
connected to the Terminal Block in any combination.
3) Along with the RTD Wires, feed the wiring from the Digital Control into the opening in
the Pellet Hopper.
4) Carefully insert the Digital Control into the opening in the Pellet Hopper. Again, you
may need to adjust the angle of the Digital Control to allow the circuit board to pass
through the opening.
5) Using the two screws that mounted the Smoker Control, attach the Digital Control to
the Pellet Hopper. Do not over tighten the screws.

6) Connect the Molex Connectors according to the color coding shown on the Digital
Control Wiring Diagram. You may have some excess length for the RTD Wires. This
additional wiring can be coiled and secured to the Digital Control Wiring with a cable
tie or a twist tie. Make sure that none of the wires interfere with the fan blades on the
Draft Inducer Fan or the Auger Drive Motor.
Replace the Grease Drain Pan and the Porcelain Grill, connect the Power Cord to an
appropriate, grounded electrical outlet and you are ready to go.
REPLACEMENT ON OLDER MODEL GRILLS
Some of the later model grills had a smaller cutout originally used for our controls.
These are the instruction for replacement for those models. After the original control has
been removed by following instructions and the RTD has been installed per instruction
above before you can begin.
1) Loosen the two screws on the green terminal block connector located on the
back upper right corner of the controller using a small screwdriver.
2) Insert the RTD wire out through the cutout for the control and connect to the
green connector located on the back of the new control into the green terminal
block and tighten down the screws.
3) Insert the wires for the control into the cutout. Then when inserting the control
into the cutout angle the control from the side away from the fuse and insert this
side first. You will need to slide the control all the way to the left at an angle until
the fuse holder clears the cutout.
4) Insert the two retaining screws into the holes provided on the face plate of the
control and tighten with a screw driver.
5) Connect the Molex connectors to the correct components per the wiring diagram
and then the grill is ready for use.
The small cutout is 2.25” remove fuse cap and fuse Install RTD wires to connector.
Insert wires and tilt controller Set controller flat and insert fuse from behind. Replace screws and connect wires.

INITIAL FIRING INSTRUCTIONS
(To be used on initial firing or anytime the Grill runs out of Pellets)
In order to ensure proper operation of the Grill, you must first
allow the Auger Tube to be “charged” with Pellets.
1) Open the Door and remove the Porcelain Grill, Grease Drain Pan and Heat Baffle
from inside the Grill.
2) Make sure the Switch is OFF and the Dial Knob is in the OFF/ SHUT DOWN CYCLE
position. Plug the Power Cord into an appropriate, grounded electrical outlet.
3) Open the Pellet Hopper Lid and locate the Auger. Make sure there are no foreign
objects in the Auger. Turn the Switch to ON and the Dial Knob to the Smoke setting
look into the Pellet Hopper to confirm the Auger is turning. At the same time, place
your fingers over the Firepot and feel the air movement from the Draft Inducer Fan.
Look to see if the Hot Rod is getting hot. DO NOT TOUCH IT! Turn the Switch to off
and the Dial Knob to OFF/SHUT DOWN CYCLE.
4) Fill the Pellet Hopper with TRAEGER BBQ PELLETS. WARNING! USE ONLY
TRAEGER BRAND BBQ PELLETS, which are specifically made to work in our
Grills. NEVER use heating fuel pellets in the Grill. Turn the Switch to ON, set the
Dial Knob to HIGH. Note: During the initial charging of the Auger, it will take time for
the Pellets to travel from the Pellet Hopper to the Firepot. When the Pellets begin to
fall into the Firepot, turn the Switch to OFF and the Dial Knob to OFF/SHUT DOWN
CYCLE.
5) Turn the Switch to ON, set the Dial Knob to SMOKE. Let the Pellets come to full
flame. Once you see flames come out of the Firepot, turn the Switch to OFF and the
Dial Knob to OFF/SHUT DOWN CYCLE, and let the Grill cool down.
RECOMMENDATION for ease of clean-up: Line the Grease Drain Pan with
heavy-duty aluminum foil. Be sure the edges and ends of the foil are tight
against the bottom of the Grease Drain Pan. Position the Heat Baffle, the foil lined
Grease Drain Pan and Porcelain Grill in their proper locations.
6) With the Door open, turn the Switch to On and the Dial Knob to SMOKE. In
approximately 2 minutes you will notice whitish-gray smoke coming out of the Grill
as the Pellets ignite. After assuring the Pellets have ignited, close the Door and set
the Temperature Dial to any cooking setting desired.
7) Note: Before cooking the first batch of food in your new Grill, you will need to
season the Grill. Turn the Temperature Dial to HIGH and run for 45 minutes at
this setting with the Door closed. This must be done before cooking any food
on the Grill.
8) The Grill should be allowed to pre-heat for approximately 10 minutes with the Door
closed before placing food in the Grill.
SECTION THREE: SUBSEQUENT START-UP
With the Door open, turn the Switch to ON and Temperature Dial to SMOKE. In
approximately 2 minutes you will notice whitish-gray smoke coming out of the Grill
as the Pellets ignite. After assuring the Pellets have ignited, close the Door and set
the Temperature Dial to any cooking setting desired.

Control Shutdown cycle
The digital control for the BBQ020 comes with an automatic shut down cycle.
When finished cooking on your BBQ020 set the Dial Knob to the off position, this will
leave the Draft Induction Fan running for ten minutes to burn any excess pellets in the
fire pot. After the fan runs for ten minutes the controller will power off and the fan and it
will stop running. CAUTION! The main power switch will shut the power off to the
controller and the Dial Knob switch will cut off power to the grill components only. When
servicing the controller or any parts ensure that the power supply is disconnected to
avoid a shock hazard.
THERMOSTAT CONTROL FUNCTIONS
Adjustment of the “P”(Smoke) settings:- call customer service before adjusting.
Due to the widely varying temperature swings and operating environments experienced
by our customers, the digital controllers contain a function that will allow the grill to
better function in extreme temperature conditions for the smoke function. These
changes should only be performed when the conditions are expected to be present for
extended periods.
In order to access this functionality, locate the small hole on the face plate of the digital
controller just to the right of the red digital display. Turn the controller knob to the 225
setting. Using a very small screwdriver or other pointed object (a bent paper clip works
well), insert into the hole and use it to depress the micro switch located inside. Each
time you depress the switch, the digital readout will change from a temperature display
to a “P” setting followed by a number. The factory default setting is P-2. The setting
range available is from P-0 to P-5 (however it is not recommended that a setting above
5 ever be used). The “P” readout will change each time you depress the micro switch.
With all “P” settings, the Auger motor on time remains constant at 15 seconds while
the Auger motor time off is influenced by the “P” setting.
P-2 Setting (factory): Auger motor on time of 15 seconds, off time: 65 seconds.
P-3 Setting: Auger motor on 15 seconds, off time: 75 seconds
P-4 Setting: Auger motor on 15 seconds, off time: 85 seconds
P-5 Setting: Auger motor on 15 seconds, off time: 95 seconds
Increasing the number decreases the Smoking Temperature. Decreasing the number
increases the Smoking Temperature.
Note: The Traeger Service Department recommends a setting no higher than P-5! Also,
once
a Smoke Adjustment is made, the temperature on the digital readout should be
monitored. If the temperature is consistently below 160 degrees F while “Smoking”,
there is a risk of losing the fire in the firepot. If your fire should go out while “Smoking”,
turn the controller to the OFF POSITION. DO NOT attempt to restart the Grill until you
complete the recovery process (below). Failure to do so could result in an “over firing”
condition and can cause serious damage to your Grill.
Recovery process:
• Make sure that the Grill is cool to the touch!

• Open the Door and remove the Porcelain Grill, Grease Drain Pan and the Heat
Baffle.
Important: Remove all unburned Pellets and ash from inside and around the
Firepot. A Shop-Vac is ideal for this task. CAUTION! Assure that the Grill is
cold to avoid a fire from hot ash!
• Replace the Heat Baffle, Grease Drain Pan and the Porcelain Grill and initiate
startup
• If this didn’t remedy the problem, contact Traeger Technical Support for
additional troubleshooting assistance
NOTE TO GRILL OWNERS
Now that your Traeger Pellet Grill is equipped with a Digital Thermostat Control, this
handy conversion chart will help you determine where to set the Thermostat when the
recipes call for “Smoke”, “Medium” or “High” settings with the 3-Speed Smoker Control.
Remember: Grill temperature is affected by conditions such as outside temperature,
precipitation and wind as well as altitude. Please keep this in mind when determining
how long it will take food to cook on your Grill.
If your Grill has a Dome Thermometer, you will probably notice a difference in the
temperature displayed on the Readout of the Digital Control and the reading on the
Dome Thermometer. This difference is a result of the separate locations on the Grill at
which each device takes its reading.
We highly recommend that every Traeger Grill Owner purchase a Traeger Pocket
Thermometer (P/N BAC212) to help you cook more accurately and confidently. This
Traeger accessory may be purchased on-line at www.traegergrills.com or through a
Traeger Dealer in your area.
To order parts or accessories: Call, E-mail or write to your Traeger Dealer or Traeger
Pellet Grills. Please provide your name, phone number, address, Model and Serial
Number of the Grill (located on a label inside the Hopper Lid), along with the part
identification.
TRAEGER PELLET GRILLS, LLC
1215 Wilmington Ave Suite 200
Salt Lake City, UT 84106
TRAEGER TECHNICAL SUPPORT
Available 7 Days a Week 5AM to 7PM
Pacific Time
TRAEGER PARTS DEPARTMENT
Available Weekdays 8AM to 3:30PM
Pacific Time
TRAEGER SALES/ORDER DESK
Available Weekdays 8AM to 4:30PM
Pacific Time
TOLL-FREE TELEPHONE: 1-800-872-3437
E-mail: service@traegergrills.com
Website: www.traegergrills.com
3-Speed Smoker Control Settings
Digital Thermostat Suggested Settings
Smoke
Smoke (160-180 F.)
Medium
225-275 Degrees F.
High
350-400 Degrees F.
/