Garmin Instinct User manual

Category
Activity trackers
Type
User manual
INSTINCT
Owner’s Manual
© 2018 Garmin Ltd. or its subsidiaries
All rights reserved. Under the copyright laws, this manual may not be copied, in whole or in part, without the written consent of Garmin. Garmin reserves the right to change or improve its
products and to make changes in the content of this manual without obligation to notify any person or organization of such changes or improvements. Go to www.garmin.com for current updates
and supplemental information concerning the use of this product.
Garmin
®
, the Garmin logo, and ANT+
®
, Auto Lap
®
, Auto Pause
®
, Edge
®
, inReach
®
, TracBack
®
, VIRB
®
, and Virtual Partner
®
are trademarks of Garmin Ltd. or its subsidiaries, registered in the USA
and other countries. Garmin Connect
, Garmin Explore
, Garmin Express
, Garmin Move IQ
, Instinct
, QuickFit
, tempe
, TrueUp
, and Xero
are trademarks of Garmin Ltd. or its
subsidiaries. These trademarks may not be used without the express permission of Garmin.
American Heart Association
®
is a registered trademark of American Heart Association, Inc. Android
is a trademark of Google Inc. Apple
®
and Mac
®
are trademarks of Apple Inc., registered in the
U.S. and other countries. The Bluetooth
®
word mark and logos are owned by the Bluetooth SIG, Inc. and any use of such marks by Garmin is under license. Advanced heartbeat analytics by
Firstbeat. Windows
®
is a registered trademark of Microsoft Corporation in the United States and other countries. Other trademarks and trade names are those of their respective owners.
This product is ANT+
®
certified. Visit www.thisisant.com/directory for a list of compatible products and apps.
M/N: A03603
Introduction
WARNING
See the Important Safety and Product Information guide in the
product box for product warnings and other important
information.
Always consult your physician before you begin or modify any
exercise program.
Device Overview
À
LIGHT
CTRL
Select to turn the backlight on and off.
Hold to view the controls menu.
Hold to turn the device on.
Á
GPS
Select to view the activity list and start or stop an activity.
Select to choose an option in a menu.
Hold to view GPS coordinates and save your location.
Â
BACK
SET
Select to return to the previous screen.
Hold to view the clock menu.
Ã
DOWN
ABC
Select to scroll through the widget loop and menus.
Hold to view the altimeter, barometer, and compass (ABC)
screen.
Ä
UP
MENU
Select to scroll through the widget loop and menus.
Hold to view the menu.
Viewing the Controls Menu
The controls menu contains options, such as turning on do not
disturb mode, locking the keys, and turning the device off.
NOTE: You can add, reorder, and remove the options in the
controls menu (Customizing the Controls Menu, page 15).
1
From any screen, hold CTRL.
2
Select UP or DOWN to scroll through the options.
Viewing Widgets
Your device comes preloaded with several widgets, and more
are available when you pair your device with a smartphone.
Select UP or DOWN.
The device scrolls through the widget loop.
Select GPS to view additional options and functions for a
widget.
Charging the Device
WARNING
This device contains a lithium-ion battery. See the Important
Safety and Product Information guide in the product box for
product warnings and other important information.
NOTICE
To prevent corrosion, thoroughly clean and dry the contacts and
the surrounding area before charging or connecting to a
computer. Refer to the cleaning instructions in the appendix.
1
Plug the small end of the USB cable into the charging port on
your device.
2
Plug the large end of the USB cable into a USB charging
port.
3
Charge the device completely.
Pairing Your Smartphone with Your Device
To use the connected features of the Instinct device, it must be
paired directly through the Garmin Connect
Mobile app,
instead of from the Bluetooth
®
settings on your smartphone.
1
From the app store on your smartphone, install and open the
Garmin Connect Mobile app.
2
Bring your smartphone within 10 m (33 ft.) of your device.
3
Select CTRL to turn on the device.
The first time you turn on the device, it is in pairing mode.
TIP: To manually enter pairing mode, you can hold MENU,
and select Settings > Pair Phone.
4
Select an option to add your device to your Garmin Connect
account:
If this is the first time you are pairing a device with the
Garmin Connect Mobile app, follow the on-screen
instructions.
If you already paired another device with the Garmin
Connect Mobile app, from the or menu, select
Garmin Devices > Add Device, and follow the on-screen
instructions.
Product Updates
On your computer, install Garmin Express
(www.garmin.com
/express). On your smartphone, install the Garmin Connect
Mobile app.
This provides easy access to these services for Garmin
®
devices:
Software updates
Data uploads to Garmin Connect
Product registration
Setting Up Garmin Express
1
Connect the device to your computer using a USB cable.
Introduction 1
2
Go to www.garmin.com/express.
3
Follow the on-screen instructions.
Activities and Apps
Your device can be used for indoor, outdoor, athletic, and fitness
activities. When you start an activity, the device displays and
records sensor data. You can save activities and share them
with the Garmin Connect community.
For more information about activity tracking and fitness metric
accuracy, go to garmin.com/ataccuracy.
Starting an Activity
When you start an activity, GPS turns on automatically (if
required). When you stop the activity, the device returns to
watch mode.
1
From the watch face, select GPS.
2
Select an activity.
3
If necessary, follow the on-screen instructions to enter
additional information.
4
If necessary, wait while the device connects to your ANT+
®
or
Bluetooth sensors.
5
If the activity requires GPS, go outside, and wait while the
device locates satellites.
6
Select GPS to start the timer.
NOTE: The device does not record your activity data until
you start the timer.
Tips for Recording Activities
Charge the device before starting an activity (Charging the
Device, page 1).
Select UP or DOWN to view additional data pages.
Stopping an Activity
1
Select GPS.
2
Select an option:
To resume your activity, select Resume.
To save the activity and return to watch mode, select
Save.
To suspend your activity and resume it at a later time,
select Resume Later.
To navigate back to the starting point of your activity along
the path you traveled, select Back to Start > TracBack.
NOTE: This feature is available only for activities that use
GPS.
To navigate back to the starting point of your activity by
the most direct path, select Back to Start > Straight Line.
NOTE: This feature is available only for activities that use
GPS.
To discard the activity and return to watch mode, select
Discard > Yes.
NOTE: After stopping the activity, the device saves it
automatically after 30 minutes.
Creating a Custom Activity
1
From the watch face, select GPS > Add.
2
Select an option:
Select Copy Activity to create your custom activity
starting from one of your saved activities.
Select Other to create a new custom activity.
3
If necessary, select an activity type.
4
Select a name or enter a custom name.
Duplicate activity names include a number, for example:
Bike(2).
5
Select an option:
Select an option to customize specific activity settings. For
example, you can customize the data screens or auto
features.
Select Done to save and use the custom activity.
6
Select Yes to add the activity to your list of favorites.
Indoor Activities
The Instinct device can be used for training indoors, such as
running on an indoor track or using a stationary bike. GPS is
turned off for indoor activities.
When running or walking with GPS turned off, speed, distance,
and cadence are calculated using the accelerometer in the
device. The accelerometer is self-calibrating. The accuracy of
the speed, distance, and cadence data improves after a few
outdoor runs or walks using GPS.
TIP: Holding the handrails of the treadmill reduces accuracy.
You can use an optional foot pod to record pace, distance, and
cadence.
When cycling with GPS turned off, speed and distance are not
available unless you have an optional sensor that sends speed
and distance data to the device (such as a speed or cadence
sensor).
Calibrating the Treadmill Distance
To record more accurate distances for your treadmill runs, you
can calibrate the treadmill distance after you run at least 1.5 km
(1 mi.) on a treadmill. If you use different treadmills, you can
manually calibrate the treadmill distance on each treadmill or
after each run.
1
Start a treadmill activity (Starting an Activity, page 2), and run
at least 1.5 km (1 mi.) on the treadmill.
2
After you complete your run, select GPS.
3
Select an option:
To calibrate the treadmill distance the first time, select
Save.
The device prompts you to complete the treadmill
calibration.
To manually calibrate the treadmill distance after the first-
time calibration, select Calibrate & Save > Yes.
4
Check the treadmill display for the distance traveled, and
enter the distance on your device.
Outdoor Activities
The Instinct device comes preloaded with outdoor activities,
such as running and cycling. GPS is turned on for outdoor
activities. You can add new activities based on default activities,
such as walking or rowing. You can also add custom activities to
your device (Creating a Custom Activity, page 2).
Viewing Your Ski Runs
Your device records the details of each downhill skiing or
snowboarding run using the auto run feature. This feature is
turned on by default for downhill skiing and snowboarding. It
automatically records new ski runs based on your movement.
The timer pauses when you stop moving downhill and when you
are on a chairlift. The timer remains paused during the chairlift
ride. You can start moving downhill to restart the timer. You can
view run details from the paused screen or while the timer is
running.
1
Start a skiing or snowboarding activity.
2
Hold MENU.
3
Select View Runs.
2 Activities and Apps
4
Select UP and DOWN to view details of your last run, your
current run, and your total runs.
The run screens include time, distance traveled, maximum
speed, average speed, and total descent.
Using the Metronome
The metronome feature plays tones at a steady rhythm to help
you improve your performance by training at a faster, slower, or
more consistent cadence.
NOTE: This feature is not available for all activities.
1
From the watch face, select GPS.
2
Select an activity.
3
Hold MENU.
4
Select the activity settings.
5
Select Metronome > Status > On.
6
Select an option:
Select Beats / Minute to enter a value based on the
cadence you want to maintain.
Select Alert Frequency to customize the frequency of the
beats.
Select Sounds to customize the metronome tone and
vibration.
7
If necessary, select Preview to listen to the metronome
feature before you run.
8
Go for a run (Starting an Activity, page 2).
The metronome starts automatically.
9
During your run, select UP or DOWN to view the metronome
screen.
10
If necessary, hold MENU to change the metronome settings.
Swimming
NOTICE
The device is intended for surface swimming. Scuba diving with
the device may damage the product and will void the warranty.
NOTE: The device cannot record wrist heart rate data while
swimming.
Swim Terminology
Length: One trip down the pool.
Interval: One or more consecutive lengths. A new interval starts
after a rest.
Stroke: A stroke is counted every time your arm wearing the
device completes a full cycle.
Swolf: Your swolf score is the sum of the time for one pool
length and the number of strokes for that length. For
example, 30 seconds plus 15 strokes equals a swolf score of
45. Swolf is a measurement of swimming efficiency and, like
golf, a lower score is better.
Stroke Types
Stroke type identification is available only for pool swimming.
Your stroke type is identified at the end of a length. Stroke types
appear when you are viewing interval history. You can also
select stroke type as a custom data field (Customizing the Data
Screens, page 13).
Free Freestyle
Back Backstroke
Breast Breaststroke
Fly Butterfly
Mixed More than one stroke type in an interval
Drill Used with drill logging (Training with the Drill Log, page 3)
Tips for Swimming Activities
Before starting a pool swimming activity, follow the on-screen
instructions to select your pool size or enter a custom size.
Select SET to record a rest during pool swimming.
The device automatically records swim intervals and lengths
for pool swimming.
Select SET to record an interval during open water
swimming.
Resting During Pool Swimming
The default rest screen displays two rest timers. It also displays
time and distance for the last completed interval.
NOTE: Swim data is not recorded during a rest.
1
During your swim activity, select SET to start a rest.
The display reverses to white text on a black background,
and the rest screen appears.
2
During a rest, select UP or DOWN to view other data screens
(optional).
3
Select SET, and continue swimming.
4
Repeat for additional rest intervals.
Training with the Drill Log
The drill log feature is available only for pool swimming. You can
use the drill log feature to manually record kick sets, one-arm
swimming, or any type of swimming that is not one of the four
major strokes.
1
During your pool swim activity, select UP or DOWN to view
the drill log screen.
2
Select SET to start the drill timer.
3
After you complete a drill interval, select SET.
The drill timer stops, but the activity timer continues to record
the entire swim session.
4
Select a distance for the completed drill.
Distance increments are based on the pool size selected for
the activity profile.
5
Select an option:
To start another drill interval, select SET.
To start a swim interval, select UP or DOWN to return to
the swim training screens.
Heart Rate Features
The Instinct device has a wrist-based heart rate monitor and is
also compatible with chest heart rate monitors (sold separately).
You can view heart rate data on the heart rate widget. If both
wrist-based heart rate and chest heart rate data are available,
your device uses the chest heart rate data.
Wrist-based Heart Rate
Wearing the Device
Wear the device above your wrist bone.
NOTE: The device should be snug but comfortable. For more
accurate heart rate readings on the Instinct device, it should
not move while running or exercising.
NOTE: The optical sensor is located on the back of the
device.
Heart Rate Features 3
See Tips for Erratic Heart Rate Data, page 4 for more
information about wrist-based heart rate.
For more information about accuracy, go to garmin.com
/ataccuracy.
Tips for Erratic Heart Rate Data
If the heart rate data is erratic or does not appear, you can try
these tips.
Clean and dry your arm before putting on the device.
Avoid wearing sunscreen, lotion, and insect repellent under
the device.
Avoid scratching the heart rate sensor on the back of the
device.
Wear the device above your wrist bone. The device should
be snug but comfortable.
Wait until the icon is solid before starting your activity.
Warm up for 5 to 10 minutes and get a heart rate reading
before starting your activity.
NOTE: In cold environments, warm up indoors.
Rinse the device with fresh water after each workout.
Viewing the Heart Rate Widget
The widget displays your current heart rate in beats per minute
(bpm) and a graph of your heart rate for the last 4 hours.
1
From the watch face, select DOWN.
2
Select GPS to view your average resting heart rate values for
the last 7 days.
Broadcasting Heart Rate Data to Garmin Devices
You can broadcast your heart rate data from your Instinct device
and view it on paired Garmin devices. For example, you can
broadcast your heart rate data to an Edge
®
device while cycling,
or to a VIRB
®
action camera during an activity.
NOTE: Broadcasting heart rate data decreases battery life.
1
From the heart rate widget, hold MENU.
2
Select Options.
3
Select an option:
Select Broadcast Heart Rate to start broadcasting heart
rate data now.
Select Broadcast During Activity to broadcast heart rate
during timed activities (Starting an Activity, page 2).
The Instinct device starts broadcasting your heart rate data,
and appears.
NOTE: You can view only the heart rate widget while
broadcasting heart rate data.
4
Pair your Instinct device with your Garmin ANT+ compatible
device.
NOTE: The pairing instructions differ for each Garmin
compatible device. See your owner's manual.
TIP: To stop broadcasting your heart rate data, select any
key, and select Yes.
Turning Off the Wrist Heart Rate Monitor
The default value for the Wrist Heart Rate setting is Auto. The
device automatically uses the wrist-based heart rate monitor
unless you pair an ANT+ heart rate monitor to the device.
1
From the heart rate widget, hold MENU.
2
Select Options > Status > Off.
Training
Setting Up Your User Profile
You can update your gender, birth year, height, weight, heart
rate zone, and power zone settings. The device uses this
information to calculate accurate training data.
1
Hold MENU.
2
Select Settings > User Profile.
3
Select an option.
Fitness Goals
Knowing your heart rate zones can help you measure and
improve your fitness by understanding and applying these
principles.
Your heart rate is a good measure of exercise intensity.
Training in certain heart rate zones can help you improve
cardiovascular capacity and strength.
If you know your maximum heart rate, you can use the table
(Heart Rate Zone Calculations, page 5) to determine the best
heart rate zone for your fitness objectives.
If you do not know your maximum heart rate, use one of the
calculators available on the Internet. Some gyms and health
centers can provide a test that measures maximum heart rate.
The default maximum heart rate is 220 minus your age.
About Heart Rate Zones
Many athletes use heart rate zones to measure and increase
their cardiovascular strength and improve their level of fitness. A
heart rate zone is a set range of heartbeats per minute. The five
commonly accepted heart rate zones are numbered from 1 to 5
according to increasing intensity. Generally, heart rate zones are
calculated based on percentages of your maximum heart rate.
Setting Your Heart Rate Zones
The device uses your user profile information from the initial
setup to determine your default heart rate zones. You can set
separate heart rate zones for sport profiles, such as running,
cycling, and swimming. For the most accurate calorie data
during your activity, set your maximum heart rate. You can also
set each heart rate zone and enter your resting heart rate
manually. You can manually adjust your zones on the device or
using your Garmin Connect account.
1
Hold MENU.
2
Select Settings > User Profile > Heart Rate.
3
Select Max. HR, and enter your maximum heart rate.
4
Select Resting HR, and enter your resting heart rate.
You can use the average resting heart rate measured by your
device, or you can set a custom resting heart rate.
5
Select Zones > Based On.
6
Select an option:
Select BPM to view and edit the zones in beats per
minute.
Select %Max. HR to view and edit the zones as a
percentage of your maximum heart rate.
Select %HRR to view and edit the zones as a percentage
of your heart rate reserve (maximum heart rate minus
resting heart rate).
7
Select a zone, and enter a value for each zone.
8
Select Add Sport Heart Rate, and select a sport profile to
add separate heart rate zones (optional).
9
Repeat the steps to add sport heart rate zones (optional).
4 Training
Heart Rate Zone Calculations
Zone % of
Maximum
Heart Rate
Perceived Exertion Benefits
1 50–60% Relaxed, easy pace,
rhythmic breathing
Beginning-level
aerobic training,
reduces stress
2 60–70% Comfortable pace,
slightly deeper
breathing, conversation
possible
Basic cardiovascular
training, good
recovery pace
3 70–80% Moderate pace, more
difficult to hold
conversation
Improved aerobic
capacity, optimal
cardiovascular training
4 80–90% Fast pace and a bit
uncomfortable, breathing
forceful
Improved anaerobic
capacity and
threshold, improved
speed
5 90–100% Sprinting pace,
unsustainable for long
period of time, labored
breathing
Anaerobic and
muscular endurance,
increased power
Activity Tracking
The activity tracking feature records your daily step count,
distance traveled, intensity minutes, floors climbed, calories
burned, and sleep statistics for each recorded day. Your calories
burned includes your base metabolism plus activity calories.
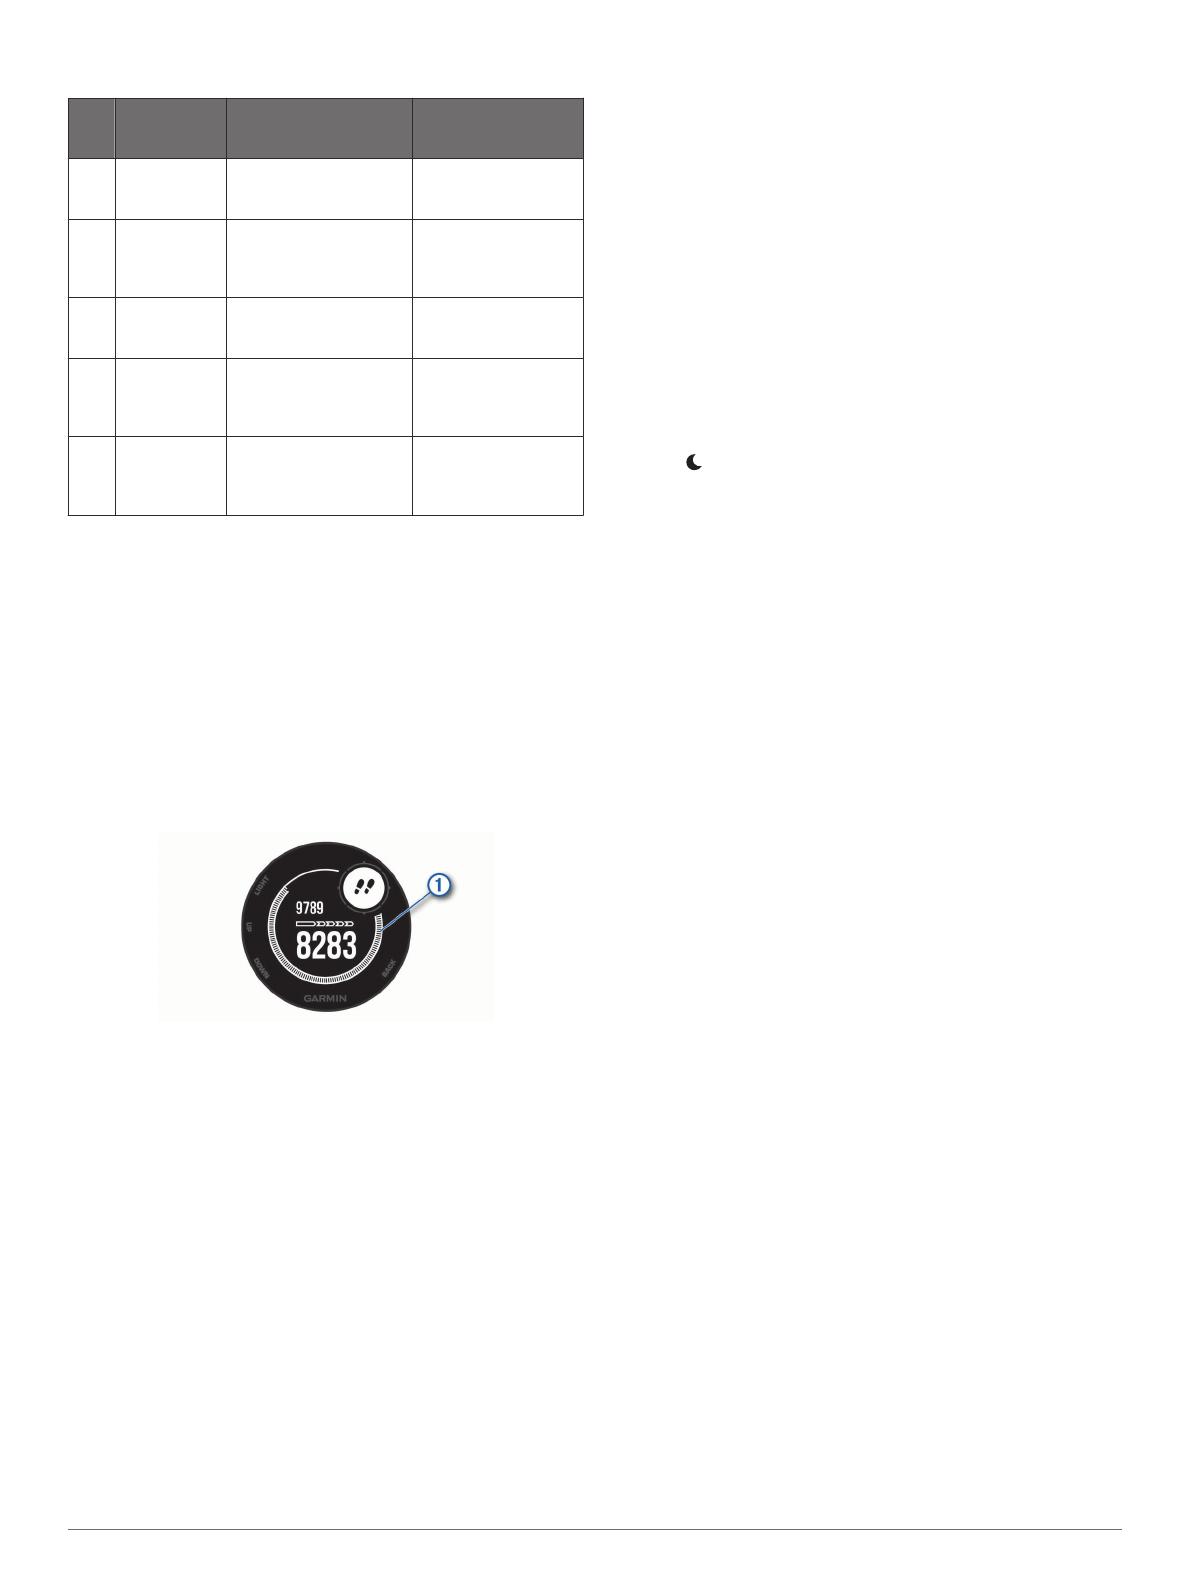
The number of steps taken during the day appears on the steps
widget. The step count is updated periodically.
For more information about activity tracking and fitness metric
accuracy, go to garmin.com/ataccuracy.
Auto Goal
Your device creates a daily step goal automatically, based on
your previous activity levels. As you move during the day, the
device shows your progress toward your daily goal
À
.
If you choose not to use the auto goal feature, you can set a
personalized step goal on your Garmin Connect account.
Using the Move Alert
Sitting for prolonged periods of time can trigger undesirable
metabolic state changes. The move alert reminds you to keep
moving. After one hour of inactivity, Move! and the move bar
appear. Additional segments appear after every 15 minutes of
inactivity. The device also beeps or vibrates if audible tones are
turned on (System Settings, page 16).
Go for a short walk (at least a couple of minutes) to reset the
move alert.
Sleep Tracking
While you are sleeping, the device automatically detects your
sleep and monitors your movement during your normal sleep
hours. You can set your normal sleep hours in the user settings
on your Garmin Connect account. Sleep statistics include total
hours of sleep, sleep levels, and sleep movement. You can view
your sleep statistics on your Garmin Connect account.
NOTE: Naps are not added to your sleep statistics. You can use
do not disturb mode to turn off notifications and alerts, with the
exception of alarms (Using Do Not Disturb Mode, page 5).
Using Automated Sleep Tracking
1
Wear your device while sleeping.
2
Upload your sleep tracking data to the Garmin Connect site
(Manually Syncing Data with Garmin Connect Mobile,
page 11).
You can view your sleep statistics on your Garmin Connect
account.
Using Do Not Disturb Mode
You can use do not disturb mode to turn off the backlight, tone
alerts, and vibration alerts. For example, you can use this mode
while sleeping or watching a movie.
NOTE: You can set your normal sleep hours in the user settings
on your Garmin Connect account. You can enable the Sleep
Time option in the system settings to automatically enter do not
disturb mode during your normal sleep hours (System Settings,
page 16).
1
Hold CTRL.
2
Select .
Intensity Minutes
To improve your health, organizations such as the U.S. Centers
for Disease Control and Prevention, the American Heart
Association
®
, and the World Health Organization, recommend at
least 150 minutes per week of moderate intensity activity, such
as brisk walking, or 75 minutes per week of vigorous intensity
activity, such as running.
The device monitors your activity intensity and tracks your time
spent participating in moderate to vigorous intensity activities
(heart rate data is required to quantify vigorous intensity). You
can work toward achieving your weekly intensity minutes goal by
participating in at least 10 consecutive minutes of moderate to
vigorous intensity activities. The device adds the amount of
moderate activity minutes with the amount of vigorous activity
minutes. Your total vigorous intensity minutes are doubled when
added.
Earning Intensity Minutes
Your Instinct device calculates intensity minutes by comparing
your heart rate data to your average resting heart rate. If heart
rate is turned off, the device calculates moderate intensity
minutes by analyzing your steps per minute.
Start a timed activity for the most accurate calculation of
intensity minutes.
Exercise for at least 10 consecutive minutes at a moderate or
vigorous intensity level.
Wear your device all day and night for the most accurate
resting heart rate.
Garmin Move IQ
Events
The Move IQ feature automatically detects activity patterns,
such as walking, running, biking, swimming, and elliptical
training, for at least 10 minutes. You can view the event type
and duration on your Garmin Connect timeline, but they do not
appear in your activities list, snapshots, or newsfeed. For more
detail and accuracy, you can record a timed activity on your
device.
Activity Tracking Settings
Hold MENU, and select Settings > Activity Tracking.
Status: Turns off the activity tracking feature.
Move Alert: Displays a message and the move bar on the
digital watch face and steps screen. The device also beeps
or vibrates if audible tones are turned on (System Settings,
page 16).
Goal Alerts: Allows you to turn on and off goal alerts. Goal
alerts appear for your daily steps goal, daily floors climbed
goal, and weekly intensity minutes goal.
Move IQ: Allows you to turn on and off Move IQ events.
Training 5
Turning Off Activity Tracking
When you turn off activity tracking, your steps, floors climbed,
intensity minutes, sleep tracking, and Move IQ events are not
recorded.
1
Hold MENU.
2
Select Settings > Activity Tracking > Status > Off.
Workouts
You can create custom workouts that include goals for each
workout step and for varied distances, times, and calories. You
can create workouts using Garmin Connect or select a training
plan that has built-in workouts from Garmin Connect, and
transfer them to your device.
You can schedule workouts using Garmin Connect. You can
plan workouts in advance and store them on your device.
Following a Workout From the Web
Before you can download a workout from Garmin Connect, you
must have a Garmin Connect account (Garmin Connect,
page 10).
1
Connect the device to your computer.
2
Go to www.garminconnect.com.
3
Create and save a new workout.
4
Select Send to Device, and follow the on-screen
instructions.
5
Disconnect the device.
Starting a Workout
Before you can start a workout, you must download a workout
from your Garmin Connect account.
1
From the watch face, select GPS.
2
Select an activity.
3
Hold MENU.
4
Select Training > My Workouts.
5
Select a workout.
NOTE: Only workouts that are compatible with the selected
activity appear in the list.
6
Select Do Workout.
7
Select GPS to start the timer.
After you begin a workout, the device displays each step of the
workout, step notes (optional), the target (optional), and the
current workout data.
About the Training Calendar
The training calendar on your device is an extension of the
training calendar or schedule you set up in Garmin Connect.
After you have added a few workouts to the Garmin Connect
calendar, you can send them to your device. All scheduled
workouts sent to the device appear in the training calendar list
by date. When you select a day in the training calendar, you can
view or do the workout. The scheduled workout stays on your
device whether you complete it or skip it. When you send
scheduled workouts from Garmin Connect, they overwrite the
existing training calendar.
Using Garmin Connect Training Plans
Before you can download and use a training plan from Garmin
Connect, you must have a Garmin Connect account (Garmin
Connect, page 10), and you must pair the Instinct device with a
compatible smartphone.
1
From the Garmin Connect Mobile app, select Training >
Training Plans > Find a Plan.
2
Select and schedule a training plan.
3
Select , and follow the on-screen instructions.
4
Review the training plan in your calendar.
Interval Workouts
You can create interval workouts based on distance or time. The
device saves your custom interval workout until you create
another interval workout. You can use open intervals for track
workouts and when you are running a known distance.
Creating an Interval Workout
1
From the watch face, select GPS.
2
Select an activity.
3
Hold MENU.
4
Select Training > Intervals > Edit > Interval > Type.
5
Select Distance, Time, or Open.
TIP: You can create an open-ended interval by selecting the
Open option.
6
If necessary, select Duration, enter a distance or time
interval value for the workout, and select .
7
Select BACK.
8
Select Rest > Type.
9
Select Distance, Time, or Open.
10
If necessary, enter a distance or time value for the rest
interval, and select .
11
Select BACK.
12
Select one or more options:
To set the number of repetitions, select Repeat.
To add an open-ended warm up to your workout, select
Warm Up > On.
To add an open-ended cool down to your workout, select
Cool Down > On.
Starting an Interval Workout
1
From the watch face, select GPS.
2
Select an activity.
3
Hold MENU.
4
Select Training > Intervals > Do Workout.
5
Select GPS to start the timer.
6
When your interval workout has a warm up, select SET to
begin the first interval.
7
Follow the on-screen instructions.
After you complete all of the intervals, a message appears.
Stopping an Interval Workout
At any time, select SET to end an interval.
At any time, select GPS to stop the timer.
If you added a cool down to your interval workout, select SET
to end the interval workout.
Using Virtual Partner
®
Your Virtual Partner is a training tool designed to help you meet
your goals. You can set a pace for the Virtual Partner and race
against it.
NOTE: This feature is not available for all activities.
1
Hold MENU.
2
Select Settings > Activities & Apps.
3
Select an activity.
4
Select the activity settings.
5
Select Data Screens > Add > Virtual Partner.
6
Enter a pace or speed value.
7
Start your activity (Starting an Activity, page 2).
8
Select UP or DOWN to scroll to the Virtual Partner screen
and see who is leading.
6 Training
Setting a Training Target
The training target feature works with the Virtual Partner feature
so you can train toward a set distance, distance and time,
distance and pace, or distance and speed goal. During your
training activity, the device gives you real-time feedback about
how close you are to achieving your training target.
1
From the watch face, select GPS.
2
Select an activity.
3
Hold MENU.
4
Select Training > Set a Target.
5
Select an option:
Select Distance Only to select a preset distance or enter
a custom distance.
Select Distance and Time to select a distance and time
target.
Select Distance and Pace or Distance and Speed to
select a distance and pace or speed target.
The training target screen appears and displays your
estimated finish time. The estimated finish time is based on
your current performance and the time remaining.
6
Select GPS to start the timer.
Cancelling a Training Target
1
During an activity, hold MENU.
2
Select Cancel Target > Yes.
Racing a Previous Activity
You can race a previously recorded or downloaded activity. This
feature works with the Virtual Partner feature so you can see
how far ahead or behind you are during the activity.
NOTE: This feature is not available for all activities.
1
From the watch face, select GPS.
2
Select an activity.
3
Hold MENU.
4
Select Training > Race an Activity.
5
Select an option:
Select From History to select a previously recorded
activity from your device.
Select Downloaded to select an activity you downloaded
from your Garmin Connect account.
6
Select the activity.
The Virtual Partner screen appears indicating your estimated
finish time.
7
Select GPS to start the timer.
8
After you complete your activity, select GPS > Save.
Personal Records
When you complete an activity, the device displays any new
personal records you achieved during that activity. Personal
records include your fastest time over several typical race
distances and longest run or ride.
Viewing Your Personal Records
1
Hold MENU.
2
Select History > Records.
3
Select a sport.
4
Select a record.
5
Select View Record.
Restoring a Personal Record
You can set each personal record back to the one previously
recorded.
1
Hold MENU.
2
Select History > Records.
3
Select a sport.
4
Select a record to restore.
5
Select Previous > Yes.
NOTE: This does not delete any saved activities.
Clearing a Personal Record
1
Hold MENU.
2
Select History > Records.
3
Select a sport.
4
Select a record to delete.
5
Select Clear Record > Yes.
NOTE: This does not delete any saved activities.
Clearing All Personal Records
1
Hold MENU.
2
Select History > Records.
NOTE: This does not delete any saved activities.
3
Select a sport.
4
Select Clear All Records > Yes.
The records are deleted for that sport only.
Clock
Setting an Alarm
You can set up to ten separate alarms. You can set each alarm
to sound once or to repeat regularly.
1
From any screen, hold SET.
2
Select Alarms.
3
Enter the alarm time.
4
Select Repeat, and select when the alarm should repeat
(optional).
5
Select Sounds, and select a type of notification (optional).
6
Select Backlight > On to turn on the backlight with the alarm
(optional).
7
Select Label, and select a description for the alarm
(optional).
Starting the Countdown Timer
1
From any screen, hold SET.
2
Select Timers.
3
Enter the time.
4
If necessary, select an option to edit the timer:
To automatically restart the timer after it expires, select UP
> Restart > On.
To select a type of notification, select UP > Sounds.
5
Select GPS to start the timer.
Using the Stopwatch
1
From any screen, hold SET.
2
Select Stopwatch.
3
Select GPS to start the timer.
4
Select SET to restart the lap timer
À
.
Clock 7
The total stopwatch time
Á
continues running.
5
Select GPS to stop both timers.
6
Select UP, and select an option.
Syncing the Time with GPS
Each time you turn on the device and acquire satellites, the
device automatically detects your time zones and the current
time of day. You can also manually sync the time with GPS
when you change time zones, and to update for daylight saving
time.
1
From any screen, hold SET.
2
Select Set Time With GPS.
3
Wait while the device locates satellites (Acquiring Satellite
Signals, page 19).
Setting Alerts
1
From any screen, hold SET.
2
Select Alerts.
3
Select an option:
To set an alert to sound a specific number of minutes or
hours before the actual sunset occurs, select Til Sunset >
Status > On, select Time, and enter the time.
To set an alert to sound a specific number of minutes or
hours before the actual sunrise occurs, select Til Sunrise
> Status > On, select Time, and enter the time.
To set an alert to sound when a storm approaches, select
Storm > On, select Rate, and select the rate of pressure
change.
To set an alert to sound every hour, select Hourly > On.
Navigation
Saving Your Location
You can save your current location to navigate back to it later.
1
From any screen, hold GPS.
2
Select GPS.
3
If necessary, select DOWN to edit location information.
Editing Your Saved Locations
You can delete a saved location or edit its name, elevation, and
position information.
1
From the watch face, select GPS > Navigate > Saved
Locations.
2
Select a saved location.
3
Select an option to edit the location.
Viewing the Altimeter, Barometer, and
Compass
The device contains internal altimeter, barometer, and compass
sensors with automatic calibration.
1
From any screen, hold ABC.
2
Select UP or DOWN to view separate altimeter, barometer,
and compass screens.
Projecting a Waypoint
You can create a new location by projecting the distance and
bearing from your current location to a new location.
1
If necessary, select GPS > Add > Project Wpt. to add the
project waypoint app to the apps list.
2
Select Yes to add the app to your list of favorites.
3
From the watch face, select GPS > Project Wpt..
4
Select UP or DOWN to set the heading.
5
Select GPS.
6
Select DOWN to select a unit of measure.
7
Select UP to enter the distance.
8
Select GPS to save.
The projected waypoint is saved with a default name.
Navigating to a Destination
You can use your device to navigate to a destination or follow a
course.
1
From the watch face, select GPS > Navigate.
2
Select a category.
3
Respond to the on-screen prompts to choose a destination.
4
Select Go To.
Navigation information appears.
5
Select GPS to begin navigation.
Creating and Following a Course on Your
Device
1
From the watch face, select GPS > Navigate > Courses >
Create New.
2
Enter a name for the course, and select .
3
Select Add Location.
4
Select an option.
5
If necessary, repeat steps 3 and 4.
6
Select Done > Do Course.
Navigation information appears.
7
Select GPS to begin navigation.
Marking and Starting Navigation to a Man
Overboard Location
You can save a man overboard (MOB) location, and
automatically start navigation back to it.
TIP: You can customize the hold function of the keys to access
the MOB function (Customizing the Hot Keys, page 16).
From the watch face, select GPS > Navigate > Last MOB.
Navigation information appears.
Navigating with Sight 'N Go
You can point the device at an object in the distance, such as a
water tower, lock in the direction, and then navigate to the
object.
1
From the watch face, select GPS > Navigate > Sight 'N Go.
2
Point the top of the watch at an object, and select GPS.
Navigation information appears.
3
Select GPS to begin navigation.
Navigating to Your Starting Point During an
Activity
You can navigate back to the starting point of your current
activity in a straight line or along the path you traveled. This
feature is available only for activities that use GPS.
8 Navigation
1
During an activity, select GPS > Back to Start.
2
Select an option:
To navigate back to the starting point of your activity along
the path you traveled, select TracBack.
To navigate back to the starting point of your activity in a
straight line, select Straight Line.
Your current location
À
, the track to follow
Á
, and your
destination
Â
appear on the map.
Navigating to the Starting Point of Your Last
Saved Activity
You can navigate back to the starting point of your last saved
activity in a straight line or along the path you traveled. This
feature is available only for activities that use GPS.
1
Select GPS > Navigate > Back to Start > Straight Line.
A line appears on the map from your current location to the
starting point of the last saved activity.
NOTE: You can start the timer to prevent the device from
timing out to watch mode.
2
Select DOWN to view the compass (optional).
The arrow points toward your starting point.
Stopping Navigation
1
During an activity, hold MENU.
2
Select Stop Navigation.
Calculating the Size of an Area
Before you can calculate the size of an area, you must acquire
satellites.
1
From the watch face, select GPS > Area Calc..
2
Walk around the perimeter of the area.
TIP: You can hold MENU, and select Pan/Zoom to adjust the
map (Panning and Zooming the Map, page 9).
3
Select GPS to calculate the area.
4
Select an option:
To exit without saving, select Done.
To convert measurements of the area to a different unit of
measure, select Change Units.
To save, select Save Activity.
Map
represents your location on the map. Location names and
symbols appear on the map. When you are navigating to a
destination, your route is marked with a line on the map.
Map navigation (Panning and Zooming the Map, page 9)
Map settings (Map Settings, page 15)
Panning and Zooming the Map
1
While navigating, select UP or DOWN to view the map.
2
Hold MENU.
3
Select Pan/Zoom.
4
Select an option:
To toggle between panning up and down, panning left and
right, or zooming, select GPS.
To pan or zoom the map, select UP and DOWN.
To quit, select BACK.
History
History includes time, distance, calories, average pace or speed,
lap data, and optional sensor information.
NOTE: When the device memory is full, your oldest data is
overwritten.
Using History
History contains previous activities you have saved on your
device.
1
Hold MENU.
2
Select History > Activities.
3
Select an activity.
4
Select an option:
To view additional information about the activity, select
Details.
To select a lap and view additional information about each
lap, select Laps.
To select an interval and view additional information about
each interval, select Intervals.
To select an exercise set and view additional information
about each set, select Sets.
To view the activity on a map, select Map.
To view your time in each heart rate zone, select Time in
Zone (Viewing Your Time in Each Heart Rate Zone,
page 9).
To view an elevation plot of the activity, select Elevation
Plot.
To delete the selected activity, select Delete.
Viewing Your Time in Each Heart Rate Zone
Before you can view heart rate zone data, you must complete an
activity with heart rate and save the activity.
Viewing your time in each heart rate zone can help you adjust
your training intensity.
1
Hold MENU.
2
Select History > Activities.
3
Select an activity.
4
Select Time in Zone.
Viewing Data Totals
You can view the accumulated distance and time data saved to
your device.
1
Hold MENU.
2
Select History > Totals.
3
If necessary, select an activity.
4
Select an option to view weekly or monthly totals.
Using the Odometer
The odometer automatically records the total distance traveled,
elevation gained, and time in activities.
1
Hold MENU.
2
Select History > Totals > Odometer.
3
Select UP or DOWN to view odometer totals.
History 9
Syncing Activities
You can sync activities from other Garmin devices to your
Instinct device using your Garmin Connect account. For
example, you can record a ride with an Edge device, and view
your activity details on your Instinct device.
1
Hold MENU.
2
Select History > Options > TrueUp > On.
When you sync your device with your smartphone, recent
activities from your other Garmin devices appear on your Instinct
device.
Deleting History
1
Hold MENU.
2
Select History > Options.
3
Select an option:
Select Delete All Activities to delete all activities from the
history.
Select Reset Totals to reset all distance and time totals.
NOTE: This does not delete any saved activities.
4
Confirm your selection.
Connected Features
Connected features are available for your Instinct device when
you connect the device to a compatible smartphone using
Bluetooth wireless technology. Some features require you to
install the Garmin Connect Mobile app on the connected
smartphone. Go to www.garmin.com/apps for more information.
Phone notifications: Displays phone notifications and
messages on your Instinct device.
LiveTrack: Allows friends and family to follow your races and
training activities in real time. You can invite followers using
email or social media, allowing them to view your live data on
a Garmin Connect tracking page.
Activity uploads to Garmin Connect: Automatically sends
your activity to your Garmin Connect account as soon as you
finish recording the activity.
Bluetooth sensors: Allows you to connect Bluetooth
compatible sensors, such as a heart rate monitor.
Find my phone: Locates your lost smartphone that is paired
with your Instinct device and currently within range.
Find my device: Locates your lost Instinct device that is paired
with your smarphone and currently within range.
Enabling Bluetooth Notifications
Before you can enable notifications, you must pair the Instinct
device with a compatible mobile device (Pairing Your
Smartphone with Your Device, page 1).
1
Hold MENU.
2
Select Settings > Phone > Smart Notifications > Status >
On.
3
Select During Activity.
4
Select a notification preference.
5
Select a sound preference.
6
Select Not During Activity.
7
Select a notification preference.
8
Select a sound preference.
9
Select Timeout.
10
Select the amount of time the alert for a new notification
appears on the screen.
Viewing Notifications
1
From the watch face, select UP to view the notifications
widget.
2
Select GPS, and select a notification.
3
Select DOWN for more options.
4
Select BACK to return to the previous screen.
Managing Notifications
You can use your compatible smartphone to manage
notifications that appear on your Instinct device.
Select an option:
If you are using an Apple
®
smartphone, use the
notifications settings on your smartphone to select the
items to show on the device.
If you are using a smartphone with Android
, from the
Garmin Connect Mobile app, select Settings > Smart
Notifications.
Turning Off Bluetooth Technology
1
Hold MENU.
2
Select Settings > Phone > Status > Off to turn off Bluetooth
wireless technology on your Instinct device.
Refer to the owner's manual for your mobile device to turn off
Bluetooth wireless technology on your mobile device.
Turning On and Off Smartphone Connection Alerts
You can set the Instinct device to alert you when your paired
smartphone connects and disconnects using Bluetooth wireless
technology.
NOTE: Smartphone connection alerts are turned off by default.
1
Hold MENU.
2
Select Settings > Phone > Alerts.
Locating a Lost Mobile Device
You can use this feature to help locate a lost mobile device that
is paired using Bluetooth wireless technology and currently
within range.
1
Hold CTRL to view the controls menu.
2
Select .
The Instinct device begins searching for your paired mobile
device. An audible alert sounds on your mobile device, and
the Bluetooth signal strength displays on the Instinct device
screen. The Bluetooth signal strength increases as you move
closer to your mobile device.
3
Select BACK to stop searching.
Garmin Connect
You can connect with your friends on your Garmin Connect
account. Garmin Connect gives you the tools to track, analyze,
share, and encourage each other. Record the events of your
active lifestyle including runs, walks, rides, swims, hikes, and
more.
You can create your free Garmin Connect account when you
pair your device with your phone using the Garmin Connect
Mobile app, or you can go to connect.garmin.com.
Track your progress: You can track your daily steps, join a
friendly competition with your connections, and meet your
goals.
Store your activities: After you complete and save a timed
activity with your device, you can upload that activity to your
Garmin Connect account and keep it as long as you want.
Analyze your data: You can view more detailed information
about your activity, including time, distance, heart rate,
calories burned, and customizable reports.
10 Connected Features
Share your activities: You can connect with friends to follow
each other's activities or post links to your activities on your
favorite social networking sites.
Manage your settings: You can customize your device and
user settings on your Garmin Connect account.
Updating the Software Using Garmin Connect Mobile
Before you can update your device software using the Garmin
Connect Mobile app, you must have a Garmin Connect account,
and you must pair the device with a compatible smartphone
(Pairing Your Smartphone with Your Device, page 1).
1
Synchronize your device with the Garmin Connect Mobile
app (Manually Syncing Data with Garmin Connect Mobile,
page 11).
When new software is available, the Garmin Connect Mobile
app automatically sends the update to your device.
2
Follow the on-screen instructions.
Updating the Software Using Garmin Express
Before you can update your device software, you must have a
Garmin Connect account, and you must download and install
the Garmin Express application.
1
Connect the device to your computer using the USB cable.
When new software is available, Garmin Express sends it to
your device.
2
Disconnect the device from your computer.
Your device alerts you to update the software.
3
Select an option.
Using Garmin Connect on Your Computer
The Garmin Express application connects your device to your
Garmin Connect account using a computer. You can use the
Garmin Express application to upload your activity data to your
Garmin Connect account and to send data, such as workouts or
training plans, from the Garmin Connect website to your device.
1
Connect the device to your computer using the USB cable.
2
Go to www.garmin.com/express.
3
Download and install the Garmin Express application.
4
Open the Garmin Express application, and select Add
Device.
5
Follow the on-screen instructions.
Manually Syncing Data with Garmin Connect Mobile
1
Hold CTRL to view the controls menu.
2
Select .
Garmin Explore
The Garmin Explore website and mobile app allow you to plan
trips and use cloud storage for your waypoints, routes, and
tracks. They offer advanced planning both online and offline,
allowing you to share and sync data with your compatible
Garmin device. You can use the mobile app to download maps
for offline access, and then navigate anywhere without using
your cellular service.
You can download the Garmin Explore app from the app store
on your smartphone, or you can go to explore.garmin.com.
Customizing Your Device
Widgets
Your device comes preloaded with widgets that provide at-a-
glance information. Some widgets require a Bluetooth
connection to a compatible smartphone.
Some widgets are not visible by default. You can add them to
the widget loop manually.
ABC: Displays combined altimeter, barometer, and compass
information.
Alternate time zones: Displays the current time of day in
additional time zones.
Calendar: Displays upcoming meetings from your smartphone
calendar.
Calories: Displays your calorie information for the current day.
Compass: Displays an electronic compass.
Dog tracking: Displays your dog's location information when
you have a compatible dog tracking device paired with your
Instinct device.
Floors climbed: Tracks your floors climbed and progress
toward your goal.
Heart rate: Displays your current heart rate in beats per minute
(bpm) and a graph of your heart rate.
Intensity minutes: Tracks your time spent participating in
moderate to vigorous activities, your weekly intensity minutes
goal, and progress toward your goal.
inReach
®
controls: Allows you to send messages on your
paired inReach device.
Last activity: Displays a brief summary of your last recorded
activity, such as your last run, last ride, or last swim.
Last sport: Displays a brief summary of your last recorded
sport.
Music controls: Provides music player controls for your
smartphone.
My day: Displays a dynamic summary of your activity today. The
metrics include timed activities, intensity minutes, floors
climbed, steps, calories burned, and more.
Notifications: Alerts you to incoming calls, texts, social network
updates, and more, based on your smartphone notification
settings.
Sensor information: Displays information from an internal
sensor or a connected ANT+ sensor.
Steps: Tracks your daily step count, step goal, and data for
previous days.
Stress: Displays your current stress level and a graph of your
stress level. You can do a breathing activity to help you relax.
Sunrise and sunset: Displays sunrise, sunset, and civil twilight
times.
VIRB controls: Provides camera controls when you have a
VIRB device paired with your Instinct device.
Weather: Displays the current temperature and weather
forecast.
Xero
bow sight: Displays laser location information when you
have a Xero bow sight paired with your Instinct device.
Customizing the Widget Loop
You can change the order of widgets in the widget loop, remove
widgets, and add new widgets.
Customizing Your Device 11
1
Hold MENU.
2
Select Settings > Widgets.
3
Select a widget.
4
Select an option:
Select Reorder to change the location of the widget in the
widget loop.
Select Remove to remove the widget from the widget
loop.
5
Select Add Widgets.
6
Select a widget.
The widget is added to the widget loop.
inReach Remote
The inReach remote function allows you to control your inReach
device using your Instinct device. Go to buy.garmin.com to
purchase an inReach device.
Using the inReach Remote
Before you can use the inReach remote function, you must set
the inReach widget to be shown in the widget loop (Customizing
the Widget Loop, page 11).
1
Turn on the inReach device.
2
On your Instinct device, select UP or DOWN from the watch
face to view the inReach widget.
3
Select GPS to search for your inReach device.
4
Select GPS to pair your inReach device.
5
Select GPS, and select an option:
To send an SOS message, select Initiate SOS.
NOTE: You should only use the SOS function in a real
emergency situation.
To send a text message, select Messages > New
Message, select the message contacts, and enter the
message text or select a quick text option.
To send a preset message, select Send Preset, and
select a message from the list.
To view the timer and distance traveled during an activity,
select Tracking.
VIRB Remote
The VIRB remote function allows you to control your VIRB
action camera using your device. Go to www.garmin.com/VIRB
to purchase a VIRB action camera.
Controlling a VIRB Action Camera
Before you can use the VIRB remote function, you must enable
the remote setting on your VIRB camera. See the VIRB Series
Owner's Manual for more information. You must also set the
VIRB widget to be shown in the widget loop (Customizing the
Widget Loop, page 11).
1
Turn on your VIRB camera.
2
On your Instinct device, select UP or DOWN from the watch
face to view the VIRB widget.
3
Wait while the device connects to your VIRB camera.
4
Select GPS.
5
Select an option:
To record video, select Start Recording.
The video counter appears on the Instinct screen.
To take a photo while recording video, select DOWN.
To stop recording video, select GPS.
To take a photo, select Take Photo.
To change video and photo settings, select Settings.
Controlling a VIRB Action Camera During an Activity
Before you can use the VIRB remote function, you must enable
the remote setting on your VIRB camera. See the VIRB Series
Owner's Manual for more information. You must also set the
VIRB widget to be shown in the widget loop (Customizing the
Widget Loop, page 11).
1
Turn on your VIRB camera.
2
On your Instinct device, select UP or DOWN from the watch
face to view the VIRB widget.
3
Wait while the device connects to your VIRB camera.
When the camera is connected, a VIRB data screen is
automatically added to the activity apps.
4
During an activity, select UP or DOWN to view the VIRB data
screen.
5
Hold MENU.
6
Select VIRB Remote.
7
Select an option:
To control the camera using the activity timer, select
Settings > Timer Start/Stop.
NOTE: Video recording automatically starts and stops
when you start and stop an activity.
To control the camera using the menu options, select
Settings > Manual.
To manually record video, select Start Recording.
The video counter appears on the Instinct screen.
To take a photo while recording video, select DOWN.
To manually stop recording video, select GPS.
To take a photo, select Take Photo.
Activities and App Settings
These settings allow you to customize each preloaded activity
app based on your needs. For example, you can customize data
pages and enable alerts and training features. Not all settings
are available for all activity types.
Hold MENU, select Settings > Activities & Apps, select an
activity, and select the activity settings.
3D Distance: Calculates your distance traveled using your
elevation change and your horizontal movement over ground.
3D Speed: Calculates your speed using your elevation change
and your horizontal movement over ground (3D Speed and
Distance, page 14).
Alerts: Sets the training or navigation alerts for the activity.
Auto Climb: Enables the device to detect elevation changes
automatically using the built-in altimeter.
Auto Lap: Sets the options for the Auto Lap
®
feature (Auto Lap,
page 13).
Auto Pause: Sets the device to stop recording data when you
stop moving or when you drop below a specified speed
(Enabling Auto Pause
®
, page 14).
Auto Run: Enables the device to detect ski runs automatically
using the built-in accelerometer.
Auto Scroll: Enables you to move through all of the activity data
screens automatically while the timer is running (Using Auto
Scroll, page 14).
Background Color: Sets the background color of each activity
to black or white.
Countdown Start: Enables a countdown timer for pool
swimming intervals.
Data Screens: Enables you to customize data screens and add
new data screens for the activity (Customizing the Data
Screens, page 13).
GPS: Sets the mode for the GPS antenna. Using the GPS +
GLONASS or GPS + GALILEO options provides increased
12 Customizing Your Device
performance in challenging environments and faster position
acquisition. Using the GPS and another satellite together can
reduce battery life more than using the GPS option only.
Using the UltraTrac option records track points and sensor
data less frequently (UltraTrac, page 14).
Lap Key: Enables you to record a lap, set, or a rest during the
activity (Turning On and Off the Lap Key, page 14).
Metronome: Plays tones at a steady rhythm to help you
improve your performance by training at a faster, slower, or
more consistent cadence (Using the Metronome, page 3).
Pool Size: Sets the pool length for pool swimming.
Power Save Timeout: Sets the power-save timeout options for
the activity (Power Save Timeout Settings, page 14).
Rename: Sets the activity name.
Restore Defaults: Allows you to reset the activity settings.
Stroke Detect.: Enables stroke detection for pool swimming.
Customizing the Data Screens
You can show, hide, and change the layout and content of data
screens for each activity.
1
Hold MENU.
2
Select Settings > Activities & Apps.
3
Select the activity to customize.
4
Select the activity settings.
5
Select Data Screens.
6
Select a data screen to customize.
7
Select an option:
Select Layout to adjust the number of data fields on the
data screen.
Select a field to change the data that appears in the field.
Select Reorder to change the location of the data screen
in the loop.
Select Remove to remove the data screen from the loop.
8
If necessary, select Add to add a data screen to the loop.
You can add a custom data screen, or select one of the
predefined data screens.
Adding a Map to an Activity
You can add the map to the data screens loop for an activity.
1
Hold MENU.
2
Select Settings > Activities & Apps.
3
Select the activity to customize.
4
Select the activity settings.
5
Select Data Screens > Add > Map.
Alerts
You can set alerts for each activity, which can help you to train
toward specific goals, to increase your awareness of your
environment, and to navigate to your destination. Some alerts
are available only for specific activities. There are three types of
alerts: event alerts, range alerts, and recurring alerts.
Event alert: An event alert notifies you once. The event is a
specific value. For example, you can set the device to alert
you when you reach a specified elevation.
Range alert: A range alert notifies you each time the device is
above or below a specified range of values. For example, you
can set the device to alert you when your heart rate is below
60 beats per minute (bpm) and over 210 bpm.
Recurring alert: A recurring alert notifies you each time the
device records a specified value or interval. For example, you
can set the device to alert you every 30 minutes.
Alert Name Alert Type Description
Cadence Range You can set minimum and maximum
cadence values.
Calories Event,
recurring
You can set the number of calories.
Custom Event,
recurring
You can select an existing message or
create a custom message and select an
alert type.
Distance Recurring You can set a distance interval.
Elevation Range You can set minimum and maximum
elevation values.
Heart Rate Range You can set minimum and maximum heart
rate values or select zone changes. See
About Heart Rate Zones, page 4 and
Heart Rate Zone Calculations, page 5.
Pace Range You can set minimum and maximum pace
values.
Proximity Event You can set a radius from a saved
location.
Run/Walk Recurring You can set timed walking breaks at
regular intervals.
Speed Range You can set minimum and maximum
speed values.
Stroke Rate Range You can set high or low strokes per
minute.
Time Event,
recurring
You can set a time interval.
Setting an Alert
1
Hold MENU.
2
Select Settings > Activities & Apps.
3
Select an activity.
NOTE: This feature is not available for all activities.
4
Select the activity settings.
5
Select Alerts.
6
Select an option:
Select Add New to add a new alert for the activity.
Select the alert name to edit an existing alert.
7
If necessary, select the type of alert.
8
Select a zone, enter the minimum and maximum values, or
enter a custom value for the alert.
9
If necessary, turn on the alert.
For event and recurring alerts, a message appears each time
you reach the alert value. For range alerts, a message appears
each time you exceed or drop below the specified range
(minimum and maximum values).
Auto Lap
Marking Laps by Distance
You can use Auto Lap to mark a lap at a specific distance
automatically. This feature is helpful for comparing your
performance over different parts of an activity (for example,
every 1 mile or 5 kilometers).
1
Hold MENU.
2
Select Settings > Activities & Apps.
3
Select an activity.
NOTE: This feature is not available for all activities.
4
Select the activity settings.
5
Select Auto Lap.
6
Select an option:
Select Auto Lap to turn Auto Lap on or off.
Select Auto Distance to adjust the distance between
laps.
Customizing Your Device 13
Each time you complete a lap, a message appears that displays
the time for that lap. The device also beeps or vibrates if audible
tones are turned on (System Settings, page 16).
If necessary, you can customize the data pages to display
additional lap data (Customizing the Data Screens, page 13).
Customizing the Lap Alert Message
You can customize one or two data fields that appear in the lap
alert message.
1
Hold MENU.
2
Select Settings > Activities & Apps.
3
Select an activity.
NOTE: This feature is not available for all activities.
4
Select the activity settings.
5
Select Auto Lap > Lap Alert.
6
Select a data field to change it.
7
Select Preview (optional).
Enabling Auto Pause
®
You can use the Auto Pause feature to pause the timer
automatically when you stop moving. This feature is helpful if
your activity includes stop lights or other places where you must
stop.
NOTE: History is not recorded while the timer is stopped or
paused.
1
Hold MENU.
2
Select Settings > Activities & Apps.
3
Select an activity.
NOTE: This feature is not available for all activities.
4
Select the activity settings.
5
Select Auto Pause.
6
Select an option:
To pause the timer automatically when you stop moving,
select When Stopped.
To pause the timer automatically when your pace or
speed drops below a specified level, select Custom.
Enabling Auto Climb
You can use the auto climb feature to detect elevation changes
automatically. You can use it during activities such as climbing,
hiking, running, or biking.
1
Hold MENU.
2
Select Settings > Activities & Apps.
3
Select an activity.
NOTE: This feature is not available for all activities.
4
Select the activity settings.
5
Select Auto Climb > Status > On.
6
Select an option:
Select Run Screen to identify which data screen appears
while running.
Select Climb Screen to identify which data screen
appears while climbing.
Select Invert Colors to reverse the display colors when
changing modes.
Select Vertical Speed to set the rate of ascent over time.
Select Mode Switch to set how quickly the device
changes modes.
3D Speed and Distance
You can set 3D speed and distance to calculate your speed or
distance using both your elevation change and your horizontal
movement over ground. You can use it during activities such as
skiing, climbing, navigating, hiking, running, or biking.
Turning On and Off the Lap Key
You can turn on the Lap Key setting to record a lap or a rest
during an activity using SET. You can turn off the Lap Key
setting to avoid recording laps due to accidental key presses
during an activity.
1
Hold MENU.
2
Select Settings > Activities & Apps.
3
Select an activity.
4
Select the activity settings.
5
Select Lap Key.
The lap key status changes to On or Off based on the current
setting.
Using Auto Scroll
You can use the auto scroll feature to cycle through all of the
activity data screens automatically while the timer is running.
1
Hold MENU.
2
Select Settings > Activities & Apps.
3
Select an activity.
NOTE: This feature is not available for all activities.
4
Select the activity settings.
5
Select Auto Scroll.
6
Select a display speed.
UltraTrac
The UltraTrac feature is a GPS setting that records track points
and sensor data less frequently. Enabling the UltraTrac feature
increases battery life but decreases the quality of recorded
activities. You should use the UltraTrac feature for activities that
demand longer battery life and for which frequent sensor data
updates are less important.
Power Save Timeout Settings
The timeout settings affect how long your device stays in
training mode, for example, when you are waiting for a race to
start. Hold MENU, select Settings > Activities & Apps, select
an activity, and select the activity settings. Select Power Save
Timeout to adjust the timeout settings for the activity.
Normal: Sets the device to enter low-power watch mode after 5
minutes of inactivity.
Extended: Sets the device to enter low-power watch mode after
25 minutes of inactivity. The extended mode can result in
shorter battery life between charges.
Customizing Your Activity List
1
Hold MENU.
2
Select Settings > Activities & Apps.
3
Select an option:
Select an activity to customize the settings, set the activity
as a favorite, change the order of appearance, and more.
Select Add to add more activities or create custom
activities.
Removing an Activity or App
1
Hold MENU.
2
Select Settings > Activities & Apps.
3
Select an activity.
4
Select an option:
To remove an activity from your list of favorites, select
Remove from Favorites.
To delete the activity from the apps list, select Remove.
14 Customizing Your Device
Customizing the Controls Menu
You can add, remove, and change the order of the shortcut
menu options in the controls menu (Viewing the Controls Menu,
page 1).
1
Hold MENU.
2
Select Settings > Controls.
3
Select a shortcut to customize.
4
Select an option:
Select Reorder to change the location of the shortcut in
the controls menu.
Select Remove to remove the shortcut from the controls
menu.
5
If necessary, select Add New to add an additional shortcut to
the controls menu.
Customizing the Watch Face
You can customize the watch face information and appearance.
1
From the watch face, hold MENU.
2
Select Watch Face.
3
Select UP or DOWN to preview the watch face options.
4
Select GPS.
5
Select an option:
To activate the watch face, select Apply.
To customize the data that appears on the watch face,
select Customize, select UP or DOWN to preview the
options, and select GPS.
Sensors Settings
Compass Settings
Hold MENU, and select Settings > Sensors & Accessories >
Compass.
Calibrate: Allows you to manually calibrate the compass sensor
(Calibrating the Compass Manually, page 15).
Display: Sets the directional heading on the compass to letters,
degrees, or milli-radians.
North Ref.: Sets the north reference of the compass (Setting the
North Reference, page 15).
Mode: Sets the compass to use electronic-sensor data only
(On), a combination of GPS and electronic-sensor data when
moving (Auto), or GPS data only (Off).
Calibrating the Compass Manually
NOTICE
Calibrate the electronic compass outdoors. To improve heading
accuracy, do not stand near objects that influence magnetic
fields, such as vehicles, buildings, and overhead power lines.
Your device was already calibrated at the factory, and the
device uses automatic calibration by default. If you experience
irregular compass behavior, for example, after moving long
distances or after extreme temperature changes, you can
manually calibrate the compass.
1
Hold MENU.
2
Select Settings > Sensors & Accessories > Compass >
Calibrate > Start.
3
Follow the on-screen instructions.
TIP: Move your wrist in a small figure eight motion until a
message appears.
Setting the North Reference
You can set the directional reference used in calculating
heading information.
1
Hold MENU.
2
Select Settings > Sensors & Accessories > Compass >
North Ref..
3
Select an option:
To set geographic north as the heading reference, select
True.
To set the magnetic declination for your location
automatically, select Magnetic.
To set grid north (000º) as the heading reference, select
Grid.
To set the magnetic variation value manually, select User,
enter the magnetic variance, and select Done.
Altimeter Settings
Hold MENU, and select Settings > Sensors & Accessories >
Altimeter.
Calibrate: Allows you to manually calibrate the altimeter sensor.
Auto Cal.: Allows the altimeter to self-calibrate each time you
turn on GPS tracking.
Elevation: Sets the units of measure for elevation.
Calibrating the Barometric Altimeter
Your device was already calibrated at the factory, and the
device uses automatic calibration at your GPS starting point by
default. You can manually calibrate the barometric altimeter if
you know the correct elevation.
1
Hold MENU.
2
Select Settings > Sensors & Accessories > Altimeter.
3
Select an option:
To calibrate automatically from your GPS starting point,
select Auto Cal. > On.
To enter the current elevation, select Calibrate.
Barometer Settings
Hold MENU, and select Settings > Sensors & Accessories >
Barometer.
Calibrate: Allows you to manually calibrate the barometer
sensor.
Plot: Sets the time scale for the chart in the barometer widget.
Storm Alert: Sets the rate of barometric pressure change that
triggers a storm alert.
Watch Mode: Sets the sensor used in watch mode. The Auto
option uses both the altimeter and barometer according to
your movement. You can use the Altimeter option when your
activity involves changes in altitude, or the Barometer option
when your activity does not involve changes in altitude.
Pressure: Sets how the device displays pressure data.
Calibrating the Barometer
Your device was already calibrated at the factory, and the
device uses automatic calibration at your GPS starting point by
default. You can manually calibrate the barometer if you know
the correct elevation or the correct sea level pressure.
1
Hold MENU.
2
Select Settings > Sensors & Accessories > Barometer >
Calibrate.
3
Select an option:
To enter the current elevation or sea level pressure, select
Yes.
To calibrate automatically from your GPS starting point,
select Use GPS.
Map Settings
You can customize how the map appears in the map app and
data screens.
Hold MENU, and select Settings > Map.
Customizing Your Device 15
Orientation: Sets the orientation of the map. The North Up
option shows north at the top of the screen. The Track Up
option shows your current direction of travel at the top of the
screen.
User Locations: Shows or hides saved locations on the map.
Auto Zoom: Automatically selects the zoom level for optimal
use of your map. When disabled, you must zoom in or out
manually.
Navigation Settings
You can customize the map features and appearance when
navigating to a destination.
Customizing Map Features
1
Hold MENU.
2
Select Settings > Navigation > Data Screens.
3
Select an option:
Select Map to turn on or off the map.
Select Elevation Plot to turn on or off the elevation plot.
Select a screen to add, remove, or customize.
Heading Settings
You can set the behavior of the pointer that appears when
navigating.
Hold MENU, and select Settings > Navigation > Type.
Bearing: Points in the direction of your destination.
Course: Shows your relationship to the course line leading to
the destination.
Setting Navigation Alerts
You can set alerts to help you navigate to your destination.
1
Hold MENU.
2
Select Settings > Navigation > Alerts.
3
Select an option:
To set an alert for a specified distance from your final
destination, select Final Distance.
To set an alert for the estimated time remaining until you
reach your final destination, select Final ETE.
To set an alert when you stray from the course, select Off
Course.
4
If necessary, select Status to turn on the alert.
5
If necessary, enter a distance or time value, and select .
System Settings
Hold MENU, and select Settings > System.
Language: Sets the language displayed on the device.
Time: Adjusts the time settings (Time Settings, page 16).
Backlight: Adjusts the backlight settings (Changing the
Backlight Settings, page 16).
Sounds: Sets the device sounds, such as key tones, alerts, and
vibrations.
Do Not Disturb: Turns on or off do not disturb mode. Use the
Sleep Time option to turn on do not disturb mode
automatically during your normal sleep hours. You can set
your normal sleep hours on your Garmin Connect account.
Hot Keys: Allows you to assign shortcuts to device keys
(Customizing the Hot Keys, page 16).
Auto Lock: Allows you to lock the keys automatically to prevent
accidental key presses. Use the During Activity option to lock
the keys during a timed activity. Use the Not During Activity
option to lock the keys when you are not recording a timed
activity.
Units: Sets the units of measure used on the device (Changing
the Units of Measure, page 16).
Format: Sets general format preferences, such as the pace and
speed shown during activities, the start of the week, and
geographical position format and datum options.
Data Recording: Sets how the device records activity data. The
Smart recording option (default) allows for longer activity
recordings. The Every Second recording option provides
more detailed activity recordings, but may not record entire
activities that last for longer periods of time.
USB Mode: Sets the device to use mass storage mode or
Garmin mode when connected to a computer.
Reset: Allows you to reset user data and settings (Resetting All
Default Settings, page 19).
Software Update: Allows you to install software updates
downloaded using Garmin Express.
Time Settings
Hold MENU, and select Settings > System > Time.
Time Format: Sets the device to show time in a 12-hour or 24-
hour format.
Set Time: Sets the time zone for the device. The Auto option
sets the time zone automatically based on your GPS position.
Time: Allows you to adjust the time if it is set to the Manual
option.
Alerts: Allows you to set sunrise and sunset alerts to sound a
specific number of minutes or hours before the actual sunrise
or sunset occurs.
Sync With GPS: Allows you to manually sync the time with GPS
when you change time zones, and to update for daylight
saving time.
Changing the Backlight Settings
1
Hold MENU.
2
Select Settings > System > Backlight.
3
Select During Activity or Not During Activity.
4
Select an option:
Select Keys to turn on the backlight for key presses.
Select Alerts to turn on the backlight for alerts.
Select Gesture to turn on the backlight by raising and
turning your arm to look at your wrist.
Select Timeout to set the length of time before the
backlight turns off.
Select Brightness to set the brightness level of the
backlight.
Customizing the Hot Keys
You can customize the hold function of individual keys and
combinations of keys.
1
Hold MENU.
2
Select Settings > System > Hot Keys.
3
Select a key or combination of keys to customize.
4
Select a function.
Changing the Units of Measure
You can customize units of measure for distance, pace and
speed, elevation, weight, height, and temperature.
1
Hold MENU.
2
Select Settings > System > Units.
3
Select a measurement type.
4
Select a unit of measure.
Viewing Device Information
You can view device information, such as the unit ID, software
version, regulatory information, and license agreement.
1
Hold MENU.
16 Customizing Your Device
2
Select Settings > About.
Viewing E-label Regulatory and Compliance
Information
The label for this device is provided electronically. The e-label
may provide regulatory information, such as identification
numbers provided by the FCC or regional compliance markings,
as well as applicable product and licensing information.
1
Hold MENU.
2
From the settings menu, select About.
Wireless Sensors
Your device can be used with wireless ANT+ or Bluetooth
sensors. For more information about compatibility and
purchasing optional sensors, go to buy.garmin.com.
Pairing Your Wireless Sensors
The first time you connect a wireless sensor to your device
using ANT+ or Bluetooth technology, you must pair the device
and sensor. After they are paired, the device connects to the
sensor automatically when you start an activity and the sensor is
active and within range.
1
If you are pairing a heart rate monitor, put on the heart rate
monitor.
The heart rate monitor does not send or receive data until
you put it on.
2
Bring the device within 3 m (10 ft.) of the sensor.
NOTE: Stay 10 m (33 ft.) away from other wireless sensors
while pairing.
3
Hold MENU.
4
Select Settings > Sensors & Accessories > Add New.
5
Select an option:
Select Search All.
Select your sensor type.
After the sensor is paired with your device, the sensor status
changes from Searching to Connected. Sensor data appears
in the data screen loop or a custom data field.
Using an Optional Bike Speed or Cadence
Sensor
You can use a compatible bike speed or cadence sensor to
send data to your device.
Pair the sensor with your device (Pairing Your Wireless
Sensors, page 17).
Set your wheel size (Wheel Size and Circumference,
page 22).
Go for a ride (Starting an Activity, page 2).
Foot Pod
Your device is compatible with the foot pod. You can use the
foot pod to record pace and distance instead of using GPS when
you are training indoors or when your GPS signal is weak. The
foot pod is on standby and ready to send data (like the heart
rate monitor).
After 30 minutes of inactivity, the foot pod powers off to
conserve the battery. When the battery is low, a message
appears on your device. Approximately five hours of battery life
remain.
Improving Foot Pod Calibration
Before you can calibrate your device, you must acquire GPS
signals and pair your device with the foot pod (Pairing Your
Wireless Sensors, page 17).
The foot pod is self-calibrating, but you can improve the
accuracy of the speed and distance data with a few outdoor runs
using GPS.
1
Stand outside for 5 minutes with a clear view of the sky.
2
Start a running activity.
3
Run on a track without stopping for 10 minutes.
4
Stop your activity, and save it.
Based on the recorded data, the foot pod calibration value
changes, if necessary. You should not need to calibrate the
foot pod again unless your running style changes.
Calibrating Your Foot Pod Manually
Before you can calibrate your device, you must pair your device
with the foot pod sensor (Pairing Your Wireless Sensors,
page 17).
Manual calibration is recommended if you know your calibration
factor. If you have calibrated a foot pod with another Garmin
product, you may know your calibration factor.
1
Hold MENU.
2
Select Settings > Sensors & Accessories.
3
Select your foot pod.
4
Select Cal. Factor > Set Value.
5
Adjust the calibration factor:
Increase the calibration factor if your distance is too low.
Decrease the calibration factor if your distance is too high.
Setting Foot Pod Speed and Distance
Before you can customize the foot pod speed and distance, you
must pair your device with the foot pod sensor (Pairing Your
Wireless Sensors, page 17).
You can set your device to calculate speed and distance using
your foot pod data instead of GPS data.
1
Hold MENU.
2
Select Settings > Sensors & Accessories.
3
Select your foot pod.
4
Select Speed or Distance.
5
Select an option:
Select Indoor when you are training with GPS turned off,
usually indoors.
Select Always to use your foot pod data regardless of the
GPS setting.
tempe
The tempe is an ANT+ wireless temperature sensor. You can
attach the sensor to a secure strap or loop where it is exposed
to ambient air, and therefore, provides a consistent source of
accurate temperature data. You must pair the tempe with your
device to display temperature data from the tempe.
Device Information
Specifications
Battery type Rechargeable, built-in lithium-ion battery
Water rating 10 ATM*
Operating and storage
temperature range
From -20º to 60ºC (from -4º to 140ºF)
Charging temperature range From 0º to 45ºC (from 32º to 113ºF)
Wireless frequencies/
protocols
2.4 GHz @ 2.4 dBm nominal
*The device withstands pressure equivalent to a depth of 100 m.
For more information, go to www.garmin.com/waterrating.
Wireless Sensors 17
Battery Life Information
The actual battery life depends on the features enabled on your
device, such as activity tracking, wrist-based heart rate,
smartphone notifications, GPS, internal sensors, and connected
sensors (Maximizing the Battery Life, page 20).
Battery Life Mode
Up to 14 days Smartwatch mode with activity tracking and 24/7 wrist-
based heart rate monitoring
Up to 16 hours GPS mode with wrist-based heart rate
Up to 40 hours UltraTrac GPS mode
Data Management
NOTE: The device is not compatible with Windows
®
95, 98, Me,
Windows NT
®
, and Mac
®
OS 10.3 and earlier.
Disconnecting the USB Cable
If your device is connected to your computer as a removable
drive or volume, you must safely disconnect your device from
your computer to avoid data loss. If your device is connected to
your Windows computer as a portable device, it is not necessary
to safely disconnect the device.
1
Complete an action:
For Windows computers, select the Safely Remove
Hardware icon in the system tray, and select your device.
For Apple computers, select the device, and select File >
Eject.
2
Disconnect the cable from your computer.
Deleting Files
NOTICE
If you do not know the purpose of a file, do not delete it. Your
device memory contains important system files that should not
be deleted.
1
Open the Garmin drive or volume.
2
If necessary, open a folder or volume.
3
Select a file.
4
Press the Delete key on your keyboard.
NOTE: If you are using an Apple computer, you must empty
the Trash folder to completely remove the files.
Device Maintenance
Device Care
NOTICE
Do not use a sharp object to clean the device.
Avoid chemical cleaners, solvents, and insect repellents that can
damage plastic components and finishes.
Thoroughly rinse the device with fresh water after exposure to
chlorine, salt water, sunscreen, cosmetics, alcohol, or other
harsh chemicals. Prolonged exposure to these substances can
damage the case.
Avoid pressing the keys under water.
Avoid extreme shock and harsh treatment, because it can
degrade the life of the product.
Do not store the device where prolonged exposure to extreme
temperatures can occur, because it can cause permanent
damage.
Cleaning the Device
NOTICE
Even small amounts of sweat or moisture can cause corrosion
of the electrical contacts when connected to a charger.
Corrosion can prevent charging and data transfer.
1
Wipe the device using a cloth dampened with a mild
detergent solution.
2
Wipe it dry.
After cleaning, allow the device to dry completely.
TIP: For more information, go to www.garmin.com/fitandcare.
Changing the Bands
You can replace the bands with new Instinct bands or
compatible QuickFit
22 bands.
1
Use a paper clip to push in the watch pin.
2
Remove the band from the watch.
3
Select an option:
To install Instinct bands, align one side of the new band
with the holes on the device, push in the exposed watch
pin, and press the band into place.
NOTE: Make sure the band is secure. The watch pin
should align with the holes on the device.
18 Device Maintenance
  • Page 1 1
  • Page 2 2
  • Page 3 3
  • Page 4 4
  • Page 5 5
  • Page 6 6
  • Page 7 7
  • Page 8 8
  • Page 9 9
  • Page 10 10
  • Page 11 11
  • Page 12 12
  • Page 13 13
  • Page 14 14
  • Page 15 15
  • Page 16 16
  • Page 17 17
  • Page 18 18
  • Page 19 19
  • Page 20 20
  • Page 21 21
  • Page 22 22
  • Page 23 23
  • Page 24 24
  • Page 25 25
  • Page 26 26

Garmin Instinct User manual

Category
Activity trackers
Type
User manual

Ask a question and I''ll find the answer in the document

Finding information in a document is now easier with AI