11
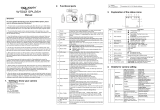
2. Use the LCD screen to view your subject.
3. Use the “Zoom In and Zoom Out” buttons to zoom in
and out on your subject. The value of magnification
level appears on the screen.
4. Press the Shutter button to start recording. While
recording the top right of the screen will display how
long it has been recording for. You can pause the
recording by pressing the Right button and press it
again to resume recording.
5. Press the Shutter button again to stop recording or
recording stops when the current micro SD card is full.
PLAYBACK MODE
VIEWING SAVED FILES
Playback mode allows you to view all your saved files. To
access the playback menu: