Page is loading ...

pH500 & mV600 Series
Panel-mounted,
Microprocessor-based
pH and ORP Controllers
Instruction Manual

2
All rights are reserved. Reproduction in whole or in part is prohibited without the
written consent of the copyright owner, Hanna Instruments Inc., Woonsocket, Rhode
Island, 02895, USA.
Dear Customer,
Thank you for choosing a Hanna Instruments Product.
This instruction manual refers to the following products:
pH500111-α pH controller with single setpoint, ON/OFF
control, analog output
pH500112-α pH controller with single setpoint, ON/OFF
control, RS232 output
pH500121-α pH controller with single setpoint, propor-
tional and ON/OFF controls, analog output
pH500122-α pH controller with single setpoint, propor-
tional and ON/OFF controls, RS232 output
pH500211-α pH controller with dual setpoint, ON/OFF
control, analog output
pH500212-α pH controller with dual setpoint, ON/OFF
control, RS232 output
pH500221-α pH controller with dual setpoint, proportional
and ON/OFF controls, analog output
pH500222-α pH controller with dual setpoint, proportional
and ON/OFF controls, RS232 output
mV600111-α ORP controller with single setpoint, ON/OFF
control, analog output
mV600112-α ORP controller with single setpoint, ON/OFF
control, RS232 output
mV600121-α ORP controller with single setpoint, propor-
tional and ON/OFF controls, analog output
mV600122-α ORP controller with single setpoint, propor-
tional and ON/OFF controls, RS232 output
α = 1 means 115 Vac, 50/60 Hz power supply
α = 2 means 230 Vac, 50/60 Hz power supply
Please read this instruction manual carefully before using the
controller. For more information about Hanna Instruments
and our products, visit www.hannainst.com or e-mail us
For technical support, contact your local Hanna Instruments
Office or e-mail us at [email protected].

3
TABLE OF CONTENTS
PRELIMINARY EXAMINATION ..................4
GENERAL DESCRIPTION ......................4
FUNCTIONAL DESCRIPTION ..................6
MECHANICAL DIMENSIONS. . . . . . . . . . . . . . . . . . . 7
SPECIFICATIONS pH500 & mV600 ..............8
INSTALLATION .............................9
SETUP MODE. . . . . . . . . . . . . . . . . . . . . . . . . . . . . 11
CONTROL MODE .........................17
IDLE MODE ..............................22
ANALOG OUTPUT .........................23
RS232 COMMUNICATION AND DATA LOGGING ..25
CALIBRATION ............................27
LAST CALIBRATION DATA ....................39
STARTUP ................................42
FAULT CONDITIONS AND SELFTEST PROCEDURES . 43
pH VALUES AT VARIOUS TEMPERATURES .........47
ELECTRODE CONDITIONING AND MAINTENANCE 48
TAKING REDOX MEASUREMENTS ..............52
ACCESSORIES ............................54
WARRANTY ..............................60
CE DECLARATION OF CONFORMITY ...........62

4
PRELIMINARY EXAMINATION
Remove the instrument from the packing material and exam-
ine it carefully to make sure that no damage has occurred
during shipping. If there is any noticeable damage, please
contact your local Hanna Instruments Office.
Note Save all packing materials until you are sure that the instru-
ment functions correctly. Any damaged or defective items
must be returned in their original packing materials together
with the supplied accessories.
GENERAL DESCRIPTION
The product is a real time microprocessor-based pH/ORP
controller. It provides accurate measurements, flexible
ON/OFF or proportional control capabilities and dual
alarm signals.
The system is composed of a case inside which the signal
conversion circuitry, the microprocessor circuitry and the
output power drivers are contained.
MAIN FEATURES OF DIFFERENT MODELS
• Display: large LCD with 4½ 17 mm digits and 3 ½ 10 mm
digits.
• LEDs: three (mV600) or four (pH500) LEDs are provided
for signaling the energizing of relay 1 (a yellow led), relay
2 (a yellow led in pH500 Series only) and alarm relays (a
green and a red LED).
• Relays: 1 or 2 output relays for acid or base dosage
(COM, NO and NC contacts) and 1 output relay for
alarm condition (COM, NO and NC contacts).
• RS232 isolated communication link (optional).
• Calibration and Setup procedures allowed only through
an unlock password.
• Calibration: for pH500 Series in 1, 2 or 3 points with
buffers 4.01, 7.01 and 10.01 pH (25 °C); for mV600
Series in 1 or 2 points at 0, 350 and 1900 mV.
• Temperature compensation of the Hanna Instruments
standard buffers (for pH500 Series only).

5
• Temperature compensation of the pH reading (for pH500
Series only).
• Manual temperature setting when the temperature probe
is not inserted or temperature exceeds the upper range.
• Last calibration data internally recorded (non-volatile EE-
PROM memory): calibration date and time, pH offset, pH
slopes, number of calibration points and correspondent
pH values (for pH500 Series only) or calibration date
and time and the mV calibration points used (for mV600
Series only).
• Input: pH electrode with BNC connector.
• Output:
- isolated 0-1 mA, 10 K maximum load (optional);
- isolated 0-20 mA, 750 maximum load (optional);
- isolated 4-20 mA, 750 maximum load (optional);
- isolated 0-5 Vdc, 1 K minimum load (optional);
- isolated 1-5 Vdc, 1 K minimum load (optional);
- isolated 0-10 Vdc, 1 K minimum load (optional).
• Real time clock.

6
FUNCTIONAL DESCRIPTION
FRONT PANEL
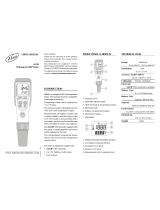
1. Liquid Crystal Display
2. LCD key exits from setup and calibration modes and reverts back
to normal mode (in idle or control phases with the mea-
surement on the display). In pH500 series, during pH
calibration, alternately displays pH buffer value or current
temperature
3. SETUP key enters setup mode
4. CAL DATA key last calibration data viewing (enters and exits)
5. CAL key initiates and exits calibration mode
6. key increases the blinking digit/letter by one when selecting a
parameter. Advances forward while in last calibration data
viewing mode. Increases the temperature setting when
temperature probe is not inserted
7. key decreases the blinking digit/letter by one when selecting a
parameter. Reverts backward while in last calibration data
viewing mode. Decreases the temperature setting when
temperature probe is not inserted
8. key moves to the next digit/letter (circular buffer) when selecting
a parameter. Same as key during last calibration data
viewing mode
9. CFM key confirms current choice (and skips to the next item)
10. LEDs

7
MECHANICAL DIMENSIONS
FRONT VIEW SIDE VIEW
REAR PANEL
1. RS232 Connection Port (pH500XY2 and mV600XY2 models only)
2. Analog Output (pH500XY1 and mV600XY1 models only)
3. Power Supply Input
4. Alarm Terminal
5. Relay 2 - Second Dosing Terminal (pH5002XY models only)
6. Relay 1 - First Dosing Terminal
7. Connections for Pt 100 Temperature Sensor
8. Connection for Electrode Reference
9. Connection for Potential Matching Pin
10. BNC Socket for pH or ORP Electrode
11. ±5V Power Supply Output
Unplug the meter before starting any electrical connections.

8
SPECIFICATIONS pH500 & mV600
Range
0.00 -14.00 pH (pH500 series only)
±2000 mV (mV600 series only)
-9.9 to 120.0 °C
Resolution
0.01 pH (pH500 series)/ ±1 mV (mV600 series)
0.1 °C
Accuracy
(@20 °C/68 °F)
±0.02 pH (pH500 series)/ ±2 mV (mV600 series)
±0.5 °C
Typical EMC
Deviation
±0.2 pH (pH500 series)/ ±10 mV (mV600 series)
±0.5 °C
Calibration
pH: automatic, 1. 2 or 3 point, at pH4.01, 7.01, 10.01
ORP: automatic, 2 point, at 0 and 350 or 1900 mV
Temperature
Compensation
(pH500 series only)
automatic (with Pt100 probe) or manual, -9.9 to 120 °C
Outputs
digital:RS232 bi-directional, optoisolated; or analog,
galvanically isolated: 0-1 mA, 0-20 mA and 4-20 mA, 0-5
VdC and 0-10 Vdc
Setpoint Relay
1 or 2 contact outputs SPDT, 5A-250 Vac, 5A-30 Vdc (re-
sistive load). Fuse protected: 5A, 250V FUSE
Alarm Relay
1 conatct output SPDT, 5A-250 Vac, 5A-30 Vdc (resistive
load). Fuse protected: 5A, 250V FUSE
Installation Category II
Power Supply 230 ± 10% VAC or 115 ± 10% VAC, 50/60 Hz
Power Consumption 15VA
Over Current
Protection
400 mA 250V fast fuse
Max. Oscillation
Frequency
4 MHz
Environment 0 to 50 °C (32 to 122 °F), RH max 95%
Enclosure single case 1/2 DIN
Dimensions
panel cutout: 140 x 140 mm
instrument: 144 x 144 x 170 mm
Weight approximately 1.6 kg. (3.5 lb.)

9
INSTALLATION
pH500 and mV600
offer a multitude of
possibilities, from
single and dual set-
points to ON/OFF or
propotional dosage,
isolated outputs with
user-selectable zoom,
bi-directional RS232,
recorder outputs in
mAmps and Volts.
In addition, pH500
and mV600 are both
equipped with the
exclusive differential
input.
In a system with poor
grounding, it is possi-
ble to have a ground
current flowing through
the reference junction.
This can cause a rap-
id degradation of the
electrode.
The Hanna Instruments
differential input re-
duces the likelihood of
ground loops.
See the diagram for a
recommended instal-
lation.

10
• Power Supply: Connect a 3-wire power
cable to the terminal strip, while paying
attention to the correct line (L), earth (PE)
and neutral (N) terminal connections.
Power: 115VAC - 100 mA / 230VAC - 50 mA
Line Contact: fused inside 400 mA.
PE must be connected to ground; leakage current 1mA.
• Electrode: Connect the pH or ORP electrode to the BNC
socket (#10 at page 7).
To benefit from the differential input, connect the proper
electrode wire (if available) or a cable with a potential
matching pin (grounding bar) to the relevant terminal (#9
at page 7).
Note When it is not possible to immerse the Potential Matching
Pin together with the pH electrode in the solution, disable
the differential input by connecting the Connection for Po-
tential Matching Pin (#9 at page 7) with the Connection for
Electrode Reference (#8 at
page 7) with a jumper wire.
• Pt 100 Terminals: these contacts (#7 at page 7) connect
the Pt 100 temperature sensor for automatic temperature
compensation of pH measurement. In the case of shielded
wire, connect the shield to pin 4.
In the case of a 2-wire sensor
connect the Pt 100 to pins 1 and
3, and short pins 2 and 3 with a
jumper wire.
If the Pt 100 has more than 2
wires, connect the two wires of
one end to pins 2 and 3 (pin 2 is
an auxiliary input to compensate
for the cable resistance) and one
wire from the other end to pin
1. Leave the fourth wire unconnected, if present.
• Power Supply Output: these terminals
provide +5 Vdc and -5 Vdc signals to
supply power to amplified electrodes.
Note All cables connected to rear panel should
end with cable lugs.

11
SETUP MODE
pH500 and mV600 offer a multitude of possibilities from
ON/OFF or proportional dosage to analog recorder output
and from alarm to selftest features.
The Setup Mode allows the user to set all needed charac-
teristics of the meter.
The setup mode is entered by pressing SETUP
and entering the password when the device is
in idle or control mode.
Generally speaking, if the password is not inserted the user
can only view the setup parameters (except for password)
without modifying them (and the device remains in control
mode). An exception is certain setup items, or flags, which
can activate special tasks when set and confirmed.
Each setup parameter (or setup item) is assigned a two-digit
setup code which is entered and displayed on the secondary
LCD.
The setup codes can be selected after password and CFM
are pressed. When CFM is pressed, the current setup item
is saved on EEPROM and the following item is displayed.
Whenever LCD is pressed, the
device reverts back to control
mode. The same is true when
CFM is pressed on the last setup
item.
The possible transitions in setup mode are the following:
ENTERING THE PASSWORD
• Press SETUP to enter the setup mode. The LCD will display
“0000” on the upper part and “PAS” on the lower. The
first digit of the upper part of the LCD will blink.
• Enter the first value of the pass-
word by the or keys.

12
• Then confirm the displayed digit
with and move to the next one.
• When the whole password has been
inserted, press CFM to confirm it.
Note The default password is set at “0000”.
• The LCD will display “SET” on the
upper part and “c.00” on the low-
er, allowing the user to edit setup
parameters (see table below).
• Enter the code of the parameter you want to set, using the
arrow keys as per the password procedure above (e.g.41).
• Confirm the code by pressing CFM and the default or the
previously memorized value will be displayed with the first
digit blinking.
Note When the password is not inserted or a wrong password is
confirmed, the display will only show the previously memo-
rized value, without blinking (read only mode). In this case,
the value cannot be set. Press LCD and start again.
• Enter the desired value using the arrow keys and then
press CFM.

13
• After confirmation, the selected param-
eter is displayed. The user can scroll
through the parameters by pressing
CFM.
In order to directly set another pa-
rameter, press SETUP again and en-
ter the code or scroll to it by pressing
CFM.
The following table lists the setup codes along with the
description of the specific setup items, their valid values
and whether password is required to view that item (“PW”
column):
Code Valid Values Default PW
00 Factory ID 0 to 9999 0000 no
01 Process ID 0 to 9999 0000 no
02 Control
enable/disable
0: C.M. disabled
1: C.M. enabled
0 no
11 Relay 1 mode (M1) 0: disabled
1: ON-OFF high setpoint
2: ON-OFF low setpoint
3: Proportional, high setpoint
4:Proportional, low setpoint
0 no
12 Relay 1 setpoint (S1) 0.00 to 14.00 pH
-2000 to 2000 mV
8.00 pH
500 mV
no
13 Relay 1 hysteresis (H1) 0.00 to 14.00 pH
0 to 4000 mV
1 pH
50 mV
no
14 Relay 1 deviation (D1) 0 to 50 to 14.00 pH
25 to 4000 mV
1 pH
50 mV
no
21* Relay 2 mode (M2) same as relay 1 0 no
22* Relay 2 setpoint (S2) 0.00 to 14.00 pH
-2000 to 2000 mV
6.00 pH
-500 mV
no
23* Relay 2 hysteresis (H2) 0.00 to 14.00 pH
0 to 4000 mV
1 pH
50 mV
no
24* Relay 2 deviation (D2) 0.50 to 14.00 pH
25 to 4000 mV
1 pH
50 mV
no
* Available only in models with two relays

14
Code Valid Values Default PW
30 Relay 3 high alarm (HA)
0.00 to 14.00 pH
-2000 to 2000 mV
HA>LA, HA>S1 or HA>S2
9.00 pH
600 mV
no
31 Relay 3 low alarm (LA)
0.00 to 14.00 pH
-2000 to 2000 mV
LA<HA, LA<S1 or LA<S2
5.00 pH
-600 mV
no
32 Proportional control mode
period
1 to 30 min 5 min no
33 Maximum relay ON time 10 to 9999 min (after which an
alarm mode is entered)
60 no
34 Contact action delay 00:00 to 30:00 (mm:ss) 00:00 no
40 Analog output selection 0: 0-1 mA
1: 0-20 mA
2: 4-20 mA
3: 0-5 VDC
4: 1-5 VDC
5: 0-10 VDC
2 no
41 Analog output lower limit
(O_VARMIN)
0.00 to 13.00 pH
-2000 to 2000 mV
(0_VARMIN<0_VARMAX-(1.00
pH or 50 mV))
0.00 pH
-2000 mV
no
42 Analog output
upper limit (O_VARMAX)
1.00 to 14.00
-2000 to 2000 mV
(0_VARMIN<0_VARMAX-(1.00
pH or 50 mV))
14.00 pH
2000 mV
no
60 Current day 01 to 31 from RTC no
61 Current month 01 to 12 from RTC no
62 Current year 1997 to 9999 from RTC no
63 Current time 00:00 to 23:59 from RTC no
71 Baud rate 1200, 2400, 4800, 9600 4800 no
90 Display selftest 1: on 0: off 0 yes
91 Keyboard selftest 1: on 0: off 0 yes
92 EEPROM selftest 1: on 0: off 0 yes
93 Relays and LEDs selftest 0: off
1: on
0 yes
94 Watchdog selftest 0: off
1: on
0 yes
99 Unlock password 0000 to 9999 0000 yes

15
Note The process controller automatically checks to ensure that
the entered data matches other related variables. If a wrong
configuration is entered, “WRONG” blinks on the LCD to
prompt the user. The correct configurations are the following:
If M1=/ 0 then S1<HA, S1>LA;
If M2=/ 0 then S2<HA, S2>LA;
If M1= 1 then S1-H1>LA;
If M1= 2 then S1+H1<HA;
If M1= 3 then S1+D1<HA;
If M1= 4 then S1-D1>LA;
If M2= 1 then S2-H2>LA;
If M2= 2 then S2+H2<HA;
If M2= 3 then S2+D2<HA;
If M2= 4 then S2-D2>LA;
If M1= 1 and M2 = 2
then S1-H1>S2+H2, S2>LA, HA>S1;
If M1 = 2 and M2 = 1
then S2-H2>S1+H1, S1>LA, HA>S2;
If M1 = 3 and M2 = 2
then S1>S2+H2, S2>LA, HA>S1+D1;
If M1 = 2 and M2 = 3
then S1+H1<S2, S1>LA, HA>S2+D2;
If M1 = 4 and M2 = 1
then S1<S2–H2, S1–D1>LA, HA>S2;
If M1 = 1 and M2 = 4
then S1–H1>S2, S2–D2>LA, HA>S1;
If M1 = 3 and M2 = 4
then S1>S2, S2–D2>LA, HA>S1+D1;
If M1 = 4 and M2 = 3
then S2>S1, S1–D1>LA, HA>S2+D2;
where the minimum deviation (D1 or D2) is 0.5 pH (for
pH500) or 25 mV (for mV600).

16
Note The password cannot be viewed when SETUP is pressed
without entering the original password first. The default
password is set at “0000”. In the event that the user forgets
the password, this can be reset to “0000” by pressing and
holding CFM and then pressing LCD and CAL DATA at the
same time when the pH controller is in normal operating
mode (idle or control with measurement displaying).
Note When a wrong setup value is con-
firmed, the pH controller does not
skip to the next setup item but re-
mains in the current item displaying
a flashing “WRONG” indicator until
the parameter value is changed by
the user (the same is also true for the setup code selection).
In some circumstances, user cannot succeed in setting a
parameter to a desired value if the related parameters are
not changed beforehand; e.g. to set a pH high setpoint to
10.00 the high alarm must be set to a value greater than
pH10.00 first.
Note The setup item 34 is active only in ON/OFF mode and
refers to alarm and dosing relays. When a threshold value
is reached, the corresponding relay will wait for the set time
before starting any action. The default value “00 min 00
sec” means immediate action.
For items 40, 41 and 42, the output is related to pH or mV
units depending on the model (pH process meters or mV
process meters).

17
CONTROL MODE
The control mode is the normal operational mode for these
meters. During control mode pH500 and mV600 fulfill the
following main tasks:
• convert information from pH/ORP and temperature inputs
to digital values;
• control relays and generate the analog outputs as deter-
mined by the setup configuration, display alarm condition;
• RS232 management.
In addition, pH500 and mV600 can log working data
through RS232 connection. This data includes:
• pH, mV and
o
C measured values;
• last calibration data;
• setup configuration (also from PC).
The status of the meter is shown by the LED’s on the right
STATUS LEDs
Control Alarm Alarm LED (green) Relay LED (yellow) Red LED
OFF --- ON OFF ON
ON OFF ON ON or OFF OFF
ON ON OFF ON or OFF Blinking
Meter exits control mode by pressing SETUP or CAL and
confirming the password. Note
that this command generates
a temporary exit. To deactivate
the control mode definitively, set
CONTROL ENABLE to “0” (item
# 02).
RELAY MODES
Once enabled, the relays 1 and 2 can be used in four
different modes:
1) ON/OFF, high setpoint (acid dosage);
2) ON/OFF, low setpoint (base dosage);
3) proportional, low setpoint (base dosage, if available);
4) proportional, high setpoint (acid dosage, if available).

18
An upper boundary is imposed for acid/base dosage time
when relays are energized continuously, i.e. when relay works
in ON/OFF mode or in proportional mode but in the latter
case only if the relay is always ON. This parameter can be
set through setup procedure. When the maximum boundary
is reached, an alarm is generated; device stays in alarm
condition until relay is de-energized.
ON/OFF CONTROL MODE
Either for mode 1 or 2 (base or acid dosage) the user has
to define the following values through setup:
• relay setpoint (pH/mV value);
• relay hysteresis (pH/mV value).
Connect your device to the COM
and NO (Normally Open) or NC
(Normally Closed) terminals.
The ON relay state occurs when relay is energized (NO and
COM connected, NC and COM disconnected).
The OFF relay state occurs when relay is de-energized (NO
and COM disconnected, NC and COM connected).
The following graphs show relay states along with pH mea-
sured value (similar graph can be derived for mV control).
As shown below, a high setpoint relay is activated when the
measured pH exceeds the setpoint and is deactivated when
it is below the setpoint value minus hysteresis.
Such a behavior is suitable to control an acid dosing pump.
A low setpoint relay as can be seen from the following graphs
is energized when the pH value is below the setpoint and is
de-energized when the pH value is above the sum of setpoint
and the hysteresis. The low setpoint relay may be used to
control an alkaline dosing pump.
ON
OFF
Setpoint
14
Setpoint –
Hysteresis

19
PROPORTIONAL CONTROL MODE
The user can vary three different parameters, i.e. the setpoint
(S1 or S2), the deviation (D1 or D2) and the proportional
control mode period T
c
from 1 to 30 minutes. Duration of
the activated control is directly proportional to the error value
(Duty Cycle Control Mode): as the measurement approaches
setpoint, the ON period diminishes.
The following graph describes the pH process controller
behavior. Similar graph may apply to the mV controller.
During proportional control the process controller calculates
the relay activation time at certain moments t
0
, t
0
+T
c
, t
0
+2T
c
etc. The ON interval (the shaded areas) is then proportional
to the error amplitude.
For example with S1 representing High Setpoint
Setpoint (S1) = 7.00 pH
Deviation (D1) = 1.00 pH
T
c
= 1 minute
If measurement > 8.00 pH, then ON all the time.
If measurement = 7.60 pH, then ON for 36 seconds
OFF for 24 seconds.
If measurement = 7.10 pH, then ON for 6 seconds
OFF for 54 seconds.
The number of strokes per minute of the pump can be
changed only by means of the pump’s command.
Referring to the following diagram (low setpoint) the relay is:
• ALWAYS ON if pH < setpoint-deviation;
• ON proportionally to the error
if setpoint - deviation < pH < setpoint
ON
OFF
14
Setpoint +
Hysteresis
Setpoint
t
0
t
0
+T
c
t
0
+2T
c
t
0
+3T
c

20
• ALWAYS OFF if pH > setpoint;
Using a similar format, the second relay may be set up
according to the diagram below.
ALARM RELAY
The alarm relay functions in the following manner:
FS•O=NC(Normally
Closed)
De-energized Relay
COM
FS•C=NO (Normally Open)
EnergizedRelay
During alarm condition, the relay is de-energized. When
not in alarm condition, the relay is energized.
Example: High alarm set at 10 pH
Low alarm set at 4 pH
Note If the power supply is interrupted, the relay is de-energized
as if in alarm condition to alert the operator.
ON
OFF
Low setpoint mode
0 alarm Setpoint
14
Setpoint–
Deviation
High setpoint mode
alarm
ON
OFF
0
Setpoint +
Deviation
Setpoint
14
/