Page is loading ...

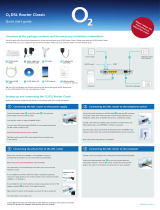
QUICK-START GUIDE
1&1 DSL-MODEM
AVM FRITZ!Box 7412
Connect DSL-Modem
Connect device
Enter 1&1 Start-Code
Connect telephone
Help and contact information

Internet, telephone and more:
YOUR 1&1 DSL
Welcome to our 1&1 customer world!
I am glad that you have found the internet package you were looking for from us. I am convinced that
you have made the right choice!
Here at 1&1 you can choose a connection to suit your needs, either with or without a minimum contract
period. We provide top-quality networking and entertainment solutions to enhance your comfort within
your own four walls. In addition, with a 1&1 DSL connection, you receive everything that you need to set
up your own home network. You can, for example, store your data centrally, so that it can be accessed
by all of the computers in your household.
This quick-start guide summarises all of the key information you need to get started with 1&1, to ensure
the process is as pleasant and smooth as possible. You can also find valuable tips and tricks in our
detailed DSL user guide, available online at www.1und1.de/handbuch-dsl
Our friendly customer support staff are available 24/7 to answer any questions you may have. Satisfied
customers are our priority.
Enjoy your 1&1 DSL!
Martin Witt
Managing Director of 1&1 Telecom GmbH
2

Contents
Before you get started ..............................................4
Safety information
Pre-requisites for a smooth-running service
Manufacturer’s information
Check the package contents
Technical requirements
Device overview - buttons, ports, type plate
LED indicator lights
Initial set-up ............................................................. 9
Connect 1&1 DSL-Modem
Connect device
LAN connection
Enter 1&1 Start-Code
Connect telephone
Analogue telephone
Analogue telephone with TAE plug
Troubleshooting ...................................................... 18
No internet connection
Device doesn’t work correctly
Telephone calls are not working properly
No incoming calls
Reset 1&1 DSL-Modem to factory settings
Recycling and disposal ...........................................26
Returning old devices
Help and contact information ................................27
FAQs
Free telephone support
Free email support
Forum
User guide
3

Safety information
Before you get started
The 1&1 DSL-Modem does not have an on/off switch. As such,
it must be possible to unplug the 1&1 DSL-Modem at all times.
Plug the 1&1 DSL-Modem into an easily accessible power
socket.
Overloaded sockets, extension cables and multiple socket
outlets can cause fires and electrocution. Avoid the use of
extension cables and multiple socket outlets wherever possible.
Do not connect several extension cables or multiple socket
outlets together.
Heat build-ups can lead to the 1&1 DSL-Modem overheating.
This could damage the 1&1 DSL-Modem. Ensure there is
sufficient air circulation around the 1&1 DSL-Modem. Ensure
that the ventilation slots on the housing of the 1&1 DSL-Modem
remain unobstructed. Do not place the 1&1 DSL-Modem on
rugs, carpets or upholstered furniture. Do not cover the 1&1
DSL-Modem.
The underside of the 1&1 DSL-Modem may become warm
during normal operation. This heat may cause damage to
heat-sensitive surfaces. Do not place the 1&1 DSL-Modem on
heat-sensitive surfaces.
In the case of storms, there is a risk of lightning strike, which
could lead to surge damages to connected electronic devices.
Do not install the 1&1 DSL-Modem during a storm. In the case
of storms, unplug the 1&1 DSL-Modem and disconnect the DSL
or VDSL connection.
If moisture or liquid reaches the 1&1 DSL-Modem, it could lead
to electric shocks or short circuits. Only ever use the 1&1 DSL-
Modem inside buildings. Do not allow any liquids to get inside
the 1&1 DSL-Modem.
There is a risk to users if the 1&1 DSL-Modem is opened incor-
rectly or if improper repairs are carried out. Do not open the
housing of the 1&1 DSL-Modem. If repairs are needed, return
the 1&1 DSL-Modem to 1&1.
Dust, moisture and steam, as well as strong detergents or
solvents, can damage the 1&1 DSL-Modem. Protect the 1&1
DSL-Modem from dust, moisture and steam. Always unplug the
1&1 DSL-Modem before cleaning. Clean the 1&1 DSL-Modem
with a damp, lint-free cloth.
Do not use the 1&1 DSL-Modem in areas where the use of
wireless equipment is forbidden. Follow the relevant signs or
instructions from authorised personnel.
During installation and operation of the 1&1 DSL-Modem, ensu-
re that people maintain a distance of at least 20 cm.
Do not install or operate your 1&1 DSL-Modem near flammable
gases or in areas where there is a risk of explosion.
4

Connect the 1&1 DSL-Modem to the master telephone
socket
Only connect the 1&1 DSL-Modem to the master telephone
socket. Ask a technician to remove all other telephone sockets
where possible, as these may interfere with the signal.
Do not connect any other devices to the master tele-
phone socket
Connect all other devices, such as telephones, fax machines
and answering machines, to the 1&1 DSL-Modem only. Do not
connect any devices directly to the telephone socket.
Do not use any extension cables between the telepho-
ne socket and the 1&1 DSL-Modem
Do not extend the cable linking the telephone socket to the 1&1
DSL-Modem. The longer this cable is, the more likely there will
be external interferences to the connection.
Use 1&1 Start-Code
The 1&1 Start-Code guarantees a complete installation and the
smooth running of your DSL connection. You can only set up
your device with the 1&1 Start-Code if the device is in its origi-
nal condition, or has been restored to factory settings.
The 1&1 DSL-Modem is a FRITZ!Box 7412, manufactured by AVM.
As such, the designation of the manufacturer AVM FRITZ!Box 7412
is found in the user interface and in the network name (SSID).
The manufacturer's address is:
AVM GmbH, Alt-Moabit 95, 10559 Berlin.
avm.de
Pre-requisites for a smooth-running service Manufacturer’s information
5

Check the package contents Technical requirements
In order to ensure a smooth installation of the device, it is im-
portant that all accessories are to hand. As such, first check the
contents of the delivery of the device.
In addition to the operating instructions, the complete package
includes the following components:
1&1 DSL connection in Germany
Up-to-date web browser with HTML5 support
For LAN connections: device with network
connection
1. DSL router “1&1 DSL-Modem”
2. Power supply for “1&1 DSL-Modem”
3. DSL/telephone cable
4. Network cable
5. Personal security letter
contains the 1&1 Start-Code and your 1&1 customer information
1.
2.
3.
4.
Ihre 1&1 Kundennummer:
123456789
Ihre E-Mail-Adresse:
Ihre 1&1 Rufnummern:
01234/1234567
+49 9876543210
Ihre 1&1 Zugangsdaten
1&1 Start-Code:
Internetzugangskennung:
Zugangspasswort:
XXXX - XXXX - XXXX
1und1/[email protected]
xxxxxxxxx
Sehr geehrter Herr Muster,
heute erhalten Sie die Zugangsdaten für Ihren 1&1 Anschluss. Bitte beachten Sie hierzu die Hinweise auf
der Rückseite und bewahren Sie diese Zugangsdaten in Ihren Unterlagen auf.
Mit dem 1&1 Start-Code und der Schnell-Start-Anleitung richten Sie Ihre Internetverbindung und Telefonie
bequem ein. Dies ist mit 1&1 Hardware und aktuellen Produkten des Herstellers AVM möglich.
Sollte eine Einrichtung über den 1&1 Start-Code nicht möglich sein, können Sie Ihren Router mit der Inter-
netzugangskennung und dem Internetpasswort auch manuell konfigurieren. Wird anschließend keine
Internetverbindung aufgebaut, setzen Sie bitte ein „H“ vor Ihre Kennung – z. B.: H1und1/[email protected].
Sobald eine Verbindung zum Internet besteht, richten Sie Ihre Telefonie ganz einfach im 1&1 Control-Center
– https://control-center.1und1.de – unter dem Menüpunkt „Rufnummern verwalten“ ein. Dort können Sie
Ihre Zugangsdaten übrigens auch aufrufen und anpassen.
Haben Sie Fragen? Wir sind gerne für Sie da. Sie erreichen uns täglich rund um die Uhr – kostenfrei aus
dem Fest- und Mobilfunknetz der 1&1 Telecom GmbH – unter: 0721 96 00.
Ich wünsche Ihnen viel Spaß beim Surfen mit 1&1.
Freundliche Grüße aus Montabaur
Ihre 1&1 Kundenkommunikation
Ihr 1&1 Anschluss – Ihre Zugangsdaten
Montabaur, 01.06.2018
1&1 Kundenservice
Telefon: 0721 96 00
E-Mail: [email protected]
1&1 Telecom GmbH
Elgendorfer Str. 57
56410 Montabaur
5.
6

Device overview
DSL LAN FON
Power
DS
L
DS
DS
DS
DS
DS
DS
DS
DS
DS
DS
DS
DS
DS
DS
DS
S
DS
DS
DS
DS
DS
DS
DS
D
L
L
L
L
L
L
L
L
L
L
L
L
L
L
L
L
L
L
L
LAN
N
N
N
N
N
N
N
NN
N
N
N
N
N
N
N
N
N
N
N
N
N
N
N
N
N
A
A
A
A
A
A
A
A
A
A
A
A
A
A
A
A
A
A
A
A
A
A
A
A
A
L
L
L
L
L
LL
L
L
L
L
L
L
L
L
L
L
L
L
L
O
O
O
N
ON
N
N
FO
FO
O
O
O
O
O
O
O
O
O
O
O
O
O
O
O
O
O
O
O
O
O
O
O
O
O
O
O
O
O
O
O
O
O
O
O
O
O
O
O
O
O
O
O
O
O
O
O
O
O
O
O
O
O
O
O
O
O
O
O
O
N
N
N
N
N
N
N
N
N
N
N
N
N
N
N
N
N
N
N
N
N
N
N
N
N
N
N
N
N
N
N
N
N
N
N
N
N
N
N
N
N
N
N
N
N
N
N
N
N
N
N
N
N
N
N
N
N
N
N
N
N
N
N
N
N
N
N
N
N
N
N
N
N
N
N
F
F
F
F
F
F
F
F
F
F
F
F
F
F
F
F
F
F
F
F
F
F
F
F
F
F
F
F
F
F
F
F
F
F
F
F
F
F
F
F
F
F
Power
o
o
o
o
o
o
o
o
o
o
o
o
o
o
o
o
o
o
o
o
we
we
we
we
we
we
we
we
we
we
we
we
we
we
we
we
we
we
we
we
w
w
we
w
we
we
e
r
r
r
r
r
r
r
r
r
r
r
r
r
r
r
r
r
r
r
r
r
r
r
r
P
P
P
P
P
P
P
P
P
P
P
P
P
P
P
P
P
P
P
P
P
P
P
P
P
P
FON
LAN
DSL
7

LED indicator lights
Light Status Meaning
Info
Flashing
There are new messages on an answering machine.
The firmware is being updated.
Fon
Permanently
illuminated
Active telephone connection via the internet.
Flashing Messages in the 1&1 Mailbox.
Power / DSL
Permanently
illuminated
Power provided and DSL connection operational.
Flashing
Power provided, DSL connection being established
or has been interrupted.
8

1. Connect 1&1 DSL-Modem
Note:
Only use the original po-
wer supply delivered with
this 1&1 DSL-Modem!
Step 1
Plug in the 1&1 DSL-Modem to a power
socket using the power supply cable.
The “Power / DSL” light will start to flash
after a few seconds.
Step 2
Plug the long end of the DSL cable into
the port labelled “DSL” on your
1&1 DSL-Modem.
Initial set-up
9

Step 3
Plug the other end of the DSL cable into the
port labelled “F” on the telephone socket.
There will be no DSL connection until
your DSL connection date.
The connection will be available by
6pm at the latest on this day.
1&1 will inform you of your connec-
tion date by letter, email and SMS.
Step 4
The “Power / DSL” light will stop flashing
and will be permanently illuminated once
the connection to the DSL network has been
established. This may take a few minutes.
– Phone socket –
Note:
Only connect the 1&1
DSL-Modem to the master
telephone socket! Ask a
technician to remove all
other telephone sockets
where possible, as these
may interfere with the
signal and affect your
connection.
10

2. Connect device
LAN connection (wired)
Use the network cable to connect the
1&1 DSL-Modem to the network port
on your computer.
Connection via a network cable ( LAN).
11

3. Enter 1&1 Start-Code
Step 1
Open your web browser (e.g. Chrome,
Firefox, Safari, Internet Explorer, Edge
The configuration page will be displayed.
If the configuration page does not open
automatically, enter http://fritz.box or
ht tp://192.168.178.1 into the address line of
your browser.
Step 2
Determine a FRITZ!Box password
2
and
click on OK
2a
.
Enter the FRITZ!Box password again when
you are asked to.
FRITZ!Box password
The password provides ac-
cess to the user interface.
2a
2
12

1&1 Start-Code
Your 1&1 Start-Code is a
combination of letters and
numbers.
It is used to:
Enter your internet
and telephone login
details for your 1&1
DSL-Modem
Set up your internet
connection
Set up at least one
telephone number
Enter your account
details so you can use
the 1&1 online storage
– Example 1&1 Start-Code –
– Letter with login details –
Step 3
You need your personal security letter entitled
“Ihr 1&1 Anschluss – Ihre Zugangsdaten”
(Your 1&1 connection - your login details) for
the next steps. This letter contains your 1&1
Start-Code.
3
.
Ihre 1&1 Kundennummer:
123456789
Ihre E-Mail-Adresse:
Ihre 1&1 Rufnummern:
01234/1234567
+49 9876543210
Ihre 1&1 Zugangsdaten
1&1 Start-Code:
Internetzugangskennung:
Zugangspasswort:
XXXX - XXXX - XXXX
1und1/[email protected]
xxxxxxxxx
Sehr geehrter Herr Muster,
heute erhalten Sie die Zugangsdaten für Ihren 1&1 Anschluss. Bitte beachten Sie hierzu die Hinweise auf
der Rückseite und bewahren Sie diese Zugangsdaten in Ihren Unterlagen auf.
Mit dem 1&1 Start-Code und der Schnell-Start-Anleitung richten Sie Ihre Internetverbindung und Telefonie
bequem ein. Dies ist mit 1&1 Hardware und aktuellen Produkten des Herstellers AVM möglich.
Sollte eine Einrichtung über den 1&1 Start-Code nicht möglich sein, können Sie Ihren Router mit der Inter-
netzugangskennung und dem Internetpasswort auch manuell konfigurieren. Wird anschließend keine
Internetverbindung aufgebaut, setzen Sie bitte ein „H“ vor Ihre Kennung – z. B.: H1und1/[email protected].
Sobald eine Verbindung zum Internet besteht, richten Sie Ihre Telefonie ganz einfach im 1&1 Control-Center
– https://control-center.1und1.de – unter dem Menüpunkt „Rufnummern verwalten“ ein. Dort können Sie
Ihre Zugangsdaten übrigens auch aufrufen und anpassen.
Haben Sie Fragen? Wir sind gerne für Sie da. Sie erreichen uns täglich rund um die Uhr – kostenfrei aus
dem Fest- und Mobilfunknetz der 1&1 Telecom GmbH – unter: 0721 96 00.
Ich wünsche Ihnen viel Spaß beim Surfen mit 1&1.
Freundliche Grüße aus Montabaur
Ihre 1&1 Kundenkommunikation
Ihr 1&1 Anschluss – Ihre Zugangsdaten
Montabaur, 01.06.2018
1&1 Kundenservice
Telefon: 0721 96 00
E-Mail: [email protected]
1&1 Telecom GmbH
Elgendorfer Str. 57
56410 Montabaur
3
Ihr 1&1 Anschluss - Ihre Zugangsdaten
Montabaur, 01.05.2017
1&1 Kundenservice
Telefon: 0721 96 00
E-Mail: [email protected]
1&1 Telecom GmbH
Elgendorfer Str. 57
56410 Montabaur
13

Step 6
Once you have successfully set up your
connection, you will see an overview of your
telephone numbers.
Activate “Mit der Einrichtung Ihrer
Telefone, Faxgeräte und Anrufbeant-
worter fortfahren” (Continue to set-up
your telephone and fax devices) and click on
Weiter (Continue)
6
.
5a
5
Note:
Please note that we can
only guarantee a complete
installation and smooth
functioning of your DSL
account if you use the 1&1
Start-Code!
Step 4
Enter the 12-character 1&1 Start-Code,
containing both upper and lower case letters
and numbers, into the appropriate field.
4
.
Ignore the hyphens. When entering the
Start-Code, make sure that you enter the
Start-Code correctly into the two rows,
without making any typing errors.
Click on Weiter (Continue)
4a
.
If you receive an error message, try entering
the 1&1 Start-Code again.
4
4a
____-____-____
– Example –
1&1 Start-Code
xxxx xxxx xxxx
14

You have now set up your device and your DSL connection. You can now surf the web and, once
you have connected a telephone to the FON connection you can also make phone calls.
Step 7
The setup assistant „Telefoniegeräte verwal-
ten“ is started. With this assistant you setup
your telephones, fax machines, message
boxes and you determine:
which number is used to make outgoing
calls (telephone, fax).
on which number the connected devices
will react.
Click on Beenden (finish)
6
.
6
Note:
A message box and the
anologue telephone are
setup already.
15

4. Connect telephone
The telephone number that you gave to or received from 1&1 when placing your order will be set up for
1&1 telephone calls once you have entered the 1&1 Start-Code.
Analogue telephone with TAE plug
Plug the telephone cable (TAE) into the port
labeled “FON” on the 1&1DSL-Modem.
16
DSL LAN FON
Power
DSL
S
S
SS
S
S
S
S
S
S
S
S
S
S
S
S
S
S
S
S
S
S
S
S
S
S
S
S
D
D
DD
D
DD
D
D
D
D
D
D
D
DD
D
D
D
D
D
D
D
D
L
L
L
L
L
L
L
L
L
L
L
L
L
L
L
L
L
L
L
L
L
L
L
LAN
NNNN
N
N
N
N
N
N
N
N
N
N
N
N
N
N
N
N
N
N
N
N
N
N
A
A
A
A
A
A
A
A
A
A
A
A
A
A
A
A
A
A
A
A
A
A
A
A
A
L
L
L
L
L
L
L
L
L
L
LL
L
L
L
L
L
L
L
L
L
L
L
L
O
O
ON
ON
N
N
FO
FO
O
O
O
O
O
O
O
O
O
O
O
O
O
O
O
O
O
O
O
O
O
O
O
O
O
O
O
O
O
O
O
O
O
O
O
O
O
O
O
O
O
O
O
O
O
O
O
O
O
O
O
O
O
O
O
O
O
O
O
O
O
O
O
O
O
O
N
N
N
N
N
N
N
N
N
N
N
N
N
N
N
N
N
N
N
N
N
N
N
N
N
N
N
N
N
N
N
N
N
N
N
N
N
N
N
N
N
N
N
N
N
N
N
N
N
N
N
N
N
N
N
N
N
N
N
N
N
N
N
N
N
N
N
N
N
N
N
N
N
N
N
N
N
F
F
F
F
F
F
F
F
F
F
F
F
F
F
F
F
F
F
F
F
F
F
F
F
F
F
F
F
F
F
F
F
F
F
F
F
F
F
F
F
F
F
F
Power
e
e
e
e
e
e
e
e
e
e
e
e
e
e
e
e
e
e
e
e
e
e
e
e
e
e
o
o
o
o
o
o
o
o
o
o
o
o
o
o
o
o
o
o
o
o
o
o
o
o
o
o
w
w
w
w
w
w
w
w
w
w
w
w
w
w
w
w
w
w
w
w
w
w
w
w
w
r
r
r
r
r
r
r
r
r
r
r
r
r
r
r
r
r
r
r
r
r
r
r
r
P
P
P
P
P
P
P
P
P
P
P
P
P
P
P
P
P
P
P
P
P
P
P
P
P
3779 8981 1562 8981 1234

17
Analogue telephone with RJ11 plug
Plug the telephone cable (RJ11) into the
port labeled „FON“ on the 1&1 DSL-Modem.
Make sure that you plug the cable into the
socket precisely as shown.

Troubleshooting
Problem Possible cause Solution
No internet connection or
faulty internet connection
The connection date has not yet
passed
Wait for your connection to be set-up. You can find your
connection date in your documentation. The connection will
be available by 6pm at the latest on this day.
Incorrect cabling Check the cables connecting your router and the telephone
socket. > page 20
Incorrect login details Enter the correct login details. > page 12
Device doesn’t work correctly Restart the device. > page 22
No phone line connection
or faulty phone line
Telephone not connected correctly Plug the telephone in properly.
Telephone numbers allocated
incorrectly
Allocate the telephone numbers correctly to the devices.
see ”Handbuch DSL“
Unstable DSL connection Open up the FRITZ!Box user interface. Click on Internet >
DSL information > Interference resistance. Choose: Maximum
stability. > page 24
Incorrect login details Enter the correct login details. > page 12
Device doesn’t work correctly Restart the device. > page 22
18

Problem Possible cause Solution
No network connection or
faulty network connection
No connection to the 1&1 DSL-
Modem
Reconnect your device via LAN.
> page 11
No Wi-Fi connection The 1&1 DSL-Modem does not have Wi-Fi.
No LAN connection Check that the cables between your 1&1 DSL-Modem and
your device are plugged in correctly. Check the sockets and
cables for damage.
LAN connection working but
cannot log in
Check your firewall settings and make sure your security
software isn’t blocking access.
1&1 DSL-Modem not
working properly or not
responding
Device error Restore the device to factory settings.
> page 23
19

Incorrect cabling
Most faults are due to issues with the cables.
Ensure that the DSL cable is plugged into the
DSL port on the 1&1 DSL-Modem
A
and
that the other end of the cable is plugged
into theport labelled “F” on the telephone
socket
B
.
1&1 DSL-Modem not connected to the
internet
No internet connection
FRITZ!Box password
The password provides ac-
cess to the user interface.
Step 1
Open your browser and go to http://fritz.box.
Step 2
Enter your password and click on
Anmelden (Log on)
2
.
Additional support
B
A
2
20
/