Page is loading ...

Operation voltage: 3VDC CR2025 Battery
Operation frequency: 434MHZ / 868MHZ
RF Wireless Control distance: 20M
SR-2501: 12-36VDC input, 4 channels x 5A, constant voltage, 4 channels x (60-180)W
SR-2501EA: 12-24VDC input, 4 channels x 8A, constant voltage, 4 channels x (96-192)W
SR-2502: 12-36VDC input, 4 channels x 350mA, constant current, 4 channels x (4.2-12.6)W
SR-2503: 12-36VDC input, 4 channels x 700mA, constant current, 4 channels x (8.4-25.2)W
SR-2501TC: 12-36VDC input, 2 channels x 5A, constant voltage, 2 channels x (60-180)W
SR-2502TC: 12-36VDC input, 2 channels x 350mA, constant current, 2 channelsx(4.2-12.6)W
SR-2503TC: 12-36VDC input, 2 channels x 700mA, constant current, 2 channels x (8.4- 25.2)W
SR-2501S: 12-36VDC input, 1 channel x 8A, constant voltage, 1 channel x (96-288)W
SR-2502S: 12-36VDC input, 1 channel x 350mA, constant current, 1 channel x (4.2-12.6)W
SR-2503S: 12-36VDC input, 1 channel x 700mA, constant current, 1 channel x (8.4-25.2)W
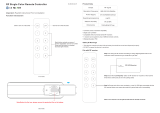
The SR-2828 and its receiver is a Single Zone RF Wireless
LED Dimmer. It lets you individually control multiple receiv-
ers in sync in single zone.
One remote can control endless of receivers in sync; One
receiver can be controlled by max 8 remotes.
After you have wired all the receivers according to Figure illustration you need to do the following:
4.1 Pull off the plastic lm cover of the battery at the back of remote.
4.2 Pair remote with receiver: short press the Learning Key on the receiver, then immediately short
press any one of the keys on the remote . Once you do that, the LED lights will blink once. Now
your remote and receiver are paired!
4.3 Do the same for the other receivers if you use them. The receiver has a special “Learning Key”.
You can add as many optional receivers as you wish, you can have an endless number of receivers
to be controlled in sync, which will let you escalate any installation from small to super-size.
Memory Reset:
In case you want to reset the memory
of the receiver, press “Learning Key”
for 10 seconds while the unit is being
powered. The unit will then reset to
factory defaults. Re assigning the
receiver to a different remote is easy,
just repeat Step 2 as above.

/


