Page is loading ...

Warning
Prior to the installation of this product, the installation instruction
must be read and completely understood. Failure to do so may
result in personal injury, property damage or voiding of factory
warranty.
Do not install on a structure that is prone to vibration, movement
or chance of impact. Reinforce the structure as required before
installation.
The desk clamp can support a maximum thickness of 9 cm.
Confirm the desk edge before installation.
Pay attention to the weight capacity of the mount. Exceeding the
limitation can result in function unworkable or even serious
personal injury and property damage.
Never operate the mount if parts are missing or damaged.
Contact your local service center for warranty service.
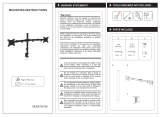
WARNING STATEMENTS
PRODUCT LINE GRAPH
01
Installation
INSTRUCTIONS
0-8kgs/0-17.6lbs
Load
15” - 27” 75x75, 100x100
VESA
-90°/+85°
Tilt
180°
Swivel
Rotate
360°
Gas Spring Aluminum LCD Monitor Desk Mount
1074mm / 42.3”
310mm / 12.2”
90°
85°
360°
90°
85°
360°
±180°
±180°
±180°
±180°
±90°
±90°
0-350/0-13.8”

03
TOOLS REQUIRED NOT INCLUDED
PARTS INCLUDED
M4x12 (x8) M4x30 (x8)
13X5.5X16.5 (x8)
(x1)
S=4mm
(x1)
S=3mm
(x1)
S=5mm
A
B
02
1
a
b
x2
x2
c
Loosen clamp screw until enough space is left for the edge of the desk.
Tighten clamp using clamp screw until mount is securely fastened to desk.
NOTE: If space is still not enough for clamp, remove
clamp screw and attachment entirely and reattach
clamp screw with attachment upside-down.
2
B
S=5mm
S=3mm
(x1)
C
D
M6x25 (x2) (x2)
(x2)
S=3mm

04
05
Lift the VESA plate along with monitor and put it on head slot.
6
Flush surface installation: Install 4
screws through faceplate to
monitor via mounting holes.
M4x12
5
Recessed surface installation: Put 4 spacers between faceplate and monitor.
Install 4 screws through faceplate, spacers to monitor via mounting holes.
A
M4x30
13X5.5X16.5
Insert the arms to the steel pipe above the locating ring.
4
3
Adjust locating ring at proper height and screw up tight to hold the mount.
Adjust aluminum support part above the locating ring and use a hex key to
fix it.
A
S=3mm
S=3mm
C
M6x25
Insert the screw through the
hole from the supporting part
to the decorative cap.
B
S=4mm
S=4mm
Turn round the VESA plate
to the correct position

06
B
S=5mm
8
Use a hex wrench to adjust the damp for adjust. Turn counter-clockwise to
reduce damping and clockwise to increase damping.
S=5mm
Swivel
Tilt
S=5mm
Swivel
Tilt
Use a hex wrench to adjust the height tension of the gas spring arm, to
keep different weight of monitors still at any position.
B
S=5mm
7
NOTE: Turn clockwise to reduce
tension for lighter monitors and
counter-clockwise to increase
tension for heavier monitors.
07
10
Insert cables into cable covers. Leave enough slack of cables at arm
joints for full adjustment.
9
Insert cable covers in spring arm.
A
D
/