G0040160, REV.- Page 1 of 2For the latest version of installation instructions visit www.ciro3d.com
This indication alerts you to the fact that ignoring the contents described herein can result in potential serious injury or death if not followed.
This indication alerts you to the fact that ignoring the contents described herein can or will result in material damage and/or personal injury.
This indication alerts you to the fact if you ignore this detail you will affect the performance or functionality of the product.
NOTE: Ciro products are designed and manufactured under very strict quality control. Ciro warrants that products sold to the original purchaser shall be free from any defects in materials
and workmanship for a period of 3 (three) years from the date of purchase, and a limited lifetime warranty against LED failure. Ciro will have no obligation if the customer cannot show
proof of purchase. Warranty will not be granted unless the part is properly installed, unmodified and maintained. Ciro will not be liable for any consequential and incidental damages,
including labor, or non-Ciro products. Please visit Ciro3d.com for our complete warranty policy.
All Ciro products are designed for "easy assembly" and/or "plug and play". We recommend a competent mechanic install our products, using standard mechanical procedures to assure a
safe and successful installation. Read completely and understand the instructions prior to starting installation.
WARNING
CAUTION
ATTENTION
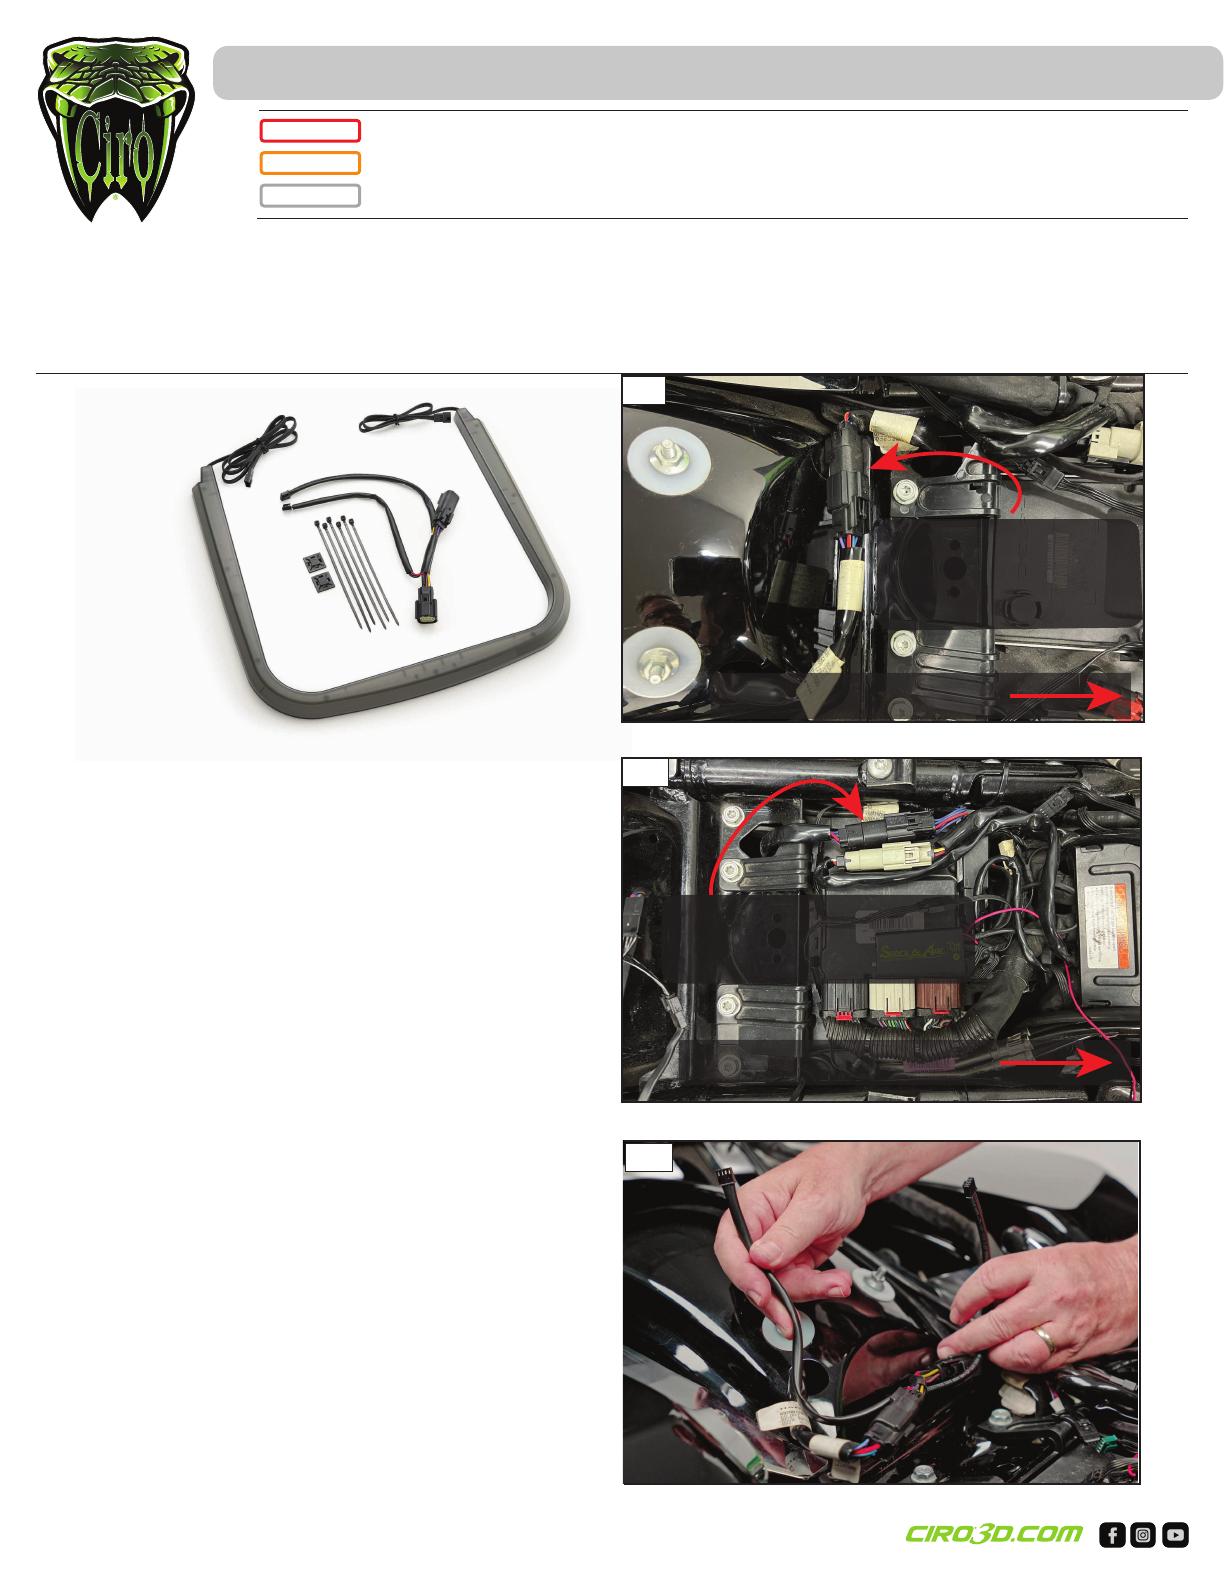
Included Items
TAILO Light
Wiring Adapter
Hardware Kit
tailotm light for harley-davidson® tour-pak®
Installation Instructions:
1. Park on a level surface and shut off the motorcycle. Ensure
the engine has had time to cool before installation.
2. Remove seat and set aside. This installation was done on a
motorcycle with a stock Tour-Pak with the OEM 6-pin harness
positioned as in Fig.1. If your motorcycle has a Tour-Pak
installed as an accessory see Fig. 2 for the location of the
harness.
3.
Locate the OEM 6-pin wiring harness and install the wiring
adapter. Fig. 3 Connect the left and right TAILO connectors to the
wiring adapter to understand their placement and functions. Note
the right side of the adapter will have a brown wire and the left side
will have a purple wire. These indicate turn signals. When finished
disconnect the TAILO connectors.
4.
Test fit the TAILO Light onto the Tour-Pak using your fingers in the
indentation under the Tour-Pak to center the light, Fig. 5, or if
preferred mark the position with masking tape. Run the wires from
the front of the light into the seat area.
ATTENTION: Thoroughly clean the mounting surface with denatured
alcohol or an ammonia based cleaner to remove all wax, oil, and
residue. Fig. 4
5.
Remove the red backer from the adhesive and install the TAILO
Light. Press the light firmly onto the surface for 60 seconds. The
adhesive cures within 24 hrs. NOTE, Do not install if the temperature
is below 50° F. The adhesive will not cure properly.
Fig.1
Fig.2
Fig.3
OEM 6-pin wiring
harness for motorcycles
with King Tour-Pak
OEM 6-pin wiring
harness on motorcycles
with accessory Tour-Paks
Front of Motorcycle
Front of Motorcycle


