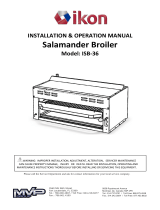
Southbend 323OA Owner's manual

Category
Cookers
Type
Owner's manual

This manual is also suitable for

~ southbend
A MIDDLEBY COMPANY
IMPORTANT
FOR FUTURE REFERENCE
Please complete this informa-
tion and retain this manual for
the life of the equipment.
MODEL #
SERIAL #
DATE PURCHASED
OWNER’S MANUAL
INSTALLATION
USER’S GUIDE
SERVICE
PARTS
SALAMANDER
RADIANT BROILER
MODELS: S-36, S-36A, S-60, S-6OA, 3230,323OA
S-36W, S-36AW, 323OW, 3230AW
These instructions should be read thoroughly before attempting installation. Installation
and Start Up should be performed by a qualified service technician. The Manufacturer,
Southbend (Head Office: 1100 Old Honeycutt Rd., Fuquay, North Carolina 27526)
informs you that unless the installation instructions for the above described Southbend
product are followed and performed by a qualified service technician, (a person
experienced in and knowledgeable concerning the installation of commercial gas
and/or electrical cooking equipment) then the terms and conditions of the
Manufacturer’s Limited Warranty will be rendered void and no warranty of any kind
shall apply.
If the equipment has been changed, altered, modified or repaired by other than a
qualified service technician during or after the 12-month limited warranty period, then
the manufacturer shall not be liable for any incidental or consequential damages to any
person or to any property which may result from the use of the equipment thereafter.
Some States do not allow the exclusion or limitation of incidental or consequential
damages, so the above limitation or exclusion thereto may not apply to you.
In the event you have any questions concerning the installation, use, care, or service of
the product, write Customer Service Department, Southbend, 1100 Old Honeycutt Rd.,
Fuquay, North Carolina 27526.
WARNING: Improper installation, adjustment, alteration, service
or maintenance can cause property damage, injury or death.
Read the installation, operating and maintenance instructions
thoroughly before installing or servicing this equipment.
1
I
$4.00
SALAMANDER
RADIANT BROILER
(Manual Section BR)
Congratulations! You have just purchased one of the finest pieces of heavy-duty, commercial cooking
equipment on the market today.
You will find that your new equipment, like all Southbend equipment, has been designed and
manufactured to some of the toughest standards in the industry - those of Southbend. Each piece of
Southbend equipment has been carefully engineered and designs have been verified through
laboratory tests and field installations in some of the more strenuous commercial cooking applications.
With proper care and field maintenance, you will experience years of reliable, trouble-free operation
from your Southbend equipment. To get the best results, it’s important that you read this manual
carefully.
TABLE OF CONTIZNTS:
SECTION ONE - INSTALLATION
Specifications . . . . . . . . . . . . . . . . . . . . . . . . . . . . . . . . . . . . . . . . . . . . . . . . . . . . . . . . 1
Installation . . . . . . . . . . . . . . . . . . . . . . . . . . . . . . . . . . . . . . . . . . . . . . . . . . . . . . . . . . 2
SECTION TWO - USERS GUIDE
Warranty............................................................ 1
Operation............................................................ 2
Maintenance......................................................... 3
SECTION THREE - SERVICE
Adjustments . . . . . . . . . . . . . . . . . . . . . . . . . . . . . . . . . . . . . . . . . . . . . . . . . . . . . . . . . 1
Troubleshooting . . . . . . . . . . . . . . . . . . . . . . . . . . . . . . . . . . . . . . . . . . . . . . . . . . . . . . 2
SECTION FOUR - PARTS
PartsList............................................................ 1
RETAIN THIS MANUAL FOR FIJTURE REFERENCE.
CAUTION
POST IN PROMINENT LOCATION INSTRUCTIONS TO BE FOLLOWED IN
THE EVENT THE SMELL OF GAS IS DETECTED. THIS INFORMATION
SHALL BE OBTAINED FROM LOCAL GAS SUPPLIER.
INTENDED FOR COMMERCIAL USE ONLY. NOT FOR HOUSEHOLD USE.
FOR YOUR SAFETY
DO NOT STORE OR USE GASOLINE
OR OTHER FLAMMABLE VAPORS AND LIQUIDS
IN THE VICINITY OF THIS OR ANY OTHER APPLIANCE.
KEEP AREA AROUND APPLIANCES FREE AND CLEAR FROM COMBUSTIBLES.
IN THE EVENT A GAS ODOR IS DETECTED, SHUT DOWN EQUIPMENT AT THE
MAIN SHUTOFF VALVE AND CONTACT THE LOCAL GAS COMPANY OR GAS
SUPPLIER FOR SERVICE.
southbend
A
bfmms~ycohfpANy
1100 Old Honeycutt Road
Fuquay. NC 27526
(919) 552-9161
FAX (919) 552-9798
(800) 348-2558
SALAMANDER RADIANT BROILER
INSTALLATION
SPECIFICATIONS
NOTE: If this equipment is being installed over 2,000 feet altitude and was not so specified on order,
contact Southbend Service Department. Failure to install with proper orifice sizing may void the
TOP VIEW
FRONT VIEW
SIDE VIEW
S-36A
-
S-66A
MODELS
S-36A for 36?h” Range
S-60A for 60%” Range
TOP VIEW
u
FRONT VIEW
SIDE VIEW
MODEL
Not For Scale
GRID SIZE
For Dimensional Purposes Only
Width
Depth
3230A
S-36A (36% Range)
S80A 60%” Range)
23”
15”
23”
15”
MODEL
3230A
3230AW
S-36A
siztr
GAS
TYPE
Natural
Propane
MANIFOLD
BURNERS
PILOTS
PRESSURE
(IN W-C.)
RATE
BTUslHr. No*
ORIFICE
RATE
ORIFICE
SIZE
BTUslHr. No*
SIZE
4”
20,000
2
#lo04744
Approx.
#44
800
1
Adj.
10”
20,000
2
HO08764
#54
“P&o”“.
1
Adj.
SALAMANDER RADIANT BROILER
SECTION ONE - INSTALlATlON
PAGE 1
\
INSTALLATION
WARNING: THESE PROCEDURES MUST BE FOLLOWED BY QUALIFIED
PERSONNEL OR WARRMJTY WILL BE VOIDED.
GENERAL:
The installation must conform with local codes, or in the absence of local codes, with the
National Fuel Gas Code, ANSI Z223.1-Latest Edition. Canadian installation must comply with
CAN/CGA-B149.1 Natural Gas Installation Code, Code CAN/CGA-B149.2 Propane Installation Code.
Canadian Electrical Code Parts I, or Local Codes and CSA C22.1
These models are for operation on natural or propane gases.
The appliance should be connected ONLY to the type of gas for which it is equipped. All Southbend
equipment is adjusted at the factory, however, burner air shutters and pilot heights should be checked
at installation and adjusted if necessary. Check type of gas on serial plate located on interior bottom. at
center towards front under ffease
fan.
For orifice sizes and pressure regulator settings refer to chart under “specifications.”
An adequate gas supply is imperative. Undersized or low pressure lines restrict the volume of gas
necessary for satisfactory performance. A pressure regulator, which is provided with each unit, is set to
maintain a 4” W.C. manifold pressure for natural gas and a 10” W.C. manifold pressure for propane
gas. However, to maintain these conditions, the pressure on the supply line when all units are
operating simultaneously, should not drop below 7” W.C. for natural gas or 11” W.C. for propane gas.
All pipe joints should be tested for leaks with a soap and water solution before operating the unit. The
test pressure should not exceed 14” W.C.
CAUTION:
THIS APPLIANCE AND ITS INDIVIDUAL SHUTOFF VALVE MUST BE
DISCONNECTED FROM THE GAS SUPPLY PIPING SYSTEM DURING ANY
PRESSURE TESTING OF THAT SYSTEM AT TEST PRESSURES IN EXCESS OF 1 I2
PSIG (3.45 EPA).
THIS APPLlANCE MUST BE ISOLATED FROM THE GAS SUPPLY PIPING SYSTEM BY
CLOSING ITS INDIVIDUAL MANUAL SHUTOFF VALVE DURING ANY PRESSURE
TESTING OF THE GAS SUPPLY PIPING SYSTEM AT TEST PRESSURES EQUAL TO
OR LESS THAN 1 I2 PSIG (3.45 EPA).
If applicable, the vent line from the gas appliance pressure regulator shall be installed to the outdoors
in accordance with local codes or, in the absence of local codes, with the National Fuel Gas Code, ANSI
Z233.1-Latest Edition. Canadian installation must comply with CAN/CGA-B149.1 Natural Gas
Installation Code, Code CAN/CGA-B149.2 Propane Installation Code.
EXHAUST FANS AND CANOPIES:
Canopies are set over ranges, ovens, etc., for ventilation
purposes. It is recommended that a canopy extend 6” past appliance and be located 6’6” from the floor.
Filters should be installed at an angle of 45” or more with the horizontal. This prevents dripping grease
and facilitates collecting the run-off grease in a drip pan, usually installed with a filter. A strong
exhaust fan tends to created a vacuum in the room and may interfere with burner performance or may
extinguish pilot flames. Fresh air openings approximatelv equal to the fan area will relieve such
vacuum. In case of unsatisfactory performance on any appliance, check with the exhaust fan in the
“OFF” position.
WALL EXHAUST FAN:
Should be installed at least two feet above the vent opening at the top of the
shelf or backsplash.
NOTE: Due to the variety of problems encountered by outside weather conditions, venting by canopies
or wall fans is preferred over any type of direct venting.
INSTALMTION:
NOTICE: THERE MUST BE ADEQUATE CLEARANCE BETWEEN
UNITS AND COMBUSTIBLE CONSTRUCTION. CLEARANCE MUST
ALSO BE PROVIDED FOR SERVICING AND FOR OPERATION.
WARNING: ALL UNITS MUST BE INSTALLED IN SUCH A MANNER THAT THJi’ FLOW
OF COMBUSTION AND VENTILATION AIR ARE NOT OBSTRUCTED. PROVISIONS
FOR AN ADEQUATE AIR SUPPLY MUST ALSO BE PROVIDED. DO NOT OBSTRUCT
TBE FRONT OF THE UNIT AS COMBUSTION AIR ENTERS THROUGH THIS AREk
SALAMANDER RADIANT BROILER
SECTION ONE - INSTALLATION
PAGE 2
Litho m U.S.A.
2-94
INSTALLATION
t
PLEASE NOTE C
LEARANCES BELOW:
Minimum clearances from COMBUSTIBLE CONSTRUCTION are:
TYPE
SIDES
I
ALL MODELS
T
6 IN. 6 IN.
I
I
WALL MOUNTED UNITS
I
6 IN.
I
OIN.
I
The Minimum clearances from NON-COMBUSTIBLE CONSTRUCTION are:
TYPE
SIDES
I
ALL MODELS
I
OIN.
I
0 IN.
I
I
WALL MOUNTED UNITS
I
OIN.
I
OIN.
I
NOTE: No additional clearance from the sides and rear is required for service, as the units are
serviceable from the front.
WARNINGZ
THESE PROCEDURES MUST BE FOLLOWED BY QUALIFIED PERSONNEL OR
WARRANTY WILL BE VOIDED.
WARNING:
FOR AN APPLIANCE EQUIPPED WITH CASTERS, THE INSTALLATION SHALL BE
MADE WITH A CONNECTOR THAT COMPLIES WITH THE STANDARD FOR
CONNECTORS FOR MOVABLE GAS APPLIANCES, ANSI 221.69~LATEST EDITION,
CAN1 6.1068, AND A QUICK-DISCONNECT DEVICE THAT COMPLIES WITH THE
STANDARD FOR QUICK-DISCONNECT DEVICES FOR USE WITH GAS FUEL, ANSI
Z21.41-LATEST EDITION AND CAN1 6.9 M79. ADEQUATE MEANS MUST BE
PROVIDED TO LIMIT THE MOVEMENT OF THE APPLIANCE WITHOUT
DEPENDING ON THE CONNECTOR AND THE QUICK-DISCONNECT DEVICE OR ITS
ASSOCIATED PIPING TO LIMIT THE APPLIANCE MOVEMENT.
WARNINGZ
IF DISCONNECTION OF THIS RESTRAINT IS NECESSARY TO MOVE THE
APPLIANCE FOR CLEANIN
G, ETC., RECONNECT IT WHEN THE APPLIANCE IS
MOVED TO ITS ORIGINALLY INSTALLED POSITION.
NOTE: Adequate restraining means must be attached to rear of appliance when installed. Installation
must conform to local codes as applicable.
ASSEMBLY INSTRUCTIONS FOR MODEL 3230A SAl&HANDER:
The Model 32308 can be mounted to a Sectional Series Range or be mounted to a wall t323OAW).
A. 3230A Mounted to a Sectional Range.
The 3230A is completely assembled at the factory to the flue riser of the specified sectional range as
ordered. The flue riser may or may not be mounted to the sectional range. If it is not proceed as
follows:
1. Front panel “A” is fastened with six (6) sheet metal screws. Remove the screws and the panel
will come loose. (See Fig. 1.)
2. Remove the nuts and lockwashers from collar plate studs “C” on unit.
3. Lower the flue riser with the 3230A mounted on it onto the unit such that studs “C” enter
the holes in the shelf bracket. Be certain to adequately support the broiler. Secure shelf
bracket “B” with the nuts and lockwashers which were removed previously.
4. The flue riser extension “D” is packed with the unit. Slide extension over the flue “E”
protruding through the center opening of the collar plate “F.”
SAMblANDER RADIANT BROILER
SECTION ONE - INSTALLATION
PAGE 3
\
INSTALLATION
5. Replace panel “A,”
6. Locate rear stiffeners (2 per unit), Part No. 1162339 for 42” deep units, and Part No.
1162340 for 36” deep units. The stiffeners have 10 pre-punched holes each.
7. Hold stiffeners against the rear of the unit with their outside edge approximately 718” from
the right and the left edges of the unit. Mark the stiffener hole locations on back of unit.
8. Drill out the holes at the rear of the unit with a 7/32” dia. drill bit.
9. Mount each stiffener with ten (10) l/4-20 self tapping sheet metal screws (Part No.
1146313).
10. Supporting mechanism can now be removed from broiler.
MOUNTING SHELF OR BACKSPLASH
INSTALLATION INSTRUCTIONS
FIGURE 1
SALAMANDER RADIANT BROILER
SECTION ONE - INSTALLATION
PAGE
4
Lifho m U.S.A.
2-94
INSTALLATION
t
B. 3230AW Mounted to Wall
1. Each 3230AW will be mounted to the wall with one of the following kits:
EACH BLACK KIT INCLUDES: (Kit No. 4440035)
r
WY.
1
1
1
B
6
11
11
11
8
1
2
1
1
Part No.
Description
Item No.
1073106
Right Mounting Bracket
(1)
1073105
Left Mounting Bracket
(1)
1073104
Wall Plate
(2)
1073107
Fig.
2
False Back
(3)
1073100
Bottom Support
(4)
Self Tapping Screws - x-20
1146341
Machine Screws - lo-24
1146410
Square Nuts - lo-24
1146501
Lock Washer - “/,,
1146300
Sheet Metal Screws - #lO x
%
1163558
Bottom Cover
1163560
Bottom Bracket
iii Fig.
3
1173329
Air Wash Baffle
(6)
1173337
Air Wash Stiffener
(7)
J
EACH STAINLESS STEEL KIT INCLUDES: (Kit No. 4440036)
WY.
Part No.
Description Item No,
1
1073103
Wall Plate
(2)
1
1073108
False Back (3) Fig. 2
1
1073102
Right Bottom Support
(4)
1
1073101
Left Bottom Support
(4)
SAME MOUNTING BRACKETS AS ABOVE
SAME SCREWS AS ABOVE
1
1166917 Flue Diverter
(5)
1
1173329
Air Wash Baffle
(6)
1
1173337 Air Wash Stiffener
(7)
FASTENER CODE
S-l
x-20 Self-Tapping Screw
S #lO
Sheet Metal Screw
N-B lo-24 Nut, Lock Washer, Machine Screw
(Drill 306” hole for N-B - S/32” hole for S - 7132” hole for S-l)
2. Attach right and left mounting brackets (1) to unit with three x-20 self-tapping screws (S-1)
each (see Fig. 2). The six holes for the mounting brackets must be drilled in the unit. Use
a 7132” dia. drill bit.
3. Attach wall plate (2) to false back (3) with five lo-24 machine screws, lockwashers and nuts
(N-B). Attach wall plate (2) so that top row of holes is above top of false back (3). The five
holes in the false back (3) which the wall plate (2) attach to must be drilled. Use a 3/16” dia.
drill bit.
4. Attach false back (3) to right and left mounting brackets (1) with six #lO sheet metal screws
(S). The holes must be drilled in the mounting brackets. Use a 5/32” dia. drill bit.
5. Lay unit carefully on the false back. Take off bottom of unit by removing the six sheet metal
screws which secure it. Set the bottom aside; it will not be used again.
6. Attach two bottom supports (4), and false back (3), to unit with three lo-24 screws, lock-
washers and nut (N-B) each. The six holes must be drilled in the bottom of the unit (4 holes)
and false back (2 holes). Use a 3/16” dia. drill bit.
7. Attach entire unit and assembly to wall with appropriate screws (furnished by installer).
Use the five holes at top of wall plate (2) and the three holes each on the bottom supports (4).
SALAMANDER RADIANT BROILER
SECTION ONE - INSTALLATION
PAGE 5
\
INSTALLATION
8.
Attach the two bottom brackets (2) (see Fig. 3) to the bottom of the unit, at the rear, with
two of the existing five nuts.
9.
Hold bottom (1) in place and secure with four sheet metal screws (S), one in each bracket
and two in front edge. 5132” dia. holes must be drilled in each of the two brackets (2).
MODELS S36A AND S-6OA SALAMANDERS
The S60A Salamander is completely factory assembled. It is mounted on a Cafe Series unit (Models
303, 320, 321, 322 or 323 only) as ordered. It can not be mounted to the wall.
The S-36A Salamander is also completely factory assembled. It is mounted on a Cafe Series unit
(Models 300, 301, 302 or 304) as ordered. It can be mounted on the wall as follows:
A. S36AW Mounted to Wall
1.
The S36AW will be mounted to the wall with one of the following kits:
EACH BLACK KIT INCLUDES: (Kit No. 4440037)
WY-
Part No. Description
1 1073106
Right Mounting Bracket
1
1073105
Left Mounting Bracket
1 1163346
Wall Plate
4
1163348
False Back
1073100
Bottom Support
6
Self Tapping Screws-$20
11
1146341 Machine Screws-lo-24
11 1146410
Square Nuts--10-24
11 1146501
Lock Washer-x,
8 1146300
Sheet Metal Screws-#10 x %
1 1163559
Bottom Cover
2
1163560
Bottom Bracket
1 1173338
Air Wash Baffle
1
1173337
Air Wash Stiffener
Item No.
(1)
(1)
(2) Fig. 2
(3)
(4)
[ii Fig. 3
(6)
(7)
EACH STAINLESS STEEL KIT INCLUDES: (Kit No. 4440038)
Part No.
Description
1163347
Wall Plate
1163349
False Back
1073102
Right Bottom Support
1073101
Left Bottom Support
SAME MOUNTING BRACKETS AS ABOVE
SAME SCREWS AS ABOVE
1166918
Flue Diverter
1173338
Air Wash Baffle
1173337
Air Wash Stiffener
:
(5)
(6)
(7)
FASTENER CODE
S-l X-20
Self-Tapping Screw
S #lO
Sheet Metal Screw
N-B lo-24
Nut, Lock Washer, Machine Screw
(Drill 3/16” hole for N-B
- 5/32” hole for S - 7/32” hole for S-I)
2.
The S-36AW mounting is identical to the 3230AW wall mounting. Follow instructions
2
through 9 under “B. 3230AW Mounted to Wall.”
SALAMANDER RADIANT BROILER
SECTION ONE - INSTALLATION
PAGE 6
Litho in U.S.A.
2-94
INSTALLATION
S-36AW AND 3230AW SALAMANDER WALL KIT
FIGURE 2
N-B
ADDITIONAL WALL MOUNT KIT PARTS
FOR “A” MODEL SALAMANDERS
FIGURE 3
SALAMANDER RADIANT BROILER
SECTION ONE - INSTALLATION
PAGE 7
\
INSTALLATION
GAS CONNECTION:
On most units the 3/4” NPT pipe nipple with union will be factory installed. If it is on your unit, omit
Steps 1 to 4 below.
1. Locate the sheet metal cover plate on the bottom right of the unit. Remove the four screws which
hold it in place. A 3/8” NPT pipe with half of a union will now be exposed.
2. Packed separately in the unit is a pipe nipple with the mating half of the union attached. Locate
this pipe.
3. Insert the nipple, with half of the union attached, through the hole at the right rear of the unit.
On units mounted on sectional flue risers, the nipple must also be inserted through the hole in
the riser. Tighten the two halves of the union together to make a gas tight seal.
4. Replace the bottom cover plate with the four screws.
5. Locate the pressure regulator and reducing bushing packed in the unit. Connect the gas supply
line to the inlet of the pressure regulator (see arrow on body of regulator). Connect the outlet of
the pressure regulator to the inlet of the unit as required by the particular installation.
6. If applicable, the vent line from the gas appliance pressure regulator shall be installed to the
outdoors in accordance with local codes or, in the absence of local codes, with the National Fuel
Gas Code, ANSI 2223.1-1988. Canadian installation must comply with CAN/CGA-B149.1 Natural
Gas Installation Code. Code CAN/CGA-B149.2 Propane Installation Code.
NOTE: Pipe joint compound must be suitable for use with LP gas.
WARNING:
IN THE EVENT A GAS ODOR IS DETECTED, SHUT DOWN EQUIPMENT AT
THE MAIN SHUTOFF VALVE AND CONTACT THE LOCAL GAS COMPANY
OR GAS SUPPLIER FOR SERVICE.
BROILER CERAMICS:
The broiler ceramic tiles are packed in the unit and must be installed before operating. To install:
1. Remove rack and drip pan.
2. Locate the ceramic tiles (12), bar burners (2) and the sheet metal channels (2) packed in the unit
and unwrap.
3. Install the rear burner. There is an
orifice in the unit on each side of the
burner area. The orifice for the rear
burner is at the left side. Insert the
center opening of the air mixer cap
over this orifice and put the burner
lug at the opposite end of the burner
into the hole in the support bracket
on the right side of the unit.
4. Install the front burner in a similar
manner. The orifice is on the right
side however.
5. Place the sheet metal channels as
covers over the burners.
(See Figure 4).
6. Install the ceramic tiles between the
burners, behind the rear burner and
in front of the front burner (4 tiles
each). The cones on the ceramic tiles
must be pointing downward. The
tiles are supported by the flanges of
the sheet metal channels and the
flanges inside the unit at the front
and rear.
FIGURE 4
SALAMANDER RADIANT BROILER
_ .-
SECTION ONE - INSTALLATION
PAGE 8
Litho in USA
2-94
SALAMANDER
RADIANT BROILER
USER’S GUIDE
LIMITED WARRANTY
Southbend warrants that the equipment, as supplied by the factory to the original purchasers, is free from defects in
materials and workmanship. Should any part thereof become defective as a result of normal use within the period and
limits defined below, then at the option of Southbend such parts will be repaired or replaced by Southbend or its Autho-
rized Service Agency. This warranty is subject to the following conditions:
If upon inspection by Southbend or its Authorized Service Agency it is determined that this equipment has not been
used in an appropriate manner, has been modified, has not been properly maintained, or has been subject to misuse
or misapplication, neglect, abuse, accident, damage during transit or delivery, fire, flood, riot or Act of God, then this
warranty shall be void.
Specifically excluded under this warranty are claims relating to installation; examples are improper utility connections
and improper utilities supply. Claims relating to normal care and maintenance are also excluded; examples are calibra-
tion of controls, and adjustments to pilots and burners.
Equipment failure caused by inadequate water quality is not covered under warranty. WATER QUALITY must not exceed
the following limits: Total Dissolved Solids (TDS) - 60 PPM (Parts Per Million). Hardness - 2 Grains or 35 PPM, PH Factor
- 7.0 to 7.5. Water pressure 30 PSI minimum, 60 PSI maximum. Boiler maintenance is the responsibility of the owner
and is not covered by warranty.
This equipment is intended for commercial use only. Warranty is void if equipment is installed in other than commercial
application.
Repairs under this warranty are to be performed only by a Southbend Authorized Service Agency. Southbend can not
be responsible for charges incurred from other than Authorized Southbend Agencies.
THIS WARRANTY MUST BE SHOWN TO AN AUTHORIZED SERVICE AGENCY WHEN REQUESTING IN-WARRANTY
SERVICE WORK. THE AUTHORIZED SERVICE AGENCY MAY AT HIS OPTION REQUIRE PROOF OF PURCHASE.
This warranty does not cover services performed at overtime or premium labor rates nor does Southbend assume any
liability for extended delays in replacing or repairing any items in the equipment beyond the control of Southbend. “South-
bend shall not be liable for consequential or special damages of any nature that may arise in connection with such product
or part.” Should service be required at times which normally involve overtime or premium labor rates, the owner shall
be charged for the difference between normal service rates and such premium rates.
In all circumstances, a maximum of one hundred miles in travel and two and one half hours (2.5) travel time shall be
allowable. In all cases the closest Southbend Authorized Agency must be used.
The actual warranty time periods and exceptions are as follows:
This warranty only covers product shipped into the 48 contiguous United States and Hawaii, one year labor, one year
parts effective from the date of original purchase. There will be no labor coverage for equipment located on any island
not connected by roadway to the mainland.
Exceptions to standard warranty, effective within above limitations:
Glass Windows, Door Gaskets, Rubber Seals, Light Bulbs, Ceramic Bricks,
Sight Glasses, Cathodic Descalers or Anodes . . . . . . . . . . . . . . . . . . . . . . . . . . . . . . . .90 days material and labor
Stainless Steel Fry Pot . . . . . . . . . . . . . . . . . . .4 years extended material warranty on fry pot only - no labor
Stainless Steel Open Top Burners. . . . . . . . . . . . .4 years extended material warranty on burners only - no labor
Pressure Steam Boiler Shell . . . . . . . . . . . . Prorated 4 years extended warranty on boiler shell only - no labor
Boiler shells which have not been properly maintained will not be covered by warranty
In all cases parts covered by a five year warranty will be shipped FOB the factory after the first year.
Our warranty on all replacement parts which are replaced in the field by our Authorized Service Agencies will be limited
to three months on labor, six months on materials (parts) effective from the date of installation. See LIMITED WARRANTY
- REPLACEMENT PARTS for conditions and limitations.
If the equipment has been changed, altered, modified or repaired by other than a qualified service technician during
or after the one year limited warranty period, then the manufacturer shall not be liable for any damages to any person
or to any property which may result from the use of the equipment thereafter.
“THE FOREGOING WARRANTY IS IN LIEU OF ANY AND ALL OTHER WARRANTIES EXPRESSED OR IMPLIED
INCLUDING ANY IMPLIED WARRANTY OF MERCHANTABILITY OR FITNESS, AND CONSTITUTES THE ENTIRE
LIABILITY OF SOUTHBEND. IN NO EVENT DOES THE LIMITED WARRANTY EXTEND BEYOND THE DURATION
OF ONE YEAR FROM THE EFFECTIVE DATE OF SAID WARRANTY.”
SALAMANDER RADIANT BROILER
SECTION TWO - USER’S GUIDE
PAGE 1
IL
II OPERATION
Before turning main gas supply on, make sure all control valves are in the “OFF” position - turn on
main gas supply. On new installations start with the burners of the unit(s) furthest from the gas input
to the manifold. This will purge the system of air. Turn gas supply “ON.”
1. Light constant pilot located on left side between the burners.
2. Adjust the pilot to a flame approximately 3/4” in height, if necessary.
3. Always check the pilot to make sure it is lit before turning on main burners.
CAUTION:
IF YOU SMELL GAS DURING THE LIGHTING PROCEDURE, IMMEDIATELY
SHUT OFF THE GAS SUPPLY UNTIL THE LEAKHAS BEEN CORRECTED.
CAUTION:
FOR SAFETY REASONS, THE BROILER BURNERS SHOULD BE VISUALLY
OBSERVED FOR PROPER IGNITION
EACH
TIME THE UNIT IS PLACED IN
OPERATION. THIS SAFETY CONSIDERATION SHOULD BE OBSERVED FOR ALL
OVER-FIRED BROILERS. SHOULD IGNITION FAlL AFTER 5 SECONDS, TURN
BROILER VALVE OFF AND WAIT 5 MINUTES BEFORE TRYING AGAlN.
4. Turn on main burners by turning knob counterclockwise. Turning knob to its furthest
counterclockwise position is “LOW.” Turn knob clockwise to increase burner flame, until “HI” is
reached (1st click). Turning knob to its furthest clockwise position is “OFF.”
The effective broiler area of this unit is marked by (2) l/8” diameter-rods located 3” in from each
side of the rack.
SALAMANDER RADIANT BROILER
SECTION TWO - USER’S GUIDE
PAGE 2
Litho in USA
2-94
MAINTENANCE l’
WARNING:
ALL ADJUSTING AND SERVICE SHOULD BE PERFORMED BY A PERSON
KNOWLEDGEABLE IN MAKING SUCH ADJUSTMENTS. IF IN DOUBT -
CALL YOUR AUTHORIZED SERVICE AGENCY.
WARNING:
DISCONNECT POWER FROM APPLIANCE EQUIPPED WITH CONVECTION-
TYPE OVEN HAVING A RADIANT BROILER MOUNTED TO APPLIANCE
BEFORE CLEANIN G OR SERVICING, IF APPLICABLE.
Southbend equipment is sturdily constructed of the best quality materials and is designed to provide
durable service when treated with ordinary care. To expect the best performance, your equipment must
be maintained in good condition and cleaned daily. Naturally, the periods for this care and cleaning
depend on the amount and degree of usage.
MAINTENANCE:
1. Keep exposed, cleanable areas of unit clean at all times.
Daily:
A. Remove and clean rack.
B. Remove and clean drip pan.
C. Remove, empty and clean grease pan.
D. Wash exposed cleanable areas.
Monthly:
A. Clean around burner air mixer, orifices and pilots if grease or lint has accumulated.
B. Visually assure carry-over ports on burners are unobstructed.
C. Assure proper ignition of burners from pilot.
Vent System:
At least twice a year the unit venting system should be examined and cleaned.
STAINLESS STEEL: To remove normal dirt, grease, or product residue from stainless steel, use
ordinary soap and water (with or without detergent) applied with a sponge or cloth. Dry thoroughly with
a clean cloth. Never use vinegar or any corrosive cleaner.
To remove grease and food splatter or condensed vapors that have baked on the equipment, apply
cleanser to a damp cloth or sponge and rub cleanser on the metal in the direction of the polishing lines on
the metal. Rubbing cleanser as gently as possible in the direction of the polished lines will not mar the
finish of the stainless steel. NEVER RUB WITH A CIRCULAR MOTION. Soil and burnt deposits which
do not respond to the above procedures can usually be removed by rubbing the surface with SCOTCH-
BRITE scouring pads or STAINLESS scouring pads. DO NOT USE ORDINARY STEEL WOOL as any
particles left on the surface will rust and further spoil the appearance of the finish. NEVER USE A WIRE
BRUSH, STEEL SCOURING PADS (EXCEPT STAINLESS), SCRAPER, FILE OR OTHER STEEL
TOOLS. Surfaces which are marred collect dirt more rapidly and become more difficult to clean. Marring
also increases the possibility of corrosion attack. Refinishing may then be required.
TO REMOVE HEAT TINT: Darkened areas sometimes appear on stainless steel surfaces where the
area has been subjected to excessive heat. These darkened areas are caused by thickening of the
protective surface of the stainless steel and are not harmful. Heat tint can normally be removed by the
foregoing, but tint which does not respond to this procedure calls for a vigorous scouring in the direction
of the polish lines using SCOTCH-BRITE scouring pads or a STAINLESS scouring pad in combination
with a powered cleanser. Heat tint action may be lessened by not applying, or by reducing, heat to
equipment during slack periods.
SALAMANDER RADIANT BROILER
SECTION TWO - USER’S GUIDE
PAGE 3
Ii MAINTENANCE
BLACK BAKED ENAMEL:
1. Allow unit to cool somewhat after use and wash exterior with a hot, mild detergent or soap
solution; particularly clean off all grease deposits. Dry thoroughly with a dry cloth.
TO
CLEAN RACK:
To prevent excess smoking, the racks, rack pan and the other members must be kept clean of food
remnants. Use wire brush or similar scraping utensil. DO NOT USE STEEL WOOL or similar scrub
pad which will leave small metal particles that can get into food.
1.
Rotate rack stops up out of the path of the rack.
2. Slide rack forward and out of broiler. Clean rack thoroughly with a non-toxic solvent.
3. Clean all parts of rack channels and the raising and lowering mechanism with a non-toxic
solvent.
4. Replace rack and rotate rack stops back into position.
SALAMANDER RADIANT BROILER
SECTION TWO - USER’S GUIDE
PAGE 4
Litho in U.S.A.
2-94
SALAMANDER RADIANT BROILER
SERVICE
ADJUSTMENTS
WARNING:
ADJUSTMENTS AND SERVICE WORK MAY BE PERFORMF,D ONLY BY A
QUALIFIED TECHNICIAN WHO IS EXPERIENCED IN, AND
KNOWLEDGEABLE WITH, THE OPERATION OF COMMERCIAL GAS
COOKING EQUIPMENT. HOWEVER, TO ASSURE YOUR CONFIDENCE,
CONTACT YOUR AUTHORIZED SERVICE AGENCY FOR RELIABLE
SERVICE, DEPENDABLE ADVICE OR OTHER ASSISTANCES, AND FOR
GENUINE FACTORY PARTS.
WARNING
DISCONNECT POWER FROM APPLIANCE EQUIPPED WITH
CONVECTION-TYPE OVEN HAVING A RADIANT BROILER MOUNTED TO
APPLIANCE BEFORE
CLEANIN
G OR SERVICING, IF APPLICABLE.
In case of problems in operation at initial installation, check type of gas and manifold pressure and
compare with information listed on the serial plate, located on interior bottom, at center towards front
under grease pan.
PILOTS:
1. Locate pilot valve on bottom of unit near the front edge. It is inside the unit and can be seen
through a small hole.
2. Turn slotted screw on valve until pilot achieves ignition of both burners. If pilots are turned to
high, soot will begin to form on ceramics above pilot flames. Pilot flames should be
approximately 3f4” in length.
BURNERS:
1.
2.
3.
4.
5.
6.
7.
a.
9.
10.
To adjust burner air shutters, first observe burner flames:
A. If flames are lifting off the burner ports, air shutter must be closed.
B. If flames have large yellow tips or are sooting ceramic tiles, air shutter must be opened.
Turn off burners and allow to cool.
Remove ceramic tiles around burner requiring adjustment.
Remove burner.
Loosen air shutter screw and adjust air shutter as per Step 1 above.
Tighten screw.
Re-install burner.
Replace ceramic tiles.
Light burner and observe flame.
Repeat this procedure, as necessary, to obtain a stable blue flame with a slight yellow tip.
SAIAMANDER RADIANT BROILER
SECTION THREE - SERVICE
PAGE 1
\
\
ADJUSTMENTS
PRESSURE REGULATOR:
1.
2.
3.
4.
5.
6.
7.
8.
9.
10.
11.
12.
13.
14.
15.
16.
17.
Turn off main gas to unit.
Remove broiler bottom (6 sheet metal screws).
Remove pilot line valve from manifold.
Install a fitting appropriate to connect a manometer.
Be sure both valves are in the “OFF” position and turn on main gas.
Ignite rear burner by hand and then front burner.
With burners full on, read manometer. It should read 4” W.C. for natural gas and 10” W.C. for
propane gas. (If pressure is satisfactory, go to Step 10.1
Remove cap from top of regulator.
With a screwdriver, rotate adjustment screw “clockwise” to increase, or “counterclockwise” to
decrease, pressure until manometer shows correct reading.
Turn burner valves to “OFF” position.
Turn main gas off.
Remove manometer fitting.
Replace pilot valve in manifold.
Put bottom on.
Turn on main gas.
Light pilot.
Verify proper burner ignition.
TROUBLE SHOOTING:
Problem Look for -
Unit will not turn on
- main gas supply “OFF.”
- pilot out.
Burners produce excessive
carbon deposits
- incorrect gas type.
-
incorrect supply pressure.
- primary air not adjusted properly.
-
incorrect orifices.
Pilot produces excessive
carbon deposits
- pilot gas not adjusted properly.
-
incorrect gas type.
-
incorrect supply pressure.
Pilot will not stay ignited
- pilot gas not adjusted properly.
-
clogged orifice.
- draft condition.
-
improper ventilation system.
-
air in gas line.
SALAMANDER RADIANT BROILER
SECTION THREE - SERVICE
PAGE 2
Litho in USA
2-94
SALAMANDER RADIANT BROILER
PARTS
Genuine Parts
Protect YOU Ail-Ways !
WARNING - WARRANTY WILL BE VOID IF
A. SERVICE WORK IS PERFORMED BY OTHER THAN A QUALIFIED
TECHNICIAN.
B. OTHER THAN GENUINE SOUTHBEND REPLACEMENT PARTS ARE
INSTALLED.
REPLACEMENT PARTS LIST
The serial plate is located on the interior bottom, at center towards front under grease pan. When
ordering parts from the Southbend Parts Distributor, please supply them with the Model Number,
Serial Number, Part Number, Description, plus Finish and/or Type of Gas if applicable.
For parts not listed consult a Southbend Authorized Parts Distributor or Southbend Authorized
Service Agency. If necessary, please consult Southbend Parts Department for assistance.
Part No.
Description
3230 S-36
S-60 3230A S-36A S-60A
1164209
Valve
2 2
2 2 2
2
1073495
Valve Knob Assembly (Off-On)
2 2
2
1163309
Burner - before 2-19-81
2 2
2 2 2
2
1166890
Bar Burner Assembly - after 2-19-81
2 2
2 2 2
2
1167527
Air Shutter Assembly
2 2
2
766
Rack Frame Assembly
1 1
1
P750
Rack
1 1
1
1166888
Rack & Handle Assembly
1 1
1
718
Rack Pan
1 1
1
1166281
Rack Only
1 1
1
717
Grease Pan
1 1
1 1 1
1
15962
Mechanism Handle Knob
1 1
1 1 1
1
P4771
Ceramic
12 12
12 12 12
12
P1089
Spring
2 2
2
1161263
Pencil Pilot Assembly (Natural)
1 1
1 1 1
1
1161262
Pencil Pilot Assembly (Propane)
1 1
1 1 1
1
1004744
Burner Orifice (Natural)
2 2
2 2 2
2
1004754
Burner Orifice (Propane)
2 2
2 2 2
2
1160205
Pressure Regulator (Natural) (1160164)
1 1
1 1 1
1
1160206
Pressure Regulator (Propane) (1160173)
1 1
1 1 1
1
SALAMANDER RADIANT BROILER
SECTION FOUR - PARTS
PAGE 1
PARTS
Part No. Description
3236
S-36
S-60 3230A
S-36A SS-BOA
1073495
Valve Handle Assembly (Hi-Lo)
2
2 2 2 2
2
1166894
Air Shutter Weld Assembly
2 2
2
1166889
Bar Burner Assembly Complete
2 2
2
1166281
Rack
1
1 1
1166887
Handle for Rack
1
1 1
1166886
RackPan
1
1 1
1166757
Mechanism Handle Assembly
1
1 1
1166747
Carriage Assembly Complete
1
1 1
1166748
Carriage Weld Assembly Only
1
1 1
4440006
Roller Bearing Kit(P9130 & P9136)
2 2
2
1166756
RackStop
2 2
2
727 Burner Rest
1
1 1 1
1 1
11653
Brick Rest
2
2 2
1163176
CeramicSupport-Front& Back
2
2 2
1166901
Pilot Shield
1
1 1
1166739
Handle Pocket Cover Assembly
1
1 1
1166755
Upper Parallel Arm
1
1 1
1166743
Lower Parallel Arm
1
1 1
1171715
Mechanism HandleAssembly(901)
(1163263,1061496,1161497)
1
1 1 1
1 1
1163263
Mechanism Handle Assembly
1
1 1
1061900
Tension Spring for Handle
1
1 1 1
1 1
1147600
Hex Head Spring Bolt-Handle
1
1 1 1
1 1
1106816
Index Plate
1
1 1 1
1 1
1123700
Parallel Arm Bracket
4
4 4
1166734
Parallel Arm Mounting Bracket
2
2 2
1166738
Spring Bracket
1
1 1
1165756
Spring
1
1 1
1126498
Left Upright Assembly
1
1
1126499
Right Upright Assembly
1
1
1031199
Manifold and Bracket Assembly
1
1 1 1
1 1
1173167
Rear BrickRest
1
1 1
1173322
Front Brick Rest
1
1 1
SALAMANDER RADIANT BROILER
SECTION FOUR - PARTS
PAGE 2
Liiho in U.S.A.
2-94
SALAMANDER
RADIANT BROILER
Genuine Parts
Protect YOU All-Ways !
A product with the Southbend name incorporates the best in durability and low
maintenance. We all recognize however, that replacement parts and occasional
professional service may be necessary to extend the useful life of this unit. When
service is needed, contact a Southbend Authorized Service Agency, or your dealer.
To avoid confusion, always refer to the model number, serial number, and type
of your unit.
swthbend
A NmlEm COMPAWY
PART NUMBER 1164373
Lttho in U.S.A.
3-92
1100 Old Honeycutt
Road
Fuquay-Varina. NC 27526
(919) 552-9161
FAX (919) 552.9796
(600) 346-2558
  • Page 1 1
  • Page 2 2
  • Page 3 3
  • Page 4 4
  • Page 5 5
  • Page 6 6
  • Page 7 7
  • Page 8 8
  • Page 9 9
  • Page 10 10
  • Page 11 11
  • Page 12 12
  • Page 13 13
  • Page 14 14
  • Page 15 15
  • Page 16 16
  • Page 17 17
  • Page 18 18
  • Page 19 19

Southbend 323OA Owner's manual

Category
Cookers
Type
Owner's manual
This manual is also suitable for

Ask a question and I''ll find the answer in the document

Finding information in a document is now easier with AI