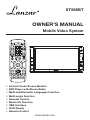
Lanzar STS65BT Owner's manual
- Category
- Car media receivers
- Type
- Owner's manual
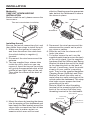
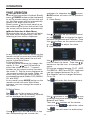
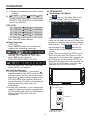
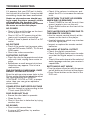
Lanzar STS65BT keeps you entertained on the road with its 6.5-inch touchscreen display, DVD player, and stereo radio. Enjoy movies, videos, or music from DVDs, VCDs, CDs, or MP3s. Connect your iPod or USB device for even more entertainment options. The Bluetooth function lets you stream music wirelessly from your phone or tablet. The remote control provides convenient operation from anywhere in your vehicle.
Lanzar STS65BT keeps you entertained on the road with its 6.5-inch touchscreen display, DVD player, and stereo radio. Enjoy movies, videos, or music from DVDs, VCDs, CDs, or MP3s. Connect your iPod or USB device for even more entertainment options. The Bluetooth function lets you stream music wirelessly from your phone or tablet. The remote control provides convenient operation from anywhere in your vehicle.


-
 1
1
-
 2
2
-
 3
3
-
 4
4
-
 5
5
-
 6
6
-
 7
7
-
 8
8
-
 9
9
-
 10
10
-
 11
11
-
 12
12
-
 13
13
-
 14
14
-
 15
15
-
 16
16
-
 17
17
-
 18
18
-
 19
19
-
 20
20
-
 21
21
-
 22
22
-
 23
23
-
 24
24
-
 25
25
-
 26
26


Lanzar STS65BT Owner's manual
- Category
- Car media receivers
- Type
- Owner's manual
Lanzar STS65BT keeps you entertained on the road with its 6.5-inch touchscreen display, DVD player, and stereo radio. Enjoy movies, videos, or music from DVDs, VCDs, CDs, or MP3s. Connect your iPod or USB device for even more entertainment options. The Bluetooth function lets you stream music wirelessly from your phone or tablet. The remote control provides convenient operation from anywhere in your vehicle.
Ask a question and I''ll find the answer in the document
Finding information in a document is now easier with AI
Related papers
Other documents
-
 PYLE Audio PLTVRDIN65 User manual
-
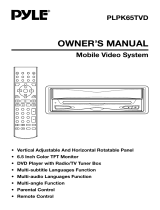 PYLE Audio PLPK65TVD User manual
-
Lenco DVD-305 Owner's manual
-
Boss Audio Systems BV7338B Owner's manual
-
-
Pyle PLD27 Owner's manual
-
 Boss Audio Systems BV7334 Owner's manual
-
 PYLE Audio PLTD145 User manual
-
 PYLE Audio PLTVD7P User manual
-
 PYLE Audio Car Video System PLTVD5P User manual


