Samsung SCU-2370 User manual

Category
Security cameras
Type
User manual

This manual is also suitable for

Positioning System
User Manual
SCU-2370
SCU-9051
SCU-VAC
SCU-VAC1
Copyright
©2010 Samsung Techwin Co., Ltd. All rights reserved.
Trademark
is the registered logo of Samsung Techwin Co., Ltd.
The name of this product is the registered trademark of Samsung Techwin Co., Ltd.
Other trademarks mentioned in this manual are the registered trademark of their respective company.
Restriction
Samsung Techwin Co., Ltd shall reserve the copyright of this document. Under no circumstances, this document
shall be reproduced, distributed or changed, partially or wholly, without formal authorization of Samsung Techwin.
Disclaimer
Samsung Techwin makes the best to verify the integrity and correctness of the contents in this document, but
no formal guarantee shall be provided. Use of this document and the subsequent results shall be entirely on the
user’s own responsibility. Samsung Techwin reserves the right to change the contents of this document without
prior notice.
Warranty
If the product does not operate properly in normal conditions, please let us know. Samsung Techwin will resolve
the problem for free of charge. The warranty period is 3 years. However, the followings are excluded:
If the system behaves abnormally because you run a program irrelevant to the system operation.
Deteriorated performance or natural worn-out in process of time
Positioning System
User Manual
English - 3
SAFETY INFORMATION
safety information
CAUTION
RISK OF ELECTRIC SHOCK.
DO NOT OPEN
CAUTION:
TO REDUCE THE RISK OF ELECTRIC SHOCK, DO NOT REMOVE COVER (OR BACK) NO USER
SERVICEABLE PARTS INSIDE. REFER SERVICING TO QUALIFIED SERVICE PERSONNEL.
This symbol indicates that dangerous voltage consisting a risk of electric shock is present within
this unit.
This symbol indicates that there are important operating and maintenance instructions in the
literature accompanying this unit.
WARNING
To reduce the risk of fi re or electric shock, do not expose this appliance to rain or moisture.
To prevent injury, this apparatus must be securely attached to the fl oor/wall in accordance with the installation
instructions.
- REPLACE WITH SAME TYPE 250V T10AL FUSE(F1, F2)
WARNING
Be sure to use only the standard adapter that is specifi ed in the specifi cation sheet.
Using any other adapter could cause fi re, electrical shock, or damage to the product.
Incorrectly connecting the power supply or replacing battery may cause explosion, fi re, electric shock, or
damage to the product.
Do not connect multiple cameras to a single adapter. Exceeding the capacity may cause abnormal heat
generation or fi re.
Securely plug the power cord into the power receptacle. Insecure connection may cause fi re.
When installing the camera, fasten it securely and fi rmly. The fall of camera may cause personal injury.
Do not place conductive objects (e.g. screwdrivers, coins, metal parts, etc.) or containers fi lled with water
on top of the camera. Doing so may cause personal injury due to fi re, electric shock, or falling objects.
Do not install the unit in humid, dusty, or sooty locations. Doing so may cause fi re or electric shock.
If any unusual smells or smoke come from the unit, stop using the product. In such case, immediately
disconnect the power source and contact the service center. Continued use in such a condition may cause
re or electric shock.
If this product fails to operate normally, contact the nearest service center. Never disassemble or modify this product
in any way. (SAMSUNG is not liable for problems caused by unauthorized modifi cations or attempted repair.)
When cleaning, do not spray water directly onto parts of the product. Doing so may cause fi re or electric shock.
CAUTION
Do not drop objects on the product or apply strong blows to it. Keep away from a location subject to
excessive vibration or magnetic interference.
Do not install in a location subject to high temperature (over 50°C), low temperature (below -50°F), or high
humidity. Doing so may cause fi re or electric shock.
If you want to relocate the already installed product, be sure to turn off the power and then move or reinstall it.
Remove the power plug from the outlet when there is a lighting storm. Neglecting to do so may cause fi re
or damage to the product.
Keep out of direct sunlight and heat radiation sources. It may cause fi re.
1.
2.
3.
4.
5.
6.
7.
8.
9.
10.
1.
2.
3.
4.
5.
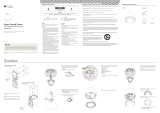
4_ safety information
safety information
Install it in a place with good ventilation.
Avoid aiming the camera directly towards extremely bright objects such as sun, as this may damage the
CCD image sensor.
Apparatus shall not be exposed to dripping or splashing and no objects fi lled with liquids, such as vases,
shall be placed on the apparatus.
The Mains plug is used as a disconnect device and shall stay readily operable at any time.
Do not expose the camera to radioactivity. Radioactivity exposure may damage the CCD.
6.
7.
8.
9.
10.
FCC Statement
This device complies with part 15 of the FCC Rules. Operation is subject to the following two conditions :
This device may not cause harmful interference, and
This device must accept any interference received including interference that may cause undesired operation.
CAUTION
This equipment has been tested and found to comply with the limits for a Class A digital device, pursuant
to part 15 of FCC Rules. These limits are designed to provide reasonable protection against harmful
interference when the equipment is operated in a commercial environment.
This equipment generates, uses, and can radiate radio frequency energy and, if not installed and used
in accordance with the instruction manual, may cause harmful interference to radio communications.
Operation of this equipment in a residential area is likely to cause harmful interference in which case the
user will be required to correct the interference at his own expense.
IC Compliance Notice
This Class A digital apparatus meets all requirements of the Canadian Interference.-Causing
Equipment Regulations of ICES-003.
1)
2)
Correct disposal of batteries in this product
(Applicable in the European Union and other European countries with separate battery return systems.)
This marking on the battery, manual or packaging indicates that the batteries in this product should not be
disposed of with other household waste at the end of their working life. Where marked, the chemical symbols
Hg, Cd or Pb indicate that the battery contains mercury, cadmium or lead above the reference levels in EC
Directive 2006/66. If batteries are not properly disposed of, these substances can cause harm to human
health or the environment.
To protect natural resources and to promote material reuse, please separate batteries from other types of
waste and recycle them through your local, free battery return system.
Correct Disposal of This Product (Waste Electrical & Electronic Equipment)
(Applicable in the European Union and other European countries with separate collection systems)
This marking on the product, accessories or literature indicates that the product and its electronic
accessories (e.g. charger, headset, USB cable) should not be disposed of with other household waste at
the end of their working life. To prevent possible harm to the environment or human health from uncontrolled
waste disposal, please separate these items from other types of waste and recycle them responsibly to
promote the sustainable reuse of material resources.
Household users should contact either the retailer where they purchased this product, or their local
government office, for details of where and how they can take these items for environmentally safe recycling.
Business users should contact their supplier and check the terms and conditions of the purchase contract.
This product and its electronic accessories should not be mixed with other commercial wastes for disposal.
English - 5
IMPORTANT SAFETY INSTRUCTIONS
Read these instructions.
Keep these instructions.
Heed all warnings.
Follow all instructions.
Clean only with dry cloth.
Do not block any ventilation openings. Install in accordance with the manufacturer’s instructions.
Do not install near any heat sources such as radiators, heat registers, or other apparatus (including
amplifi ers) that produce heat.
Do not defeat the safety purpose of the polarized or grounding-type plug.
A polarized plug has two blades with one wider than the other. A grounding type plug has two blades and
a third grounding prong. The wide blade or the third prong is provided for your safety. If the provided plug
does not fi t into your outlet, consult an electrician for replacement of the obsolete outlet.
Protect the power cord from being walked on or pinched particularly at plugs, convenience receptacles,
and the point where they exit from the apparatus.
Only use attachments/accessories specifi ed by the manufacturer.
Use only with the cart, stand, tripod, bracket, or table specifi ed by the manufacturer, or sold with the
apparatus. When a cart is used, use caution when moving the cart/apparatus combination to avoid injury
from tip-over.
Unplug this apparatus during lightning storms or when unused for long periods of time.
When a cart is used, use caution when moving the cart/apparatus combination to
avoid injury from tip-over.
Refer all servicing to qualifi ed service personnel. Servicing is required when the
apparatus has been damaged in any way, such as powersupply cord or plug is
damaged, liquid has been spilled or objects have fallen into the apparatus, the apparatus has been
exposed to rain or moisture, does not operate normally, or has been dropped.
. Refer all servicing to qualifi ed service personnel. Servicing is required when the apparatus has been
damaged in any way, such as powersupply cord or plug is damaged, liquid has been spilled or objects
have fallen into the apparatus, the apparatus has been exposed to rain or moisture, does not operate
normally, or has been dropped.
Apparatus shall not be exposed to dripping or splashing and no objects fi lled with liquids, such
as vases, shall be placed on the apparatus
1.
2.
3.
4.
5.
6.
7.
8.
9.
10.
11.
12.
13.
14.
important safety instructions
6_ important safety instructions
PRECAUTIONS ON INSTALLATION AND USE
Be sure to install the product vertically. Do never place it in other ways or reversely.
For safety reasons to prevent a risk of accidental drop-off, use a strong safety chain while installing
the product.
The wall where you intend to install the product should be fi rm and solid as well as the screws in
order to prevent a risk of drop-off.
Pay special attention to safe transportation. A sudden impact may cause a damage to the product.
When connecting the power, communication, video and lightening device using the cable gland,
seal off the cable gland with a Tefl on tape (PTFE) so that no water can infl ow.
If you need to open the housing for the installation work, be sure to turn off the product before
proceeding.
Use only the provided or rated AC adapter.
Use only power adapter with 24V AC, 6A or higher that satisfi es the power specifi cations.
For product consulting, contact your nearest retailer. Note that servicing may be chargeable for using a special equipment such
as an extension ladder.
This is an assistant device to the monitoring system; the company do not take responsibility for any fi nancial or physical damage
to the product that may occur due to theft, fi re or natural disasters.
CAUTIONS FOR OPERATING TEMPERATURE
The camera cannot operate properly at temperatures lower than -50ºC.
Even if the surrounding temperature is -50ºC or higher, the camera may not thaw itself and
operate properly depending on the installation environment.
Always keep the power on, so the camera can maintain its internal temperature at -10ºC or
higher.
If the camera was turned on after being left at temperatures lower than -50ºC for a long duration:
If the internal temperature is lower than -20ºC, the camera does not transmit video signals
and displays a black screen along with the “Wait to warm up(xx Left)” message, instead of
operating properly.
If the internal temperature is higher than -20ºC and lower than -10ºC, the “Wait to warm up(xx
Left)” message disappears as the camera resets itself and enters the operation mode.
However, only manual P/T operation is in effect while the Sequence and Turbo commands are
limited in use.
If the internal temperature is higher than -10ºC, the camera activates all Sequence and Turbo
commands.
y
y
y
y
y
y
y
y
M
1.
2.
3.
4.
-
-
-
English - 7
CONTENTS
contents
INTRODUCTION
8
Features
What’s included
Component Names and Functions
CONNECTION &
INSTALLATION
12
Camera Wiring Interface Board
Camera and Appliances Wiring Diagram
Communication Protocol DIP Switch
Settings
Camera ID DIP Switch Settings
Preparing Adapter and Cables
Product Confi gurations
Camera Installation
SETUP
23
Interface Symbols
Using and setting the menus
OSD Menu Chart
Camera Setting
Sequence Setting
P/T Setting
OSD Setting
Alarm Setting
Initialize
Status
TROUBLESHOOTING
60
Troubleshooting
PRODUCT SPECIFICATIONS
63
Product Specifi cations
Dimensions (SCU-2370/VAC/9051)
8_ introduction
Features
Versatile protocols and coaxial communication
RS-422/485, Coaxial communication methods are supported.
RS-422/485 (10 species) : SAMSUNG-T, SAMSUNG-E, Pelco(D/P), Panasonic, Honeywell, AD, Vicon,
GE, Bosch.
Coaxial Communications: Pelco Coaxitron (automatic detection)
Wide Range Auto Security Functions
Multiple Preset Function Saving : Up to 12 camera image properities can be saved individually to
provide high quality pictures. (SCU-2370)
Image Holding : Provides Preset Freeze to reduce the eye fatigue of the observer when moving the group.
PTZ Trace : Patterns operated with the joystick can be saved and replayed by users.
Swing : Using the Swing function commands the camera to move between 2 selected locations,
monitoring the route.
Group Search : Maximum 255 Preset positions are toured in order.
Area Masking
If a monitoring location includes a highly private area, the area can be selectively masked on the
screen.
Smart P/T
The Smart P/T function automatically adjusts the control speed of the Pan and Tilt functions
according to the current zoom ratio. It is useful to adjust the functions manually for detailed controls
when monitoring at high zoom ratios. (SCU-2370/VAC)
Day & Night
With its daytime & nighttime switch and Sens-Up functions based on the ICR (Infrared Cut fi lter
Removal) method, the camera provides high quality pictures regardless of whether it is day or night.
Sens-Up increases the CCD sensitivity by electrically extending the camera’s exposure time.
Day & Night enables you to select between color and B/W modes depending on the lighting conditions.
OSD(On Screen Display)
The camera IDs, camera preset numbers, preset names, area names, and camera operation status
are displayed on the monitor, allowing set up of various camera functions through the OSD menu
screen.
Preset Position Saving and Loading
Up to 255 preset positions can be set. Using this function saves and brings up the camera feed of
a selected monitoring location.
y
-
-
y
-
-
-
-
-
y
y
y
-
-
y
y
introduction
English - 9
INTRODUCTION
WHAT’S INCLUDED
Check if the following items are included in the product package.
Main Body Sunshield L-type hexagon wrenches (5.0mm)
Positioning System
User Guide
SCU-2370
SCU-9051
SCU-VAC
SCU-VAC1
Fuse (2EA)
User Guide
Mount
The following items are sold separately from the camera.
SBU-220PM
Pole Mount
SBU-500WM
Wall Mount
Light Projector Mount
10_ introduction
introduction
COMPONENT NAMES AND FUNCTIONS
Front
Lens
Wiper : Use it to wipe out the front glass of the housing.
Sunshield
Inside the housing
English - 11
INTRODUCTION
Back
COM/ID Setup Switch
Video Out Cable
Communication Cable
Power Cable
For the DIP switch settings, please refer to the on Pages 15~18.
M
12_
connection & installation
Camera Wiring Interface Board
For the camera wiring, please refer to the picture below.
(When using coaxial communication, a separate control signal connection is not required.)
y
RS-485 Communications
y
RS-422 Communications
Communication/Control Signal Diagram
Video
Communications/
Control Signal
Alarm Input
Alarm Output
Lighting Power
Power Supply
connection & installation
Camera
RXD+
RXD-
TXD+
TXD-
Controller
or DVR
Camera
RXD+
RXD-
TXD+
TXD-
TXD+
TXD-
RXD+
RXD-
Controller or DVR
RXD+
RXD-
y
Alarm Output
y
Alarm Input
Alarm Connections
Alarm Connections
Name Descriptions
IN1 Alarm Signal Input 1
IN2 Alarm Signal Input 2
In3 Alarm Signal Input 3
GND Ground
Type Name Descriptions
Alarm
Output
COM1 Alarm Out 1 (Common)
1N.O Alarm Out 1 (for Normal Open)
1N.C Alarm Out 1 (for Normal Close)
COM2 Alarm Out 2 (Common)
2N.O Alarm Out 2 (for Normal Open)
2N.C Alarm Out 2 (for Normal Close)
External
Device
COM External Device (AUX) Terminal
N.O
External Device (for Normal
Open) Terminal
RXD+
RXD-
TXD+
RXD+
RXD-
TXD-
English - 13
CONNECTION & INSTALLATION
CAMERA AND APPLIANCES WIRING DIAGRAM
Connecting with Samsung Techwin’s “Stand Alone DVR”
RS-485 :
y
RS-422 :
y
Camera
Camera
RXD+
RXD-
RXD+
RXD-
TXD+
TXD-
T(TXD)+
T(TXD)-
T(TXD)+
T(TXD)-
R(RXD)+
R(TXD)-
Stand Alone DVR
Stand Alone DVR
The maximum power capacity of the built-in relay is 30VDC/2A, 125VAC/0.5A, and 250VAC/0.25A.
A separate relay driver device is required if used with an adaptor which exceeds specifi ed nominal specifi cations.
Connecting the power connector and GND incorrectly to the NC/NO and COM ports may cause a short circuit and fi re,
damaging the camera.
M
Power Module Connection Diagram
The power adaptor (AC) has no polarity.
Ú
14_
connection & installation
Connecting with the Samsung Techwin Controller SPC-6000
RS-485 :
y
RS-422 :
y
Camera
Camera
RXD+
RXD-
TXD+
TXD-
RXD+
RXD-
<Controller>
To connect to Samsung PC DVR
RS-485 :
y
Camera
RXD+
RXD-
PC DVR
TX RX TX RX
+- +- +- + -
G
TXD+
TXD-
RXD+
RXD-
TXD+
TXD-
M
E
N
U
S
E
A
R
C
H
M
U
L
T
I
R
E
C
M
E
N
U
P
R
E
S
E
T
G
R
O
U
P
T
R
A
C
K
C
A
M
1
2
3
4
5
6
7
8
9
0
M
O
N
C
L
O
S
E
O
P
E
N
N
E
A
R
F
A
R
W
I
D
E
T
E
L
E
P
T
Z
D
V
R
M
T
X
S
E
T
U
P
E
S
C
F
U
N
C
E
N
T
E
R
SRP-1610/1650
TX RX TX RX
+- +- +- + -
G
English - 15
CONNECTION & INSTALLATION
COMMUNICATION PROTOCOL DIP SWITCH SETTINGS
Coaxial communication automatically detects signals, and so does not require a separate communication
setup process.
Pin No. Purpose
1 ~ 4 Protocol Settings
5 Transfer Method (RS-485/422) Settings
6 Response Mode Settings
7 Terminal Resistance RX
8 Terminal Resistance TX
9 TEST
10 Factory Default
Protocol Settings
Select a communication protocol for the camera.
No Protocol #4 #3 #2 #1
1 SAMSUNG-T OFF OFF OFF OFF
2 SAMSUNG-E OFF OFF OFF ON
3 Pelco-D OFF OFF ON OFF
4 Pelco-P OFF OFF ON ON
5 Panasonic OFF ON OFF OFF
6 Vicon OFF ON OFF ON
7 Honeywell OFF ON ON OFF
8 AD OFF ON ON ON
8 GE ON OFF OFF OFF
10 Bosch ON OFF OFF ON
16_
connection & installation
Communication Method Settings
Select a communication method for the camera.
Function ON OFF
#5 Transfer Mode Switch RS-422(4Wire) RS-485(2Wire)
Communication Response Settings
Select a communication response method for the camera and controller: Response or No Response.
Function ON OFF
#6 Response Mode Switch Response No Response
Termination Settings
To prevent the attenuation of communication signals between the camera and controller, the items at
the end of line must be set up with the termination settings.
Camera Input Position
#7 #8
Terminal Resistance RX ON OFF
Terminal Resistance TX OFF ON
When terminating for RS-485: #8 l ON
When terminating for RS-422: #7, #8 l ON
Initialize
Initialize the system using the Initialize switch on the rear of the product.
Once initialized, all current settings will return to the factory default.
Initialize Do not use initialization
#10 ON OFF
If you do not set the Reset witch to OFF after resetting the system, all stored data will be lost when you restart the
system.
I
I
English - 17
CONNECTION & INSTALLATION
Baud Rate Settings
Select the transfer speed of a selected communication protocol.
No Baud Rate(BPS) #9 #10
1 2,400 ON ON
2 4,800 ON OFF
3 9,600 OFF OFF
4 19,200 OFF ON
To use a third party controller with this product, please contact our After-Sales Service or Technology Department.
Controls Using Different Protocols
AD Protocol VICON Protocol GE Protocol
Entering Camera OSD 3+Auxilary ON IRIS OPEN IRIS OPEN
Exiting Camera OSD 3+Auxilary OFF IRIS CLOSE IRIS CLOSE
ENTER IRIS OPEN IRIS OPEN IRIS OPEN
ESC IRIS CLOSE IRIS CLOSE IRIS CLOSE
For more information about the protocols, refer to our offi cial website.
The product’s DIP switch is set to OFF when shipped, and the default values are presented as shadowed in corresponding
settings table.
M
18_
connection & installation
CAMERA ID DIP SWITCH SETTINGS
Assign a unique number for each camera to identify itself from others.
The initial value of the switch is “0”, and all of the 8 switches are
defaulted to OFF.
Each switch has a unique value, and the board ID is the sum of
the values of the switches.
Refer to the example below for the board ID.
Example 1
Example 2 Example 3




ON
OFF
1
2
4
8
16
32
64
128




ON
OFF
1
2
4
8
16
32
64
128




ON
OFF
1
2
4
8
16
32
64
128
1+2 = 3 (Board ID = 3) 4+32 = 36 (Board ID = 36)
1+2+4+8+16+32+64+128
= 255 (Board ID = 255 )
Use a unique ID for each Camera.
1.
2.
M




ON
OFF
1
2
4
8
16
32
64
128
English - 19
CONNECTION & INSTALLATION
PREPARING ADAPTER AND CABLES
Power Adapter
Power adapter has the capacity of AC24V 6A.
Video Cable
The camera’s video output port is connected to the monitor with a BNC coaxial cable, shown below :
If the distance between the camera and the monitor exceeds the recommended maximum, please use
an auxiliary video amp.
If the camera is controlled through coaxial communication, please use a video amp intended for coaxial communications.
Regular video amps do not transfer coaxial signals.
Communications Cable
For the camera to communicate with the controller, a
RS-485/422 communications line is required. To ensure the
quality of long distance communication and the accuracy of the
overall communication it is recommended using a twisted pair
cable such as UTP.
Depending on the camera’s environment, the communications distance may vary.
Neither the video nor communications cable is enclosed with the camera.
y
y
M
y
M
Distance
Recommended Cable
Specification
300m 4C2V(RG-59/U)
450m 5C2V(RG-6/U)
600m 7C2V(RG-11/U)
20_
connection & installation
PRODUCT CONFIGURATIONS
M
E
N
U
SE
AR
CH
M
UL
TI
RE
C
ME
NU
PR
ESE
T
GRO
UP
TR
A
CK
CAM
1
2
3
4
5
6
7
8
9
0
M
ON
CLO
SE
O
P
E
N
NE
AR
FAR
WID
E
T
E
L
E
P
T
Z
D
VR
M
T
X
S
E
T
UP
E
S
C
FU
N
C
E
NT
E
R
M
E
N
U
SE
AR
C
H
M
UL
TI
RE
C
ME
NU
PRE
SE
T
GR
O
UP
TR
A
CK
CAM
1
2
3
4
5
6
7
8
9
0
M
ON
CLO
SE
O
P
E
N
NEAR
FAR
WID
E
T
E
L
E
P
T
Z
D
V
R
M
T
X
S
E
T
UP
E
S
C
FU
N
C
E
NT
E
R
RS-485
SRD Series



RS-485
SRD Series
Coaxial Communication
SRD Series
Coaxial Communication
SRD Series
CONTROLLER (SUB)
CONTROLLER (MAIN)
CONTROL LINE
VIDEO LINE





CONTROL/VIDEO LINE
  • Page 1 1
  • Page 2 2
  • Page 3 3
  • Page 4 4
  • Page 5 5
  • Page 6 6
  • Page 7 7
  • Page 8 8
  • Page 9 9
  • Page 10 10
  • Page 11 11
  • Page 12 12
  • Page 13 13
  • Page 14 14
  • Page 15 15
  • Page 16 16
  • Page 17 17
  • Page 18 18
  • Page 19 19
  • Page 20 20
  • Page 21 21
  • Page 22 22
  • Page 23 23
  • Page 24 24
  • Page 25 25
  • Page 26 26
  • Page 27 27
  • Page 28 28
  • Page 29 29
  • Page 30 30
  • Page 31 31
  • Page 32 32
  • Page 33 33
  • Page 34 34
  • Page 35 35
  • Page 36 36
  • Page 37 37
  • Page 38 38
  • Page 39 39
  • Page 40 40
  • Page 41 41
  • Page 42 42
  • Page 43 43
  • Page 44 44
  • Page 45 45
  • Page 46 46
  • Page 47 47
  • Page 48 48
  • Page 49 49
  • Page 50 50
  • Page 51 51
  • Page 52 52
  • Page 53 53
  • Page 54 54
  • Page 55 55
  • Page 56 56
  • Page 57 57
  • Page 58 58
  • Page 59 59
  • Page 60 60
  • Page 61 61
  • Page 62 62
  • Page 63 63
  • Page 64 64
  • Page 65 65
  • Page 66 66
  • Page 67 67
  • Page 68 68
  • Page 69 69
  • Page 70 70
  • Page 71 71
  • Page 72 72

Samsung SCU-2370 User manual

Category
Security cameras
Type
User manual
This manual is also suitable for

Ask a question and I''ll find the answer in the document

Finding information in a document is now easier with AI