Page is loading ...

How deep do I dig the holes?
Holes should be dug 38" to 48" deep for a regular 6" fence, and make sure to put 2" to 4" of
gravel in the bottom of the hole for drainage. The Post should end up 6' 4" high from the
ground to the top of the post.
Do I put concrete in the hole?
You can either put gravel in the bottom of the hole for Drainage or you can put concrete in the
hole and stab the post into the wet concrete leaving 78” from ground to post top. This will
give the post a footing to sit on when dry.
How much gravel do I put in the hole?
You should put approximately 2" to 4" of gravel in the bottom of the hole making sure that the
Post stands 6' 4" tall from the ground to the top of the post.
How wide should the holes be?
An 8" diameter wide hole should be dug for the posts to be inserted for a solid Fence.
How far apart should the posts be?
The Posts need to be placed Exactly 8 feet (96"), apart to the posts centres. If you encounter
rocks, cement or other debris dis-allowing you to place the post at exactly 8 feet from the
previous post you can move the post slightly closer to the previous post But NEVER Further
than 8 feet apart.
The reason for this is that the Stringers can be cut shorter than 8 feet but cannot be
extended.
How high should the posts be?
Once you have your Gravel in the hole and you place the posts into the hole the post must
stand 6' 4" tall from the ground level to the top of the Post. This allows for up to 4" clearance
on the bottoms of the fence boards to the top of the fence posts.
How do I install a gate?
You can tap a regular gate into the slipfence aluminum posts if required or you can purchase a
Slipfence gate kit on this website.
Gate?
There is a Slipfence Gate kit also available on this website so you can build your custom sized
gate on site. The Gate kit includes 2 self closing hinges, a Thumb Latch, 6 stabilizing corner
brackets, 100 wood screws, and even a couple of rubber straps to emulate the look of the
Stringers if your gate is being placed in the middle of the fence run.
What if I hit rocks while drilling post-holes?
If you hit rocks that disable you to drill the Post hole exactly 8' from the previous post you can
always drill slightly shorter than 8 feet from the previous post because the stringers can be

cut. NEVER drill a posthole further than 8 feet from the previous post or the stringers will not
fit. Even if you need to drill a foot shorter for one fence section it should not be noticeable.
What if a post has been set already in concrete further than 8' apart from the
previous post?
If the posts have been set in concrete further than 8' or 96" from the previous post then it is
recommended RE-drilling and resetting 3 posts that are 6 feet apart to cover the same 24foot
span. Then after resetting three fence posts in concrete 6 feet apart, cut the 6 stringers to 6
feet and continue with the rest of the fence sections being 8' apart.
Can I make the post-holes longer than 8’?
NEVER MAKE THE POST HOLES LONGER THAN 8 FEET APART !!
Shorter than 8 feet apart is OK because the Stringers can be cut to length but cannot be
lengthened.
Can I make the post-holes shorter than 8’ apart?
Yes the post holes can be shorter than 8 feet apart to accommodate for rocks or debris that
you are unable to drill in that exact spot.
Can I place the posts shorter than 8’?
Yes the posts can be placed at a shorter distance than exactly 8 feet, (96") apart because the
stringers can be cut to size if necessary.
Can I place the post further apart than 8’?
NEVER PLACE THE POSTS FURTHER THAN 8 FEET APART TO THEIR CENTER !!
Shorter is better than longer because the stringers can be cut to size but cannot be
lengthened.
How do I cut the stringer?
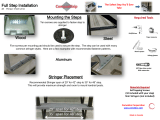
Stringers can be cut with a Metal saw, Hack Saw, Aluminum Saw or Power saw with metal
cutting blade. Anything that can cut metal will cut the stringers. The best way to cut the
stringers is to sandwich them together and cut 2 at the same time so your bottom and top
stringers are cut at the exact same length. Make sure that before you cut the stringers that
that the picket holes are set up identically prior to cutting.
Can I cut the stringer?
Yes the Stringers can be cut to size if necessary. Try to cut on exactly a half board hole so the
board widths look uniform in the fence section if you must cut down the stringer.
Does the carriage bolt go on the top or bottom?
The carriage Part of the bolt which is the rounded top with the Square fitting between the top
and the threads is to be inserted from the top through the square stringer hole and then

through the Elongated bracket hole and the grip nut should be screwed onto the bottom of the
Carriage bolt that is sticking out from the bottom of the Bracket and tightened when level.
What if my posts aren’t level?
It is very important to set your posts level in concrete. If they are not level you have 2" of
play on each post with the elongated hole in each bracket to which you fasted the stringers to
so the stringers should still be able to fasten to the posts even if the posts are not level. One
thing that will be very noticeable in any fence construction project is if the posts are not set
level in the concrete. It is very important to take the extra time when setting your Fence posts
in concrete to get them level and as close to exactly 8 feet apart as possible. By doing this and
having the posts set level and exactly 8 feet to the center of each post, the rest of your fence
construction will be much quicker and easier to assemble.
What if my stringer sags?
The stringer should not Sag before you start attaching fence boards to it. If it is sagging prior
to attaching the fence boards then the stringer could have been bent in transit, so a straight
stringer should be used. If the Stringer sags after you have attached your fence boards to it
with the wood screws then the fence boards were fastened to the stringers incorrectly. To fix
this sag you must un-screw the wood screws until all of the Fence boards in that section are
now released from the stringer. Then eyeball the stringer from the end to make sure that it is
now either straight or has a slight bow upward without the weight of the Fence boards on it.
Then place your first board through the centre of the stringer and before screwing the stringer
to the first centre board apply a little bit of pressure up on the stringer then screw in the
board. Once all of the other boards are attached using the proper fastening technique as
explained in the instructional video. This little hint will ensure no sagging of the stringer when
the boards are all fastened. Do this for both top and bottom stringers. This pre-loads the
stringer so that when all of the boards are fastened and create one square panel it will remain
as one square panel.
Another tip if the boards are really wet and weighing down the stringer during installation, is
to place an 8’ centre fence board in through the centre board hole in both the top and the
bottom stringer and push it all the way down to the ground. Then push up on your top stringer
creating a little bit of a bow in the top stringer and fasten the board to the top stringer with
the two screws provided. Then do the same with the bottom stringer. Pull it up creating a bow
and fasten the board to the stringer with the two bottom screws.
What if my fence sags?
The stringer should not Sag before you start attaching fence boards to it. If it is sagging prior
to attaching the fence boards then the stringer could be bent so a straight stringer should be
used. If the Stringer sags after you have attached your fence boards to it with the wood
screws then the fence boards were fastened to the stringers incorrectly. To fix this sag you
must un-screw the wood screws until all of your Fence boards in that section are now released
from the stringer. Then eyeball the stringer from the end to make sure that is is now straight
without the weight of the Fence boards on it. Do this for both top and bottom stringers. Then
once you have made sure that then stringers are straight you must attached the fence boards
one at a time by first screwing through the top two screw holes into the boards adn then the
bottom two for each board. NEVER, screw in all of the top screws and then all of the bottom
ones after. This will cause the Stringers to sag.

Screw in top two then bottom two for each board one at a time.
What if I don’t have 8’ for a section?
If your last or first section in your fence project is less than 8 feet that is fine. The stringers
can be cut to size for a shorter section with any Hack saw or Metal blade saw.
What concrete should I use?
Try to use Post Hole Concrete as it dries quickly and you can get started on your fence
installation quicker than regular concrete. Although either will work.
What tools do I need?
Tools required for the installation of your fence are the following:
1) Post hole Shovel
2) Level
3) ½” socket wrench, open wrench, or socket on a drill
4) Phillips or Robertson #2 screwdriver or drill with either bit.
5) Metal Saw
6) 2" x 6" board 7 feet long
Do I need concrete tubes?
Concrete Post tubes can be used or not. If used an 8" diameter is sufficient.
How do I repair a Broken Fence-post?
There is a Slipfence Repair technique on the Slipfence Website to repair broken Fence posts.
There are also instructions on the website to repair the Post.
How do I repair broken fence-boards?
Unscrew the wood screws holding the fence board in place and simply slip the broken board
out and slip a new fence board in through both stringers making sure it is level with the other
boards in the section and then screw in the wood screws first top and then bottom
!
/


