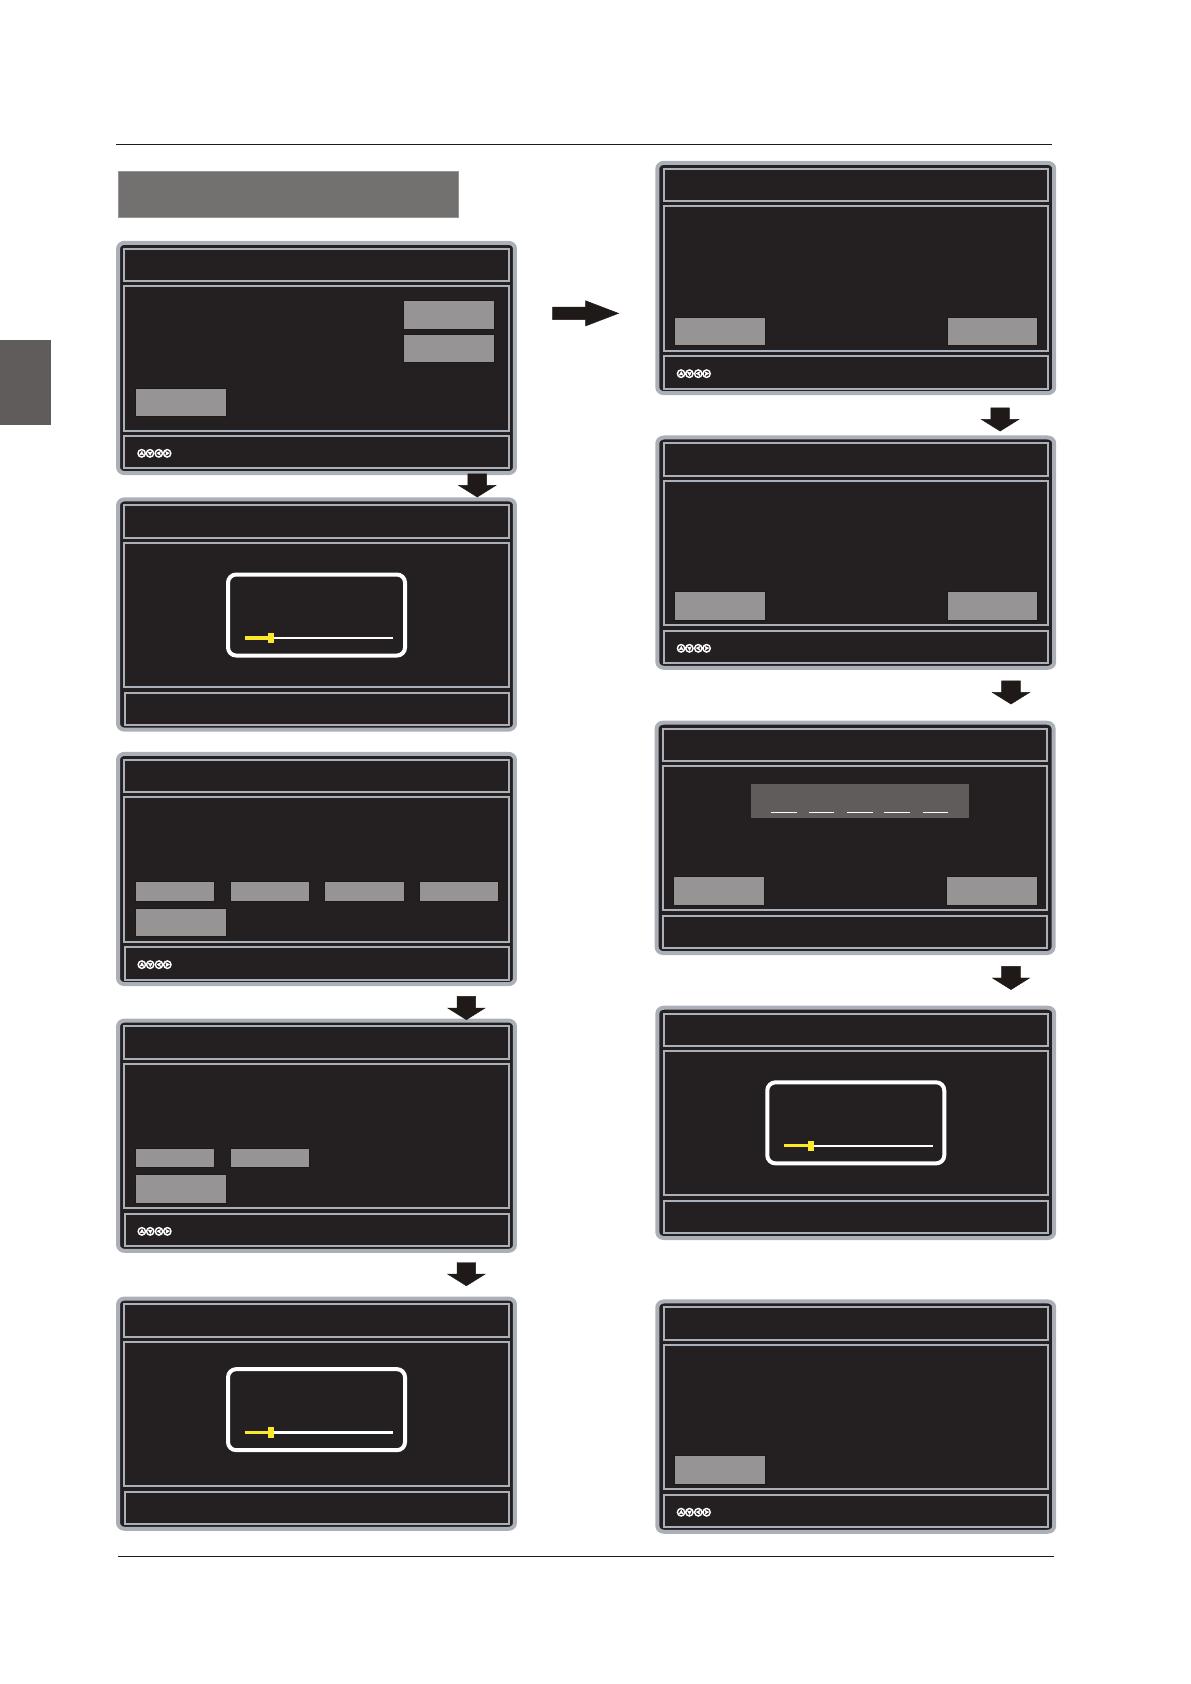
Cable or Satellite Source Input
Go Back
:Select
Enter:Next
Use the left/right arrows on your remote control to select the type of
connection are you using to connrct the set top box?
For optimal video quality we recommend HDMI or Component (refer to Quick
Connect Guide or User Manual to help you determine what connection you
are using).
,
HDMI
Component
Other
Antenna
16
Channel Scan
English
MENU OPERATION
:Select
Scan Channels from the Antenna or coaxial cable input
Go Back
Use the Up and Down arrows on your remote
control to select the channel scan type.
Scanning Channels
Menu:Quit
Enter:Next
Cable
Antenna[ATSC]
Antenna RF Warning
Go Back
:Select
Enter:Next
Exit Setup
Proceed
Notice: Westinghouse Digital dose not recommend using the RF Antenna
input as your cable or satellite connection because it will provide poor video
quality to your HDTV. Use a different connection for optimum conditions. If
you do not have a cable box that provides an HD quality signal, we
recommend that you call your cable provider for an upgrade. Otherwise,
select Proceed.
ERROR: Access Code Incorrect
Go Back
Check the access code provide by the Channel Access Service,
then select Go Back to enter the access code again.
:Select
Enter:Next
If the Channel Access continues to fail contact Westinghouse
Digital customer service at 1-800-701-0680 for further
assistance.
Antenna [ATSC] Channel Access
Go Back
Contact Westinghouse’s Channel Access Service by:
Web:www.westinghousedigital.com/support;
select Channel Access and enter Access Info
Text Message: Text Tuner to 95495
Phone: 1-800-701-0680 follow instructions.
Select Next to obtain the Access code.
:Select
Next
Enter:Next
Antenna [ATSC] Channel Access Information
Go Back
To access channel scan you will need the following Access Information:
Model: xxxxxxxxxx
Serial No: xxxxxxxxx
Channel Scan Type: ATSC
Provide these items to Westinghouse’s Channel Access Service by web,
text, or phone to obtain an Access Code, then select Next to input access
code.
:Select
Enter Channel Access Code
Go Back
Using your remote control to enter the 5 digit access code
provided by the channel access service.
Next
Enter:Next
Next
Enter:Next
Scanning Channels
If the password is wrong.
Antenna
Scanning Channels
RF CH:
Found :
7
4
Cable
Antenna[ATSC]
RF CH:
Found :
7
4
RF CH:
Found :
7
4
Proceed
Menu:Quit
Menu:Quit
Antenna users need a Channel Access Code in order to
perform a channel scan and receive broadcast signals.
0-9: Key in password


