Page is loading ...

AK200115389 (081)
AP9000
single undersink water filter system
installation and operating instructions
WARRANTY
The Aqua-Pure Premium AP9000 water filter system is designed to operate at a maximum pressure of 862kPa (125psi) and at a maximum temperature
of 38°C. Cuno Pacific Pty Ltd warrants this filter system to be free from defects in material and workmanship for a period of one year from the date of
purchase(*warranty period does not apply to cartridge which is consumable). This warranty is expressly limited to the repair or replacement at our
premises of any part or parts proving defective providing the housing has been installed in accordance with our Installation Instructions all relative
plumbing codes, the installation of an approved pressure limiting device preceding the filter, and the pressure and temperature do not exceed the limits
stated herein. This warranty does not extend to mechanical damage caused during installation or use. Save insofar as they may be excluded by law, this
warranty is given in lieu of all other expressed or implied warranties or conditions and Cuno Pacific Pty Ltd shall in no event be held liable for damages
or delays caused by defects and assumes no responsibility for unauthorised repairs.
AS/NZS 3497:1998
Lic WMKA21119
SAI Global
www.aquapure.com.au
1300 345 837
for technical assistance and product support, phone or visit our website:

AP9000
single undersink water filter system
Not even an Aqua-Pure filter can make unsafe water safe
The AP9000 water filter system should only be used on water that is microbiologically safe – that is, water
that has been adequately chlorinated or disinfected. Additional equipment (such as a chlorine injection
system or an ultraviolet steriliser) will be required for unsafe water.
It works best when it’s used
If the Aqua-Pure water filter system has not been used for more than one day, you will need to flush 1 to
2 litres of water through the system before using the water. The AP9000 requires a minimum water supply
pressure of 172kPa (25psi) and not exceed a maximum water pressure of 862kPa (125psi). A 650kPA
(94psi) Pressure Limiting Valve must be installed on the inlet side of this system (see below).
What a Valve
The AP9000 system has been supplied with an Aqua-Pure 98210 Multi-Function Control Valve (MFCV) as
standard equipment. This valve must be installed as detailed in the Installation Drawings and Instructions,
to provide:
•Flow Restriction
•650kPa Pressure Limiting
•Dual Check Backflow Prevention
• Anti-Hammer Protection to the filter system.
This valve is fitted with a Particle Removal Screen on the inlet side to protect the intricate mechanism from
debris that may be in the water supply. This screen must remain in place at all times. Failure to comply
with these requirements will void the warranty.
Have a change of heart every 12 months
The heart of an AP9000 filter system is the AP9112 filter cartridge, which has a recommended maximum
life of 12 months. The life and performance of a cartridge may vary depending on the volume and quality
of the incoming water supply being filtered. Your cartridge may need replacing earlier than 12 months if
you notice a reduced volume or flow from the filter faucet, or the return of an unpleasant taste/odour to the
filtered water.
Worth doing…worth doing properly
Installation of the AP9000 filter system must comply with any existing State or Local Plumbing codes, some
of which require installation by a licensed plumber. For correct operation of this appliance, it is essential
that these Installation and Operating Instructions be strictly observed.
6. Plumbing the system – and let the Aqua-Pure water flow
6.1 Measure a length of white tubing, to run from fitting on faucet (6) to outlet connection on NEP head
(4). Push tubing firmly into faucet fitting (6), ensuring it is fully seated. Push other end into the outlet
on NEP head (4), (ref fig 19).
6.2 Measure another length of tubing to connect from the inlet connection on the NEP head (4) to quick
connect fitting (2) on the MFCV (1), previously installed. Push tubing firmly into fittings.
6.3 Neatly fix water tubing to cupboard walls with plastic clips and screws provided.
6.4 Turn faucet to on position. Turn water supply on slowly to release any air trapped in the system.
Allow the water to run through system for 3 minutes to flush superficial dust and fines from the
system. Turn faucet off.
The water may appear “milky”; this is normal and it is caused by tiny air bubbles being expelled
from the cartridge. You may flush water through the system until the water appears clear, or use
the system and this condition will clear itself.
The Aqua-Pure AP9000 water filter system is now ready to produce Sparkling Clean and Great Tasting
Water for you and your family’s protection and enjoyment.
fig 19

1
3
3
5
4
6
7
8
2
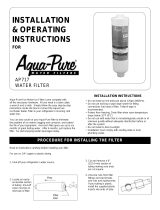
Installation instructions:
1. Your Aqua-Pure AP9000 component identification & content check list:
5. Mounting the system
5.1 Mark location of fixing holes (ref fig 12) and fix
unit to cupboard with two of the mounting
screws provided (ref fig 13). Remember,
approximately 55mm space must be provided
below the bottom of the cartridge, to allow
removal.
5.2 Remove protective red cap from cartridge (5).
Align centre of label on cartridge (5) with inlet
on head (4), push cartridge (5) into head firmly
and turn to right (ref fig 14)
5.3 Determine suitable location on sink or
benchtop for Chrome Faucet (7). Drill a 12mm
hole (ref fig 15).
HELPFUL HINT: For mounting in stainless steel sink, it is
advisable to place masking tape over drill spot to prevent
drill movement. Drill a 3mm pilot hole, followed by 12mm
hole for the faucet shaft. It is advisable to use good
quality, sharp drill bits
5.4 Place small rubber washer, chrome
escutcheon and large rubber washer on shaft
of faucet (ref fig 16). Insert faucet shaft into the
hole you have just drilled (ref fig 17).
5.5 Place large plastic washer, metal locking
washer and lock nut on undersink side of
faucet shaft (ref fig 16), tighten nut and ensure
faucet handle is pointing in desired direction
(ref fig 18).
5.6 Screw Quick Connect Faucet Connector (6) onto
the end of faucet shaft. This fitting does not
require thread tape and should be tightened,
so it does not leak.
fig 12. fig 13.
fig 17.
fig 18.
fig 14.
fig 15.
Small Rubber Washer
Chrome Escutcheon
Large Rubber Washer
sink or benchtop
Large Plastic Washer
Locking Washer
Retaining nut
Quick Connect
Faucet Connector (6)
fig 16
Ref
1
1a
2
3
4
5
6
7
8
*
*
Qty
1
1
1
1
1
1
1
1
1
4
6
Description
Multi Function Control Valve (MFCV)
Black Stopper Plug
Quick Connect 1/4" Male x 3/8" Tube
High Pressure Tubing 3/8” O.D x 2 metres
NEP Head
Cartridge AP9112
Quick Connect 3/8” Tube x 7/16-24” UNS Thread
Deluxe Swivel Long Reach Faucet
Thread Seal Tape
3/8” Plastic Clips for tube
Screws 10G x _” P/H Self Tapping
Part No.
AK200094956
-
AK200106396
AK200072689
70020042886
AK200115686
AK200115371
AK200043847
AK200095102
AK200115496
AK200093255
* not shown
1a

85mm
385mm
fig 1.
min.
60mm
2. The Quick Connect Push-In system
All fittings provided for the water tubing are “Quick Connect Push-In Fittings”, which do not require any
tools or sealing materials.
To connect: To disconnect
4. Water supply
The installation of your Aqua-Pure AP9000 water filter
system requires access to cold water feed from a
1/2” or 3/4” tap, such as that used for dishwashers
and mixer taps (ref fig 2).
If you do not have a 1/2” or 3/4” tap available then
you will require the services of a licensed plumber to
install your Aqua-Pure AP9000 water filter system.
CAUTION: If the dishwasher is connected to hot water
you cannot proceed to connect the water filter system
by this method.
fig 2.
option A option B
3. Decide where your Aqua-Pure system should
be installed before working out how
Choose a suitable area within the cupboard under
the sink to mount the AP9000 water filter system
see fig 1.
Cut end of tube square Insert and seat firmly Press and hold collet
against fitting, pull tube
out of fitting
4.1 Turn water supply tap off and remove
dishwasher/mixer tap connecting hose from
tap.
4.2 Thread tape Quick Connect Fitting (2) with
thread tape supplied (ref fig 5). Remove black
stopper plug (1a) from the Multi-Function
Control Valve (MFCV) (1) (ref fig 6) and screw
Quick Connect Fitting (2) into side outlet port of
MFCV (1) until it is tight enough so it will not
leak (ref fig 7)
Option A (ref fig 2)
1. Screw MFCV (1) onto 3/4” water supply tap with
inlet spinning nut (ref fig 8). Ensure rubber
washer is fitted into tap entry nut. Hand tighten
sufficiently to avoid leaking.
Option B (ref fig 2)
1. Take MFCV (1) and with an 8mm Hex Key,
unscrew inlet nut by inserting Hex Key into key
provision in inlet. Once in place, turn Hex Key
anti-clockwise to unscrew adaptor nut (ref fig 9).
2. Screw MFCV (1) to water supply tap. Hand
tighten sufficiently to avoid leaking (ref fig 10).
CAUTION! Do not overtighten MFCV
4.3 Reconnect dishwasher hose to end of MFCV (1)
(ref fig 2)
4.4 If you do not have a dishwasher or a mixer tap,
screw the black stopper plug (1a) removed in
above and screw into the end of the MFCV (1)
(ref fig 11)
fig 7.
fig 5. fig 6.
fig 8.
fig 9.
fig 10.
fig 11.
HELPFUL HINT: If there is insufficient room in your cupboard
to install the AP9000 water filter system vertically, it can
safely be tilted up to 60 degrees clockwise or
anti-clockwise
/