6)Wait one minute approximately,
then insert the " Testing bottle " to the bottom of
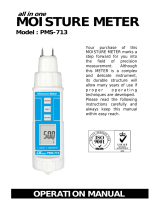
" Container " ( 3-2, Fig. 1 ) completely.
Before the measurement, it should envelop in the
" Cover " ( 3-1, Fig. 1 ) completely.
7)Press " Test Button " ( 3-5, Fig. 1 ) once, the display
will show the text " tESt " ( TEST )" with flashing,
wait approx. 10 seconds, the Display will show
the measurement value.
Wash ( Reins ) the Testing bottle
* After the testing, it should wash ( reins )
the Testing Bottle by the Distill Water
4-3 Free/Total Chlorine mode selection
1)Meter is under the power off conditions.
Press " Hold Button " ( 3-4, Fig. 1 ) " REC Button " (
3-8, Fig. 1 ) at the same time ( not release ), then
press the " Power Button " ( 3-6, Fig. 1 ) will enter the
selection mode to select the function of " Free
Chlorine " or the " Total Chlorine ".
2)Press the " TEST Button " ( 3-5, Fig. 1 ) to select the
desiring function ( Free Chlorine or Total Chlorine ),
then " REC Button " to confirm and save the selection
mode into the memory.
Remark :
* For the swinging pool application, typical to
select the " Free Chlorine " function.
* For the industrial water pollution application, typical
to select the " Total Chlorine " function.
8