Page is loading ...

1. Please get to know your kit before you start building!
MULTIPLEX model kits are subject to constant quality checks throughout the production process, and we sincerely
hope that you are happy with the contents of your kit. However, we would ask you to check all the parts before you start
construction, as we cannot exchange components which you have already worked on. If you find any part is not
acceptable for any reason, we will readily repair or exchange it once we have checked its condition. Just send the
component to our Model Department, and be sure to include a brief description of the fault.
We are constantly working on improving our models, and for this reason we must reserve the right to change the kit
contents in terms of shape or dimensions of parts, technology, materials and fittings, without prior notification. Please
understand that we cannot entertain claims against us if the kit contents do not agree in every respect with the instructions
and the illustrations.
Caution!
Radio-controlled models, and especially model aircraft, are by no means playthings. To build and operate
them safely requires a certain level of technical competence and manual skill, together with discipline and
a responsible attitude at the flying field. Errors and carelessness in constructing and operating models can
result in serious personal injury and damage to property. Since we, as manufacturers, have no control over
the construction, maintenance and operation of our products, we wish to take this opportunity to point out
these hazards, and to emphasise your personal responsibility.
Extra items required:
Radio control system components: Function
Pico „Ein-Stein“
(unit incorporating 2 servos, 1 receiver, 1 switch) Elevator/rudder Order No. 1 4004
Pico Control 400 Duo Speed control Order No. 7 5023
MULTIPLEX MS-X4 servo (2 x required) Ailerons Order No. 6 5041
Expansion adaptor Ailerons Order No. 8 5060
Alternative units:
MULTIPLEX Micro 5/7 receiver Order No. 5 5933
MULTIPLEX MS-X4 servo (4 x required) Ele / rudd* / 2 x ail Order No. 6 5041
Pico Control 400 Duo Speed control Order No. 7 5023
The fuselage can also take MS 12 or MS-X5 servos (2 x) Order No. 6 5092 / 6
5042
Expansion adaptor Ailerons Order No. 8 5060
* We recommend fitting rudder control, but it is not essential
Flight batteries:
MULTIPLEX 7/1400 SCR flight battery Order No. 15 5306
or MULTIPLEX 7/1700 SCR-C flight battery Order No. 15 5646
Battery charger:
Pico AUTO-charger, for rapid-charging transmitter and flight batteries Order No. 9 2526
Adhesives:
MULTIPLEX Z-Poxy 112 g (5-minute epoxy) Order No. 59 2500
( MULTIPLEX ZACKI 5 g (cyano-acrylate) Order No. 59 2700)
Tools:
Scissors, combination pliers, balsa knife, cross-point and slot-head screwdriver.
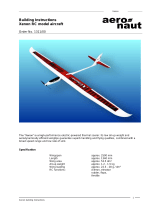
Specification TWIN STAR
Wingspan 1420 mm
Fuselage length 985 mm
Wing area (FAI) approx. 40 dm²
Weight approx. 1450 g
Wing loading 37.5 g/dm²
Wing section Clark Y mod., thickened
Tailplane section Flat plate
Controls Elevator, rudder, ailerons & motor speed
Important
For all joints involving the styrofoam wing and tail panels it is essential that you do not use solvent-based adhesives,
and in particular avoid instant or cyano glue (cyano-acrylate). If you use such materials they melt and destroy a large
volume of foam, and the component will be completely ruined. Use solvent-free adhesives, such as 5-minute epoxy or
white glue.
Using 5-minute epoxy (e.g. MULTIPLEX Z-Poxy, Order No. 59 2500)
This adhesive should only be used at room temperature. Its maximum working time („pot life“) is about 5 minutes, so
you should only mix up the quantity you need for the job in hand. Take great care to mix equal quantities of the two
components, and mix them up quickly and thoroughly. Apply the adhesive sparingly to one side of the joint, press the
parts together immediately and secure them with tape or clamps for at least 10 minutes. Excess resin can easily be
wiped off with methylated spirit, but only while still soft. Do not use any other solvent, as these materials tend to
attack and destroy the foam and ABS components of your model. Please read the glue manufacturer’s
recommendations.
Building instructions
1

Building the model
1. Completing the canopy
Glue the canopy plate 67 to the rear face of the
canopy 11 in such a position that it fits neatly below
the front wing retainer plate 62, which is fitted later.
Place the canopy on the fuselage 10, apply glue to
the canopy plate and slide it into position using the
wing retainer plate 62 as a guide. Tape or clamp the
plate in place, taking care not to glue the wing
retainer plate 62 in place at the same time.
The canopy is retained at the front with a rubber
band, so it cannot be lost.
Fit the screw hooks 49 in the two screw hook support
blocks 68, and bend the fuselage-mounted hook to
shape using pliers or a vice. Slip a length of thread
through the screw hook and glue the block 68 in the
appropriate recess in the battery duct. Tie the rubber
band to the thread and pull it through the screw hook.
Glue the canopy-mounted screw hook in its recess
and wipe off excess glue.When the glue has set hard
connect the rubber band to the top screw hook (fig.
1). To fit the canopy first engage it at the rear and
then press it down at the front. To change the battery
open the canopy and swivel it to one side without
disconnecting the rubber band.
Tip: if the rubber band grows weaker you can „wind
up“ the band by rotating the canopy to increase the
tension.
2. Completing the tailplane
Attach the elevator 31 to the tailplane 30 using four
hinges 40. The slot for the elevator horn must be on
the underside. Secure the hinges with 5-minute
epoxy, but use as little adhesive as possible. Too
much doesn’t make a better job; it just looks messy
(fig. 2).
3. Completing the fin and rudder
Attach the rudder 33 to the fin 32 using two hinges
40, again using 5-minute epoxy (fig. 2).
4. Fitting the horns
Locate the elevator and rudder horns 41 and fit a
pushrod connector 43 into the outermost hole of
each. Slip the M2 washer 45 over the threaded shank
and screw the self-locking nut 46 on top to secure
the connector. Fit the socket-head cap screws 44 in
the threaded holes in the pushrod connectors. Glue
the horns 41 in the slots in the elevator and rudder
with the row of holes facing forwards (fig. 3).
5. Gluing the tail panels to the fuselage
Particular care is needed at this stage, as proper
alignment is crucial to the model’s flying
characteristics. We take the greatest care in
production, but there are always minor manufacturing
tolerances which have to be allowed for.
The first step is to cut down the bowden cable outer
tubes 80 and 81 to length: 320mm for the rudder,
480mm for the elevator. Insert the tailplane 30 into
the fuselage 10 „dry“, i.e. without glue. Adjust the
position of the tailplane until it rests snugly inside
the fuselage and no gaps are visible.
Lay the elevator bowden cable outer 81 in the longi-
tudinal channel in the fuselage and glue the tailplane
30 and fin 32 to the fuselage. Note that the bowden
cable outer should project from the front end of the
fuselage channel by about 10mm. While the glue is
still soft carefully align the tailplane and fin relative
to the wing saddle. This is done by placing a ruler
on the wing saddle and aligning the tailplane with it
(sight along the fuselage from the nose). Use pins if
necessary to hold the parts in place. The fin should
be exactly at right-angles to the tailplane (check with
a setsquare).
Lay the bowden cable outer 80 in the channel in the
fin strake 34 and glue both parts to the fuselage.
Position the elevator pushrod outer (left) and the
rudder pushrod outer (right - as seen from the tail),
and secure them with a little glue (fig. 4).
6. Installing the wing retainer plates in the
fuselage
Glue the wing retainer plate 62 in the fuselage with
the hole facing the tail, resting flush against the
canopy. Glue the retainer plate 63 underneath part
62 at the same time, and clamp the parts together
with clothes pegs. Check that the holes line up
exactly. Remove all excess glue as it is squeezed
out, especially any inside the hole (fig. 5).
The rear wing retainer plate is formed by gluing
together the three parts 64 with their edges flush.
The holes must line up accurately. Remove all excess
glue, especially inside the hole. Glue part 65 to the
underside of parts 64 ensuring that the hole is still
clearly visible. When the glue has set hard drive the
thread-cutting screw 47 through the front and rear
wing retainer plates to cut a thread for the wing
screws. This is done by positioning the thread-cutting
screw exactly at right-angles to the wing saddle
(foam) and driving it through the plywood about three
times using a screwdriver, repeatedly blowing out
the swarf (waste material) which results. Clamp the
rear wing retainer plate in a vice for the thread-cutting
process. It is glued in the fuselage permanently once
the wing has been completed (fig. 6).
7. Joining the wings
It is essential to glue the wing panels 20 and 21
together with the correct dihedral.
The wing roots are supplied pre-cut to the correct
angle. Lay the wings down flat, then pack up both
tips by about 20 mm (e.g. with books) until the wing
roots fit together snugly, with no gap. Note that the
motor nacelles must project over the edge of the table
when you do this. The spar slots in the two wing
panels must line up exactly, i.e. they must not be
offset relative to each other.
Glue the wings together with a simple butt-joint using
5-minute epoxy, and be sure to align the wings
carefully while the glue is still soft. Excess resin can
be wiped off the wings with methylated spirit, but
only while it is still soft (fig. 7).
8. Deploying the power system cables
The cable set 92 for the electric motors 90 is supplied

in the kit, and no soldering is required - all
connections simply plug together. Press the cable
into the spar channel in the wings (fig. 8).At the
nacelles the cables must be left long enough to allow
the motors to be replaced at any time. Connect the
motors 90 to the cable set 92, taking great care to
maintain correct polarity (red dot on motor to red
wire). You may need to adjust the angle of the
connector pins with a pair of pliers.
Important:
You will find a thin wire projecting out of the
motor casing adjacent to each terminal. The-
se are the ends of the suppressor capacitors
installed inside the motor. Thread the wire
through the hole in the motor terminal and
bend it over to ensure that it makes good
electrical contact (fig. 9).
9. Installing the motors
Apply a little glue to the holes in the propellers 91
and push them onto the motor shafts.
Connect the motors 90 to the cable set, then apply a
few drops of 5-minute epoxy to the front part of the
nacelles, push the motors into place and glue the
in-fill pieces 22 in the remaining recess. The best
way to do this is to apply one drop of resin to the
motor and a few more to the foam (fig. 10).
10. Installing the ailerons
Each aileron 23 and 24 is attached to the wing using
two hinges 40, which are secured with a little glue in
the usual way. Fit a pushrod connector 43 in the
outermost hole in the aileron horns 41 (1 x left, 1 x
right). Fit the M2 washers 45 over the threaded
shanks and secure them with the self-locking nuts
46. Fit a socket-head cap screw 44 in the threaded
hole in each pushrod connector using the allen key
48 provided. Glue the horns 41 in the slots in the
ailerons with the row of holes facing forwards and
the pushrod connector facing the fuselage (fig. 11).
11. Deploying the aileron servo cables
For each servo a 60cm long servo extension lead,
MPX Order No. 8 5092, is pressed into the channel
in the wing below the rear spar. The servos are
connected using plugs and sockets, i.e. no soldering
is required. Position the extension lead socket
adjacent to the servo well. Run the rest of the cable
(with the plug) out of the wing at the fuselage end.
12. Installing the wing spars
The spars are supplied ready to fit, and trimming is
not usually necessary.Assemble the spars 60 and
61 from two wood strips each, ensuring that they
both have the same dihedral.
Carry out a „dry run“ to check that the spars fit
correctly, then glue them in the wing using 5-minute
epoxy. Make sure that the various cables are in place
before you do this!
Lay the wing on the workbench inverted, pack it up
in the centre and press the spars completely into
the channel. Wipe off excess glue immediately, and
clean off resin residues with methylated spirits.
13. Installing the aileron servos
The wells for the aileron servos are designed to take
Multiplex MS-X4 servos (two required), MPX Order
No. 6 5041. The servos are glued in place, but to
ensure that they can still be removed they are first
fitted with a piece of heat-shrink sleeving about
20mm wide. The glue is then applied to the sleeve
rather than the servo itself. Roughen up the shrunk-
on sleeve with glasspaper, connect the servo plug
and install the servo with a little 5-minute epoxy.
Carefully stow the excess servo cable inside the
cable well. Connect the pre-formed (Z-bend) end of
the steel pushrod 42 to the outermost hole in the
aileron output lever. Slip the straight end of the
pushrod through the pushrod connector, set the
servo arm and aileron to neutral (centre) and tighten
the socket-head cap screw 44 in the pushrod
connector using the allen key 48 (fig. 12).
14. Trimming the wing fairing
Trim the wing fairing 25 to fit neatly, placing the fairing
on the wing to check alignment. Mark the centreline
and re- move the foam under the marked hole
positions to provide the extra space required. This
is easily done using a screwdriver or the steel
pushrod 42.
15. Attaching the wing to the fuselage
To ensure that the hole spacing in the wing fairing
25 matches that of the wing retainer plates in the
fuselage, the rear retainer plate is not glued in place
until this stage. Place the wing fairing on the wings,
lay the hole reinforcement 71 in the recess in the
underside and screw the rear wing retainer plate to
the underside of the wing with the retaining screw.
Now temporarily fix the wing on the fuselage by fitting
the front retaining screw. Check that the rear wing
retainer plate engages fully in the channel in the
fuselage, and that the wing is central on the fuselage.
Trim the parts as required until the fit and alignment
are exactly correct. The rear wing retainer plate can
now be glued in the fuselage channel following the
same procedure as outlined above. When the resin
has set hard unscrew the wing and glue the
reinforcing former 66 in the fuselage. Glue the hole
reinforcement 71 to the underside of the wing with a
little glue and screw the wing on the fuselage again.
Now glue the wing fairing 25 to the wing using 5-
minute epoxy (apply the glue sparingly), and fit the
retaining screws to hold the fairing in place on the
fuselage until the glue has cured. Remember to
check wing / fuselage alignment carefully, and take
care to keep the glue well clear of the wing screws
(fig. 13). Part 25 can also be held on the wing with
two strips of tape for a neater appearance.
16. Installing the receiving system
The model is designed for the Pico system („Ein-
Stein“ block), but standard 15 / 19mm servos can be
fitted in conjunction with a micro-receiver.
Attaching the hook-and loop (Velcro) tape:
The adhesive on the hook-and-loop tape does

not stick well to the foam surface. Apply a
thin coating of 5-minute epoxy to the hook
tape and glue it inside the fuselage.
- Pico „Ein-Stein“ receiver block:
Glue the Ein-Stein quick-release mount to the bottom
of the fuselage with the retaining lug at the rear. The
plate must rest against the rear edge of the fuselage
to ensure that there is sufficient space for the plugs
in the socket bank of the „Ein-Stein“. You will need
to remove a little foam to clear the retaining lug.
Fix the speed controller for the motors to the fuselage
adjacent to the flight battery in the canopy area of
the fuselage using Velcro tape and connect its plug
to channel 4 on the „Ein-Stein“. Connect an
expansion adaptor 8 5060 to socket 5, then install
the „Ein-Stein“ with the socket bank facing forward
and secure it with the single retaining screw (fig. 14).
Slip the pre-formed steel pushrods 82 and 83 into
the bowden cable outers from the front, fitting them
through the hole in the pushrod connectors at the
tail end as you do so.
Looking from above and from the tail of the model,
connect the rudder pushrod to the third hole in the
inner shank of the servo output lever on the right-
hand side of the case. Connect the elevator pushrod
to the left-hand servo output arm, using the second
hole on the inside shank. You will need to unscrew
the servo output arms in order to connect the
pushrods. Slip the Z-bend of the pushrod through
the hole and re-fit the output arms, taking care to set
them at the correct „neutral“ position. At the tail end
set the rudder and elevator to centre and tighten
the socket-head cap screws in the pushrod
connectors using the allen key 48.
Alternative arrangement: separate elevator and
rudder servos
When installing the servos ensure that the output
arms are at the same height as the pushrods.
1. MS12 and MS-X5 servos:
Trim the servo support rails 69 to fit in the fuselage
together with the servos. Attach the servos flush with
the outside ends of the rails 69 and glue the rails in
the fuselage (fig.15a)
2. MS-X4 servos:
Glue together the servo support rails 69 and the
support strips 70 and trim them to fit in the fuselage
together with the servos. Attach the servos flush with
the ends of the plywood strips 70 and glue the
supports in the fuselage (fig.15b).
Install the receiver (Micro 5/7) in front of the servos
and the speed controller (PiCO-Control 400 DUO),
using Velcro tape to fix them to the fuselage sides.
Plug in the cables.
17. Final assembly
Apply two strips of Velcro „hook“ tape 61 to the inside
of the battery duct, and glue the „loop“ tape 62 to
the underside of the flight battery. We recommend
that you stick a loop of tape round the battery to
facilitate its removal from the fuselage. Place the
battery in the battery duct and temporarily connect
the power system and the aileron servos.
Do not connect the motors to the power
system until your transmitter is switched on
and you are certain that the transmitter
control which governs the motors is at the
„OFF“ position.
Screw the wing to the fuselage. Switch on the
transmitter and connect the flight battery to the speed
controller. It is essential that your controller features
what is known as a BEC system (Battery Eliminator
Circuit - integral receiver power supply).
Remove all loose lightweight objects from the area
behind the model, and hold the airframe securely.
Now switch on the motors briefly and check the
direction of rotation of the propellers.
Take care: even with small motors and
propellers the spinning blades always
represent an injury risk!
18. Control surface travels
If the model is to have a well-balanced control
response the control surface travels must be set
correctly. The rudder should move about 15mm to
right and left (measured at the trailing edge of the
rudder) and the elevator should rise (stick pulled
back) by about 12mm and fall (stick pushed forward)
by about 10mm.The ailerons should have about
20mm up-movement and 8mm down-movement.
When you move the aileron stick to the right the right-
hand aileron should deflect upwards.
19. Balancing
Your „Twin Star“ is stable and docile in the air, but
only when balanced at the correct position - just like
any other flying machine. Assemble the model
completely, ready to fly, and install the flight battery.
On the underside of the wing the spar is located at a
point 75mm back from the wing root leading edge.
Support the model on two fingertips at this point, and
it should balance level (fig. 16). If not, move the flight
battery forward or back to correct. The MULTIPLEX
CG balance (Order No. 69 3054) makes balancing
an easy, convenient and accurate matter. Once you
have found the correct battery position, cut a piece
of scrap foam to act as a packing piece in the battery
box, so that the battery always stays in the same
place.If you intend rolling the model or trying inverted
flight we recommend that you secure the flight pack
so that it cannot fall out. This is done by pushing
another piece of scrap foam between the battery and
the front wing retaining plate, but take care not to
obstruct the circulation of cooling air too much.
20. And now a little decoration:
The kit is supplied with a multi-colour decor sheet 2
to decorate the model. Cut out the individual name
placards and emblems and apply them to the model.
You can follow our suggested scheme or adopt your
own. The black / white sticker 3 is applied over the

spars and servo on the underside of the wing.
Apply the transparent yellow strip 12 to the underside
of the fuselage and slit it at the front in a „sunburst“
pattern to help it follow the curvature neatly.The
sticker provides adequate protection to the foam
surface to prevent landing damage.
21. Preparations for the first flight
Please wait for a day with as little breeze as possible
for the first flight. The evening is often a good time
for test flying.
Be sure to carry out a range check before your first
flight!
The transmitter and flight battery must be fully and
recently charged. Check carefully that your channel
is vacant before you switch on the transmitter. Ask
your assistant to walk away holding the transmitter,
with the aerial fully collapsed.Ask your assistant to
operate one function continuously as he walks away,
while you watch the servos. Up to a distance of about
80m the non-controlled servo should not move at
all, and the controlled one should follow the stick
movements smoothly and with no delays or hiccups.
This test is only a reliable indicator if the radio band
is clear of interference, and if no other radio control
transmitters are switched on - even on different
channels. Repeat the check with the motors
running; the range should only be very slightly less.
If you encounter a problem, do not risk a flight under
any circumstances. Send the whole system
(complete with battery, switch harness and servos)
to the Service Department of your equipment
manufacturer for checking.
The first flight ...
Do not try any hand-glides with the motors
stopped!
The model is best hand-launched, always directly
into wind. For the first flight we strongly
recommend that you ask an experienced
modeller to help you.
Once the model is at a safe height, adjust the trim
sliders on the transmitter until the model flies straight
and level without your help. Keeping the model at a
reasonable altitude, switch off the motors and fly the
model around so that you have a good idea of its
control response on the glide. Simulate a landing
approach several times at height, so that you are
prepared for the „real thing“ when the flight battery
gives out. Always avoid turning tightly when the
model is close to the ground, especially on the
landing approach. The only important consideration
is that you land the model safely, i.e. it is much better
to land gently some distance away than force the
model back to your feet and in doing so crash it.
22. If a landing doesn’t quite go perfectly ...
If a landing goes badly wrong it is perfectly possible
for a tail panel or wing to suffer damage or even be
broken off entirely. Don’t worry: it’s easy to carry out
a quick repair with 5-minute epoxy, even at the flying
field. Apply 5-minute epoxy thinly to the break
surfaces, push the parts together and hold them in
position for about 5 minutes. Now leave the resin to
set hard for a further 10 minutes - and you are ready
to fly again. Always apply resin sparingly as too much
just looks unsightly without making the joint any
stronger. If you have plenty of time we recommend
using white glue for repairs. The advantage of this
adhesive is that it produces a virtually invisible joint.
The drawback is that the mended panel must be
aligned carefully and weighted down overnight to
avoid the danger of warps.
23. Safety
Safety is the First Commandment when flying any
model aircraft. Third party insurance should be
considered a basic essential. If you join a model club
suitable cover will usually be available through the
organisation. It is your personal responsibility to
ensure that your insurance is adequate; in this case,
that it covers powered models.
Make it your job to keep your models and your radio
control system in perfect order at all times. Check
the correct charging procedure for the NC batteries
used in your RC system and model. Make use of all
sensible safety systems and precautions which are
advised for your system. An excellent source of
practical accessories is the MULTIPLEX main
catalogue, as our products are designed and
manufactured exclusively by practising modellers for
other practising modellers. Always fly with a
responsible attitude. You may think that flying low
over other people’s heads is proof of your piloting
skill; others know better. The real expert does not
need to prove himself in such childish ways. Let other
pilots know that this is what you think too. Always fly
in such a way that you do not endanger yourself or
others. Bear in mind that even the best RC system
in the world is subject to outside interference. No
matter how many years of accident-free flying you
have under your belt, you have no idea what will
happen in the next minute.
MULTIPLEX Modelltechnik GmbH
Model Development

Part No. Description Material Dimensions
No. off
1 1 Building instructions A4 format
2 1 Name placard - decor set, sheet 1 Printed film Ready made
3 1 Name placard - decor set, sheet 2 Printed film Ready made
Fuselage
10 1 Fuselage Moulded styrofoam Ready made
11 1 Canopy Moulded styrofoam Ready made
12 1 Landing skid - self-adhesive film Clear film Ready made
Wings
20 1 L.H. wing panel and motor nacelle Moulded styrofoam Ready made
21 1 R.H. wing panel and motor nacelle Moulded styrofoam Ready made
22 2 In-fill piece for motor nacelles Moulded styrofoam Ready made
23 1 L.H. aileron Moulded styrofoam Ready made
24 1 R.H. aileron Moulded styrofoam Ready made
25 1 Wing fairing Vac. formed plastic Ready made
Tail panels
30 1 Tailplane Moulded styrofoam Ready made
31 1 Elevator Moulded styrofoam Ready made
32 1 Fin Moulded styrofoam Ready made
33 1 Rudder Moulded styrofoam Ready made
34 1 Fin strake Moulded styrofoam Ready made
Accessories
40 10 Hinge Plastic Ready made
41 4 Glue-in horn Plastic Ready made
42 2 Aileron pushrod, one Z-bend Metal Ready made
43 4 Pushrod connector Metal Ready made
44 4 Socket-head cap screw, pushrod connector Steel M3 x 3 mm
45 4 M2 washer Steel Ready made
46 4 Self-locking nut Steel M2
47 1 Thread-cutting screw Steel M4 x 20 mm
48 1 Allen key Metal 1.5 mm A/F
49 2 Screw hook Metal Ready made
50 1 Rubber band Rubber Ready made
51 3 Velcro tape, hook Plastic 25 x 60 mm
52 3 Velcro tape, loop Plastic 25 x 60 mm
53 1 Front wing retainer screw Plastic M4 x 40 mm
54 1 Rear wing retainer screw Plastic M4 x 25 mm
Wooden parts
60 1 Front spar (2 strips - short) Obechi Ready made
61 1 Rear spar (2 strips - long) Balsa Ready made
62 1 Wing retainer plate, front top Plywood Die-cut, 3 mm
63 1 Wing retainer plate, front bottom Plywood Die-cut, 3 mm
64 3 Wing retainer plate, rear top Plywood Die-cut, 3 mm
65 1 Wing retainer plate, rear bottom Balsa 10 x 12 x 28 mm
66 1 Reinforcing former Plywood Die-cut, 3 mm
67 1 Canopy plate Plywood Die-cut, 3 mm
68 2 Screw hook block Balsa 8 x 8 x 10 mm
69 2 Servo rail Balsa 10 x 12 x 52 mm
70 2 Servo rail Plywood Die-cut, 3 mm
71 2 Hole reinforcement Plywood Die-cut, 3 mm
Wire and tube
80 1 Bowden cable outer, rudder Plastic 3 / 2 Ø x 320 mm
81 1 Bowden cable outer, elevator Plastic 3 / 2 Ø x 480 mm
82 1 Pre-formed rudder pushrod (Z-bend) Steel 1.3 Ø x 510 mm
83 1 Pre-formed elevator pushrod (Z-bend) Steel 1.3 Ø x 560 mm
Power set
90 2 Electric motor Permax 400 Ready made
91 2 Propeller Plastic 125 x 110 mm
92 1 Power system cable set Plastic / metal Ready made
MULTIPLEX Modellsport GmbH & Co KG
Neuer Weg 2
D-75223 Niefern
/