Page is loading ...

JKS Steering Stabilizer Tie Rod Mount Installation PN OGS924 Page 1 of 2
Installation
Instructions
Product: Steering Stabilizer Tie Rod Mount
Part Number: PN OGS924
Application: Jeep Wrangler JK, 2007+
Welcome
CONGRATULATIONS on purchasing a new Steering
Stabilizer Tie Rod Mount from JKS Manufacturing. We
are committed to providing you with the best products
available and your satisfaction is our first priority.
PLEASE READ these Installation Instructions carefully,
and save them for future reference, as they contain
important installation and maintenance information.
Important
NOT COMPATIBLE WITH the OE steering stabilizer.
Make sure you have an aftermarket steering stabilizer
with 5/8” ID bushing before attempting installation.
Tools Required
Metric/Standard Socket Wrench Set
Torque Wrench
Tape Measure *
Factory Service Manual (recommended)
* Indicates tool that may not be necessary for every installation.
Thoroughly read instructions in advance to determine which
tools will be required for your application.
Parts
DESCRIPTION PART # QTY
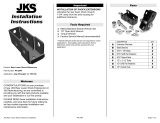
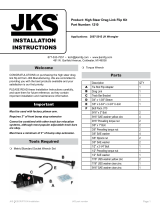
A Tie Rod Bracket Assembly PN 925010 1
B U-Bolt Strap PN U140 2
C 7/16” Split Lock Washer PN 33624 4
D 7/16” GR5 Nut PN 36358 4
E 7/16” Fender Washer PN 33010 1
F 7/16” Ovalok Nut PN 37306 1

JKS Steering Stabilizer Tie Rod Mount Installation PN OGS924 Page 2 of 2
Installation
1. REMOVE OE TIE ROD MOUNT
Remove the steering stabilizer retainer nut from
the factory mount on the tie rod.
Remove end of stabilizer from factory mount.
Remove the hardware that secures the factory
stabilizer mount to the tie rod.
Remove the factory stabilizer mount from the
vehicle and discard along with original
hardware.
2. INSTALL NEW STEERING
STABILIZER TIE ROD MOUNT
To ensure a proper fit, clean any dirt, debris or
grease from surface of tie rod where the
stabilizer was mounted.
Determine the ideal configuration and
placement of the Steering Stabilizer Tie Rod
Mount on the tie rod. Take into consideration
the following factors:
Stabilizer mount on tie rod should be
aligned with stabilizer mount on axle. There
should be no binding of the stabilizer or its
bushings throughout its entire stroke.
Mounting position on tie rod must allow
unrestricted steering from lock-to-lock.
Tie Rod Mount and steering stabilizer must
not interfere with differential cover on axle.
For maximum versatility, the Steering Stabilizer
Tie Rod Mount can be installed in various
configurations based on your individual vehicle
requirements. The following are just two of the
most common configurations:
Place the Tie Rod Bracket Assembly (A) on the
tie rod in the desired configuration and loosely
install the U-Bolt Straps (B) along with the 7/16”
Split Lock Washers (C) and 7/16” GR5 Nuts
(D). Do not tighten hardware yet.
IMPORTANT: This product is not compatible
with the factory steering stabilizer. An
aftermarket damper with 5/8” ID bushings
must be installed.
Slide end of steering stabilizer onto mounting
stud of Tie Rod Bracket Assembly (A) followed
by the supplied 7/16” Fender Washer (E) and
7/16” Ovalok Nut (F).
IMPORTANT: If stabilizer bushing contains a
metal sleeve, remove it to allow fitment.
Tighten 7/16” Ovalok Nut (F) until the Fender
Washer (E) bottoms on the mounting stud.
With the Steering Stabilizer Tie Rod Mount
loosely installed on tie rod, find a position that
allows unrestricted lock-to-lock steering and full
steering stabilizer travel.
Once the final mounting position is established,
evenly tighten each of the 7/16” GR5 Nuts (D)
to 35 ft-lbs. using a torque wrench.
2011 JKS Manufacturing, Inc & Aftermarketing, LLC
Revision Date 4/28/2011
/


