Page is loading ...

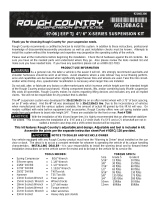
Thank you for choosing Rough Country for all your vehicle needs.
Please read instructions before beginning installation. Check the kit hardware against the kit contents shown below. Be
sure you have all needed parts and know where they go.
If question exist, please call us @1-800-222-7023. We will be happy to answer any questions concerning this product.
Check all fasteners for proper torque. Check to ensure for adequate clearance between all components.
Periodically check all hardware for tightness.
KIT CONTENTS:
Driver Side Tail Light x1
Pass Side Tail Light x1
TOOLS NEEDED:
Flat Pry Tool
Phillips Bit Driver
10mm Wrench or Socket
Torque Specs:
Size Grade 5 Grade 8 Size Class 8.8 Class 10.9
5/16” 15 ft/lbs 20ft/lbs 6MM 5ft/lbs 9ft/lbs
3/8” 30 ft/lbs 35ft/lbs 8MM 18ft/lbs 23ft/lbs
7/16” 45 ft/lbs 60ft/lbs 10MM 32ft/lbs 45ft/lbs
1/2” 65 ft/lbs 90ft/lbs 12MM 55ft/lbs 75ft/lbs
9/16” 95 ft/lbs 130ft/lbs 14MM 85ft/lbs 120ft/lbs
5/8” 135ft/lbs 175ft/lbs 16MM 130ft/lbs 165ft/lbs
3/4” 185ft/lbs 280ft/lbs 18MM 170ft/lbs 240ft/lbs
JEEP 2018-UP JL Rear LED Tail Lights
RCH5900

1. Locate the interior bolt cover on the inside of the vehicle. Using a Flat pry tool remove the cover. See Photo 1.
2. Loosen the tail light bolt using a 10mm socket. Retain the bolt for reuse. See Photo 2.
3. Remove the bolt and the tail light from the vehicle. See Photo 3.
4. Release the center lock tab. Then disconnect the plug. See Photo 4.
5. Remove the mounting bracket from the tail light. Using a Phillips bit driver remove the (3) screws from the mount.
Then release the clip and remove the bracket from the tail light. See Photo 5.
6. Place the mount onto the new tail light, seating the clip into the base of the light. Secure the mount using the (3) re-
tained screws. See Photo 6.
Photo 1 Photo 2
Photo 3 Photo 4
Photo 5 Photo 6
Remove the bolt cover. Loosen the tail light bolt.
Remove the bolt and the tail light. Disconnect the tail light plug.
Remove the mounting bracket from the tail light. Install mounting bracket on the new tail light.
INSTALLATION INSTRUCTONS

7. Connect the wiring harness from the new tail light to the vehicle harness and lock the tab in place. See Photo 7.
8. Install the tail light into the vehicle. See Photo 8.
9. Install the tail light bolt into the bracket. Snug using a 10mm socket. Do not over tighten. See Photo 9.
10. Install the interior bolt cover. See Photo 10.
11. Repeat steps 1-10 on the opposite side of the vehicle.
12. After installation of the tail lights check that all functions of the tail light are to be in working order.
Photo 7 Photo 8
Photo 9 Photo 10
Connect the tail light harness. Install the tail light into the vehicle.
Secure the tail light with the OE bolt. Install the interior bolt cover.

By purchasing any item sold by Rough Country, LLC, the buyer expressly warrants that he/she is in compliance with all
applicable, State, and Local laws and regulations regarding the purchase, ownership, and use of the item. It shall be the
buyers responsibility to comply with all Federal, State and Local laws governing the sales of any items
listed, illustrated or sold. The buyer expressly agrees to indemnify and hold harmless Rough Country,
LLC for all claims resulting directly or indirectly from the purchase, ownership, or use of the items.
/