Page is loading ...

User Manual SW6000 CAA.docx 1/91
SW6000
User Manual
CAA Conference Admin Application
User guide for Shure SW6000 Conference Management Software
Version: 9.3 (2021)

Shure Incorporated
User Manual SW6000 CAA.docx 2/91
Table of Contents
Introduction ...................................... 4
1.1 Licensing .......................................... 4
Features ............................................ 5
2.1 SW6000 General Description ............... 5
2.2 SW6000 Conference Management
Software (basic) ................................ 5
2.3 SW6000 Expanding Options ................ 5
General .............................................. 7
3.1 Starting the CAA ............................... 7
3.2 Closing the CAA................................. 7
3.3 Screen Sizes ..................................... 7
3.4 General Screen Functionality ............... 8
3.5 Search List ....................................... 8
3.6 Buttons ............................................ 8
Language Selection ........................... 9
Meetings .......................................... 10
5.1 Meeting Mode ................................. 13
5.2 Speak Mode .................................... 15
5.3 Participant Seat Table ...................... 16
5.4 Agenda .......................................... 19
5.4.3.1 Descriptions ................................... 22
5.4.3.2 Pre-requests to Speak ..................... 22
5.4.3.3 Vote Results ................................... 23
5.4.3.4 Hyperlinks ..................................... 24
5.4.3.5 Notes ............................................ 24
5.5 Meeting Options .............................. 25
5.6 Import Agenda from Word ................ 28
Tables .............................................. 30
6.1 Users ............................................. 30
6.2 Groups Table .................................. 32
6.3 Default Participant Seat Table ........... 32
Messages ......................................... 33
Reports ............................................ 34
8.1 Meeting Log Reports ........................ 34
8.2 Participant Meeting Report ................ 36
8.3 User Table Report ............................ 37
8.4 Agenda Report ................................38
8.5 Participant Statistical Report .............39
8.6 Search in Voting Results ...................41
Setup/Equipment ............................ 42
9.1 Conference Units .............................42
9.2 Interpreter Devices ..........................46
9.3 Audio Output Units (AO) ...................48
9.4 Ambient Microphones (AM) ...............49
9.5 Meeting Displays (CDA) ....................50
9.6 ID Card’s ........................................51
9.7 Web Service ....................................53
9.8 Meeting Import/Export Mode .............53
9.9 Name Signs ....................................54
Setup/Configurations ...................... 56
10.1 Agenda Subject Configuration ...........56
10.2 Reply Configuration ..........................56
10.3 Voting Configuration ........................57
10.3.2.1 Conference Units with 3/5 Voting
Buttons .............................................. 58
10.3.2.2 Proxy Voting .............................. 58
10.3.7.1 Quorum .................................... 62
10.3.7.2 Passed ...................................... 62
10.3.9.1 Variables ................................... 63
10.3.9.2 Syntaxes ................................... 64
10.3.9.3 Use of Voting Group parameter .... 64
10.4 Mimic Configuration .........................65
10.5 CDA Screen Configuration .................67
10.6 CUA Microphones | Speak List Content67
10.7 Print Server Configuration .................68
10.8 Speech Time Configuration ...............68
10.9 Speaker Type Configuration ..............68

Shure Incorporated
User Manual SW6000 CAA.docx 3/91
10.10 Web Service Configuration ................ 68
10.11 Meeting Type Configuration .............. 69
10.12 Name Sign Templates ...................... 69
Setup/Meeting Role ......................... 70
11.1 Main Menu ...................................... 71
11.1.1.1 In-agenda Content Options ......... 72
11.1.1.2 Agenda Detailed View ................. 72
11.1.1.3 Notes ....................................... 74
11.1.1.4 Agenda Controls ........................ 74
11.1.1.5 User Rights ............................... 74
11.2 Control menu .................................. 75
11.3 Panel Buttons .................................. 76
11.4 Speak Operation Settings ................. 77
11.5 User Rights ..................................... 78
Setup/Language .............................. 80
12.1 Languages ...................................... 80
12.2 Labels ............................................ 81
12.3 Label Groups................................... 82
12.4 Units with Graphical Interface ........... 82
Setup/Rooms .................................. 83
13.1 Create Rooms ................................. 83
13.2 Room Setup .................................... 84
Setup/Database .............................. 85
14.1 Create Database Connections ............ 85
Connect to Database........................ 86
Tools ............................................... 87
16.1 Tools/System Messages ................... 87
16.2 Tools/License Information ................. 87
SW6000 Backup Utility .................... 88
17.1 Backing Up Data .............................. 88
17.2 Restoring Data to Same Database ..... 89
17.3 Restoring Data to Other Database ..... 90

Shure Incorporated
4/91
Introduction
The SW6000 Meeting Management Software is designed to operate with hardware units in the MXC
Microflex Conference System and the DCS 6000 Digital Conference System.
The SW6000 software facilities are controlled by licensing. The next chapter describes the basic facilities
and the expanding options.
One instance of the CUA and CAA application is included in basic SW6000 Software.
Please note that this manual may include description of features, which are not included in basic SW6000
Software like Software Controlled Voting, which is licensed separately.

Shure Incorporated
5/91
Features
The use of the SW6000 applications and modules is controlled by a ‘SW6000 License’ file. Refer to the
‘Installation Manual SW6000’ for details on the License File.
The SW6000 software package has the following system features:
• Client/server system for multiple PCs
• Multiple user profiles with different functionality
• Full language support
• Very user friendly graphical design of high quality
• Data stored in SQL database format
The basic software includes the following applications:
• CAA Conference Admin Application (one instance)
• CUA Conference User Application (one instance) incl. CUA voting client
• ECA External Control Application
With the following functionality:
• Microphone Control
• Agenda Control
• Messaging
• Mimic/synoptic layout
• User table
• Interpretation Control
• Multiple Languages
• ID card registration/programming
• Multiple room control
The functionality in the basic software can be expanded with the following modules and applications:
SW6000-VOTE
This ‘Parliamentary voting’ module enables start/stop of voting from the CUA application and is needed if
voting in the system is required.
SW6000-ESI
The External System Interface module includes the following functionality:
• Streaming Application Control
• Web Service Interface (Streaming of Dynamic data)
• Import/Export of meetings
SW6000-ADV
This module expands the functionality in the basic software with the following advanced controls:
• Advanced Microphone Control
• Advanced Agenda Control

Shure Incorporated
6/91
• Advanced Speech Time Control
SW6000-CAA
The ‘CAA Conference Admin Application’ is used by technicians to configure components and setup the
system.
The CAA is also used before the event by secretaries or chair persons for setting up meetings, enter
participants and agenda information.
During the event the CAA is used for making changes to the meeting agenda.
SW6000 basic includes the use of one CAA instance. Up to 15 additional CAA applications can be used
simultaneously in SW6000.
SW6000-CUA
The ‘CUA Conference User Application’ is used by Chairpersons or delegates to control microphones, view
agenda, vote, etc. on a PC instead of using the conference unit.
SW6000 basic includes the use of one CUA instance. Up to 199 additional CUA applications can be used
simultaneously in SW6000.
This application includes the facility to vote from the CUA application if the system is expanded with the
‘SW6000-VOTE Parliamentary Voting’ module.
SW6000-CDA
The ‘CDA Conference Display Application’ is used for displaying content for the audience or participants in
the meeting. Up to 16 CDA applications (instances) can be used simultaneously in SW6000.
Important: Refer to the section ‘Module Licenses’ in the ‘Installation Manual SW6000’ for information on
the module licenses needed for the required functionality.
This manual may include functionality which is licensed separately.

Shure Incorporated
7/91
General
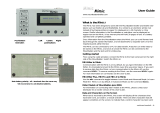
After the CAA has been installed, the CAA
shortcut is placed on the Desktop and in the
start folder.
Selecting the CAA shortcut will start the
application
A small window will appear while the
application is starting up.
Figure 3.1-A
The CAA can be closed in three different ways:
• Using the ‘Exit’ option in the menu list
• Using the standard windows option ‘x’ in the upper right corner
• Using the key combination ‘Alt+F4'
The CAA user interface (UI) is designed to run in a window or as a full screen application.
The CAA application accepts screen resolution from 1024x768 and higher, however a minimum resolution
of 1600x900 is highly recommended.

Shure Incorporated
8/91
The following describes the general
functionality that applies to all
screens in the Conference Admin
Application (CAA).
Figure 3.4-A
The above example shows the screen for creating and editing messages.
The left side of the screen will display a list of messages that allow to search for and select a specific
message to edit. The ’Search for...’ field provides free text search on the texts displayed in the list.
Entering the text ’Plea’ in the shown example would place focus on the first message where the text is
found. In this case ‘Please approach the Chairperson...’ would be found.
A vertical scroll bar will appear to enable scrolling down the message list if additional ones exist off the
screen.
The right side is for the actual functionality related to the menu selection. A tab for each language will be
available. The user can flip through the language tabs when creating or editing data thereby entering a
translation for the different languages. The system will require the user to enter data for the default
language, which is the language on the first tab from the left (e.g. English).
Entering data for the rest of the languages is optional. Selected fields will be highlighted in yellow.
Throughout this manual buttons will be referred to by putting the button text in brackets like [Add]. The
following buttons are generally implemented on all screens:
[Add]
Select the button to add a new record. When the screen is in edit mode then all fields
will be sand colored. When the adding of information is complete (possibly for several
languages) then select the [Update] button to save the information.
[Delete]
Select the button to delete selected record information. Information for the record in all
languages will be deleted.
[Update]
When information is added the changes are saved by selecting this button. Editing
existing information is done simply by selecting the information and changing it. The
fields will be sand colored to show that the screen is in edit mode.
[Copy]
Select one configuration and select this button. A copy of the configuration selected will
be created.
[Cancel]
Select the button to avoid saving changes just made or saving a newly added record. If
an existing record was being edited then the old data will reappear.
[Close]
Select the button to close the window.

Shure Incorporated
9/91
Language Selection
When the application is started the
a UI language must be selected if
more languages are in use.
If only one language is in use,
then the language selection screen
is not presented.
A user ID or password is not
required. If restricted access to
the CAA application is needed, use
the standard Windows logon when
starting up Windows or apply
‘Single Sign On’.
Figure 3.6-A
After selecting the language the
application will present the
following screen.
At the top of the screen dropdown
menu provides access to all the
different CAA screens.
Figure 3.6-B

Shure Incorporated
10/91
Meetings
Selecting the ‘Meetings’ brings up
the ‘Meetings’ page.
This screen is used to create
meetings with Participant lists
assigned to a specific meeting,
and to specify operation
parameters to be set when the
meeting is activated.
Any number of meetings can be
created.
The names of the meetings will
normally be a specific meeting
name like ‘Sales Meeting’ or
‘Annual Meeting’ running a limited
period of time.
Figure 3.6-A
Meeting ID
An alpha-numerical value use to identify the meeting.
Meeting name
Title of the meeting. Max. 50 characters.
Meeting mode
The meeting mode determines how Participants are known to the
system.
Refer to the section’5.1 Meeting Mode’.
Speak mode
Select the microphone mode to be used when the meeting is
started. Options are ‘Automatic’, ‘Manuel’, ‘FIFO’ and ‘VOX (Voice
activation)’.
Refer to the section ‘5.2 Speak Mode’.
Agenda subject configuration
Note: This facility is subject to availability of ‘SW6000-ADV’ module.
Refer to the ‘User Manual SW6000 Advanced Meeting Management’
for user information.
Voting configuration
Note: This facility is subject to availability of ‘SW6000-VOTE’
module.
The default voting configuration for the meeting can be set using a
dropdown box.
A set of voting configurations is created in
‘Setup|Configurations|Voting configuration’. The default voting
configuration for the meeting can always be changed in the CUA
before a voting session is started.

Shure Incorporated
11/91
Registration configuration
Note: This facility is subject to availability of ‘SW6000-VOTE’
module.
The dropdown selection ‘Registration Configuration’ in is used to
select the registration configuration for the meeting.
If no registration configuration is selected, registration is not
available for the meeting.
Note: Refer to the ‘User Manual SW6000 Registration Facility’ for
detailed use of the Registration facility.
Speech time configuration
The default speech time configuration for the meeting can be set
using a dropdown box.
A set of speech time configurations is created in
‘Setup|Configurations|Speech time configuration’. The speech time
configurations for the meeting can always be changed in the CUA.
Start dates
End dates
The date fields are used to specify when the meeting is to be held.
Meetings are only visible in the CUA Application if today’s date falls
on or between these two dates.
Start time
The start time of the meeting can be specified in this field.
If no time is specified, the time the meeting is started will be shown
for the first agenda subject
System language
The ‘System language’ displays the default language selected during
the installation. It is set per default and cannot be disabled. Missing
labels or text entries in other languages will show the system
language label/text entry instead.
Language in use in the meeting
The ‘Language in use in the meeting’ option enables the use of
languages during a meeting. Only those languages that have been
selected before a meeting is started will be available to the users.
The default system language selected during the installation will
always be enabled and cannot be disabled.
No language choice at meeting
start
The ‘No language choice at meeting start’ option disables the
language selection when used with meeting modes ‘No login’,
‘Prepared participant seat table’ or ‘Automatic login on preferred
seat’. The user will be presented for the CUA Main screen in the
default language, when the meeting is started. When using the
meeting modes ‘Login using code/card…’ the user will be presented
for the CUA Login screen, when the meeting is started.
Customer meeting ID
Field, which is filled in during an import from a third party system.
The field cannot be edited.
Customer field 1-4
Four user defined fields for entering data about the meeting.
Meeting type
Type of the meeting. This information is used when streaming
content to third party applications.
The ‘Meeting type’ is setup in the ‘Meeting type configuration’.
Alert on display
Note: This facility is subject to availability of ‘SW6000-ADV’ module.
Refer to the ‘User Manual SW6000 Advanced Meeting Management’
for user information.
[Seat table]
This button open the screen for creating a ‘Participant seat table’ for
the meeting.
The button is not available for the meeting modes ‘No login’ and
‘Login using code/card’.
Refer to the section ‘5.3 Participant Seat Table’.

Shure Incorporated
12/91
[Agenda]
Selecting this button bring the ‘Agenda’ popup used for creating an
Agenda to a meeting.
Refer to the section ‘5.4 Agenda’.
[Proxy votes]
On conference units
which feature 5 voting
buttons ‘Proxy’ voting
is possible. Proxy
votes cannot be
casted from the CUA.
Proxy voting enables
a Participant to cast a
vote on behalf of
another Participant.
Figure 3.6-B
The “Proxy Votes” button opens the list for assigning Participants
permission to vote for another Participant.
If time and/or date entries are made the Proxy votes are only valid
within these dates.
If only date entries are made the Proxy votes are valid from 00.00-
23.59 within these. If no time or date entries are made the Proxy
votes are valid throughout the entire meeting.
[Options]
The ‘Option’ button brings the ‘Meeting option’ popup, which is used
to set operation settings of the system used when starting the
meeting.
Refer to the section ‘5.5 Meeting Options’.
[Stop meeting]
Use this button to stop a meeting
Note: A meeting is normally stopped from the CUA application.
[Copy]
The ‘Copy’ button makes a copy of the selected meeting. Both
‘Participant seat table’, ‘Agenda’, ‘Proxy votes’ and ‘Option’ settings
are copied.
[Save as default]
The ‘Save as default’ button saves the meeting data from the
currently marked meeting and inserts this data per default when
creating new meetings.
[Delete default]
The ‘Delete default’ button deletes default meeting data.

Shure Incorporated
13/91
A number of different meeting modes are available. All modes except ‘Login using code/card’ and ‘No
login’ uses a ‘Participant seat table’, where the participants login permission, seat assignment and
meeting role are validated against this table.
Refer to section: ‘5.3 Participant Seat Table’ for details.
Available meeting modes:
Prepared
participant seat
table
Selecting this option is used for permanently assign seats
to the participants attending the meeting.
When the meeting is started all are logged in and
assignment cannot be changed during the meeting.
The login and permissions are validated to the ‘Participant
seat table’ for the meeting.
A seat, paired to a PC with CUA Application, will show the
participants name on the ‘Language selection screen’.
Login using code…
Login using
code/card
Selecting this option will allow Participants to login using
their ‘Login code’ or using an ID card, depending on the
‘Login mode’ setting in ‘Meetings|Options’.
The login and permissions are validated to the ‘User table’
Login using
code/card on seat
Selecting this option will allow Participants to be assigned a
specific seat on the ‘Participant seat table’ for the meeting.
The Participants has to login using their ‘Login code’ or
using an ID card, depending on the ‘Login mode’ setting in ‘
Meetings|Options’, but can only login on the assigned seat.
The login and permissions are validated to the ‘Participant
seat table’ for the meeting.
Login using
code/card on list
Selecting this option will allow Participants present on the
‘Participant seat table’ for the meeting to login at any seat
using their ‘Login code’ or using an ID card, depending on
the ‘Login mode’ setting in ‘Meetings|Options’.
The login and permissions are validated to the ‘Participant
seat table’ for the meeting.
The microphone in conference units with graphical user interface or ID card
reader with no participant logged in cannot be controlled.
Other units can be controlled using the CUA Mimic and will be shown with the
seat number in the ‘Speak lists’, however the units will not be shown in
participant list in the ‘Microphones’ screen and in the ‘Participants’ screen.
When using ‘Use login code’ selected in the ‘Login mode’ setting in
‘Meeting|Options’, Participants can be logged in/out, moved (not in ‘Login using
code/card on seat’) and get their ‘Meeting role’ changed by an operator
using the
CUA Mimic screen.

Shure Incorporated
14/91
Login using
code/card on
preferred seat
Login mode: ‘Use Login code’
Selecting this option will allow Participants to log
directly into the assigned seat in the ‘Participant seat
table’ for the meeting, without typing a ‘Login code’,
using the Login button in the CUA. If the participant
logout, he will be presented for the same login
screen.
Another participant can login to the seat using the
Login button in ‘Login as other user’, and then type
the login code.
On units with graphical units interface not paired to a
CUA, the participants can login using their ‘Login
code’.
Other participants on the ‘Participant seat table’ for
the meeting are logged into their seats when the
meeting is started.
Units not included in the ‘Participant seat table’ can
be controlled using the CUA Mimic and will be shown
with the seat number in the ‘Speak lists’, however the units will not be shown in
participant list in the ‘Microphones’ screen and in the ‘Participants’ screen.
Login mode: ‘Use cards ….’ or ‘Use NFC card…’
Participants in the ‘Participant seat table’ for the meeting using units with card
reader are logged in when an ID Card is inserted. When no participant is logged
in, the unit cannot be operated and participants cannot be logged in/out by an
operator using the Mimic screen.
Participants using a CUA paired with a conference unit without a Card reader are
presented for a keypad enabling the participant to login using his ‘Login code’.
Other participants on the ‘Participant seat table’ for the meeting using units
without card reader are logged into their seats when the meeting is started.
Units without card reader not included in the ‘Participant seat table’ can be
controlled using the CUA Mimic and will be shown with the seat number in the
‘Speak lists’, however the units will not be shown in participant list in the
‘Microphones’ screen and in the ‘Participants’ screen.
Automatic login on
preferred seat
This meeting mode it identical to ‘Login using code/card on preferred seat’, with
the exception that the participants using the CUA are not presented for a login
option at meeting start.
Important: This mode is not supported in DC 6990 Conference Units.
No login
This option will not use names of the participants. The lists in the ‘Microphones’
screen will show seat number.
In this mode, the ‘Participants’ screen in the CUA application will not be
available.
Note: The ‘… preferred seat’ modes differs from ‘Prepared participant seat table’ mode in the sense that
the Participants are not registered as logged in before they login and participants can be logged in/out,
moved and get their ‘Meeting role’ changed by an operator using the Mimic screen.

Shure Incorporated
15/91
The ‘Speak mode’ can always be changed during a meeting using the Meetings screen in the CUA.
Individual microphone settings which might be assigned to any conference unit are not overridden. See
section ‘Setup|Meeting Role’ for further details about Individual microphone settings.
The following modes are available for the meeting:
Manual
All speak requests from participant with Delegate meeting role are inserted
into a request queue. Their microphones are turned on when an
Operator/Chairperson grants the individual participant the right to speak.
Automatic
All speak requests from participant with Delegate meeting role causes their
microphone to turn on if the number of ‘Max. delegate speakers’ is not
reached. Depending on the ‘Speak interrupt mode’ the speak request may
be rejected.
FIFO
All delegates speak requests causes their microphone to turn on if the
number of ‘Max. delegate speakers’ is not reached. Otherwise the speak
request will be inserted into a speak-request queue. When one of the
active microphones is turned off, the first in the speak-request queue will
automatically be turned on.
VOX
Speaking into a Participant microphone will turn on the microphone if the
number of ‘Max. delegate speakers’ is not reached. Depending on the
‘Speak interrupt mode’ the speak request may be rejected.
Settings for the VOX mode can be set in the DIS-CCU browser application.
Manual + reply
Same a ‘Manual’ mode however the Reply option is enabled
Automatic + reply
Same a ‘Automatic’ mode however the Reply option is enabled
VOX + reply
Same a ‘VOX’ mode however the Reply option is enabled
Participants with Chairperson meeting role will never be placed in the speak-request queue and can
always be turned on if the number of ‘Max. speakers’ is not reached. Depending on the ‘Speak interrupt
mode’ the speak request may then be rejected.
Participants with Chairperson meeting role will interrupt a participant with Delegate meeting role if the
number of ‘Max. speakers’ is reached.

Shure Incorporated
16/91
Select the [Seat table]
button to present the
window for creating a
‘Participant seat table’ for
the meeting.
The button is only enabled
if the meeting mode is set
to
• Prepared participant
seat table
• Login using code/card
on seat
• Login using code/card
on list
• Login using code/card
on preferred seat
• Automatic login on
preferred eat.
Figure 5.3-A
[>>]
Existing user’s in the ‘User table’ will be shown in the left window. Selecting
a user and selecting ‘>>’ will place the user in seat number 1 in the
‘Default participant seat table’. The seat will automatically be generated,
when selecting ‘>>’.
Selecting an empty seat before selecting ‘>>’ will place the user in that
seat.
Selecting a seat occupied by a Participant, before selecting ‘>>’ will place
the user in a new seat.
[<<]
Selecting a seat and selecting ‘<<’ will remove a Participant from a seat.
Selecting ‘Clear seat’ will also remove a Participant from a seat.
User table
Selecting this button will show the User table. This is the default view when
opening the Participant Seat Table. The following setting can be changed:
Meeting role – assigning the Meeting role for the participant for the
meeting. The default is the meeting role assigned to the Participant in the
User table
Use second. meeting role – enabling the use of a Secondary Meeting
Role on seat types ‘Secondary seat’
Secondary meeting role – assigning a Secondary meeting role used on
seats with the Seat type configured as ‘Secondary seat’ in
‘Setup|Equipment|Conference units’.
Note: Secondary Meeting Role facility is subject to availability of ‘SW6000-
ADV’ module.
Refer to the ‘User Manual SW6000 Advanced Meeting Management’ for
user information.

Shure Incorporated
17/91
Seat table details
Figure 5.3-B
Selecting the ‘Seat table details’ button brings a window showing all the
Participant seat table details.
This option is useful if specific values different from the entries made for
the user in the ‘User table’ has to be changed for the meeting. The
following additional values can be changed:
Group – assigning a group e.g. for group speech time
Voting weight – assigning a numerical value giving the number of votes
the user has
Voting group – assigning a character used for a voting calculation for
groups with different voting rights
Mic attenuation – assigning an individual microphone level
[Show active]
Selecting ‘Show active’ will filter the list to show all user’s marked as
‘Active’ in the ‘User table’.
[Show all]
Selecting ‘Show All’ will show all user’s in the ‘User table’.
[Import participants]
Select this button to import a list of names from an XML file or to use the
‘Default participant seat table’ created in the ‘CAA|Tables|Default
participant seat table’.
[Export participants]
Select this button to export a list of participants to an XML file.

Shure Incorporated
18/91
[Add entries]
Select this button to create the number of seats,
which will be used for the meeting.
Figure 5.3-C
[Delete entry]
Select this button to delete a selected seat.
[Clear seat]
Select the button to remove a Participant from a
selected seat.
[Delete list]
Select this button to delete all seats.
[Move]
Select this button to move a Participant from one
seat to another.
Figure 5.3-D

Shure Incorporated
19/91
Figure 5.4-A
The agenda is a list of subjects with a Title and optional information like Description. Adding subjects build
the Agenda one by one in a table view.
The Agenda screen consist of an ‘Agenda Table View’ and for a selected subject the ‘Subject Tabs’ are
available for adding additional information like Description, Speak requests, Vote results, Hyperlinks or
Notes.
A number of Subject Control Buttons are available on the screen for editing/structuring the agenda
subjects.
Agenda Table View
The agenda table view consist of columns with fields for entering data and shows all subjects including
indentation.
New subjects are added automatically when entering text on a blank line below the last subject.
Subject can be moved, inserted and indented using the subject control buttons to the right.
Note: The ‘Subject title’ in a row must not be left blank in the system language.
The columns in the Table View are:
#
Field for numbering the subjects. The field can be empty.
(no header)
This field indicates the indentation level of the subject. Each level is marked
with the level number and a different color.
-/+
Expand and collapses the sub-subjects.

Shure Incorporated
20/91
Subject title
Field for entering the main subject and sub-subjects. For each main subject it
is possible to type in a number of sub-subject activates with ’>>’.
There can be a maximum of 5 levels of sub-subjects (6 levels including the
main subject). The level is marked in the second column with a color and a
level number. Each sub-subject is shown with indention as well.
The subject title can be edited in the grid or in the editing field in the
‘Descriptions’ tab. When editing in the editing field line change is possible.
Max. number of characters in a subject: 1000
Max. number of subjects (all levels): 1000
Important: The MXC640 / DC 6990 Conference Unit support up to 100
characters. Characters exceeding 100 will not be shown.
MXC640 support up to 500 subjects. If the number of subjects exceeds 500, it
will impact the performance.
Duration
Field to enter the duration of the agenda item. Max. duration is 23 hour 59
minutes.
The actual time is calculated based on the start time of the meeting.
Speaker type
configuration
Note: This facility is subject to availability of ‘SW6000-ADV’ module.
Refer to the ‘User Manual SW6000 Advanced Meeting Management’ for user
information.
Speaker
It is possible to insert an unlimited number of speakers as sub-subject to a
main subject or a sub-subject. Each speaker is normally assigned each a sub-
subject i.e. at level 3 below a level 2 subject like “Reply”. The speaker is
selected by selecting the speaker field at the subject. A popup will open,
listing the Participants assigned to the meeting in the Participant Seat Table.
Alternatively, the speaker name can be typed in the speaker field at the
subject.
If a subject with a speaker is set current in the ‘CUA|Agenda’ screen the
microphone for the speaker will be set active on the seat, selected in the field
‘Open Mic On’.
If the subject title is empty the speaker name is shown in the ‘CUA|Agenda’
and ‘CDA|Agenda’. If the subject title is not empty the speaker name is not
shown, but the subject title is shown instead.
Open mic on
Note: This facility is subject to availability of ‘SW6000-ADV’ module.
Refer to the ‘User Manual SW6000 Advanced Meeting Management’ for user
information.
“Document” icon
This field indicates is one or more documents are linked to the subject
Agenda subject
configuration
Note: This facility is subject to availability of ‘SW6000-ADV’ module.
Refer to the ‘User Manual SW6000 Advanced Meeting Management’ for user
information.
(No header)
Indication column. The field is black if a voting configuration is selected for
the subject.
Voting configuration
Field for assigning voting configurations for the individual agenda subjects.
Note: This facility is subject to availability of ‘SW6000-VOTE’ module.
/