Page is loading ...

USER GUIDE
Aleratec
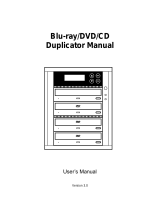
1:2 DVD/CD Copy Cruiser Pro HLX
TM
Win/Mac
Part No. 260167

www.aleratec.com
Copyright/Model Identification
The content of this manual is for informational purposes only and is subject
to change without notice.
This manual is copyright with all rights reserved. Under copyright laws, this
manual and the software described within may not be copied, except in the
normal use of the product(s) described within or to make a backup copy.
Copyright© 2010
Aleratec, Inc.
9851 Owensmouth Avenue
Chatsworth, CA 91311 U.S.A.
www.aleratec.com
1:2 DVD/CD Copy Cruiser Pro HLX™ is a trademark of Aleratec, Inc.
Please record the following information to help expedite any warranty claim:
Model No. _____________________ Serial No._____________________
Date Purchased ________________________________________________
Place of Purchase ______________________________________________
NOTE: Please store and track the included software, registration codes and
parts carefully. Requests for replacement software, registration codes, and/
or parts may incur a fee.

www.aleratec.com
Radio/TV Interference Statement
The equipment described in this guide emits radio frequency energy. If it
is not installed in accordance with the manufacturer’s instructions, it may
cause interference with radio or television reception.
This equipment has been tested and found to comply with the limits for a
Class B digital device, pursuant to Part 15 of the FCC Rules. These limits
are designed to provide reasonable protection against harmful interference
in a residential installation.
This equipment generates, uses, and can radiate radio frequency energy.
If not installed and used in accordance with the instruction manual, this
equipment may cause harmful interference to radio communications.
However, there is no guarantee that interference will not occur in a
particular installation. If this equipment does cause harmful interference to
radio or television reception, which can be veried by turning the equipment
off and on, the user is encouraged to try to correct the interference by one or
more of the following measures:
Reorient or relocate the receiving antenna.•
Increase the separation between the equipment and the receiver.•
Connect the equipment to an electrical outlet on a circuit that is different •
from the circuit to which the receiver is connected.
Consult your dealer or an experienced radio/TV technician for help.•
This equipment has been certied to comply with the limits for a Class B
computing device, pursuant to FCC Rules. In order to maintain compliance
with FCC regulations, shielded cables must be used with this equipment.
Operation with non-approved equipment or unshielded cables is likely to
result in interference to radio and TV reception. The user is cautioned that
changes and/or modications made to this equipment, without the approval
of manufacturer, could void the user’s authority to operate this equipment.

www.aleratec.com
Safety Regulations
WARNING
To prevent re or shock hazard, do not expose the
unit to rain or moisture.
To avoid electrical shock, do not open the
cabinet. Refer servicing to authorized personnel
only.
CAUTION
As the laser beam in this DVD/CD Duplicator
is harmful to the eyes, do not attempt to
disassemble the cabinet. Refer servicing to
authorized personnel only.
The use of optical instruments with this product
will increase eye hazard.
This DVD/CD Duplicator is classied as a
CLASS 1 LASER PRODUCT.
The CLASS 1 LASER PRODUCT label is
located on top of the internal drive enclosure.
CLASS 1
LASER PRODUCT
LASER KLASSE 1
PRODUKT

www.aleratec.com
Table of Contents
Introduction .......................................................................................1
Check out Aleratec Online! ....................................................................1
Key Items – 1:2 DVD/CD Copy Cruiser Pro HLX Win/Mac ................2
Front Panel ..............................................................................................3
DVD/CD Copy Cruiser Pro HLX Win/Mac Display Panel ....................4
Precautions .......................................................................................5
Installation ..............................................................................................5
Operation ................................................................................................5
Transportation .........................................................................................5
Overview ............................................................................................6
Main Menu ..............................................................................................6
Subfunctions ...........................................................................................7
Using the DVD/CD Duplicator ........................................................10
Inserting Discs ......................................................................................10
Ejecting Discs .......................................................................................10
Power Up Sequence .............................................................................. 11
Quick Operating Sequence Overview .................................................. 11
Main Menu ............................................................................................12
Setup ..............................................................................................28
Advanced Setup .............................................................................40
Using the Duplicator as a DVD/CD-Recorder .....................................50
Specifications .................................................................................52
Troubleshooting .............................................................................53
Technical Support ..........................................................................56
Service and Support .......................................................................57
Technical Support FAX Back Form ...............................................60

www.aleratec.com

www.aleratec.com
1
Introduction
Thank you for purchasing this 1:2 DVD/CD Copy Cruiser Pro HLX Win/
Mac. Please read this User Guide thoroughly before using this product.
Page 3 shows the front panel of the 1:2 DVD/CD Copy Cruiser Pro HLX •
Win/Mac.
Page 4 shows the Duplicator LCD Display Panel.•
Check out Aleratec Online!
www.aleratec.com•
www.twitter.com/Aleratec•
www.youtube.com/Aleratec•

www.aleratec.com
2
Introduction
Key Items – 1:2 DVD/CD Copy Cruiser Pro HLX Win/
Mac
Note: Choose a Good Location
Allow adequate clearance for moving parts.1.
Do not place near heat sources such as radiators or air ducts, or in a 2.
place subject to direct sunlight, excessive dust, mechanical vibration or
shock.
Good care will help assure maximum product life. Improper operating 3.
environment and misuse may void the warranty.
Display
Panel
LightScribe
DVD/CD
Recorders
(2)
Power
Switch

www.aleratec.com
3
Introduction
Front Panel
1 Disc Tray
This tray is for loading the disc. It will accept 120 mm and 80 mm
discs. Please place the disc in the exact center of the tray.
2 Emergency Eject Pinhole
In the event of loss of power or failure to open the tray by pressing the
Eject button, insert the straightened end of a large paper clip or similar
rigid object into the Emergency Eject hole to open the tray.
3 Drive LEDs
This indicator lights up when data is being accessed or when data is
being recorded on a disc.
4 Eject Button
This button is used to open or close the tray.
1
2
3
4

www.aleratec.com
4
ENT
www.aleratec.com
ESC
Introduction
DVD/CD Copy Cruiser Pro HLX Win/Mac Display Panel
1 Display shows all functions and messages
2 ENTbutton is used to execute a selected function
3 ESCbutton is used to cancel a selected function
4 UParrow is used to scroll up through functions or menus
5 DOWN arrow is used to scroll down through functions or menus
4
1
3
5
2

www.aleratec.com
5
Precautions
Before installing your 1:2 DVD/CD Copy Cruiser Pro HLX Win/Mac,
please read the following.
Installation
Avoid placing the 1:2 DVD/CD Copy Cruiser Pro HLX Win/Mac in a
location subject to:
High humidity•
High temperature•
Excessive dust•
Mechanical vibration•
Direct sunlight•
Electromagnetic radiation•
Operation
Do not move the 1:2 DVD/CD Copy Cruiser Pro HLX Win/Mac during
operation. This may cause it to malfunction during operations.
Avoid exposing the duplicator to sudden changes in temperature as
condensation may form on the lens inside the duplicator. Operating the
duplicator immediately after a sudden increase in temperature may result in
a malfunction during playback or writing operations.
Note: The 1:2 DVD/CD Copy Cruiser Pro HLX Win/Mac must never be
cleaned with a lens cleaning kit!
Transportation
Keep the original packing materials for future moving or shipping of the 1:2
DVD/CD Copy Cruiser Pro HLX Win/Mac.

www.aleratec.com
6
Overview
Main Menu
This section provides a listing of the functions on the 1:2 DVD/CD Copy
Cruiser Pro HLX Win/Mac. Detailed descriptions of each function are given
in the next section. The functions are numbered for easy reference; these
numbers are also used in the next section.
There are 12 main menu items that will display in the 1:2 DVD/CD Copy
Cruiser Pro HLX Win/Mac Display Panel. These are:
Note: Main Menu items “Select Source” (number 8) and “Image”
(number 9) are not supported.
Note: Main Menu items “Edit Track” (number 10) is for Audio disc only.
1. Copy
ENT
ESC
2. Test
ENT
ESC
3. Test & Copy
ENT
ESC
4. Verify
ENT
ESC
5. Compare
ENT
ESC
6. Prescan
ENT
ESC
7. Disc Info
ENT
ESC
8. Select Source
ENT
ESC
9. Image
ENT
ESC
10. Edit Track
ENT
ESC
11. Setup
ENT
ESC
12. Adv Setup
ENT
ESC

www.aleratec.com
7
Overview
Subfunctions
The main menu “Edit Track” (for Audio disc only) function has 4 subfunctions.
These are:
10.1 CD to CD Edit
10.2 (Not supported)
10.3 Play Audio Track
10.4 Close Session
10. Edit Track
ENT
ESC

www.aleratec.com
8
Overview
Subfunctions - continued
The main menu “Setup” function has 18 subfunctions. These are:
Note: Functions with options are indicated with an asterisk (*).
11.01 Language
11.02 CD Burn Speed
11.03 DVD Burn Speed
11.04 Read Speed (max.)
11.05 Auto Start Drive
11.06 Startup Menu
11.07 Auto Verify*
11.08 Auto Compare*
11.09 Auto Prescan*
11.10 Eject Disc*
11.11 Burn On The Fly*
11.12 Burn Mode*
11.13 Display Time
11.14 Button Sound*
11.15 Device Info (Not supported)
11.16 System Info
11.17 Quick Erase Disc
11.18 Full Erase Disc
11. Setup
ENT
ESC

www.aleratec.com
9
Overview
The main menu “Adv Setup” (Advanced Setup) function has 16 subfunctions.
These are:
Note: Functions with options are indicated with an asterisk (*).
12.01 UnderRun Protect*
12.02 Overburn*
12.03 Read Error Skip*
12.04 (Not supported)
12.05 (Not supported)
12.06 Burn-in
12.07 Update Firmware
12.08 Compare Firmware
12.09 Hardware Diagnostic
12.10 Load Default
12.11 CD+G Format (Not supported)
12.12 ISRC
12.13 CD-Text (Not supported)
12.14 USB Option
12. Adv Setup
ENT
ESC
12.15 USB Auto-Link
12.16 Use Big Block

www.aleratec.com
10
Using the DVD/CD Duplicator
Inserting Discs
Press the Eject button on the DVD/CD Recorder.1.
Place the disc in the tray. The printed (non-shiny) surface of the disc 2.
should be up.
To close the tray, press the Eject button or lightly push the front center 3.
of the tray.
Note:
Never place two discs in the tray at the same time.•
Do not touch the surface of the disc where it has been recorded.•
When using a 120 mm disc, please place it in the center of the tray •
where you are able to see the larger position specifically for the 120
mm disc.
When using a 80 mm disc or Business Card CD-R, please place it in •
the center of the tray where you can see the position for the 80 mm
disc.
Ejecting Discs
Disc copies will Auto Eject upon completion of a successful copy. Discs can
also be manually ejected from the drives.
Press the drive’s Eject button.1.
Carefully lift the disc from the tray.2.
To close the tray, press the Eject button or lightly push the front center 3.
of the tray.
Note:
After the tray has been ejected and the disc has been removed •
or placed onto the tray, make sure to close the tray to its original
position to avoid the accumulation of dust or miscellaneous items
inside the tray.
In case of emergency, insert the straightened end of a large paper •
clip or similar rigid object into the Emergency Eject Pinhole to open
the tray. Then gently pull the tray out.

www.aleratec.com
11
Using the DVD/CD Duplicator
Power Up Sequence
During the normal powering up sequence the 1:2 DVD/CD Copy Cruiser
Pro HLX Win/Mac will preform a self-test sequence.
Quick Operating Sequence Overview
Select Copy function by pressing arrow button. Place the source DVD or •
CD in the top drive. Place blank DVD-R/RW, DVD+R/RW, CD-R/RW,
or CD-RW media in the DVD/CD-Recorder. After the recorder detects
the blank DVD/CD disc, press the ENT button to start copying.
When Copy is completed, a good disc copy will be ejected •
automatically. Failed discs will remain in the DVD/CD-Recorder
and can be ejected manually. (Default setting: a good disc will be
ejected. This can be changed; see the Set Up section.) For continuous
duplication, reload blank discs into the DVD/CD-Recorder and repeat
the procedure.
A failed disc will remain in the DVD/CD-Recorder. (Default setting: •
A failed disc is NOT ejected.) To manually eject a disc, press the ENT
button to eject a failed disc or press the eject button on the DVD/CD-
Recorder to eject the disc.

www.aleratec.com
12
Using the DVD/CD Duplicator
Main Menu
Functions are selected with the arrow keys. The numbers correspond to the
Function listing in the previous section.
Copy
During the duplication process, data will be written to a blank DVD-R/RW,
DVD+R/RW, or CD-R/RW disc loaded in the Duplicator. Before starting
the duplication process, please make sure the source DVD/CD is placed in
the DVD/CD-ROM drive.
Place a blank DVD-R/RW, DVD+R/RW, or CD-R/RW disc into the 1.
DVD/CD-Recorder; when the DVD/CD-Recorder detects the disc is
present, press the ENT button, and the duplicator will start copying.
The LCD will display the status of the copying process.2.
When Copy is nished, the nished copy will be ejected automatically. 3.
Any failed discs will remain in the DVD/CD-Recorder. Press the ENT
button to eject any failed discs.
Note: DVD-RW, DVD+RW, and CD-RW discs which already contain
data can also be used as blanks in the 1:2 DVD/CD Copy Cruiser Pro
HLX Win/Mac. Any data stored on -RW discs will be automatically
erased before copying new data. Be sure you do not want data on DVD-
RW, DVD+RW, or CD-RW discs inserted as blanks as any DVD/CD-RW
discs inserted in the DVD/CD-Recorder to be used as blank media will
automatically be erased, and then the content from the source disc will
be recorded on them.
1. Copy
ESCENT
Copying 0%
650.0MB 74:00
ESCENT
1. Copy
OK: 03
ESCENT

www.aleratec.com
13
Using the DVD/CD Duplicator
When copying audio CDs, it is highly recommended to copy at a speed
of 16x or lower to ensure the best possible quality audio reproduction.
Go to “Setup” and then “Burning Speed” to change copy speed before
selecting tracks.

www.aleratec.com
14
Using the DVD/CD Duplicator
Main Menu
Test
This function is a test process that simulates data being written to the DVD/
CD-R/RW disc, without actually burning a disc. When the test process is
complete, the DVD-R/RW or CD-R/RW discs will remain blank. For DVD-
RW or CD-RW discs that contain data, “Test” will quick erase all old data
before simulation. Therefore, never perform “Test” on DVD/CD-RW discs
that contain important data.
Note: Test is not supported by DVD+R/RW discs.
Press the 1. ENT button to start the disc simulation, or press ESC to exit.
Pressing ESC before the simulation is complete will not affect the
DVD-R/CD-R disc and they will still remain blank.
For DVD/CD-RW discs that contain data, Test will perform a Quick 2.
Erase before the actual testing. Thus, never run Test on DVD/CD-RW
discs that contain important data.
The LCD will display the status of the erasing and testing of the DVD/3.
CD.
When the process is completed, the LCD will display the status.4.
2. Test
ESCENT
Erasing Disc
ESCENT
Testing 0%
650.0MB 74:00
ESCENT
2. Test
OK: 03
ESCENT
/