260152

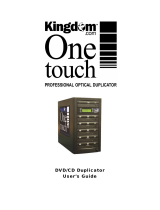
Aleratec 260152, 1:3 DVD/CD Copy Tower Pro HS, 260153 User guide

  • Hello! I am an AI chatbot trained to assist you with the Aleratec 260152 User guide. I’ve already reviewed the document and can help you find the information you need or explain it in simple terms. Just ask your questions, and providing more details will help me assist you more effectively!
USER GUIDE
Aleratec
1:3 DVD/CD Copy Tower Pro HS™
1:7 DVD/CD Copy Tower Pro HS™
Part No. 260152 ........ 1:3 DVD/CD Copy Tower Pro HS™
Part No. 260153 ........ 1:7 DVD/CD Copy Tower Pro HS™
www.aleratec.com
Copyright/Model Identication
The content of this manual is for informational purposes only and is subject
to change without notice.
This manual is copyright with all rights reserved. Under copyright laws, this
manual and the software described within may not be copied, except in the
normal use of the product(s) described within or to make a backup copy.
Copyright© 2013
Aleratec, Inc.
9851 Owensmouth Avenue
Chatsworth, CA 91311 U.S.A.
Alerate is a registered trademark, and 1:3 DVD/CD Copy Tower Pro HS™,
and 1:7 DVD/CD Copy Tower Pro HS™ are trademarks of Aleratec, Inc
Check out Aleratec Online!
• Blog.Aleratec.com
• Facebook.com/Aleratec
• Twitter.com/Aleratec
• YouTube.com/Aleratec
Please record the following information to help expedite any warranty
claim:
Model No. _____________________ Serial No. _____________________
Date Purchased ________________________________________________
Place of Purchase ______________________________________________
www.aleratec.com
Radio/TV Interference Statement
The equipment described in this guide emits radio frequency energy. If it
is not installed in accordance with the manufacturers instructions, it may
cause interference with radio or television reception.
This equipment has been tested and found to comply with the limits for a
Class B digital device, pursuant to Part 15 of the FCC Rules. These limits
are designed to provide reasonable protection against harmful interference
in a residential installation.
This equipment generates, uses, and can radiate radio frequency energy.
If not installed and used in accordance with the instruction manual, this
equipment may cause harmful interference to radio communications.
However, there is no guarantee that interference will not occur in a
particular installation. If this equipment does cause harmful interference to
radio or television reception, which can be veried by turning the equipment
off and on, the user is encouraged to try to correct the interference by one or
more of the following measures:
Reorient or relocate the receiving antenna.
Increase the separation between the equipment and the receiver.
Connect the equipment to an electrical outlet on a circuit that is different
from the circuit to which the receiver is connected.
Consult your dealer or an experienced radio/TV technician for help.
This equipment has been certied to comply with the limits for a Class B
computing device, pursuant to FCC Rules. In order to maintain compliance
with FCC regulations, shielded cables must be used with this equipment.
Operation with non-approved equipment or unshielded cables is likely to
result in interference to radio and TV reception. The user is cautioned that
changes and/or modications made to this equipment, without the approval
of manufacturer, could void the users authority to operate this equipment.
www.aleratec.com
www.aleratec.com
Table of Contents
Introduction .......................................................................................1
Product Features .....................................................................................1
Key Items – DVD/CD Copy Tower Pro HS ...........................................2
Removable Hard Disk Drive ..................................................................3
DVD/CD Copy Tower Pro HS Display Panel ........................................5
Precautions .......................................................................................6
Installation ..............................................................................................6
Input Voltage Selection ...........................................................................6
Operation ................................................................................................6
Transportation .........................................................................................6
Overview............................................................................................7
Main Menu ..............................................................................................7
Subfunctions ...........................................................................................8
Using the DVD/CD Copy Tower Pro HS ........................................11
Inserting Discs ...................................................................................... 11
Ejecting Discs ....................................................................................... 11
Power Up Sequence ..............................................................................12
Overview: Copies from Source DVD/CD ............................................12
Overview: Loading Disc Images and Making Copies from the
Hard Disk Drive ....................................................................................12
Main Menu ............................................................................................13
Specications .................................................................................63
Troubleshooting .............................................................................64
Technical Support ..........................................................................66
Service and Support.......................................................................67
Technical Support FAX Back Form ..............................................70
www.aleratec.com
www.aleratec.com
1
Introduction
Thank you for purchasing the DVD/CD Copy Tower Pro HS. Please read this
User Guide thoroughly before using this product.
Product Features
The DVD/CD Copy Tower Pro HS is a multiple disc DVD/CD Duplicator. The
DVD/CD Copy Tower Pro HS is based on Dual-Standard 8-in-1 DVD±R/RW
Technology, that supports all popular DVD formats.
High DVD recording speed for high-volume duplicating.
Powerful Control Features with LCD Display and intuitive menu maximizing
copy control, exibility, and output.
1:3 DVD/CD Copy Tower Pro HS copies three DVDs simultaneously
without a computer.
1:7 DVD/CD Copy Tower Pro HS copies seven DVDs simultaneously
without a computer.
Simple one-touch operation.
No additional hardware or software required.
Simple to use; no set-up required. Plug it in and start copying immediately.
Supports DVD-R, DVD-RW, DVD+R, DVD+RW, DVD-RAM, DVD-ROM,
CD-R, CD-RW, Audio CD, Video CD, Hybrid CD, 120 mm, and mini CD
(80 mm / 3 inch).
Automatically runs self-diagnostics at power-on.
Auto format detection.
www.aleratec.com
2
Introduction
Key Items – DVD/CD Copy Tower Pro HS
1:3 DVD/CD Copy Tower Pro HS
1:7 DVD/CD Copy Tower Pro HS
Note: Choose a Good Location
1. Allow adequate clearance for moving parts.
2. Do not place near heat sources such as radiators or air ducts, or in a
place subject to direct sunlight, excessive dust, mechanical vibration or
shock.
3. Good care will help assure maximum product life. Improper operating
environment and misuse may void the warranty.
Display Panel
Removable
Hard Drive
DVD Recorders
(3)
Power Switch
Eject Button
Display Panel
Power Switch
DVD Recorders
(7)
Eject Button
Removable
Hard Drive
www.aleratec.com
3
Introduction
Removable Hard Disk Drive
Your Copy Tower Pro HS is equipped with a removable hard disk drive
(HDD) for storing images of frequently copied discs. Storing an image of
a disc you want to copy on an HDD improves duplication speed, and adds
the convenience of not having to look around for the actual source disc you
want to copy.
Your removable HDD provides extra security, in that you can remove the
drive containing the disc images and put it in a safe place where no un-
authorized users can copy or view the data.
The removable HDD is located in the top bay in the 1:7 tower and in the
bay directly under the controller in the 1:3. The removable HDD includes
a keyed lock to protect the data on the drive from being misused or stolen.
The HDD is used in the copy process as described in the following pages of
this user guide.
Note: You can use the duplicator to copy directly from DVDs or CDs with
or without the HDD. Just place your source disc in any of the DVDRW
writers, then load the blank discs and press “Copy” and the duplicator
will copy from your source disc.
Removable Hard
Disk Drive
Key in Lock
Carriage Lever
www.aleratec.com
4
Introduction
Removable Hard Disk Drive - continued
To remove the HDD:
1. Unlock the HDD by inserting the key and turning it left
(counterclockwise) 1/4 turn. The drive is now in the unlocked position.
2. Lift the HDD carriage lever upward and pull out. The HDD carriage
will come out of the tower and a protective drive bay door will close.
To replace the HDD:
1. Align the HDD carriage with the door opening and push the drive
carriage through the protective drive bay door until you feel the drive
seat in its connector.
2. Push the HDD carriage lever down, then insert your key and turn it 1/4
turn to the right (clockwise). The HDD is now in its locked position.
You can remove the key.
Note: The HDD will not work unless it is secured in position with the
carriage lever and locked with the key. Do not unlock the HDD during
operation, as you will destroy any copies you are making.
www.aleratec.com
5
Introduction
DVD/CD Copy Tower Pro HS Display Panel
1 Display shows all functions and messages
2 ENT button is used to execute a selected function
3 ESC button is used to cancel a selected function
4 UP arrow is used to scroll up through functions or menus
5 DOWN arrow is used to scroll down through functions or menus
ENT
www.aleratec.com
ESC
4
1
3
5
2
www.aleratec.com
6
Precautions
Before installing your DVD/CD Copy Tower Pro HS, please read the
following.
Installation
Avoid placing the DVD/CD Copy Tower Pro HS in a location subject to:
High humidity
High temperature
Excessive dust
Mechanical vibration
Direct sunlight
Electromagnetic radiation
Power
This product has a manually switchable power supply. Make sure
that the power supply is set to the proper voltage for your region.
Input Voltage Selection
There is a voltage selection switch on the back of the unit that can be set for
input power of 115 VAC (the default setting) or 230 VAC. Be sure it is set
correctly for the input voltage you will be using.
Operation
Do not move the DVD/CD Copy Tower Pro HS during operation. This may
cause it to malfunction during operations.
Avoid exposing the duplicator to sudden changes in temperature as
condensation may form on the lens inside the duplicator. Operating the
duplicator immediately after a sudden increase in temperature may result in
a malfunction during playback or writing operations.
Note: The DVD/CD Copy Tower Pro HS must never be cleaned with a lens
cleaning kit!
Transportation
Keep the original packing materials for future moving or shipping of the
DVD/CD Copy Tower Pro HS.
www.aleratec.com
7
Overview
Main Menu
This section provides a listing of the functions on the DVD/CD Copy Tower
Pro HS. Detailed descriptions of each function are given in the next section.
The functions are numbered for easy reference; these numbers are also used
in the next section.
There are 12 main menu items that will display in the DVD/CD Duplicator
Display Panel. These are:
Note: Main Menu item “Image” (number 9) works only when a Hard Disk
is connected.
Note: Main Menu items “Edit Track” (number 10) is for Audio disc only.
1. Copy
ENT
ESC
2. Test
ENT
ESC
3. Test & Copy
ENT
ESC
4. Verify
ENT
ESC
5. Compare
ENT
ESC
6. Prescan
ENT
ESC
7. Disc Info
ENT
ESC
8. Select Source
ENT
ESC
9. Image
ENT
ESC
10. Edit Track
ENT
ESC
11. Setup
ENT
ESC
12. Adv Setup
ENT
ESC
www.aleratec.com
8
Overview
Subfunctions
The main menu “Image” function has 8 subfunctions. These are:
The main menu “Edit Track” function has 4 subfunctions. These are:
9.1 Load
9.2 Delete Image
9.3 Image Info
9.4 Compare Image
9.5 Select Image
9.6 Select Src Drive
9.7 Image Format Info
9.8 Edit
9. Image
ENT
ESC
10.1 CD to CD Edit
10.2 (Not supported)
10.3 Play Audio Track
10.4 Close Session
10. Edit Track
ENT
ESC
www.aleratec.com
9
Overview
The main menu “Setup” function has 23 subfunctions. These are:
11.01 Language
11.02 CD Burn Speed
11.03 DVD Burn Speed
11.04 Read Speed (max.)
11.05 Auto Drive Start
11.06 Startup Menu
11.07 Auto Verify
11.08 Auto Compare
11.09 Auto Prescan
11.10 Eject Disc
11.11 Burn On The Fly
11.12 Burn Mode
11.13 Display Time
11.14 Button Sound
11.15 Device Info
11.16 System Info
11.17 Quick Erase Disc
11.18 Full Erase Disc
11.19 Auto Close Tray
11. Setup
ENT
ESC
11.20 Quick Compare
11.21 Audio Burn Speed
11.22 BD Burn Speed (Not Supported)
11.23 Tray Out (Not Supported)
www.aleratec.com
10
Overview
Subfunctions - continued
The main menu “Adv Setup” (Advanced Setup) function has 18
subfunctions. These are:
Note: Subfunction items “12.11 CD&G Format”, “12.13 Switch Link-Host”,
“12.15 Password”, “12.17 Auto Save Image”, and “12.18 Update Drive
Firmware” are not supported.
12.01 UnderRun Protect
12.02 Overburn
12.03 Read Error Skip
12.04 Format HDD
12.05 Verify HDD
12.06 Burn-in
12.07 Update Firmware
12.08 Compare Firmware
12.09 Hardware Diagnostic
12.10 Load Default
12.11 CD&G Format (Not Supported)
12.12 ISRC & MCN
12.13 Switch Link-Host (Not Supported)
12.14 CD Text
12.15 Password
12.16 Disc Counter
12.17 Auto Save Image (Not Supported)
12. Adv Setup
ENT
ESC
12.18 Update Drive Firmware (Not Supported)
www.aleratec.com
11
Using the DVD/CD Copy Tower Pro HS
Inserting Discs
1. Press the Eject button on each drive for which you’ll be inserting a disc.
2. Place the disc in the tray. The printed (non-shiny) surface of the disc
should be up.
3. To close the tray, press the Eject button or lightly push the front center
of the tray.
Note:
Never place two discs in the tray at the same time.
Do not touch the surface of the disc where it has been recorded.
Ejecting Discs
Disc copies will Auto Eject upon completion of a successful copy. Discs can
also be manually ejected from the drives.
1. Press the drive’s Eject button.
2. Carefully lift the disc from the tray.
3. To close the tray, press the Eject button or lightly push the front center
of the tray.
Note:
After the tray has been ejected and the disc has been removed or
placed onto the tray, make sure to close the tray to its original position
to avoid the accumulation of dust or miscellaneous items inside the
tray.
In case of emergency, insert the straightened end of a large paper clip
or similar rigid object into the Emergency Eject Pinhole to open the
tray. Then gently pull the tray out.
www.aleratec.com
12
Using the DVD/CD Copy Tower Pro HS
Power Up Sequence
During the normal powering up sequence the DVD/CD Copy Tower Pro HS will
preform a self-test sequence.
Overview: Copies from Source DVD/CD
Go to menu item 8 (Select Source) by pressing the arrow buttons; press ENT to
select. You can scroll through the drives in your duplicator with the arrow keys.
Press ENT to select any one of the DVD/CD recorders to be used as a reader for
your source disc. Place your master/source disc in the recorder to be used as the
reader. Press ESC.
Go to menu item 1 (Copy) by pressing arrow buttons. Place blank media into the
recorders to be used. After all recorders detect the blank DVD discs, press the
ENT button to start copying.
When Copy is completed, good disc copies will be ejected automatically.
Failed discs will remain in the recorders and can be ejected manually. (Default
setting: good discs will be ejected and failed discs are not ejected. This can be
changed; see the Set Up section of this User Guide.)
To manually eject discs, press the ENT button to eject any failed discs, or press
the eject button on a recorder to eject a disc.
For continuous duplication, reload blank discs into the recorders and repeat the
procedure.
Overview: Loading Disc Images and Making Copies
from the Hard Disk Drive
Go to menu item 9 (Image) by pressing the arrow buttons; press ENT to select.
You can scroll thru the Image functions with the arrow keys. When you get to
“Image Src Drive”, press ENT to select any one of the DVD/CD recorders to be
used as source disc. Place your master/source disc in the recorder to be used as
the source to be copied to the hard drive. Press ESC.
Scroll to “Load”, press ENT and the duplicator will load the image from the
source drive to the hard drive in the partition of the hard drive selected. You
can load a different DVD/CD image in each partition. (Complete description of
“Image” functions will follow in this User Guide.)
Go to menu item 8 (Select Source) by pressing the arrow buttons; press ENT
to select. You can scroll thru the drives in your duplicator with the arrow keys.
Press ENT to select HDD (Hard Disk Drive). Press ESC.
Go to menu item 1 (Copy) by pressing arrow buttons. Place blank media into the
recorders to be used. After all recorders detect the blank discs, press the ENT
button to start copying.
www.aleratec.com
13
Using the DVD/CD Copy Tower Pro HS
Main Menu
Functions are selected with the arrow keys. The numbers correspond to the
Function listing in the previous section.
Copy
During the duplication process, data will be simultaneously written to all
blank discs loaded in the DVD/CD Copy Tower Pro HS. For fast copy from
source DVD/CD master disc, before starting the duplication process, please
make sure the source disc is placed in one of the DVD Recorders. For
copying from the Hard Drive, the source should be set to HDD.
1. Place blank discs into the DVD Recorders as needed; when the DVD
Recorders detect the discs are present, press the ENT button, and the
duplicator will start copying.
2. The LCD will display the status of the copying process.
3. When Copy is nished, discs which have passed will be ejected
automatically and failed discs will remain in the DVD Recorders. Press
the ENT button to eject any failed discs.
Note: DVD-RW discs which already contain data can also be used as
blanks in the DVD/CD Copy Tower Pro HS. Any data stored on DVD-RW
discs will be automatically erased before copying new data. Be sure you
do not want data on DVD±RW discs inserted as blanks as any DVD±RW
discs inserted in the DVD-Recorders to be used as blank media will
automatically be erased, and then the content from the source DVD will
be recorded on them.
1. Copy
ESCENT
Copying-DVD 0%
4213.4MB d:20:15
ESCENT
1. Copy
OK: 03
ESCENT
www.aleratec.com
14
Using the DVD/CD Copy Tower Pro HS
Main Menu
Test
This function is a test process that simulates data being written to the
blank disc, without actually burning a DVD or CD. When the test process
is complete, the discs will remain blank. For ±RW discs that contain data,
“Test” will quick erase all old data before simulation. Therefore, never
perform “Test” on ±RW discs that contain important data.
1. Press the ENT button to start the disc simulation, or press ESC to exit.
Pressing ESC before the simulation is complete will not affect the disc
and they will still remain blank.
2. For -RW discs that contain data, Test will perform a Quick Erase before
the actual testing. Thus, never run Test on -RW discs that contain
important data.
3. The LCD will display the status of the erasing and testing of the DVD.
4. When the process is completed, the LCD will display the status.
2. Test
ESCENT
Erasing Disc
ESCENT
Testing- DVD 0%
4213.4MB d:20:15
ESCENT
2. Test
OK: 03
ESCENT
/