Page is loading ...

INSTALL BRACKET
Also Included:
• Machine Screw (4)
• Self Tapping Screw (2)
• Lock Washer (2)
• Rubber Washer (2)
• Rubber Feet (5)
• Knob (2)
• Remote Head Mounting Bracket
• LAN Cable for Remote Head
• DC Cable with Fuse
• SD Card (Installed in Scanner)
• User Manual
Mounting
Bracket
For desktop use:
1. Attach the five protective rubber feet to the mounting
bracket.
2. Slide the scanner into the bracket, aligning the scanner’s
side holes with the holes in the bracket, and then screw the
mounting knobs into the scanner.
Refer to your User Manual for bracket mounting and
vehicle installation.
Package Contents:
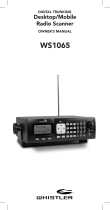
DESKTOP/MOBILE
RADIO SCANNER
Quick Start Guide WS1098
START HERE!
Scanner
AC Adapter
Antenna
1. Align the slots.
2. Rotate connector.
AC Power
1. Connect the supplied adapter to the scanner’s DC
13.8V jack.
2. Plug the adapter into a standard household power
socket.
3. To disconnect, unplug the adapter from the power
source first.
See the User Manual for complete instructions
INSTALL ANTENNA
P/N 581005b 10B15 © The Whistler Group, Inc.
USB Cable
1. Press the button for one second.
2. Use the /// to set the date and time. Press SEL to save.
3. Select Browse Library.
4. Select country.
5. Select first letter of State/Province.
6. Select State/Province.
7. Select Counties/Cites.
8. Select first letter of County.
9. Select County.
10. Select Data Type NOTE: Police/Fire and Emergency services will be in “Categories” for smaller
towns, “Systems” for larger ones.
11. Select desired agency, category or system available for the county.
12. Select desired subcategory. Investigate listings by pressing to go deeper into that selection.
When the cursor switches from the right side of the screen to the left, you are at the bottom of
a category. NOTE: When selecting a System, check at least one of the “Sites” in range, then go
further into Categories to find objects.
13. Use the SEL button to check boxes for services you wish to monitor. Press SEL to un-check a
selected service and at anytime press to go back. Once all desired objects have been checked,
press MENU.
14. Select Import Selected.
15. Select desired Scanlist location for selected objects and press to save.
16. Press SEL to continue to main menu.
17. Select Scanlists from main menu. Use the /// to rename the scanlist if desired. Confirm
box beside desired scanlist is checked.
18. Repeat steps to add additional scanlists, or select Scan from the Main Menu to begin scanning.
NOTE: When traveling or for quick programming, refer to location based, ZIP code programming,
of the User Manual.
STEP-BY-STEP PROGRAMMING
/