Page is loading ...

1
GUWAVKIT
Installation
Installation Guide
Wireless Audio / Video Kit

2
3

2
3
Table of Contents
System Requirements 4
Important Information 5
Package Contents 6
Device Overview 8
Wireless USB Transmitter 8
Wireless VGA Receiver 9
Wireless Audio Receiver 11
Preparing for Setup 12
Software Installation 17
Install Wireless USB Transmitter 25
Install Wireless VGA Receiver 27
Install Wireless Audio Receiver 35
Advanced Settings 43
Wireless USB Manager 43
Video Mode Conguration 45
Screen Resolution Conguration 48
Wireless USB Transmitter Settings 51
Wireless USB Transmitter Selection 53
Wireless USB Transmitter Reset 54
Wireless VGA Receiver in Wired Mode 55
Trouble Shooting Guide 56
Technical Specications 70
Appendix 72
Limited Warranty 76
Federal Communications Commission
(FCC) Statement
77
Contact 78

4
5
System Requirements
Microsoft Windows® XP (SP2) or Vista (32- / 64-bit) with available USB 2.0 port•
1.6 GHz processor (CPU) with 1GB of system memory (RAM) •
Flat-panel (LCD / Plasma / DLP) TV display or Projector with VGA (RGB / D-sub 15-pin / PC) •
or DVI port (Does NOT work with CRT tube TV)
TV or audio system with 3.5mm audio jack or RCA connectors•
Suggested system requirement to play online video clips in a “window” – 1.6 Ghz Atom™ with
1GB RAM, 480p video in a “window” – 1.8 Ghz Pentium™ M with 1GB RAM, 720p video in a
“window” – 2.8 GHz Pentium™ M with 1 GB RAM, 720p video in “full screen” – 2.8 GHz Core™
2 Duo with 1GB RAM.

4
5
Important Information
Before you get started, please NOTE:
Do not place Wireless USB devices under direct sunlight or near high heat emitting devices;
Do not place Wireless USB devices near water or wet surfaces to avoid electric hazards;
Do not place Wireless USB devices on any moving or unstable surfaces.

6
7
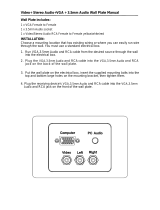
LINK PWR
Package Contents
• 1 x Wireless VGA
receiver (for display)
• 1 x Wireless Audio
receiver (for stereo)
• 1 x Wireless USB
Transmitter (for
computer)
• 1 x USB 2.0 A to mini-B cable (3 ft.)
• 1 x USB 2.0 extension cable (4 ft.)
• 1 x Gold Plated VGA cable (6 ft.)
• 1 x VGA (F) to
DVI-A adapter
• 1 x 3.5mm to 3.5mm cable

6
7
• 1 x 3.5mm to RCA cable
• 1 x Hook-and-loop
fastener
• 1 x Power adapter for Audio Receiver
• 1 x Power adapter for Video Receiver
• 1 x Quick Start Guide /
User manual
• 1 x Installation CD
• 1 x Warranty /
Registration Card

8
9
LINK PWR
Device Overview
1. LINK: Data Transfer Activity Indicator
LED blinks when data is being transferred
-
2. PWR: Power
LED is solid when powered by the PC
-
3. USB Connector
Connect to any available USB 2.0 port on your
-
computer
1
2
3
Wireless USB Transmitter

8
9
1
32
5 6 7 8
94
Wireless VGA Receiver

10
11
1. VGA : VGA Activity Indicator
LED is solid when display cable is connected
-
LED is blinking when data is being transferred -
2. PWR: Power Indicator
LED is solid when power is applied
-
3. Status Indicator
Single* solid light: device is wirelessly connected to
-
the selected Wireless USB Transmitter
Single* slowly blinking light: device is searching for a
-
Wireless USB Transmitter
Single* quickly blinking light: device is trying to
-
connect to a Wireless USB Transmitter
Rapidly scrolling lights: device is used in wired mode.
-
Three Simultaneous Blinking Lights: Cable -
Association Mode
*Only one light at a time. The position of the light indicates
which Wireless USB Transmitter the device is trying to
communicate with.
4. VGA Connector
Connects to one end of the included VGA cable, and
-
the other end to the VGA or DVI port on your display
5. Power Plug
Power adapter socket
-
6. RESET Button
Association history can be erased by pressing and
-
holding this button for 10 seconds. (Please visit P.54
for details)
7. HOST Button
This button is used to select a different Wireless USB
-
Transmitter. (Please visit P.53 for details)
8. Mini-B USB port
In wireless mode, this port is used for cable
-
association. (Please visit Appendix for details)
In wired mode, connect the VGA adapter with the
-
USB cable via this port for wired operation. (Please
visit P.55 for details)
9. WIRELESS/WIRED switch
Choose from wired or wireless mode by using this
-
switch - P.55

10
11
Wireless Audio Receiver
1. Power/Activity LED
LED is solid when connection is established
-
LED is blinking when power is on and connection is -
not established
2. 3.5mm Audio Socket
Connects to the 3.5mm audio connector of the
-
included 3.5mm or RCA audio cable, and the other
end to the available 3.5mm audio socket or RCA
audio socket on your display or stereo system
3. Mini-B USB Port
Connects to the mini-B end of the included USB
-
cable, and the Type-A end to an available USB port
on your computer to create association between your
computer and the audio receiver
4. Power plug
Power adapter socket
-
1
2
3
4

12
13
Preparing for Setup
Before you begin, please make sure to properly remove all previously installed Wireless
USB Manager and DisplayLink drivers from your system to avoid driver conict. To
properly remove previously installed drivers, please follow below instructions.
For Windows XP users
Go to Start -> Control Panel -> Add or Remove Programs1.
Select any previously installed DisplayLink software and click on 2. Remove button to properly uninstall
the program.
After all DisplayLink software are uninstalled, please restart your system. 3.

12
13
Repeat steps 1 and select any previously installed Wireless USB drivers and click on 4. Remove button to
properly uninstall the program.

14
15
For Windows Vista users
Click on the Vista logo. Click on Control Panel then double click on Programs and Features. 1.
Select any previously installed Displaylink software and click on 2. Uninstall button to properly uninstall
the program.

14
15
After successfully remove the DisplayLink software, please restart your system.3.
Repeat Step 1 and select IOGEAR Wireless USB to VGA Kit and click on 4. Uninstall.

16
17
After all previously installed DisplayLink and Wireless USB to VGA Kit software are properly
removed, please make sure to install the software on the CD following the procedures on
the next page before plugging in the Wireless USB Transmitter to your computer.
Important Note:
If installing on Windows XP, Service Pack 2 (SP2)
is required. Please verify that this has been
installed before installing the Wireless Audio/Video
Kit software. Before installing the software, please
make sure the Wireless USB Transmitter and
Wireless VGA and Audio Receivers are not
connected to the computer and not powered.

16
17
Software Installation – Windows XP
Important Note:
For Windows XP users, if you do not have Mi-
crosoft .NET Framework 2.0 installed, you will be
prompted to have it installed. Please follow below
instructions for installation.
Click “1. Yes” to install .NET 2.0 Framework
Check “License Agreement” and click “2. Install”
Click “3. Finish” to complete the installation
Restart your computer when prompted4.
Eject your CD and follow instructions below to 5.
begin the installation
For Windows XP users
Insert the installation CD into the CD-ROM on 1.
your computer and the InstallShield Wizard will
load automatically.

18
19
Click on “Next” to continue.2.
Note – If you previously installed IOGEAR Wireless
USB Hub and Adapter Kit (GUWH104KIT)
software, please follow detail instructions on P.72
Appendix.
Click on “3. Yes” to accept the software License
Agreement and continue the installation.

18
19
The InstallShield Wizard will continue loading 4.
the drivers. Do not click on any button, other-
wise, it will interrupt the installation process and
cause malfunction of the product.
The installation wizard will continue to install the 5.
video driver provided by DisplayLink. Click on
“I Accept” to continue the installation.
Note – If this screen does not appear, please make
sure you correctly remove all DispalyLink software
from your system. After un-installation, please
repeat the new software installation procedures
from P.17.

20
21
The DisplayLink driver starts to load. Do not 6.
click on any button, otherwise, it will interrupt
the installation process and cause malfunction
of the product.
Click on “7. Finish” to complete the software
installation.
It is highly recommended to restart your
system after the software installation to
ensure all drivers are loaded correctly.
/