Page is loading ...

Thank you for choosing Rough Country for all your vehicle needs.
Please read instructions before beginning installation. Check the kit hardware against the kit contents shown below. Be
sure you have all needed parts and know where they go.
If question exist, please call us @1-800-222-7023. We will be happy to answer any questions concerning this product.
Check all fasteners for proper torque. Check to ensure for adequate clearance between all components.
Check and retighten hardware at 50 miles and again at 500 miles. Periodically check all hardware for tightness.
KIT CONTENTS:
Lug Adapters x 2
License Relocation Bracket x 1
License Adjustable Upper Bracket x 1
License Adjustable Lower Bracket x 1
Tag Light 72 Inch Lead x 1
TOOLS NEEDED:
4MM Allen Wrench
5MM Allen Wrench
10MM Wrench
13MM Wrench
19MM Socket
Wire Cutter
Wire Stripper
Wire Crimper
Ratchet
HARDWARE INCLUDED:
M8-1.25 x 25mm Button Head Bolts x 6
M8-1.25 Nylon Nut x 4
1/4-20x1/2 BHCS x 4
1/4-20 Nylock Nuts x 4
24-22GA. Butt Connector x 2
Torque Specs:
Size Grade 5 Grade 8 Size Class 8.8 Class 10.9
5/16” 15 ft/lbs 20ft/lbs 6MM 5ft/lbs 9ft/lbs
3/8” 30 ft/lbs 35ft/lbs 8MM 18ft/lbs 23ft/lbs
7/16” 45 ft/lbs 60ft/lbs 10MM 32ft/lbs 45ft/lbs
1/2” 65 ft/lbs 90ft/lbs 12MM 55ft/lbs 75ft/lbs
9/16” 95 ft/lbs 130ft/lbs 14MM 85ft/lbs 120ft/lbs
5/8” 135ft/lbs 175ft/lbs 16MM 130ft/lbs 165ft/lbs
3/4” 185ft/lbs 280ft/lbs 18MM 170ft/lbs 240ft/lbs
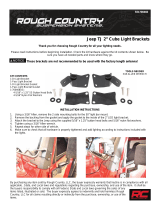
JEEP JK 2007-18 License Plate Relocation Bracket
921105410

1. Remove the top 2 lug nuts from the spare tire, if stock use a 19mm socket.
2. Install the lug nut adapters (70055BAG1), torque to spec using a 19mm socket. See Photo 1.
3. Install the lower bracket and cover plate onto the lug adapters, using the supplied (2) M8-1.25 x 25mm bolts
(10541BAG2), tighten using a 5MM Allen wrench. See Photo 2.
4. Install the middle bracket onto the license plate bracket, use the supplied (2) M8-1.25 x 25mm bolts, (2) M8-1.25
nuts (10534BAG1). See Photo 3. Tighten using a 5mm Allen wrench and a 13mm wrench.
5. Install the tag light wire (10534BAG1) into the top hole of the license plate bracket, tighten using an 10mm wrench
See Photo 4.
6. Install the assembled pieces onto the lower bracket, See Photo 5. Use the supplied (2) M8-1.25 x 25mm bolts, and
(2) M8-1.25 nuts (10534BAG1).
7. Choose the 2 holes on the lower bracket that gives the license plate bracket enough clearance in between the wheel
and tire. See Photo 6.
Photo 1 Photo 2
Photo 3 Photo 4
Photo 5 Photo 6
Install lug nut adapters. Install lower bracket and cover plate.
Install middle and plate bracket together. Install the tag light.
Install onto the lower bracket. Check for tire clearance.

8. Tighten the middle and the lower bracket, using a 5mm Allen and a 13mm wrench. See Photo 7.
9. Install the license plate onto the plate bracket, using the supplied (4) 1/4-20 x 1/2 BHCS, and (4) 1/4-20 nuts
(10534BAG1), See Photo 8. Tighten using a 4mm Allen and a 11mm wrench.
Wiring the tag light to the parking light wires.
1. Remove the gromet from the left side of the tailgate, cut a small hole through the plug just big enough to insert the
wire. See Photo 1.
2. Remove the 2 trim panels from the tailgate, use care to remove the clips, these will be reused. See Photo 2 and 3.
3. Remove tail light by removing the 2 inner screws using a Philips head screw driver then turn the tail light to the out
side to remove. See Photo 4. Retain hardware and tail light for reuse.
Photo 7 Photo 8
Photo 1 Photo 2
Photo 3 Photo 4
Tighten brackets. Install license plate onto bracket.
Install wire into gromet. Remove trim panel.
Remove trim panel. Remove tail light.

4. Note the top/clip side of the plug. Push the tab down to unlock then unplug the wiring harness from the tail light.
See Photo 5.
5. Jeeps equipped with the rear speaker will need to remove the 2 bolts in the floor, use a T30 torx to remove. See
Photo 6. Set aside and retain hardware for reuse.
6. Remove the top trim panel, unclip the back trim panel then pull the speaker trim panel back to make access for the
wiring. See Photo 7.
7. Remove the tape from the ends of the fabric wire covering on each end, pull the wire through the tailgate and push
the gromet in the tailgate that was installed in photo 1 on previous page.
8. Insert the license plate light wire through the fabric covering and tape the ends using electrical tape. See Photo 8.
9. Insert the light wire into the rubber gromet in the upper right rear corner. See Photo 9.
10. Note the top/clip side of the plug. Make connections to the 1st and the 2nd wires from the left, connect the sup-
plied black wire to the 1st wire on the plug, connect the red wire to the 2nd wire on the plug. See Photo 10.
Photo 5 Photo 6
Photo 7 Photo 8
Photo 9 Photo 10
Unplug tail light. Remove the 3 bolts from hooks.
Pull trim back. Push the wire through covering.
Insert wire in the gromet. Identify the correct side of plug.

11. Secure the wires onto the tail light wiring harness, plug the stock tail light harness back into the tail light. Install the
tail light using the retained hardware use a Philips screw driver. See Photo 11. Do not over tighten.
12. Secure the wires on the inside leading through the fabric wire covering, clip the speaker trim panel back together.
And install the OE bolts and tighten using a T30 bit. See Photo 12.
13. Re install the 2 trim panels on the tale gate, use care installing with the factory clips.
Photo 11 Photo 12
Install the tail light. Re install the rear trim/ speaker panel.

By purchasing any item sold by Rough Country, LLC, the buyer expressly warrants that he/she is in compliance with all
applicable , State, and Local laws and regulations regarding the purchase, ownership, and use of the item. It shall be
the buyers responsibility to comply with all Federal, State and Local laws governing the sales of any
items listed, illustrated or sold. The buyer expressly agrees to indemnify and hold harmless Rough
Country, LLC for all claims resulting directly or indirectly from the purchase, ownership, or use of the
items.
/


