D-Link 6513 User manual

Category
Security cameras
Type
User manual

This manual is also suitable for

User Manual
DCS-6513
Full HD WDR Day & Night Outdoor Dome Network Camera
Version 1.0 | 03/06/2013
2D-Link DCS-6513 User Manual
D-Link reserves the right to revise this publication and to make changes in the content hereof without obligation to notify any person or
organization of such revisions or changes. Information in this document may become obsolete as our services and websites develop and
change.
Manual Revisions
Revision Date Description
1.0 03/07/2013 DCS-6513 Revision A1 with rmware version 1.00
Trademarks
D-Link and the D-Link logo are trademarks or registered trademarks of D-Link Corporation or its subsidiaries in the United States or other
countries. All other company or product names mentioned herein are trademarks or registered trademarks of their respective companies.
Copyright © 2013 D-Link Corporation.
All rights reserved. This publication may not be reproduced, in whole or in part, without prior expressed written permission from D-Link Corporation.
Preface
3D-Link DCS-6513 User Manual
Table of Contents
Product Overview ......................................................................... 4
Package Contents ................................................................. 4
Introduction ............................................................................5
System Requirements .........................................................5
Features .................................................................................... 6
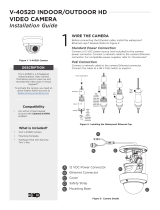
Hardware Overview ............................................................. 7
Front ...................................................................................... 7
Cable Harness..................................................................... 8
Internal .................................................................................9
Assembly and Installation .......................................................10
Concealed Cable Installation ......................................10
Exposed Cable Installation ..........................................12
Pendant Mount (Optional) ..........................................15
Bent Mount (Optional) ..................................................18
Installation of Weather Shield ........................................21
Adjusting the lens 3-axis angle ......................................25
Software Installation .........................................................26
D-ViewCam Setup Wizard ................................................29
Conguration ...............................................................................31
Using the Conguration Interface ................................31
Live Video ..............................................................................32
Setup .......................................................................................34
Setup Wizard ....................................................................34
Network Setup .................................................................40
Dynamic DNS ...................................................................43
Image Setup .....................................................................44
Audio and Video ..............................................................46
Lens Control ......................................................................48
Preset ...................................................................................49
Motion Detection ...........................................................51
Time and Date ..................................................................52
Event Setup .......................................................................53
SD Card ...............................................................................61
Advanced ...............................................................................62
Digital Input/Output ......................................................62
ICR and IR ...........................................................................63
HTTPS ..................................................................................64
Access List ..........................................................................65
Maintenance .........................................................................66
Device Management .....................................................66
System ................................................................................67
Firmware Upgrade ..........................................................68
Status ......................................................................................69
Device Info ........................................................................69
Logs .....................................................................................70
Help......................................................................................71
DI/DO Specications .................................................................72
Technical Specications ...........................................................73
4D-Link DCS-6513 User Manual
Section 1: Product Overview
Product Overview
Package Contents
If any of the above items are missing, please contact your reseller.
Note: Using a power supply with a dierent voltage than the one included with your
product will cause damage and void the warranty for this product.
DCS-6513 Full HD WDR Day &
Night Outdoor Dome Network Camera
Power adapter
CD-ROM with User Manual and software
Weather Shield
37mm Screws for Weather Shield
Quick Installation Guide
Extension Adapter
Security Wrench
Cable Cover
Rubber Plug
5D-Link DCS-6513 User Manual
Section 1: Product Overview
Introduction
The DCS-6513 Full HD WDR Day & Night Outdoor Dome Network Camera is a professional, vandal-resistant surveillance and
security solution for small, medium, and large enterprises alike. The DCS-6513 uses a 3 megapixel progressive scan CMOS sensor;
which results in low noise and high sensitivity with Wide Dynamic Range (WRD) capabilities ideal for surveillance applications.
The DCS-6513 is equipped with a P-iris lens that controls the iris with extreme precision. The built-in stepping motor maintains
the iris opening at an optimal level at all times, resulting in superior image clarity, depth of eld, and image quality.
Together with WDR enhancement, users can identify image details in extreme bright, as well as dark environments.
The DCS-6513 has an IP67 certied weatherproof housing designed for both indoor and outdoor applications. The built-in
removable IR-cut lter and IR LEDs gives the DCS-6513 the capability to view up to 20M at night. The DCS-6513 also incorporates
Power over Ethernet (PoE), allowing it to be easily installed in a variety of locations without the need for supplemental power
cabling. The combination of IP67 housing, IR-Cut Filter, IR LEDs and PoE make the DCS-6513 an ideal solution for a high
performance, reliable and cost-eective 24 hour HD surveillance solution with an easy, clutter-free installation.
Computer with Microsoft Windows 8, Windows® 7, Vista®, or XP (for CD-ROM Setup Wizard), Mac OS or Linux
PC with 1.3GHz or above; at least 128MB RAM
Internet Explorer 7 or above , Firefox 3.5 or above, Safari 4 and Chrome 8.0 or above
Existing 10/100 Ethernet-based network
An Micro SD memory card (optional) is required for recording to onboard storage. SDHC Class 6 or above is recommended.
Broadband Internet connection
System Requirements
6D-Link DCS-6513 User Manual
Section 1: Product Overview
P-iris
The P-iris lens in the DCS-6513 solves the long-standing problem of capturing sharp images in varying light conditions. The DCS-6513 optimizes the
iris opening under all lighting conditions, resulting in images with better clarity, resolution and depth of eld as well as improved image sharpness
and increased image usability for network video surveillance.
Remote Zoom & Focus
The remote focus function eliminates the need for manual focusing at the camera position and allowing the user to make key adjustments from
any computer. The remote zoom functionality allows the user to make nal adjustments to the zoom from the computer. It provides a convenient
way to ensure that the viewing angle is optimized for the scene and required need for resolution.
Wide Dynamic Range
Wide Dynamic Range technology neutralizes imperfect lighting, providing clear images with the right amount of contrast even when a subject is
backlit
Automatic Thermostat Temperature Regulation
The DCS-6513 monitors and automatically regulates its temperature to ensure optimal performance even in extreme conditions. It balances fan use
against a built in heater based on a range of preset thermostatic settings. This gives the DCS-6513 the ability to perform in the most demanding
of environments.
Remote Monitoring Utility
The D-ViewCam application adds enhanced features and functionality for the Network Camera and allows administrators to congure and access
the Network Camera from a remote site via Intranet or Internet. Other features include image monitoring, recording images to a hard drive, viewing
up to 32 cameras on one screen, and taking snapshots.
IR LED for Day and Night Functionality
The built-in infrared LEDs enables night time viewing of up to 20 meters (65.6 feet).
Robust Weatherproof and Vandal-resistant Housing
The DCS-6513 housing is compliant with both the IP67 weatherproof and IK-10 vandal-resistant certications, allowing you to rest assured that it
will continue to provide round-the-clock surveillance in the toughest of conditions and locations.
PoE (Power over Ethernet) for Flexible Installation
The DCS-6513 can draw all the power it needs from a PoE switch or PoE injector, negating the need for a separate power installation.
Features
7D-Link DCS-6513 User Manual
Section 1: Product Overview
1 Camera Lens
Vari-focal lens to record video of the surrounding area
2 Light Sensor
The light sensor measures the lighting conditions and switches between color
and infrared accordingly
3 IR LEDs
Infrared LEDs illuminate the camera's eld of view at night
4 Power/Status LED
Indicates the camera's current status
5 Protective Casing
The camera is housed in an IP67 certied weatherproof casing, which protects
it against rain and dust. This case is also IK-10 certied vandal-resistant.
2
3
5
4
1
Front
Hardware Overview
8D-Link DCS-6513 User Manual
Section 1: Product Overview
Cable Harness
1 BNC Connector
The BNC connector is recommended for use with handheld monitors to
check the Field of View during installation.
2 Power Connector Power connector for the provided 12V DC power adapter.
3 Audio In (A.In) Connects to a microphone.
4 Audio Out (A.Out)
Connects to a speaker.
5 DI/DO Connector
I/O connectors for external devices. 12V DC output.
6 Reset Button
Press and hold the recessed button for 10 seconds to reset the camera.
7 24 V Power Connector Connects to 24 V AC power supply.
2
1
6
7
4
3
5
9D-Link DCS-6513 User Manual
Section 1: Product Overview
Internal
1 Micro SD Card Slot
Insert an Micro SD card for local storage of recorded image and video
1
Disassemble the Camera
Open the camera enclosure
by loosen the 4 screws. Lift
the dome o the base of the
camera.
Install the Micro SD Card
Push the Micro SD card into the
camera with the gold contacts
oriented towards the base of the
camera. To eject the Micro SD card,
push the Micro SD card into the slot.
10D-Link DCS-6513 User Manual
Section 2: Assembly and Installation
Assembly and Installation
Standard Mounting Instructions
Height: 23 mm (0.9 inches)
Diameter: 183 mm (7.2 inches)
Weight: 400 g (0.9 lbs)
Concealed Cable Installation
1. Disassemble the camera enclosure (see page 9).
2. Thread the cables through the waterproof plugs at the bottom of the base of the camera.
Attach the cables to the corresponding cable connectors.
3. Locate a suitable position on the ceiling for the mounting plate to be installed.
4. Use the mounting template to mark the holes for installation.
5. Cut an access hole in the ceiling for the cables.
6. Drill four separate 6mm holes corresponding to the holes in the mounting template and insert
the plastic anchors into these holes.
7. Attach the surface bracket to the ceiling using the screws provided
11D-Link DCS-6513 User Manual
Section 2: Assembly and Installation
1. Connect the Ethernet cable and the power cable, threading them through the hole in the ceiling.
2. Push the dome body up over the base of the camera.
3. Attach the dome to the base of the camera using the three long screws and the provided security screw.
12D-Link DCS-6513 User Manual
Section 2: Assembly and Installation
Exposed Cable Installation
Height: 23 mm (0.9 inches)
Diameter: 183 mm (7.2 inches)
Weight: 400 g (0.9 lbs)
1. Disassemble the camera enclosure (see page 9).
2. Remove the small screw to release the faceplate on the side of the base of the camera
13D-Link DCS-6513 User Manual
Section 2: Assembly and Installation
1. Attach the dual-holed plate to the base of the camera
2. Thread the cables through the waterproof plugs on the side of the base of the camera. Attach the cables to the corresponding cable
connectors.
3. Place the plastic cable cover onto the dual-holed plate and attach it using the screw.
14D-Link DCS-6513 User Manual
Section 2: Assembly and Installation
1. Locate a suitable position on the ceiling for the mounting plate to be installed.
2. Use the mounting template to mark the holes for installation.
3. Drill four separate 6mm holes corresponding to the holes in the mounting template and insert the plastic anchors into these holes.
4. Attach the surface bracket to the ceiling using the screws provided.
5. Place the dome body onto the base of the camera.
6. Attach the dome to the base of the camera using the three long screws and the provided security screw.
15D-Link DCS-6513 User Manual
Section 2: Assembly and Installation
Pendant Mount (Optional)
Height: 201 mm (7.9 inches)
Diameter: 150 mm (5.9 inches)
Weight: 665 g (1.45 lbs)
Pendant
Bracket
Bracket
Cap
Rubber
Seal
Bracket
Cap
Mounting
Plate
1. Attach the mounting plate to the bracket cap using the three screws.
2. Locate a suitable position on the ceiling for a 34mm (+2 / –0 mm) hole to be cut. A
template is included to aid in marking the mounting hole.
3. Cut a hole in the ceiling according to the template.
4. Drill four separate 6mm holes corresponding to the holes in the mounting template
and insert the plastic anchors into these holes.
5. Place the rubber seal between the pendant bracket and the ceiling to ensure a
waterproof seal between the ceiling and the bracket.
6. Attach the pendant bracket to the ceiling using the screws provided.
7. Attach the bracket cap to the bottom of the pendant bracket by rotating the cap
counterclockwise to tighten it into place.
8. Insert the screw into the base of the pendant bracket at the top of the bracket cap
to secure the bracket cap into place.
16D-Link DCS-6513 User Manual
Section 2: Assembly and Installation
1. Connect the Ethernet cable and the power cable, then thread them through the pendant bracket.
2. Place the dome body onto the base of the camera.
17D-Link DCS-6513 User Manual
Section 2: Assembly and Installation
1. Attach the dome to the base of the camera using the three long screws and the provided security screw.
18D-Link DCS-6513 User Manual
Section 2: Assembly and Installation
Height: 253 mm (9.96 inches)
Diameter: 150 mm (5.9 inches)
Weight: 770 g (1.7 lbs)
Bent Mount (Optional)
Bracket Cap
Bent
Bracket
Bracket
Cap
Mounting
Plate
1. Attach the mounting plate to the bracket cap using the three screws.
2. Locate a suitable position on the wall for a 34mm (+2 / –0 mm) hole to be cut. A
template is included to aid in marking the mounting hole.
3. Cut a hole in the ceiling according to the template
4. Drill four separate 6mm holes corresponding to the holes in the mounting template
and insert the plastic anchors into these holes.
5. Place the rubber seal between the wall mount bracket and the wall to ensure a
waterproof seal between the wall and the bracket.
6. Attach the wall mount bracket to the wall using the screws provided.
7. Attach the bracket cap to the bottom of the wall mount bracket by rotating the cap
counterclockwise to tighten it into place.
8. Insert the screw into the base of the wall mount bracket at the top of the bracket
cap to secure the bracket cap into place.
9. Connect the Ethernet cable and the power cable and thread them through the wall
mount bracket.
19D-Link DCS-6513 User Manual
Section 2: Assembly and Installation
Dome
Camera
Bent
Bracket
1. Place the dome body onto the base of the camera.
20D-Link DCS-6513 User Manual
Section 2: Assembly and Installation
1. Attach the dome to the base of the camera using the three long screws and the provided security screw.
  • Page 1 1
  • Page 2 2
  • Page 3 3
  • Page 4 4
  • Page 5 5
  • Page 6 6
  • Page 7 7
  • Page 8 8
  • Page 9 9
  • Page 10 10
  • Page 11 11
  • Page 12 12
  • Page 13 13
  • Page 14 14
  • Page 15 15
  • Page 16 16
  • Page 17 17
  • Page 18 18
  • Page 19 19
  • Page 20 20
  • Page 21 21
  • Page 22 22
  • Page 23 23
  • Page 24 24
  • Page 25 25
  • Page 26 26
  • Page 27 27
  • Page 28 28
  • Page 29 29
  • Page 30 30
  • Page 31 31
  • Page 32 32
  • Page 33 33
  • Page 34 34
  • Page 35 35
  • Page 36 36
  • Page 37 37
  • Page 38 38
  • Page 39 39
  • Page 40 40
  • Page 41 41
  • Page 42 42
  • Page 43 43
  • Page 44 44
  • Page 45 45
  • Page 46 46
  • Page 47 47
  • Page 48 48
  • Page 49 49
  • Page 50 50
  • Page 51 51
  • Page 52 52
  • Page 53 53
  • Page 54 54
  • Page 55 55
  • Page 56 56
  • Page 57 57
  • Page 58 58
  • Page 59 59
  • Page 60 60
  • Page 61 61
  • Page 62 62
  • Page 63 63
  • Page 64 64
  • Page 65 65
  • Page 66 66
  • Page 67 67
  • Page 68 68
  • Page 69 69
  • Page 70 70
  • Page 71 71
  • Page 72 72
  • Page 73 73
  • Page 74 74
  • Page 75 75

D-Link 6513 User manual

Category
Security cameras
Type
User manual
This manual is also suitable for

Ask a question and I''ll find the answer in the document

Finding information in a document is now easier with AI