Samsung SYNCMASTER NC220P User manual

Category
LED displays
Type
User manual

This manual is also suitable for

SyncMaster NC220P
LED Monitor
User Manual
The color and the appearance may differ depending on the
product, and the specifications are subject to change
without prior notice to improve the performance.
Table Of Contents
MAJOR SAFETY PRECAUTIONS
Before You Start . . . . . . . . . . . . . . . . . . . . . . . . . . . . . . . . . . . . . . . . . . . 1-1
Care and Maintenance . . . . . . . . . . . . . . . . . . . . . . . . . . . . . . . . . . . . . . 1-2
Cleaning the Monitor . . . . . . . . . . . . . . . . . . . . . . . . . . . . . . . . . . . . . . . 1-3
Safety Precautions . . . . . . . . . . . . . . . . . . . . . . . . . . . . . . . . . . . . . . . . . 1-4
INSTALLING THE PRODUCT
Package Contents . . . . . . . . . . . . . . . . . . . . . . . . . . . . . . . . . . . . . . . . . 2-1
Installing the Stand . . . . . . . . . . . . . . . . . . . . . . . . . . . . . . . . . . . . . . . . 2-2
Adjusting the Product Tilt and Height . . . . . . . . . . . . . . . . . . . . . . . . . 2-3
Rotating the Monitor Screen . . . . . . . . . . . . . . . . . . . . . . . . . . . . . . . . . 2-4
Installing a Wall-mount Kit or Desktop Stand . . . . . . . . . . . . . . . . . . . 2-5
Connecting to your Network . . . . . . . . . . . . . . . . . . . . . . . . . . . . . . . . . 2-6
Connecting to another Monitor . . . . . . . . . . . . . . . . . . . . . . . . . . . . . . . 2-7
Connecting a SERIAL Cable . . . . . . . . . . . . . . . . . . . . . . . . . . . . . . . . . 2-8
Connecting with a PC . . . . . . . . . . . . . . . . . . . . . . . . . . . . . . . . . . . . . . . 2-9
Connecting a Stereo Cable . . . . . . . . . . . . . . . . . . . . . . . . . . . . . . . . . 2-10
Connecting Headphones . . . . . . . . . . . . . . . . . . . . . . . . . . . . . . . . . . . 2-11
Connecting MIC . . . . . . . . . . . . . . . . . . . . . . . . . . . . . . . . . . . . . . . . . . 2-12
Kensington Lock . . . . . . . . . . . . . . . . . . . . . . . . . . . . . . . . . . . . . . . . . 2-13
USING THE PRODUCT
What is a PC over IP? . . . . . . . . . . . . . . . . . . . . . . . . . . . . . . . . . . . . . . . 3-1
Connect to the host PC using a LAN cable . . . . . . . . . . . . . . . . . . . . . 3-2
Plug & Play . . . . . . . . . . . . . . . . . . . . . . . . . . . . . . . . . . . . . . . . . . . . . . . 3-3
Standard Signal Mode Table . . . . . . . . . . . . . . . . . . . . . . . . . . . . . . . . . 3-4
Installing the Device Driver . . . . . . . . . . . . . . . . . . . . . . . . . . . . . . . . . . 3-5
Installing a USB-to-Serial Driver . . . . . . . . . . . . . . . . . . . . . . . . . . . . . . 3-6
Product Operating Buttons . . . . . . . . . . . . . . . . . . . . . . . . . . . . . . . . . . 3-7
Using the Screen Adjustment Menu (OSD: On Screen Display) . . . . 3-8
INSTALLING THE SOFTWARE
PCoIP . . . . . . . . . . . . . . . . . . . . . . . . . . . . . . . . . . . . . . . . . . . . . . . . . . . . 4-1
Natural Color . . . . . . . . . . . . . . . . . . . . . . . . . . . . . . . . . . . . . . . . . . . . . . 4-2
MultiScreen . . . . . . . . . . . . . . . . . . . . . . . . . . . . . . . . . . . . . . . . . . . . . . . 4-3
TROUBLESHOOTING
Monitor Self-Diagnosis . . . . . . . . . . . . . . . . . . . . . . . . . . . . . . . . . . . . . 5-1
Before Requesting Service . . . . . . . . . . . . . . . . . . . . . . . . . . . . . . . . . . 5-2
FAQ . . . . . . . . . . . . . . . . . . . . . . . . . . . . . . . . . . . . . . . . . . . . . . . . . . . . . 5-3
MORE INFORMATION
Specifications . . . . . . . . . . . . . . . . . . . . . . . . . . . . . . . . . . . . . . . . . . . . . 6-1
Power Consumption . . . . . . . . . . . . . . . . . . . . . . . . . . . . . . . . . . . . . . . . 6-2
Contact SAMSUNG WORLDWIDE . . . . . . . . . . . . . . . . . . . . . . . . . . . . . 6-3
Correct Disposal of This Product
(Waste Electrical & Electronic Equipment) . . . . . . . . . . . . . . . . . . 6-4
Major Safety Precautions 1-1
1 Major Safety Precautions
1-1 Before You Start
Icons used in this manual
Using this Manual
Make yourself fully aware of the safety precautions before using this product.
If a problem occurs, refer to the 'Troubleshooting' section.
Copyright Notice
The contents of this manual are subject to change without prior notice for performance improvement.
Copyright © 2011 Samsung Electronics Co., Ltd. All Rights Reserved.
The copyright of this manual is reserved by Samsung Electronics, Co., Ltd.
The contents of this manual may not be partially or in whole reproduced, distributed or used in any form without the written
permission of Samsung Electronics, Co., Ltd.
The SAMSUNG logo and SyncMaster are the registered trademarks of Samsung Electronics, Co., Ltd.
Microsoft, Windows and Windows NT are the registered trademarks of Microsoft Corporation.
VESA, DPM and DDC are the registered trademarks of the Video Electronics Standard Association.
All other trademarks mentioned herein belong to their respective companies.
ICON NAME MEANING
Caution Indicates cases where the function may not work or the setting may be canceled.
Note Indicates a hint or tip to operate a function.
An administration fee may be charged if either
(a) an engineer is called out at your request and there is no defect in the product.
(i.e. where you have failed to read this user manual).
(b) you bring the unit to a repair centre and there is no defect in the product.
(i.e. where you have failed to read this user manual).
The amount of such administration charge will be advised to you before any work or home visit is carried
out.
1-2 Major Safety Precautions
1-2 Care and Maintenance
External Surface and Screen Maintenance
Securing the Installation Space
Keep the required distances between the product and other objects (e.g. walls) to ensure proper ventilation.
Failing to do so may result in fire or a problem with the product due to an increase in the internal temperature.
Install the product so the required distances shown in the figure are kept.
The appearance may differ depending on the product.
About persistent images
Displaying a still image for a long time may create a persistent image or stain on the screen. If you do not use the product for
a long time, set the power-saving mode or screen saver.
Due to technological constraints of the Panel manufacturer, the images generated by this product may appear either brighter
or darker than normal by appr. 1ppm (parts per million) pixel.
The number of sub-pixels of an panel by size: The number of Sub-Pixels = Max. Horizontal Resolution x Max. Vertical
Resolution x 3
Example) If the maximum resolution is 1680 x 1050, the number of sub-pixels is 1680 x1050 x 3 =5.292.000.
Clean the product with a soft, damp cloth.
Do not clean the product with an inflammable substance such
as benzene or thinner or with a wet cloth. This may result in a
problem with the product.
Do not scratch the screen with your fingernails or a sharp
object.
This may result in scratches or damage to the product.
Do not clean the product directly by spraying water onto the
product.
If water enters the product, it may result in fire, electric shock or
a problem with the product.
A white stain may be generated on the surface of the high-
glossy model due to the inherent characteristics of the material,
if a supersonic humidifier is used.
The appearance and the color may differ depending on the
model.
When installing the product with a stand When installing the product with a wall-mount
Major Safety Precautions 1-3
1-3 Cleaning the Monitor
Cleaning the Monitor
The panel and exterior of the cutting-edge monitor scratch easily and require careful attention. Clean the monitor according to
the following steps.
Precautions for Storage
Using an ultrasonic humidifier may cause white stains on a highly glossy product.
Be sure you contact the nearest service center (paid service) for cleaning the inside of the monitor.
1. Power off the monitor and PC.
2. Disconnect the power cable from the monitor.
To avoid electric shock, be sure you disconnect the cable by gripping the plug and do not touch the cable
with wet hands.
3. Wipe the monitor using a soft, slightly damp cloth that has been squeezed .
Do not use a cleaning agent that contains alcohol or solvents, or that is surface active.
Otherwise, the exterior may discolor or crack or the panel coating may come off.
Do not spray water or cleaning agent directly onto the monitor.
Otherwise, the liquid may sink into the monitor and cause a fire, electric shock, or
failure.
4. Clean the exterior of the monitor using a soft cloth dampened with a small amount of water.
5. Connect the power cable to the monitor after you have finished cleaning.
6. Power on the monitor and PC.
1-4 Major Safety Precautions
1-4 Safety Precautions
Icons used for safety precautions
Meaning of Signs
Installation Related
Warning
ICON NAME MEANING
Warning
Failing to follow the precautions marked with this sign, may result in a serious injury or
even a fatality.
Caution
Failing to follow the precautions marked with this sign, may result in a personal injury or
property damage.
Do not perform. Must be followed.
AVOID PLACING BURNING CANDLES,
MOSQUITO-REPELLENT OR CIGARETTES
ON THE PRODUCT AND INSTALLING THE
PRODUCT NEAR A HEATER.
Otherwise, it may result in fire.
Ask an installation engineer or relevant
company to install the product onto a wall.
Otherwise, it may result in injury.
Make sure to use the specified wall mount.
Avoid installing the product in a badly-ventilated
location such as inside a bookshelf or closet.
Otherwise, it may result in fire due to
internal over-heating.
Avoid installing the product in a location that is
unstable or exposed to excessive vibrations
such as on an unstable or slanted shelf.
The product may fall and this may result in
damage to the product or injury.
If you use the product in a location exposed
to excessive vibrations, it may result in a
problem with the product or fire.
Keep the plastic bags used to pack the product
away from children.
If children place the plastic bags over their
heads, they may suffocate.
Avoid installing the product in a location
exposed to direct sunlight or heat source such
as a fire or heater.
This may shorten the product life cycle or
cause fire.
Avoid installing the product at a height where
children may reach it.
If a child touches the product, the product
may fall and this may result in injury.
Since the front part is heavier, install the
product on a flat and stable surface.
Avoid installing the product in a location
exposed to dust, moisture (sauna), oil, smoke
or water (rain drops) and installing it within a
vehicle.
This may result in electric shock or fire.
Edible oil, such as soybean oil, can
damage or deform the product. Do
not install the product in a kitchen or
near a kitchen counter.
Major Safety Precautions 1-4
Caution
Usage Related
Warning
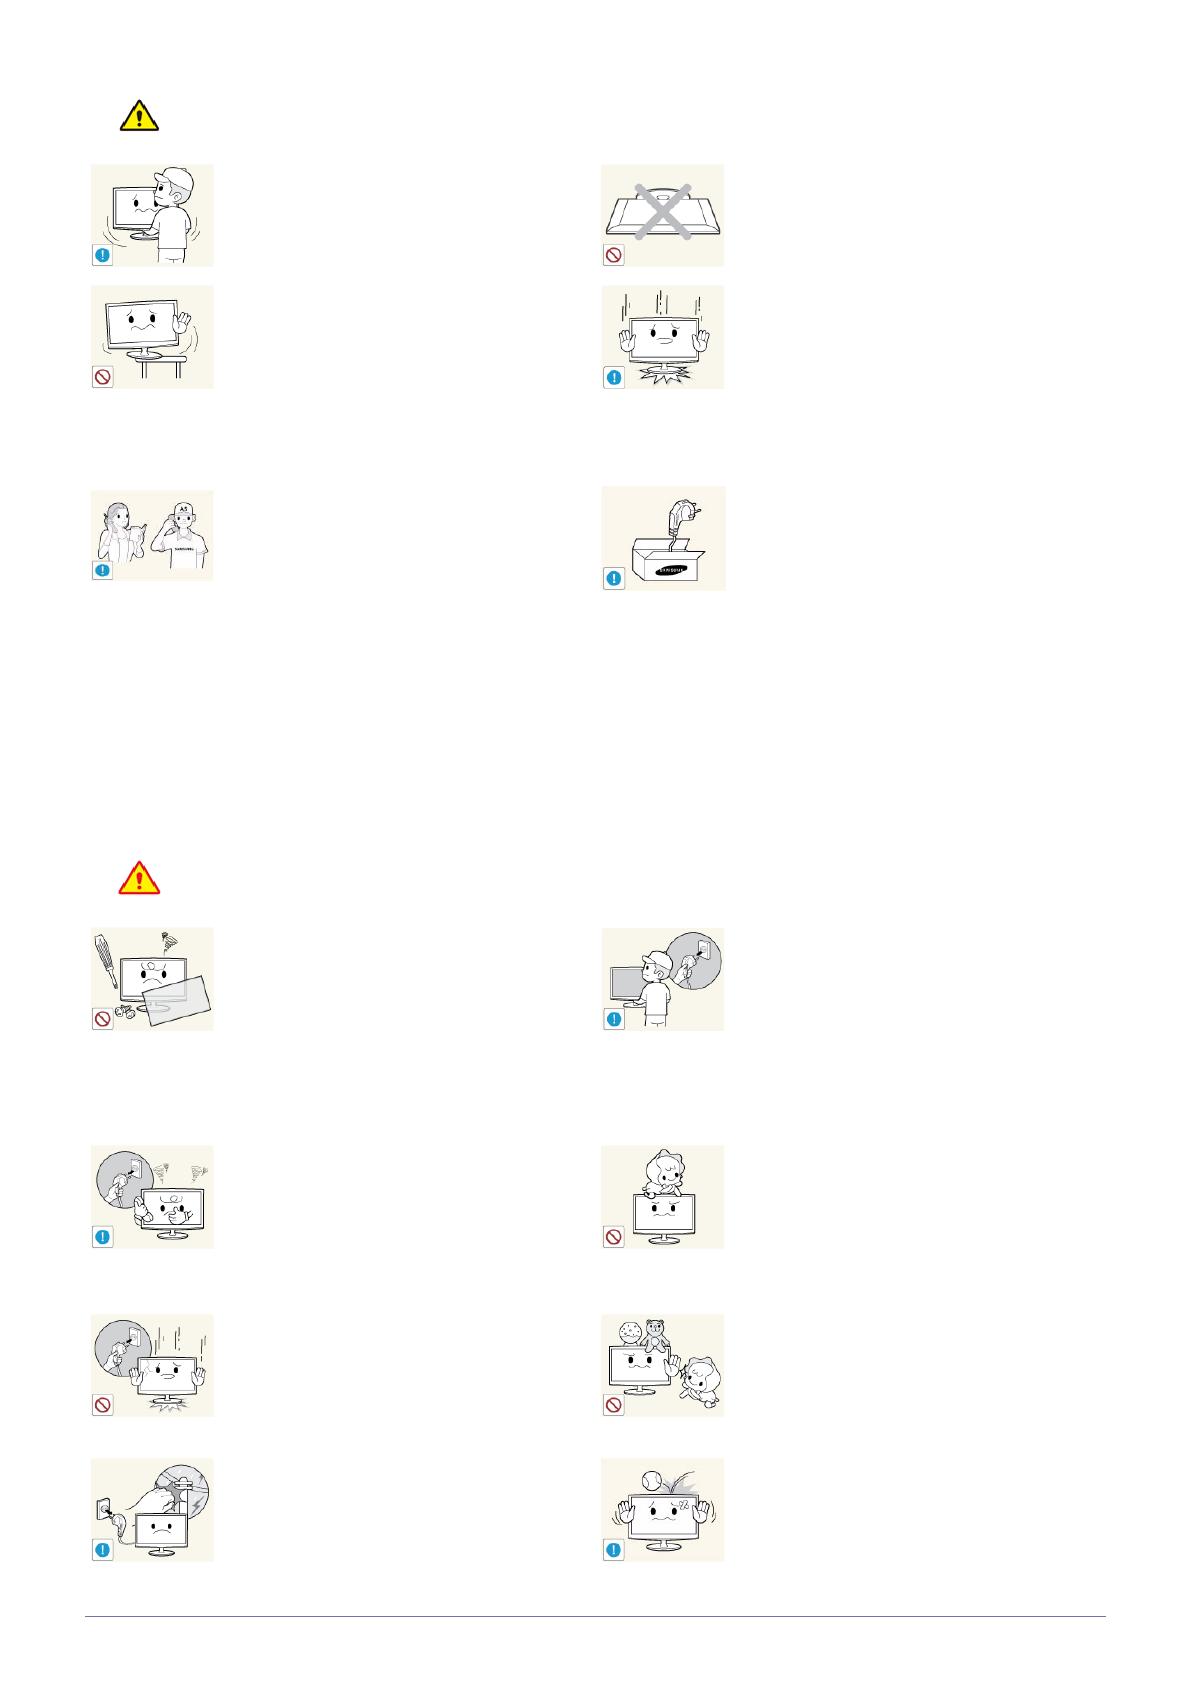
Do not let the product drop while moving it.
This may result in a problem with the
product or injury.
Do not place the product face down on the
floor.
This may damage the panel of the product.
When installing the product on a console or
shelf, make sure that the front of the product
does not protrude out of the console or shelf.
Otherwise, this may cause the product to
fall off and result in a malfunction or injury.
Make sure to use a cabinet or shelf suitable
to the size of the product.
When putting the product down, handle it
gently.
Otherwise, it may result in a problem with
the product or injury.
If the product is installed in a location where the
operating conditions vary considerably, a
serious quality problem may occur due to the
surrounding environment. In this case, install
the product only after consulting one of our
service engineers about the matter.
Places exposed to microscopic dust,
chemicals, too high or low temperature,
high humidity, such as airports or stations
where the product is continuously used for
a long time and so on.
Make sure to use only the power cord supplied
by Samsung. In addition, do not use the power
cord of another electric appliance.
Otherwise, it may result in electric shock or
fire.
Since a high voltage runs through the product,
never disassemble, repair or modify the product
yourself.
Otherwise, it may result in fire or electric
shock.
If the product needs to be fixed, contact
a service center.
If the product generates a strange noise, a
burning smell, or smoke, unplug the power
plug immediately and contact a service cen-
ter.
Otherwise, it may result in electric shock or
fire.
Avoid letting children to hang or climb onto the
product.
Otherwise, it may result in the product
falling and this may result in injury or death.
If you drop the product or the case is dam-
aged, turn the power off and unplug the
power cord. Contact a service center.
Otherwise, it may result in fire or electric
shock.
Avoid placing objects such as toys and cookies
on top of the product.
If a child hangs over the product to grab an
object, the object or the product may fall
and this may result in injury or even death.
Avoid dropping an object over the product or
cause impact to the product.
Otherwise, it may result in electric shock or
fire.
Before moving the product, turn off
the power switch and disconnect the
power cable and all other connected
cables.
Otherwise, the power cord may be
damaged and a fire or electric
shock may result.
During a lightning or thunderstorm,
power off the product and remove the
power cable.
Otherwise, it may result in electric
shock or fire.
1-4 Major Safety Precautions
Caution
Avoid moving the product by pulling the power
cord or antenna cable.
Otherwise, it may result in electric shock,
fire or a problem with the product due to
damage to the cable.
When a gas leak occurs, do not touch the
product or the power plug and ventilate
immediately.
A spark may result in an explosion or fire.
Avoid lifting up or move the product by holding
only the power cord or signal cable.
Otherwise, it may result in electric shock,
fire or a problem with the product due to
damage to the cable.
Avoid using or placing inflammable spray or
objects near the product.
This may result in an explosion or fire.
Take care not to block the vent by a table cloth
or curtain.
Otherwise, it may result in fire due to
internal overheating.
Avoid inserting metal objects such as a
chopsticks, coins or hairpins, or inflammable
objects into the product (the vents, ports, etc).
If water or an alien substance enters the
product, turn the power off, unplug the
power cord and contact a service center.
Otherwise, it may result in a problem with
the product, electric shock or fire.
Avoid placing a liquid container such as a vase,
flowerpot, beverage, cosmetics or drugs, or a
metal object over the product.
If water or an alien substance enters the
product, turn the power off, unplug the
power cord and contact a service
center.
Otherwise, it may result in a problem with
the product, electric shock or fire.
Displaying a still image for a long time may
create a persistent image or stain on the
screen.
If you do not use the product for a long time,
use the power-saving mode or set the
screensaver to the moving picture mode.
It is important to give your eyes some rest (5
minutes every hour) when viewing the product
screen for long periods of time.
This will alleviate any eye strain.
Set the appropriate resolution and frequency
for the product.
Otherwise, it may result in eye strain.
Keep small accessories away from the children.
Do not put DC power adapters together.
Otherwise, a fire may result.
Avoid placing a heavy object over the product.
Otherwise, it may result in a problem with
the product or injury.
Remove the plastic bag from the DC power
adapter before you use it.
Otherwise, a fire may result.
When not using the product for a long time
such as leaving your home, unplug the power
cord from the wall outlet.
Otherwise, it may cause dust accumulation
and result in fire caused by overheating or
short circuit or result in an electric shock.
Major Safety Precautions 1-4
Maintaining the Correct Posture when Using this Product
Do not let water enter the DC power device
or get the device wet.
An electric shock or fire may result.
Avoid using the product outdoors where
it can be exposed to rain or snow.
Be careful not to get the DC power
adapter wet when you wash the floor.
Avoid turning the product upside down or move
the product holding only the stand.
This may cause the product to fall resulting
in damage to the product or injury.
Do not put the DC power adapter near to
any heating apparatus.
Otherwise, a fire may result.
Avoid using a humidifier or cooker near the
product.
Otherwise, it may result in electric shock or
fire.
Keep the DC power adapter in a well-venti-
lated area.
Since the display panel is hot after using it for a
long time, do not touch the product.
Watching the product from too close a distance
continuously may damage your eyesight.
Take care when adjusting the angle of the
product or the height of the stand.
If your hand or finger is caught, you may be
injured.
If the product is tilted excessively, the
product may fall and this may result in
injury.
Use the product in the correct posture as follows:
Straighten your back.
Keep a distance of 45~50 cm(18~ 20inches) from your eyes to the screen. Look down at
the screen and face the screen forwards.
Adjust the angle of the product so that light is not reflected onto the screen.
Keep your elbow at a right angle and keep your arm level with the back of your hand.
Keep your elbow at a right angle.
Place your heels flat on the ground while keeping your knees at an angle of 90 degrees or
higher and maintain the position of your arm so that your arm is below your heart.
2-1 Installing the Product
2 Installing the Product
2-1 Package Contents
Unpack the product and check if all of the following contents have been included.
Store the packaging box in case you need to move the product at a later stage.
If any items are missing, contact your dealer.
Contact a local dealer to purchase optional items.
Monitor
The color and the appearance may differ depending on the product, and the specifications are subject to change without
prior notice to improve the performance.
Components may differ in different locations.
CONTENTS
Quick Setup Guide Warranty Card
(Not available in all locations)
User Manual DC-DC converter
(UPoE PD Adapter)
Stand base LAN cable (length: 300mm) Ferrite Core (1EA)
OPTIONAL PARTS
RS-232C Cable DVI Cable Stereo Cable Mouse (USB)
Keyboard Headphone D-Sub Cable USB Cable
Installing the Product 2-2
2-2 Installing the Stand
Disassembly is in the reverse order of the assembly.
The color and the appearance may differ depending on the product, and the specifications are subject to change without
prior notice to improve the performance.
Place a soft cloth over the table to protect the product and place the product onto the
cloth so that the front of the product is facing downwards.
Turn the stand in the direction indicated by the arrow.
Insert the stand base into the stand in the direction of the arrow.
Do not remove the fixing pin until you are finished attaching the stand.
Tightly fasten the screw to the bottom of the base.
After installing the stand, place the product upright.
You can remove the fixing pin and adjust the stand now.
- Caution
Do not hold the product upside down only by the stand.
2-3 Installing the Product
2-3 Adjusting the Product Tilt and Height
The color and shape of parts may differ from what is shown. Specifications are subject to change without notice to improve
quality.
To adjust the height, remove the fixing pin.
The monitor tilt and height can be adjusted.
Hold the top center of the product and adjust the height carefully.
Installing the Product 2-4
2-4 Rotating the Monitor Screen
You can rotate your monitor as shown below.
Be sure to fully extend the stand before rotating the monitor.
If you rotate the monitor without fully extending the stand, the corner of the monitor may hit the floor and get damaged.
Do not rotate the monitor counterclockwise. The monitor may get damaged.
2-5 Installing the Product
2-5 Installing a Wall-mount Kit or Desktop Stand
Before Installation
Installing a Wall-mount Kit or Desktop Stand
Align the grooves and tightly fasten the screws on the bracket on the product with the corresponding parts on the wall-mount kit
or desktop stand you want to attach.
Using a screw longer than the standard length can damage the internal components of the product.
The length of screws required for a wall mount that does not comply with the VESA standards may vary depending on the
specifications.
Do not use screws that do not comply with the VESA standards. Do not attach the wall-mount kit or desktop stand using
excessive force. The product may get damaged or fall and cause persona linjury. Samsung shall not be held liable for any
damage or injury caused by using improper screws or attaching the wall-mount kit or desktop stand using excessive force.
Samsung shall not be held liable for any product damage or personal injury caused by using a wallmount kit other than the one
specified or from an attempt to install the wall-mount kit on your own.
To mount the product on a wall, ensure you purchase a wall-mount kit that can be installed 10cm or farther away from the wall.
Be sure to use a wall-mount kit that complies with the standards.
Place a protective cloth or cushion on a flat
surface. Next, place the product with the face
down on top of the cloth or cushion.
Unfasten the screw from the back of
the product.
Lift and detach the stand.
Attach the wall-mount kit or desktop stand here
Bracket (sold separately)
Installing the Product 2-6
2-6 Connecting to your Network
The connecting part may differ depending on the product model.
Attach the DC-DC converter (UPoE PD) to the back of the product.
- Push the adapter until you hear a “click.”
Connect the LAN cable (connected to the PSE device) to the [LAN] port on the
right side of the UPoE PD adapter.
Connect the [LAN] port on the left side (where the power cable is located) of the UPoE
PD adapter to the [LAN] port on the product using the [LAN] cable.
The two [LAN] ports are designed to work as an Internet HUB. One port can be
used for input and the other port for output to connect the product to an external
Internet device.
Removing the UPoE PD adapter
Ensure you remove the UPoE PD adapter from the lower part of the adapter.
It is not supported when the network speed is below or equal to 10Mbps.
Use Cat5(*STP Type) cable for the connection.
*Shielded Twist Pair
Connect the power cable (connected to the UPoE PD adapter) to the
[DC 14V/15V] port on the product.
2-6 Installing the Product
Ferrite Core for LAN cable : The ferrite cores are used to shield the cables
from interference. When connecting the ferrite core to a cable, open the
ferrite core and clip it around the cable near the plug as shown in the figure.
: One ferrite core should be no more than 2 inches from the end of the
LAN cable that is inserted into the product.
Installing the Product 2-7
2-7 Connecting to another Monitor
The connecting part may differ depending on the product model.
Connect between the [DVI OUT] port on the product and the DVI port on your monitor using a DVI cable.
You can connect more monitors via [DVI OUT]. (For presentation purposes).
2-8 Installing the Product
2-8 Connecting a SERIAL Cable
Devices which support RS-232C connection (interface) can be connected.
Installing the Product 2-9
2-9 Connecting with a PC
The connecting part may differ depending on the product model.
Connect the [RGB IN] port of the product to the D-Sub port of your PC with a D-Sub cable.
Use the [RGB IN] port to directly connect the monitor to a PC.
  • Page 1 1
  • Page 2 2
  • Page 3 3
  • Page 4 4
  • Page 5 5
  • Page 6 6
  • Page 7 7
  • Page 8 8
  • Page 9 9
  • Page 10 10
  • Page 11 11
  • Page 12 12
  • Page 13 13
  • Page 14 14
  • Page 15 15
  • Page 16 16
  • Page 17 17
  • Page 18 18
  • Page 19 19
  • Page 20 20
  • Page 21 21
  • Page 22 22
  • Page 23 23
  • Page 24 24
  • Page 25 25
  • Page 26 26
  • Page 27 27
  • Page 28 28
  • Page 29 29
  • Page 30 30
  • Page 31 31
  • Page 32 32
  • Page 33 33
  • Page 34 34
  • Page 35 35
  • Page 36 36
  • Page 37 37
  • Page 38 38
  • Page 39 39
  • Page 40 40
  • Page 41 41
  • Page 42 42
  • Page 43 43
  • Page 44 44
  • Page 45 45
  • Page 46 46
  • Page 47 47
  • Page 48 48
  • Page 49 49
  • Page 50 50
  • Page 51 51
  • Page 52 52
  • Page 53 53
  • Page 54 54
  • Page 55 55
  • Page 56 56
  • Page 57 57
  • Page 58 58
  • Page 59 59
  • Page 60 60
  • Page 61 61
  • Page 62 62
  • Page 63 63
  • Page 64 64
  • Page 65 65
  • Page 66 66
  • Page 67 67
  • Page 68 68

Samsung SYNCMASTER NC220P User manual

Category
LED displays
Type
User manual
This manual is also suitable for

Ask a question and I''ll find the answer in the document

Finding information in a document is now easier with AI