Uniden UDS655 User manual

Category
Video surveillance kits
Type
User manual
UDS655
Wireless Video Surveillance System
CUSTOMER CARE
At Uniden®, we care about you!
If you need assistance, please do NOT return this product to your place of purchase. Our customer
care specialists are available to serve you.
Quickly find answers to your questions by:
1. Reading your owner’s manual, included with this product.
2. Visiting our customer support website at www.uniden.com.
3. Calling our customer care specialists at 1-817-858-2900 or 1-800-658-8068.
Uniden surveillance products are not manufactured and/or sold with the intent to be used for illegal purposes. Uniden
expects consumer’s use of these products to be in compliance with all local, state and federal law. For further information
on video surveillance and audio recording legal requirements, please consult your local, state and federal law.
© 2013. All rights allowed by law are hereby reserved.
CONTENTS
Getting Started ...........................................................................4
Using This Manual ......................................................................................4
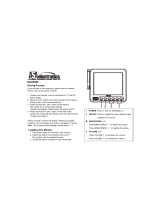
What’s Included ...........................................................................................5
Setting Up the Equipment ......................................................................6
Set Up the Camera ................................................................................. 6
Set Up the Monitor ................................................................................8
Pairing Accessory Cameras to The Monitor ......................................9
BASIC OPERATION .................................................................. 10
Getting to Know Your Monitor .......................................................... 10
Screen icons .......................................................................................... 11
Getting to Know Your Camera ............................................................ 13
Basic Operation Rules ............................................................................. 13
Using your UDS655 ................................................................................. 14
UDS655 Screen Descriptions .................................................. 16
UDS655 Main Menu Screen ................................................................. 16
Camera Setup Screen ............................................................................. 18
Pair a New Device ................................................................................ 19
Image Brightness................................................................................. 20
Activate/Deactivate ............................................................................ 21
Recorder Setup ......................................................................................... 21
Record Schedule .................................................................................. 22
Motion Detection Sensitivity .......................................................... 24
Format Storage .................................................................................... 25
Setup Masking Area ........................................................................... 25
Event List ..................................................................................................... 27
Play Back Recorded File .................................................................... 28
Delete Recorded Files ........................................................................ 29
System Setup............................................................................................. 29
Date and Time ...................................................................................... 30
TV Output ............................................................................................... 30
Power Saving ........................................................................................ 30
Multi Channel Idle Display ............................................................... 31
Default ..................................................................................................... 32
Alarm Buzzer.............................................................................................. 33
Pan Tilt Zoom ............................................................................................ 33
Scan Activated Cameras ........................................................................ 35
Memory Card OverWrite ....................................................................... 35
SPECIAL FEATURES .................................................................. 37
Remote Access .......................................................................................... 37
System Requirements ........................................................................ 37
Install Uniden Remote Service Software..................................... 38
Setting up a Portal Account ............................................................ 41
Using Remote Access ........................................................................ 44
Record Video Through the Portal ...................................................... 44
Take A Snapshot Through the Portal ................................................ 45
Play Back Recorded Files on Your PC ................................................ 45
View Live Video on TV ............................................................................ 45
Downloading and Using the Apps ......................................... 47
Android
TM ................................................................................................................................................................................ 47
Download .............................................................................................. 47
App Operation ..................................................................................... 48
iPhone® ........................................................................................................ 49
Download .............................................................................................. 49
App Operation ..................................................................................... 50
Maintaining Your System ....................................................... 52
Upgrading your Uniden UDS655 Firmware ................................... 52
Taking Care of Your Hardware ............................................................ 52
Receiver .................................................................................................. 52
Cameras .................................................................................................. 52
Solving Problems..................................................................... 53
Specications ........................................................................... 56
4
GETTING STARTED
USING THIS MANUAL
This manual is set up in seven sections:
Getting Started. This section lists the hardware that should have been in your box and how
to physically set it up. If any items are missing or damaged, contact our Customer Care Line
immediately (817-858-2929 or 800-297-1023).
Basic Operations. This section describes your equipment's function keys in detail. It also provides
a list of basic operations in an abbreviated format, referencing screen details in the third section.
Uniden UDS655 Screen Descriptions. Here you will find detailed descriptions of each screen and
how it is used.
Special Features. This section tells you about the UDS655 special features, such as how to
connect your surveillance system to the internet and access it from your PC or other wired/
wireless devices.
Downloading and Using the Apps. Here you will find instructions for downloading the Uniden
Gurardian app for Android based smartphones and iPhones and how to use them with your
system.
Maintaining Your System. This section provides tips on how to keep your UDS655 hardware
clean and in excellent working condition.
Solving Problems - Troubleshooting tips are located here.
Specification - This last section contains hardware and software specifications.
If any items are missing or damaged, contact our Customer Care Line immediately.
Never use damaged products!
5
WHAT’S INCLUDED
CH
-
CH
+
VOL+
M
VOL-
ESC
REC/DEL
ZOOM
ALARM
7” LCD Digital Wireless Monitor
(1)
Digital Wireless Camera (2) Camera Antenna (2)
Camera Stand (2) 5V/1A Power Adaptor for
Monitor / Camera (1)
Uniden Media Player and
Remote System software CD (1)
A/V Cable Extension Cable for Camera
Adaptor (2)
Screw Bag (1)
OWNER’S
MANUAL
4GB microSD™ Card and
Adapter (1 each)
Manual (1) USB cable
6
SETTING UP THE EQUIPMENT
Set Up the Camera
General Placement Guidelines
The Uniden UDSC15 cameras included with your monitor are weatherproof and have an IP66
weather rating. Water can be sprayed on them and they will still work; however, the cameras
cannot be submerged underwater.
Although the cameras can be exposed directly to the rain, it is recommended that, if they are used
outdoors, they be mounted under some type of cover like a patio overhang or eave. As rainwater
drops start to dry on the camera glass, it can create spots that will reflect the light from the infrared
LEDs used for night vision, thus causing lower quality video.
Also, as dust, grime, and cobwebs accumulate on the camera glass, they can reflect light from the
infrared LED and might lower video quality. Periodically clean the lens glass with a soft cloth.
Consider the following when placing cameras:
Clear line of sight video transmission distance is up to 500 ft.
Walls, especially brick and concrete, shorten the transmission distance.
Placement next to windows allows better transmission.
Avoid having a direct light source in the view of the camera, including street lights, ceiling or
floor lamps, spotlights in the driveway, etc.
The cameras are equipped with built-in infra-red LEDs so you can use night vision for 24-hour
surveillance. The LEDs will automatically activate at night and the picture viewed will turn to
black and white. The night viewing range is up to 40 ft. Avoid pointing the camera lens directly
at clear glass; the night vision LEDs will cause a blurred image.
Optimized motion detection range is 6 - 18 feet for the UDSC15 camera. The farther away an
object is, the less accurate the motion detection.
7
Avoid pointing the camera directly at any bushes, tree branches, or moving objects that might
naturally move due to winds. Otherwise, the motion detection feature may record unnecessarily.
You can mount the camera with the stand on the bottom (on a flat surface such as a table-top), on
the side (on a wall), or on the top (on the ceiling). When you are positioning the camera, you might
want to bring the monitor along; it’s much easier to get the camera into the right position when
you have the display handy.
Mount the Camera Base
The following tools are required:
Electric Drill
5mm Drill Bit
15mm Drill Bit
No. 2 Philips Screwdriver
1. Hold the base of the camera stand where you want
to mount it and mark the location of the screw
holes.
2. Use the included screws and anchors to attach the
base to the wall or ceiling. You can also screw the
base into a flat surface such as a tabletop if needed.
3. Before attaching the camera, tug gently on the
stand to make sure it is securely in place.
8
Attach the camera
1. For each camera, attach the camera
bracket to the mounting screw. You can
attach the stand to the top or the
bottom of the camera as needed.Tighten
it a few turns, then turn the camera to
face the direction you want.
2. Tighten the camera brace up against the
camera to secure it into place.
3. Unlock the mounting post by turning
the wingnut to the left a few turns.
4. Set the mounting post to the correct
angle, then tighten the wingnut until the
post is locked into place.
5. Attach the antenna to the rear of the
camera.
6. Connect one end of an AC adapter to the camera’s power pigtail and plug the other end into
a 120 volt AC (standard indoor) power outlet. (If necessary, connect the extension cord to the
camera’s pigtail and connect the AC adapter to the extension cord.)
Be sure the power plug and the connector are tightly twisted together to avoid water
leaking in.
7. Make sure the
Power status
light turns on. If it doesn’t, try reconnecting the AC adapter, and
make sure the power outlet isn’t controlled by a wall switch.
Set Up the Monitor
1. Remove the protective plastic from the monitor screen.
2. Flip out the stand on the back of the monitor and extend the antenna.
3. Connect an AC adapter to the power input on the side of the monitor.
1
2
4
3
Loosen the
wingnut to
unlock the
mounting
post.
Attach the camera
to the mounting
screw and turn it
to the desired
direction.
Adjust the post to
the correct angle,
then tighten the
wingnut to lock the
post into place.
Tighten the brace against
the camera to
secure it
in place.
9
4. Connect the other end of the adapter to a 120 volt AC (standard indoor) power outlet.
5. Press and hold the
POWER
button on the top of the monitor for 1 - 2 seconds to power it up.
If... Try this...
there is no camera picture Verify that the power supply adapter for the camera(s) is plugged in.
the picture quality is poor Clean the camera lens.
a white image appears at
night
The camera’s infra-red LED shines invisible light that reflects off
surfaces such as glass, causing white light. Place the camera on the
other side of windows with the lens flush against the surface to
improve the night vision, or place the camera in a well-lit area.
6. The monitor displays the Uniden title
screen and then displays the LIVE view.
7. After the system powers on, adjust the camera viewing position if needed.
PAIRING ACCESSORY CAMERAS TO THE MONITOR
The two cameras that come with your UDS655 are paired to your monitor at the factory. If you add
cameras, install them and then pair the camera to the monitor.
1. From the main menu, select
CAMERA SETUP
and press
M
. Scroll to the camera number you want
to assign to the new camera. Press
M
.
2. Press
CH+
to scroll to the pairing option. Press
M
to pair the camera.
3. Within 30 seconds, press the
PAIRING
button on the camera's power cord.
Pairing Button
10
BASIC OPERATION
GETTING TO KNOW YOUR MONITOR
1
2
1
2
3
4
5
6
7
8
9
10
11
12
Your monitor operates in three modes: M, Playback, and Record. The monitor's keys may operate
differently based on what mode it is in.
Key M (MENU) Playback
REC
Mode
Other
1 Link LED (Green)
2 Power/Charge LED
(Red)
3 Channel Switch
(
CH
)
Cursor Left
Change Camera (
)
11
Key M (MENU) Playback
REC
Mode
Other
4
Volume - (
VOL
)
Cursor Down Skip Backward
(◄◄)
5
Volume (
VOL+
)
Cursor Up Skip Forward (►►)
6 Channel Switch
+ (
+
)
Cursor Right Change Camera +
7
M
Select / Enter Pause/Play (►|| )
8
ESC
Esc/Exit/Back Esc/Exit/Back
9 Record/Stop
(
REC/DEL
Previous File (|◄) Stop
10
ZOOM
Full Stop ()
11
ALARM
Next File (► |)
12 Power Button
Screen icons
Icon Meaning
Signal Indicator
1
Channel Indicator
Recording Indicator (Red)
12
Icon Meaning
Display Modes
Quad Display
Scan Display
Camera Displayed
There are seven audio levels.
Monitor Power Indicator
YYYY-MM-DD
AMhh:mm:ss
Date and Time
X1
In ZOOM mode - Zoom Level Indicator.
X1 - Normal view.
X2 - Second level of zoom in (X2 Zoom).
13
GETTING TO KNOW YOUR CAMERA
11
10
1
8
9
2
3
4
5
6
1. Antenna 5. Link LED (Green) 9. Power Jack
2. Light Level Sensor 6. IR LED (25) 10. Microphone
3. Power LED (Red) 7. Camera Stand 11. Power Adaptor
4. Camera Lens 8. Pairing Key
BASIC OPERATION RULES
The Pairing LED on the camera will blink once to indicate pairing process has begun and then
remain solid to indicate pairing success and data transmission is in progress.
The UDS655 will return to QUAD mode from any screen after the monitor is idle for two minutes.
The UDS655 cannot begin recording if the memory card is not inserted.
After recording begins, it cannot be stopped within the first 15 seconds. Refer to
RECORDER
SETUP
, page 22, for details.
14
The UDS655 can record in QUAD mode (all 4 channels recorded simultaneously), with each
channel in 320 x 240 resolution. If only one camera is turned on (Camera Setup), then the
UDS655 records that camera in full screen (640 x 480).
Press and hold
POWER
for 1 second to turn on the system.
Press and hold
POWER
for 2 seconds to turn off the system.
USING YOUR UDS655
To... Do This
Change from quad view to
single view (or back)
With the screen in quad view, press
CH+
or
CH
to cycle your cameras
in full view mode. Once all cameras have displayed, the next press
takes you back to quad mode.
Manually start recording
Press
REC/DEL
button. Refer to
RecoRdeR Setup
, page 22, for
details.
Set up to record
automatically
Refer to
RecoRdeR Setup
, page 22, for details.
Manually stop/cancel
recording in Manual or
Motion mode
Press
REC/DEL
.
Manually cancel a
Scheduled Record
(either future recording or
currently recording)
Because this recording block has been pre-set to record for a specific
amount of time, you must reset that recording block from Schedule to
Manual or Motion Detect.
Press
REC/DEL
after the recording has been going for 15 seconds and
quickly (within 5 seconds) press
M
. The main menu displays.
Go to
RECORDER SETUP/RECORD SCHEDULE
and press
M
. Select
X : MANUA
L and press
M
again. Navigate to the block containing
the recording in progress’ time frame. Press
M
until
X : MANUAL
is
selected.
Press
ESC
to back out of the screens.
Refer to
RECORDER SETUP
, page 22, for details.
15
To... Do This
Playing back a recording
Select the record to play back (
event LiSt
, page 27) and press
M.
Cancel watching a
recorded video
Press
ESC
. The
event LiSt
screen with video files for a selected date
and time displays.
Watching recorded video
on PC or television
To view on PC: Either place the memory card in the PC's memory slot
or transfer the recorded files from the memory card to the computer.
Uniden Media Player must be installed; it is included on the CD.
To view on TV: Use the AV cable to connect the monitor to the TV
(refer to page 37).
Set the date and time See
SyStem Setup
, page 29.
Transfer a recording from
the monitor's SD card to
the computer.
Remove the memory card from the monitor and insert it in an adapter.
Insert the SD adapter into your PC. Select a destination to store the
files.
Watch live video on your
smartphone
See page 45 for details on downloading and using the apps.
16
UDS655 SCREEN DESCRIPTIONS
UDS655 MAIN MENU SCREEN
The UDS655 main menu lets you select from 8 screens to set your system preferences, from camera
brightness to setting up and viewing recordings. This section describes the screens in detail. It
provides a path to the screen being viewed and operation procedures for that screen.
Press
M
to enter the main menu.
Use
CH+
,
CH
,
VOL+
, and
VOL
to scroll through the screen selectons; the title of that screen dispays
as you scroll onto it. Press
M
to select that screen.
17
Screen Sub Screens What it Does
cAmeRA
Setup
pAiRinG Pairs new cameras to the monitor.
BRiGHtneSS Brightens or darkens the video of that camera.
ActivAte oR
deActivAte
Makes the cameras visible to the monitor.
RecoRd
Setup
RecoRd
ScHeduLe
Sets up a schedule for pre-determined recording times
and lengths.
motion
detection
SenSitivity
Records when something moves in front of the camera.
Continues recording for 2, 5, or 10 minutes. Motion
detection is on by default.
FoRmAt
StoRAGe
Formats memory card.
Setup
mASKinG AReA
Masks off areas from motion detection.
RecoRd time Sets the length of recording to 2, 5, or 10 minutes.
event LiSt event LiSt Selects and plays back recorded video.
SyStem Setup dAte And time Sets date (year/month/day) and time (hour/minute)
tv putput Sets TV output to PAL or NTSC format. (Default =
NTSC)
NTSC is the TV standard for North America.
poWeR SAvinG Sets the idle time required (5 or 10 minutes) before the
system changes to power saving mode.
ALWAyS on
blocks Power Saving mode).
muLti cHAnneL
idLe diSpLAy
Sets how the cameras will display during Idle mode
(Quad mode or in 5-, 10-, or 15-second display cycles).
deFAuLt Sets default language (English, French, or Spanish).
18
Screen Sub Screens What it Does
ALARm BuZZeR nA You can set the alarm buzzer to sound when
movement triggers a motion sensitive recording. Set it
to ON or OFF.
The SD card must be inserted and have sufficient
space for the alarm buzzer to operate.
pAn tiLt Zoom nA Zooms in and adjusts the viewing area
ScAn ActivA-
ted cAmeRA
nA Activates SCAN mode.
memoRy cARd
oveRWRite
nA Allows the oldest files to be deleted when you want to
record but the memory card is full.
CAMERA SETUP SCREEN
From this selection on the main menu -
This screen should display:
The
SETUP DETAIL OPTIONS
screen has three options:
Pair a New Device
Image Brightness
Activate or Deactivate
19
Pair a New Device
Your cameras are paired to the monitor at the factory to channels 1 and 2. You can add up to 2
more accessory cameras to your system; see our website at www.uniden.com for more information
on how to buy accessory cameras for this system. When you add an accessory camera, you
have to pair it to the monitor (that is, you have “introduce” the camera and monitor so they can
communicate).
Some things to know about pairing cameras:
If a camera is already assigned to the selected channel, the monitor overwrites that camera link
with the new one.
Only pair one camera at a time! The monitor links to the first camera it detects. If two or more
cameras are in pairing mode, you can’t control which camera the monitor will detect first.
1. From the
SETUP DETAIL OPTONS
screen, use
VOL+
and
VOL
to select the camera being added.
Press
M
. The
PAIR A NEW DEVICE
screen highlights the Pairing selection.
2. Press
M
again to begin camera pairing.
20
3. Quickly (within 30 seconds) press the
PAIRING
key on the camera cable. The green Pair LED on
the selected camera blinks once, pauses, and then stays on to indicate that data transmission is
in progress.
PAIRED
displays on the screen if pairing is successful or
PAIRING FAIL
if it isn’t. If Pairing fails,
repeat these steps. If Pairing fails again, move the camera and monitor closer together and
repeat.
Press
ESC
to back out and return to the main menu or press
VOL+
or
VOL
to select another
camera to pair.
Image Brightness
1. With the
SETUP DETAIL OPTIONS
screen displayed for a camera, press
CH+
to highlight the
Brightness selection.
2. Press
VOL+
or
VOL
to adjust the camera’s brightness; the five levels are OFF, 1 - 4. The default
level is 2.
3. Press
M
to
accept the new setting and return to the
SETUP DETAIL OPTIONS
screen. Select
another camera if needed.
  • Page 1 1
  • Page 2 2
  • Page 3 3
  • Page 4 4
  • Page 5 5
  • Page 6 6
  • Page 7 7
  • Page 8 8
  • Page 9 9
  • Page 10 10
  • Page 11 11
  • Page 12 12
  • Page 13 13
  • Page 14 14
  • Page 15 15
  • Page 16 16
  • Page 17 17
  • Page 18 18
  • Page 19 19
  • Page 20 20
  • Page 21 21
  • Page 22 22
  • Page 23 23
  • Page 24 24
  • Page 25 25
  • Page 26 26
  • Page 27 27
  • Page 28 28
  • Page 29 29
  • Page 30 30
  • Page 31 31
  • Page 32 32
  • Page 33 33
  • Page 34 34
  • Page 35 35
  • Page 36 36
  • Page 37 37
  • Page 38 38
  • Page 39 39
  • Page 40 40
  • Page 41 41
  • Page 42 42
  • Page 43 43
  • Page 44 44
  • Page 45 45
  • Page 46 46
  • Page 47 47
  • Page 48 48
  • Page 49 49
  • Page 50 50
  • Page 51 51
  • Page 52 52
  • Page 53 53
  • Page 54 54
  • Page 55 55
  • Page 56 56
  • Page 57 57
  • Page 58 58
  • Page 59 59
  • Page 60 60

Uniden UDS655 User manual

Category
Video surveillance kits
Type
User manual

Ask a question and I''ll find the answer in the document

Finding information in a document is now easier with AI