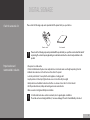
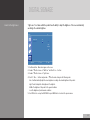
Hyundai D46ES Series can serve many use cases. For instance, for entertainment, this series can display your favorite movies and series or work as a big TV for casual gaming and entertainment apps. It is also a great assistant for any home office as it can display spreadsheets, reports and other documents or be used for presentations and video conferencing. Moreover, the D46ES series can display full websites, videos and any other online content for business and educational purposes.
Hyundai D46ES Series can serve many use cases. For instance, for entertainment, this series can display your favorite movies and series or work as a big TV for casual gaming and entertainment apps. It is also a great assistant for any home office as it can display spreadsheets, reports and other documents or be used for presentations and video conferencing. Moreover, the D46ES series can display full websites, videos and any other online content for business and educational purposes.


-
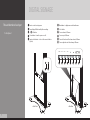
 1
1
-
 2
2
-
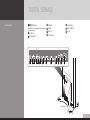
 3
3
-
 4
4
-
 5
5
-
 6
6
-
 7
7
-
 8
8
-
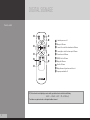 9
9
-
 10
10
-
 11
11
-
 12
12
-
 13
13
-
 14
14
-
 15
15
-
 16
16
-
 17
17
-
 18
18
-
 19
19
-
 20
20
-
 21
21
-
 22
22
-
 23
23
-
 24
24
-
 25
25
-
 26
26
-
 27
27
-
 28
28
-
 29
29
-
 30
30
-
 31
31
-
 32
32
-
 33
33
-
 34
34


Hyundai D46ES Series User manual
- Type
- User manual
- This manual is also suitable for
Hyundai D46ES Series can serve many use cases. For instance, for entertainment, this series can display your favorite movies and series or work as a big TV for casual gaming and entertainment apps. It is also a great assistant for any home office as it can display spreadsheets, reports and other documents or be used for presentations and video conferencing. Moreover, the D46ES series can display full websites, videos and any other online content for business and educational purposes.
Ask a question and I''ll find the answer in the document
Finding information in a document is now easier with AI