Page is loading ...

Installation Instructions
Original Instructions
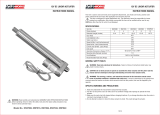
Kinetix VP Electric Cylinders
Catalog Numbers VPAR-x1xxxB, VPAR-x1xxxE, VPAR-x2xxxC, VPAR-x2xxxF,
VPAR-x3xxxE, VPAR-x3xxxH
Summary of Changes
This manual contains new and updated information as indicated in the following table.
Topic Page
Catalog Number Explanation 2
About the Kinetix VP Electric Cylinders 3
Before You Begin 4
Install the Electric Cylinder 7
Change Connector Orientation 9
Mount the Electric Cylinder 10
Dimensions 12
Connector Data 18
Commission 19
Maintenance 23
Troubleshooting 24
Accessories 26
Specifications 29
Additional Resources 31
Topic Page
Update frame 63 dimension drawing and table. 16…17

2 Rockwell Automation Publication VPAR-IN001B-EN-P - February 2019
Kinetix VP Electric Cylinders
Catalog Number Explanation
Catalog numbers consist of various characters, each of which identifies a specific version or
option for that component. Use this catalog explanation to understand the configuration of your
actuator.
Motor Mounting
(1)
A = Axial (in-line)
B = Top (parallel)
D = Left (parallel)
E = Right (parallel)
Holding Brake
(1)
2 = No Brake
4 = 24V DC Brake
Feedback
(1)
P = 18-bit absolute multi-turn digital encoder (Hiperface DSL protocol)
Q = 23-bit absolute multi-turn digital encoder (Hiperface DSL protocol) SIL 2 (PLd) rated,
12-bit secondary safety channel
W = 18-bit absolute multi-turn digital encoder (Hiperface DSL protocol) SIL 2 (PLd) rated,
9-bit secondary safety channel
Mechanical Drive/Screw Lead, Motor Type
B = 3.0 mm/rev (0.118 in./rev)
C = 5.0 mm/rev (0.197 in./rev)
E = 10.0 mm/rev (0.394 in./rev)
F = 12.7 mm/rev (0.50 in./rev)
H = 20.0 mm/rev (0.787 in./rev)
Rod Stroke Length
100 = 100 mm (3.94 in.)
200 = 200 mm (7.87 in.)
300 = 300 mm (11.81 in.)
400 = 400 mm (15.75 in.)
600 = 600 mm (23.62 in.)
800 = 800 mm (27.56 in.)
Actuator Frame Size
1 = 32
2 = 40
3 = 63
Voltage Class
A = 200V
B = 400V
X = Actuator cylinder replacement part
(refer to Actuator Cylinders on page 29
for examples on how to order)
Actuator Type
AR = Actuator Rod
Bulletin Number
VP = Kinetix® VP
(1) This field does not apply to actuator cylinder replacement parts.
VP AR - xx xxx x - x x x
MP AR - xx xxxxxx
Accessory Item Number
Accessory Type
NA = Axial (In-line) Mounting Accessory
NP = Parallel Mounting Accessory
NE = Rod-end Accessory
Actuator Type
AR = Actuator Rod
Bulletin Number
MP = MP-Series™ and Kinetix VP Actuator Accessory

Rockwell Automation Publication VPAR-IN001B-EN-P - February 2019 3
Kinetix VP Electric Cylinders
About the Kinetix VP Electric Cylinders
Kinetix VP electric cylinders feature multi-turn high-resolution encoders and are available with
24V DC brakes. The Kinetix VP motor rotates a ballscrew drive that converts rotary motion
into linear movement. This linear movement results in the extension and retraction of the piston
rod from the electric cylinder housing
The Kinetix VP electric cylinders have been designed for exact positioning at high speeds.
IMPORTANT The VP-A/Bxxxxx-x2x electric cylinders are non-braking. When there is no input torque, the
piston rod can be moved freely. You can achieve self-locking of your motion system by using
motors with an integrated brake or with high self-braking torque.
Item Description
1 Single motor connector
2 Kinetix VP motor
3 Motor mounting bolts
4Actuator cylinder
5Breather port
6 Hollow bolts with internal threads for fastening
7Piston rod
8 Wrench flats to counteract torque on piston rod
9 Accessories mounting holes
7
6 (x4)
4
8
5
3 (x4)
1
2
VPAR-A1100E-P2A Kinetix VP Electric
Cylinder
VPAR-A1100E-P2B Kinetix VP Electric
Cylinder
9(x4)

4 Rockwell Automation Publication VPAR-IN001B-EN-P - February 2019
Kinetix VP Electric Cylinders
Before You Begin
Remove all packing material, wedges, and braces from within and around the item. After
unpacking, verify the nameplate catalog number against the purchase order.
1. Remove packaging polyethylene foil and cardboard.
The packing materials are recyclable, except for oiled paper, which is waste.
2. Remove the electric cylinder carefully from its shipping container.
Consider the weight of the electric cylinder. Depending on the design, the electric
cylinder can weigh up to 20 kg (44.0 lb).
3. Visually inspect the electric cylinder for damage.
4. Examine the electric cylinder frame, piston shaft, and hollow bolts for anomalies.
5. Notify the carrier of shipping damage immediately
Planning Your Installation
See the Kinetix Linear Motion Specifications Technical Data, publication KNX-TD002, for the
specifications and additional products referenced in this section:
• This product can be operated in compliance with the relevant safety regulations only if
the maximum loading limits are observed.
• If you are mounting your electric cylinder in a vertical or sloping position, include safety
measures that controls the workload if the spindle nut fails.
• Corrosive environments reduce the service life of electric cylinders.
• Depending on the workload, the piston rod will bend. See Kinetix Linear Motion
Specifications Technical Data, publication KNX-TD002
, for the piston-rod deflection
specifications for limitations.
ATTENTION: Do not attempt to open and modify the electric cylinder except to change
the motor connector orientation as described on page
12. Only a qualified Allen-Bradley
employee can service the internal working of the electric cylinder or motor.
Failure to observe these safety precautions could result in personal injury or damage to
equipment.
ATTENTION: The electric-cylinder is not intended to be used in applications where
side-loading occurs. Loads must be guided and supported. Aligned load with the
line-of-motion of the piston rod.
Side loading reduces the lifetime of the electric-cylinder.
ATTENTION: Uncontrolled masses that are in motion can injure or damage property.
If there is a spindle nut fracture inside the actuator cylinder due to wear, the working
mass drops down.
Check whether additional external safety measures are required to help prevent damage
of the spindle nut fractures.

Rockwell Automation Publication VPAR-IN001B-EN-P - February 2019 5
Kinetix VP Electric Cylinders
• Motor feedback, auxiliary feedback, and I/O connector kits are not included, but can be
purchased separately.
• Factory manufactured single cables are available in standard cable lengths. They provide
environmental sealing and shield termination. Contact your Rockwell Automation sales
office or refer to the selection guide for cables.
Electric Cylinders with Brake Option
The brake option on this servo motor is a spring-set holding brake that releases when voltage is
applied to the brake coil. A separate power source is required to disengage the brake. A servo
motor controller or manual operator control can apply the power source.
If system main power fails, holding brakes can withstand occasional use as stopping brakes.
However, the rotational mechanical backlash that is created can potentially damage to the
system, increases brake wear, and reduces brake life.
An unpowered electric cylinder will require a brake to maintain its position if the force on the
actuator exceeds the Back Drive Force that is listed in Kinetix Linear Motion Specifications
Technical Data, publication KNX-TD002.
A brake can be used to help prevent the actuator from backdriving, typically in vertical
applications. A brake can be used for safety reasons or to hold the position of the actuator when
unpowered for energy savings.
IMPORTANT Holding brakes are not designed to stop rotation of the motor shaft, nor are they intended to be
used as a safety device. They are designed to hold a motor shaft at 0 rpm for up to the rated
brake holding torque.
The recommended method to help prevent the motor shaft from rotation is a four-step process:
1. Command the servo drive to 0 rpm.
2. Verify that the motor is at 0 rpm.
3. Engage the brake.
4. Disable the drive.
A disable drive removes the potential for brake wear that shaft oscillations cause when you have a
poorly tuned servo system.

6 Rockwell Automation Publication VPAR-IN001B-EN-P - February 2019
Kinetix VP Electric Cylinders
Prevent Electrical Noise
Electromagnetic interference (EMI), commonly called electrical noise, can reduce motor
performance. Effective techniques to counter EMI include filtering the AC power, by using
shielded cables, and the practice of good grounding techniques.
Follow these guidelines to avoid the effects of EMI:
• Isolate the power transformers or install line filters on all AC input power lines.
• Do not route cables over the vent openings of servo drives.
• Ground all equipment by using a single-point parallel ground system that employs
ground busbars or large straps. If necessary, use additional electrical-noise reduction
techniques to reduce EMI in noisy environments.
See System Design for Control of Electrical Noise Reference Manual,
publication GMC-RM001
, for additional information on reducing the effects of EMI.
Install Cables
Knowledgeable cable routing and careful cable construction improve system electromagnetic
compatibility (EMC).
Kinetix 5500 and 5700 inverters and Kinetix VP electric cylinder combinations use single
motor-cable technology with motor power, feedback, and brake wires (when specified) housed
in one cable. Feedback wires are shielded separately and provide a shield braid for grounding in
the connector kit.
ATTENTION: The overall shield on the actuator power cables must be grounded to obtain an
effective encoder signal. The encoder data signal is transmitted through an impedance-matched
twisted-wire pair that requires effective shielding for optimum performance.
Be sure that there is an effective connection between the cable shields and the drive system
ground
IMPORTANT Due to the unique characteristics of single cable technology, which is designed for and tested
with Kinetix 5500 and 5700 inverters and Kinetix VP electric cylinders, you cannot build your
own cables or use third-party cables.

Rockwell Automation Publication VPAR-IN001B-EN-P - February 2019 7
Kinetix VP Electric Cylinders
Install the Electric Cylinder
The installation must comply with all local regulations and use of equipment and installation
practices that promote electromagnetic compatibility and safety.
Follow these steps to install the electric cylinder.
1. Provide sufficient clearances in the area of the electric cylinder for it to stay within its
specified operating temperature range.
See Specifications
on page 29 for the operating temperature range. Do not enclose the
electric cylinder unless forced air is blown across the electric cylinder for cooling. Keep
devices that produce heat away from the electric cylinder.
2. Make sure that the mounting surface supports the electric cylinder evenly so that it is free
of mechanical stress and distortion.
ATTENTION: Unmounted electric cylinders, disconnected mechanical couplings, and disconnected
cables are dangerous if power is applied.
Appropriately identify disassembled equipment (tagged-out) and access to electrical power
restricted (locked-out).
Failure to observe these safety precautions could result in personal injury.
ATTENTION: Make sure that cables are installed and restrained to help prevent uneven tension or
flexion at the cable connectors.
Excessive and uneven lateral force at the cable connectors can cause the environmental seal of the
connector to open and close as the cable flexes.
Failure to observe these safety precautions could result in damage to the electric cylinder motor
and its components.
ATTENTION: Damage can occur to the electric cylinder bearings and the feedback device if a sharp
impact to the piston rod is applied during installation. Do not strike the piston rod with tools
during installation or removal.
Do not attempt to rotate the piston rod during installation. If the piston rod rotates, the
mechanism that allows the electric cylinder to extend and retract breaks.
Failure to observe these safety precautions could result in damage to the electric cylinder and its
components.
IMPORTANT Position the electric cylinder so that all operating parts are accessible and the
breather port is not covered.

8 Rockwell Automation Publication VPAR-IN001B-EN-P - February 2019
Kinetix VP Electric Cylinders
The evenness of support surface must be
≤ 0.2 mm (0.008 in.).
3. Attach mounting accessories to the electric cylinder; see Accessories
on page 26.
Tighten the fastening screws evenly.
4. Attach rod-end accessories and the workload.
Be sure that the workload center of gravity is centric to the piston rod.
When fastening a rod-end accessory or workload to the piston rod, use two wrenches.
Use one wrench to tighten the mounting nut or rod-end accessory and the other, on the
piston-rod wrench flats, to counteract the applied torque. Be sure that the torque is not
applied to the piston rod and that the piston rod does not rotate.
ATTENTION: Do not modify the settings of the screws and the threaded pins.
Do not fasten the electric cylinder by the front cover alone when used with high loads.
Heavy tensile strain can cause the screws in the cover to pull out.
Attribute Frame 32 Frame 40 Frame 63
Internal thread of cover screws M6 M6 M8
Torque, max
(1)
(1) Unless otherwise noted, the torque value has a ±20% tolerance.
5 N•m
(3.69 lb•ft)
5 N•m
(3.69 lb•ft)
9 N•m
(5.90 lb•ft)
ATTENTION: Damage can occur to the electric cylinder bearings and the feedback device
if sharp impact to the piston rod is applied during installation. Do not strike the piston
rod with tools during installation or removal.
Failure to observe these safety precautions could result in damage to the electric cylinder
and its components.
IMPORTANT Do not twist or rotate the piston rod. If the piston rod is rotated, the absolute position
of the electric cylinder will be lost and the absolute home position must be re-
established.

Rockwell Automation Publication VPAR-IN001B-EN-P - February 2019 9
Kinetix VP Electric Cylinders
If you are using a trunnion mounting kit, catalog number MPAR-NA1635xx, see
page
28 for torque values.
If you are using a rod guide accessory, catalog number MPAR-NE34xxx or
MPAR-NE150xxx, adjust the guides of the workload and the electric cylinder so that
they are exactly parallel. This alignment avoids excessive wear on the guide.
Change Connector Orientation
You can rotate the SpeedTec DIN-connector housings up to 325°.
Follow these steps to rotate the DIN connectors.
1. Mount and fully seat a mating cable on the connector.
The connector provides a larger area to grasp and extends the leverage force.
2. Grasp the mated connector and cable plug with your hands and slowly rotate the motor
connector into the new position.
Frame Size Piston Rod Thread Wrench Flats Width
32 M10 x 1.25 10 mm
40 M12 x 1.25 13 mm
63 M16 x 1.5 17 mm
ATTENTION: Do not rotate the piston rod during installation. If
the piston rod rotates, the mechanism that allows the electric
cylinder to extend and retract will break.
Use two wrenches to install the workload.
Failure to observe these safety precautions could result in
damage to the electric cylinder and its components
ATTENTION: You can rotate the connectors into a fixed position during installation of the electric
cylinder and keep them in that position without further adjustment. Strictly limit the applied
forces and the number of times the connector is rotated to be sure that connectors meet the
requirements of IP66 for the motor portion of the electric cylinder.
Failure to observe these safety precautions can result in damage to the motor and its components
Wrench Flat

10 Rockwell Automation Publication VPAR-IN001B-EN-P - February 2019
Kinetix VP Electric Cylinders
3. Remove the cable plug after the connector is aligned.
Mount the Electric Cylinder
Use stainless steel fasteners to mount your electric cylinder to your application.
Attach Single Motor Cable
Follow these steps to attach the single motor cable after the electric-cylinder is mounted.
1. Carefully align the cable connector with motor connector.
ATTENTION: Apply force only to the connectors; do not apply force to the cable. Do not
use tools, for example, pliers and vise-grips, to assist with the rotation of the connector.
Failure to observe these safety precautions can result in personal injury or damage to
equipment.
BURN HAZARD: Outer surfaces of the motor can reach high temperatures, 65 °C (149 °F), during
electric cylinder operation. To help prevent accidental contact with hot surfaces, take precautions.
Failure to observe these safety precautions can result in personal injury.
ATTENTION: Consider electric-cylinder surface temperature when making the motor-mating
connection.
Failure to observe these safety precautions can result in personal injury or damage to equipment.
ATTENTION: The keyed connector must be properly aligned and hand-tightened.
Do not use tools, or apply excessive force, when mating the cable to the motor connector.
If the connectors do not go together with light hand force, realign and try again.

Rockwell Automation Publication VPAR-IN001B-EN-P - February 2019 11
Kinetix VP Electric Cylinders
2. Hand-tighten the knurled collar one-quarter turn to seat the cable connector fully.
3. If applicable, form a drip loop in the cables to carry liquids away from the connector.
ATTENTION: Make sure that the cable is installed and restrained to prevent uneven
tension or flexion at the cable connectors. Excessive and uneven lateral force at the cable
connector can cause the environmental seal of the connector to open and close as the
cable flexes. Failure to observe these safety precautions can result in damage to the
electric-cylinder motor and its components.
ATTENTION: The overall shield on the single motor cable must be grounded to obtain an
effective encoder signal. The encoder data signal is transmitted through an impedance-
matched twisted-wire pair that requires effective shielding for optimum performance.
Be sure that there is an effective connection between the single motor cable shield and
the drive system ground.
Flat Surface
with Logo on Top
Top of connector is relative to motor
orientation.
Drip Loop
Single Motor Connector
Single Motor Cable

12 Rockwell Automation Publication VPAR-IN001B-EN-P - February 2019
Kinetix VP Electric Cylinders
Dimensions
22.0
(0.87)
122 +
(4.80) +
L7
148 ± 1 +
(5.83 ± 0.04)) +
LE
LB
90.0 ±1.0
(3.54 ± 0.04)
27.5
(1.10)
LB
56.3
(2.22)
32.5
(1.28)
32.5
(1.28)
60.0
(2.36)
157.0
(6.18)
L71
Ø30.0
(1.18) d11
Ø16.0
(0.63) h9
12.0
(0.47)
M10 x 1.25
10
16.0
(0.63)
26.0
(1.02)
10.0
(0.39)
18.0
(0.71)
45.5
(1.79)
45.5
(1.79)
6.0 (0.24)
(x4)
M6 (x4)
32.5
(1.28)
32.5
(1.28)
55.0
(2.16)
69.5
(2.74)
69.5
(2.74)
97.0
(3.82)
24.0
(0.94)
26.0
(1.02)
Detail A
+ = Plus Stroke Length
See Detail A
Kinetix VP Electric Cylinders (Frame 32)
Dimensions are with piston
rod fully retracted.
Dimensions are in mm (in.).
Flat for wrench.
Bulletin VPAR-x1xxxx-xxA (in-line configuration)
Single Motor Cable
Connector
VPAR-x1xxxx-xxB
VPAR-x1xxxx-xxD
VPAR-x1xxxx-xxE
Bulletin VPAR-x1xxxx-xxB/D/E
(parallel configuration)

Rockwell Automation Publication VPAR-IN001B-EN-P - February 2019 13
Kinetix VP Electric Cylinders
Actuators are designed to metric dimensions. Inch dimensions are approximate conversions from
millimeters. Dimensions without tolerances are for reference.
Kinetix VP Electric Cylinder Dimensions (In-line Configuration, Frame 32)
Electric Cylinder Cat. No.
L7
(1)
mm (in.)
(1) If you are ordering an VPAR-x1xxxx-P4x actuator with brake, add 30.6 mm (1.20 in.) to dimensions L7, LB, and LE.
LB
(1)
mm (in.)
LE
(1)
mm (in.)
VPAR-x1100B-P2A 467.3 (18.40)
148.1 (5.83) 85.3 (3.36)
VPAR-x1200B-P2A 567.3 (22.33)
VPAR-x1300B-P2A 667.3 (26.27)
VPAR-x1400B-P2A 767.3 (30.21)
VPAR-x1100E-P2A 492.3 (19.38)
173.1 (6.81) 110.3 (4.34)
VPAR-x1200E-P2A 592.3 (23.32)
VPAR-x1300E-P2A 692.3 (27.26)
VPAR-x1400E-P2A 792.3 (31.19)
Kinetix VP Electric Cylinder Dimensions (Parallel Configuration, Frame 32)
(1)
(1) For the complete dimension of the parallel configuration electric cylinders, use the in-
line dimensions for an electric cylinder with the same rod-stroke length and the
dimensions from this table.
Electric Cylinder Cat. No.
L71
mm (in.)
VPAR-x1100B-P2B/D/E 326.3 (12.8)
VPAR-x1200B-P2B/D/E 426.3 (16.8)
VPAR-x1300B-P2B/D/E 526.3 (20.7)
VPAR-x1400B-P2B/D/E 626.3 (24.6)

14 Rockwell Automation Publication VPAR-IN001B-EN-P - February 2019
Kinetix VP Electric Cylinders
L7
LE
LB
LB
LC
PW
L71
16.0
(0.63)
6.0 (0.24)
(x4)
M6 (x4)
P
AD
HD
30.0
(1.18)
146.5 +
(5.77 +)
176.5 ± 1 +
(6.95 ± .04 +)
28.5
(1.12)
24.0
(0.94)
30.0
(1.18)
10.5
(0.41)
21.5
(0.85)
54.0
(2.13)
54.0
(2.13)
38.0
(1.50)
38.0
(1.50)
C
AD
38.0
(1.50)
38.0
(1.50)
HC
CG
Ø 35.0
(1.38) d11
Ø 20.0
(0.79) h9
16.0
(0.63)
M12 x 1.25
13
+ = Plus Stroke Length
See Detail A
Kinetix VP Electric Cylinders (Frame 40)
Dimensions are with piston
rod fully retracted.
Dimensions are in mm (in.).
Flat for wrench.
Bulletin VPAR-x2xxxx-xxA (in-line configuration)
VPAR-x2xxxx-xxB
Detail A
VPAR-x2xxxx-xxD
VPAR-x2xxxx-xxE
Bulletin VPAR-x2xxxx-xxB/D/E
(parallel configuration)
Single Motor Cable
Connector

Rockwell Automation Publication VPAR-IN001B-EN-P - February 2019 15
Kinetix VP Electric Cylinders
Kinetix VP Electric Cylinder Dimensions (In-line, Frame 40)
Electric Cylinder
Cat. No.
L7
(1)
mm (in.)
LB
(1)
mm (in.)
LE
(1)
mm (in.)
P
mm (in.)
AD
mm (in.)
HD
mm (in.)
VPAR-x2100C-P2A 522.8 (20.58)
173.1 (6.81) 110.3 (4.34) 55.0 (2.17) 69.5 (2.74) 97.0 (3.82)
VPAR-x2200C-P2A 622.8 (24.52)
VPAR-x2300C-P2A 722.8 (28.46)
VPAR-x2400C-P2A 822.8 (32.39)
VPAR-x2600C-P2A 1022.8(40.27)
VPAR-x2100F-P2A 499.6 (19.67)
149.9 (5.90) 87.1 (3.43) 70.0 (2.76) 77.0 (3.03) 112.0 (4.41)
VPAR-x2200F-P2A 599.6 (23.61)
VPAR-x2300F-P2A 699.6 (27.54)
VPAR-x2400F-P2A 799.6 (31.48)
VPAR-x2600F-P2A 999.6 (39.35)
(1) If you are ordering an VPAR-x2xxxx-P4x actuator with brake, add 30.6 mm (1.20 in.) to dimensions L7, LB, and LE.
Kinetix VP Electric Cylinder Dimensions (Parallel, Frame 40)
(1)
(1) For complete dimensions of the parallel configuration electric cylinders, use the in-line dimensions for an electric cylinder with the
same rod-stroke length and the dimensions from this table.
Electric Cylinder
Cat. No.
L71
mm (in.)
LC
mm (in.)
HC
mm (in.)
C
(2)
mm (in.)
(2) The tolerance for this dimension is ±1.0 mm (0.04 in.).
CG
mm (in.)
PW
mm (in.)
VPAR-x2100C-P2B/D/E 356.8 (14.05)
56.3 (2.22) 157.0 (6.18) 90.0 (3.54) 27.0 (1.06) 60.0 (2.36)
VPAR-x2200C-P2B/D/E 456.8 (17.98)
VPAR-x2300C-P2B/D/E 556.8 (21.92)
VPAR-x2400C-P2B/D/E 656.8 (25.86)
VPAR-x2600C-P2B/D/E 856.8 (33.73)
VPAR-x2100F-P2B/D/E 369.8 (14.56)
69.3 (2.73) 189.0 (7.44) 100.0 (3.94) 38.0 (1.50) 86.0 (3.39)
VPAR-x2200F-P2B/D/E 469.8 (18.50)
VPAR-x2300F-P2B/D/E 569.8 (22.43)
VPAR-x2400F-P2B/D/E 669.8 (26.37)
VPAR-x2600F-P2B/D/E 869.8 (34.24)

16 Rockwell Automation Publication VPAR-IN001B-EN-P - February 2019
Kinetix VP Electric Cylinders
L7
LE
LB
LB
82.3
(3.24)
L71
P
P1
AD
HD
120 ± 1.0
(4.72 ± 0.04)
45.0
(1.77)
AD
56.5
(2.22)
56.5
(2.22)
110.0
(4.33)
225.0
(8.86)
Ø 45.0
(1.77) d11
Ø 28.0
(1.10) h9
20.0
(0.79)
M16 X 1.5
17
17.0
(0.67)
32.0
(1.26)
177.0 +
(6.97+)
214.0 ± 1 +
(8.43 ± 0.04 +)
34.0
(1.34)
36.0
(1.42)
36.5
(1.44)
15.0
(0.59)
28.5
(1.12)
75.5
(2.97)
8.0 (0.31)
(x4)
M8 (x4)
56.5
(2.22)
75.5
(2.97)
56.5
(2.22)
+ = Plus Stroke Length
See Detail A
Kinetix VP Electric Cylinders (Frame 63)
Dimensions are in mm (in.).
Dimensions are with
piston rod fully retracted.
Flat for wrench.
Detail A
Bulletin VPAR-x3xxxx-xxA (in-line configuration)
Bulletin
VPAR-x3xxxx-xxB/D/E
(parallel configuration)
VPAR-x3xxxx-xxB
VPAR-x3xxxx-xxD
VPAR-x3xxxx-xxE
Single Motor Cable
Connector

Rockwell Automation Publication VPAR-IN001B-EN-P - February 2019 17
Kinetix VP Electric Cylinders
Kinetix VP Electric Cylinder Dimensions (In-line, Frame 63)
Electric Cylinder
Cat. No.
L7
(1)
mm (in.)
(1) If you are ordering an VPAR-x3xxxE-x4x actuator with brake, add 34.5 mm (1.36 in.) to dimensions L7, LB, and LE.
If you are ordering an VPAR-x3xxxH-x4x actuator with brake, add 48.5 mm (1.91 in.) to dimensions L7, LB, and LE.
LB
(1)
mm (in.)
LE
(1)
mm (in.)
P
mm (in.)
P1
mm (in.)
AD
mm (in.)
HD
mm (in.)
VPAR-x3100E-x2A 598.5 (23.56)
181.4
(7.14)
119.7
(4.71)
89.4
(3.52)
94.4
(3.72)
86.5
(3.41)
131.2
(5.17)
VPAR-x3200E-x2A 698.5 (27.50)
VPAR-x3300E-x2A 798.5 (31.44)
VPAR-x3400E-x2A 898.5 (35.37)
VPAR-x3600E-x2A 1098.5 (43.25)
VPAR-x3800E-x2A 1298.5 (51.12)
VPAR-x3100H-x2A 577.9 (22.75)
152.4
(6.00)
90.7
(3.57)
98.3
(3.87)
101.5
(4.00)
90.8
(3.57)
140.0
(5.51)
VPAR-x3200H-x2A 677.9 (26.69)
VPAR-x3300H-x2A 777.9 (30.63)
VPAR-x3400H-x2A 877.9 (34.56)
VPAR-x3600H-x2A 1077.9 (42.44)
VPAR-x3800H-x2A 1277.9 (50.31)
Kinetix VP Electric Cylinder Dimensions (Parallel, Frame 63)
Electric Cylinder
Cat. No.
L71
mm (in.)
VPAR-x3100x-x2B/D/E 428.3 (16.86)
VPAR-x3200x-x2B/D/E 528.3 (20.80)
VPAR-x3300x-x2B/D/E 628.3 (24.74)
VPAR-x3400x-x2B/D/E 728.3 (28.67)
VPAR-x3600x-x2B/D/E 928.3 (36.55)
VPAR-x3800x-x2B/D/E 1128.3 (44.42)

18 Rockwell Automation Publication VPAR-IN001B-EN-P - February 2019
Kinetix VP Electric Cylinders
Connector Data
This table lists the signal descriptions for power, feedback, and brake pin in the single-motor
connector on the electric cylinder.
Single Cable Types
Pin High-resolution Encoder
APhase U
BPhase V
CPhase W
Ground
E
DATA+
FMBRK+
GMBRK-
HDATA-
L Reserved
Cable Type Cable Cat. No.
With brake wires
2090-CSBM1Dx-xxAAxx (standard,non-flex) or
2090-CSBM1Dx-xxAFxx (continuous-flex)
Without brake wires 2090-CSWM1Dx-xxAAxx (standard, non-flex)
A
BC
G
H
LE
F

Rockwell Automation Publication VPAR-IN001B-EN-P - February 2019 19
Kinetix VP Electric Cylinders
Commission
This section provides guidelines for using Studio 5000 Logix Designer® application to configure
your electric-cylinder servo drive system.
Configure Your Electric Cylinder with a Kinetix 5500 or Kinetix 5700 Servo Drive
Configure the electric-cylinder by using the basic parameter settings that are described in this
section.
The procedure assumes the electric-cylinder and the Kinetix 5500 or Kinetix 5700 servo drive
are installed and wired as one axis of the motion system.
To configure your drive, do the following.
1. From Axis Properties select, Motor category.
2. From the Data Source pull-down menu, choose Catalog Number.
ATTENTION: Parts that move can cause injuries. Before running the electric cylinder, make sure
that all components are secure and safeguards are in place to prevent access to the path of
machinery in motion.
Safeguards must prevent access to the electric cylinder until all motion has stopped.
Check that the electric cylinder is clear of foreign matter and tools. Objects hit by the moving
piston rod can become projectiles that can cause personal injury or damage equipment.
IMPORTANT It is your responsibility to verify that the servo control system safely controls the electric
cylinder regarding maximum force, acceleration, and speed.

20 Rockwell Automation Publication VPAR-IN001B-EN-P - February 2019
Kinetix VP Electric Cylinders
3. Click Change Catalog.
4. Select your VPAR Cylinder catalog number, click OK.
5. Click Apply.
6. From Axis Properties, select Scaling category.
ATTENTION: Incorrect parameter settings can result in uncontrolled motion that can damage to
the electric cylinder. If you initiate a motion command on an electric cylinder with an incorrect
Position mode, you can damage to the electric cylinder and the application in which it is installed.
/