Page is loading ...

Touchmonitor User Guide
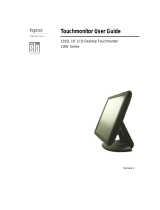
1928L 19” LCD Desktop Touchmonitor
5000 Series
Revision B

User Guide
1928L 19” LCD Desktop Touchmonitor
Revision B
P/N E116103

Copyright © 2007 Tyco Electronics Corporation. All Rights Reserved.
No part of this publication may be reproduced, transmitted, transcribed, stored in a retrieval
system, or translated into any language or computer language, in any form or by any means,
including, but not limited to, electronic, magnetic, optical, chemical, manual, or otherwise with-
out prior written permission of Elo TouchSystems.
Disclaimer
The information in this document is subject to change without notice. Elo TouchSystems makes
no representations or warranties with respect to the contents hereof, and specifically disclaims
any implied warranties of merchantability or fitness for a particular purpose. Elo TouchSystems
reserves the right to revise this publication and to make changes from time to time in the content
hereof without obligation of Elo TouchSystems to notify any person of such revisions or changes.
Trademark Acknowledgments
Elo Touchsystems AccuTouch and IntelliTouch are trademarks of Tyco Electronics Corporation.
Other product names mentioned herein may be trademarks or registered trademarks of their re-
spective companies.
iii

Warnings and Cautions
Warning
!
• Danger - Explosion hazard. Do not use in the presence of flammable anesthetics, and other
flammable materials.
• To prevent fire or shock hazards, do not immerse the unit in water or expose it to rain or
moisture.
• Do not use the unit with an extension cord receptacle or other outlets unless the prongs of the
power cord can be fully inserted.
• RISK OF ELECTRICAL SHOCK - DO NOT OPEN. To reduce the risk of electrical shock,
DO NOT remove the back of the equipment or open the enclosure. No user-serviceable parts
are inside. Refer servicing to qualified field service engineers only.
• Uninsulated voltage within the unit may have sufficient magnitude to cause electrical shock.
Avoid contact with any part inside the unit.
Caution
• Power cord is used as a disconnection device. To de-energize equipment, disconnect the
power cord.
• This unit must follow the national requirement, and local state laws to dispose unit.
• Before connecting the cables to your Elo touchmonitor, make sure all components are
powered OFF.
• The use of ACCESSORY equipment not complying with the equivalent safety requirements
of this equipment may lead to a reduced safety of the resulting system. Consideration
relating to the choices of accessory equipment should include:
• Use of accessory in the patient vicinity.
• Evidence that the safety certification of the accessory has been performed in accordance
to the appropriate IEC 60601-1 and/or IEC 60601-1-1 harmonized national standard.
• For continued safety -
- This unit only complies to the above standards if used with a medical grade power cord.
-A medical grade power supply, such as the one specified, is required for use in a medical
application.
Note:
• This symbol alerts the user to important information concerning the operation and
maintenance of this unit, which should be read carefully to avoid problems.
• This symbol means DC Current.
• This symbol means ON/OFF stand-by switch.
iv
!

!
CAUTION-Life Support
Care must be taken when this touchmonitor is a critical component of a life support system or
device. In case of failure of this touchmonitor, appropriate redundant systems should be incorpo-
rated into the system or device to prevent injury to the user or patient.
The following should be an integral part of the safety design of a life support system or device
using this touchmonitor for a critical function.
• An alternate interface or fail-safe must be available should the touchscreen fail to operate.
• The touchscreen interface must not be the only means of control of a critical function.
• An alternate video display should be incorporated into the safety design if used to monitor a
critical function.
• The internal speakers of this touchscreen monitor must not be the sole method of warning of
a critical function.
Critical functions are:
1. Life support devices or systems are devices or systems which, (a) are intended for surgical
implant into the body, or (b) support or sustain life, or (c) whose failure to perform when
properly used in accordance with instructions for use provided in the labeling, can be reason
ably expected to result in significant injury to the user.
2. A critical component is any component of a life support device or system whose failure to
perform can be reasonably expected to cause the failure of the life support device or system,
or to affect its safety or effectiveness.
v

Classification
With respect to electrical shock, fire in accordance with UL60601-1 and CAN/CSA C22.2 No.
60601-1
This monitor is a CLASS 1 (GROUNDED) DEVICE.
These displays are classified NO APPLIED PARTS EQUIPMENT.
Protection against harmful ingress of water:
INGRESS PROTECTION(IPX1)
This monitor shall be classified as ORDINARY EQUIPMENT, not intended or evaluated for use
in the presence of flammable anesthetic mixture with air, oxygen, or nitrous oxide.
Mode of Operation: CONTINUOUS OPERATION.
Environmental conditions for transport and storage
0
o
Temp. Operating C to 40
o
C
Storage / Transportation -20
o
C to +60
o
C
Humidity (non-condensing)
Operating 30% to 70%
Storage / Transportation 10% to 90%
Altitude Operating 1060hpa.
Storage / Transportation 0 to 40,000ft(12,192m)
Equivalent to 1013-303 hP.A
(14.7 to 4.4 psia)
For full Product Specifications refer to Appendix C
vi

vii

Table of Contents
Warnings and Cautions ................................................. iv
Caution-Life Support ...................................................... v
Classification .............................................................. vi
Chapter 1
INTRODUCTION 1
Product Description ................................................ 1
LCD Display Performance Features ....................... 2
19 inch TFT LCD Display Panel ...................... 2
External Medical Grade Power Supply ............ 2
Chapter 2
INSTALLATION AND SETUP 3
Unpacking Your Touchmonitor ............................... 3
Product Overview ........................................... 4
Main Unit ......................................................... 4
Back Unit ......................................................... 4
Side View ......................................................... 4
Base Bottom View ........................................... 5
KensingtonTM Lock ......................................... 5
Touch Interface Connection .................................... 6
Step 1 Connecting the Video Cable ................ 6
Step 2 Connecting the Serial/USB Cable ........ 7
Step 3 Connecting the Speaker Cable ............ 8
Step 4 Connecting the Power Cable ............... 9
Optimizing the LCD Display .................................. 10
Installing the Touch Driver Software ..................... 10
Chapter 3
OPERATION 11
About Touchmonitor Adjustments ................................ 11
Front Panel Controls ..................................... 12
Controls and Adjustment ...................................... 13
OSD Menu Functions .................................... 13
OSD Control Options ..................................... 14
Power LED Display & Power Saving .................... 15
General Power Saving Mode ........................ 15
Display Angle ................................................. 15
Chapter 4
TROUBLESHOOTING 17
Solutions to Common Problems ................................. 17
Appendix A
NATIVE RESOLUTION 19
Appendix B
TOUCHMONITOR SAFETY 21
Care and Handling of Your Touchmonitor ................... 22
Appendix C
TECHNICAL SPECIFICATIONS 23
Display Modes ............................................................. 23
Touchmonitor Specifications ........................................ 24
Power Supply Cord Selection ...................................... 25
North America ....................................................... 25
Cord selection for other than North America ........ 26
AccuTouch (resistive) Touchscreen Specifications ..... 28
IntelliTouch (resistive) Touchscreen Specifications ..... 29
Appendix D
CONTACT ELO 31
Contact Elo ............................................................. 31
Replacement Parts ..................................................... 31
REGULATORY INFORMATION 33
WARRANTY 35
INDEX 37

C H A P T E R
1
INTRODUCTION
Product Description
The 1928L is a medical display designed to present information to the operator and the customer.
The 1928L is available in serial and USB(combo) touch interface as well as no touch. The 1928L
functionally consists of a 19” LCD main display with a touchscreen. The main display element
is a 19” diagonal SXGA resolution (1280 x 1024) LCD display. The display consists of an LCD
display and touchscreen. The 1928L is powered by 12 VDC from an external medical grade
power source.
1-1

LCD Display Performance Features
19” TFT LCD Display Panel
Display format 1280 x 1024
Display area 376.32 mm (H) x 301.056 mm (V)
Pixel pitch 0.294 mm (H) x 0.294 mm (V)
Contrast Ratio 1300:1( typical)
Brightness
LCD 300 cd/m
2
(typical)
AccuTouch 246 cd/m
2
(typical)
IntelliTouch 276 cd/m
2
(typical)
Accutouch transmission 82% (typical)
Intellitouch transmission 92% (typical)
Response time Tr = 15 msec / Tf = 5 msec typical;
12 ms gray to gray response
Display color 16.7 million colors
Typical vertical viewing angle 89 deg (down) / 89 deg ( up)
Typical horizontal viewing angle 89 deg (left) / 89 deg (right)
External Medical Grade Power Supply
The 1928L is powered by an external medical grade universal input AC power source.
Power supply:
• AC power: Input voltage 100 -240 VAC, 1.0A
• Input frequency 50/60 Hz
• DC output Voltage/Current: 12 VDC/4.0A
• Load regulation: ±5% Max.
• Line regulation: ±1% Max.
1-2 Elo Touchmonitor User Guide

C H A P T E R
2
INSTALLATION AND SETUP
This chapter discusses how to install your LCD touchmonitor and how to install Elo TouchSystems
driver software.
Unpacking Your Touchmonitor
Check that the following items are present and in good condition:
LCD monitor VGA cable USB cable
Serial Cable European power cable Power cable US/Canada
CD
Software
Elo QuickStart
DVI Cable CD and Quick Install Guide Power adaptor
2-3

Product Overview
Main Unit
Back Unit
Side View
2-4 Elo Touchmonitor User Guide

Base Bottom View
Kensington
TM
Lock
The Kensington
TM
lock is a security device that prevents theft. To find out more about this secu-
rity device, go to http://www.kensington.com.
2-5

Touch Interface Connection
Note: Before connecting the cables to your touchmonitor and PC, be sure that the computer
and touchmonitor are turned off.
STEP 1-Connecting the Video Cable
CONNECTIONS ON UNDERSIDE
FEMALE 15-PIN
VIDEO PORT
VIDEO CONNECTOR
VIDEO CABLE
• Tilt the screen up and back to access the connection ports.
• Connect the 15-pin video cable (the ferrite bead end) or 24-pin DVI-D cable to the video
port on your PC.
• Connect the other end of the video cable to the video connector on your touchmonitor.
• Secure the cable to your touchmonitor and PC by turning the screws on the connector
clockwise.
2-6 Elo Touchmonitor User Guide

STEP 2-Connecting the Serial and USB Touchscreen Cable
CONNECTORS ON THE UNDERSIDE
FEMALE 9-PIN SERIAL
TOUCHSCREEN CONNECTOR
USB CONNECTOR
SERIAL TOUCHSCREEN CABLE
• Connect the female end of the serial (RS-232) cable to the serial port on your PC, or
connect the USB touchscreen cable to the USB touchscreen connector on the back of your
touchmonitor.
• Connect the male end of the cable to the serial touchscreen connector on your
touchmonitor, or connect the other end of the USB touchscreen cable to your PC.
• Secure the cable to your touchmonitor and PC by turning the screws on the connector.
2-7

STEP 3-Connecting the Speaker Cable
CONNECTIONS ON UNDERSIDE
SPEAKER
PORT
SPEAKER CABLE
• Connect the light blue end of the speaker cable to the light blue speaker port to the monitor
(audio in).
• Connect the lime (light green) end of the speaker cable to the lime speaker port on the
computer (audio out).
2-8 Elo Touchmonitor User Guide

STEP 4-Connecting the Power Cable
CONNECTIONS ON UNDERSIDE
POWER CABLE
POWER
Depending on where you live, you will use either the European or US/Canadian power cable.
• Connect the female end of the power cable to the medical grade power adaptor.
• Connect the brick power cable into the power port on the touchmonitor.
• Route the cable through the cable management channel.
NOTE: To protect your equipment against risk of damage from electrical surges in the power line,
plug the touchmonitor’s power cord into a surge protector, and then connect the surge
protector to a grounded AC electrical outlet.
2-9

Optimizing the LCD Display
To ensure the LCD display works well with your computer, configure the display mode of your
graphic card to make it less than or equal to 1280 x 1024 resolution, and make sure the timing of
the display mode is compatible with the LCD display. Refer to Appendix A for more information
about resolution. Compatible video modes for your touchmonitor are listed in Appendix C.
Installing the Touch Driver Software
Elo TouchSystems provides driver software that allows your touchmonitor to work with your
computer. Drivers are located on the enclosed CD-ROM for the following operating systems:
• Windows XP
• Windows 2000
• Windows Me
• Windows 98
• Windows 95
• Windows NT 4.0
• CE 2.x, 3.0, 4x
• Windows XP Embedded
• Windows 3.x
• MS DOS
• OS/2
Additional drivers and driver information for other operating systems (including Macintosh and
Linux) are available on the Elo TouchSystems web site at www.elotouch.com. Your Elo USB
touchmonitor is plug-and-play compliant. Information on the video capabilities of your
touchmonitor is sent to your video display adapter when Windows starts. If Windows detects
your touchmonitor, follow the instructions on the screen to install a generic plug-and-play monitor.
Refer to the appropriate following section for driver installation instructions.
2-10 Elo Touchmonitor User Guide

C H A P T E R
3
OPERATION
About Touchmonitor Adjustments
Your touchmonitor will unlikely require adjustment. Variations in video output and application
may require adjustments to your touchmonitor to optimize the quality of the display.
For best performance, your touchmonitor should be operating in native resolution, that is 1280 x
1024 at 60-75 Hz. Use the display control panel in Windows to choose 1280 x 1024 resolution.
Operating in other resolutions will degrade video performance. For further information, please
refer to Appendix A. All adjustments you make to the controls are automatically memorized.
This feature saves you from having to reset your choices every time you unplug or power your
touchmonitor off and on. If there is a power failure your touchmonitor settings will not default to
the factory specifications. To restore factory set up, choose it from the OSD. See page 14, Recall
Defaults.
3-11

Front Panel Controls
1
2
3
4
5
Control Function
1 Menu/Exit Display/Exits the OSD menus.
2 1. Enter contrast of the OSD.
2. Increase value of the adjustment item.
3. Shuffle item clockwise.
3 1. Enter audio volume adjustment.
2. Decrease value of the adjustment item.
3. Shuffle item counter-clockwise.
4 Select Select the adjustment items from the OSD menu.
5 Power Switch Switches the power of the monitor from off to on to off.
(Impotant note: Includes integrated power down delay function,
user must depress power button for five (5) seconds when powering
off)
3-12 Elo Touchmonitor User Guide
/