Streamline RH5501CH-GLD-100 Installation guide
- Category
- Sanitary ware
- Type
- Installation guide
This manual is also suitable for

streamlinebath.com
QUESTIONS ON PRODUCT, INSTALLATION, RETURNS? PLEASE CONTACT
1 (323)-612-8011support@streamlinebath.com
READ ENTIRE INSTALLATION GUIDE
PRIOR TO INSTALLING THE BATHTUB
THIS BATHTUB SHOULD ONLY BE
INSTALLED BY A CERTIFIED PLUMBER
CAUTION!
TWO PEOPLE ARE REQUIRED
TO LIFT THE BATHTUB
CLAWFOOT BATHTUB SERIES
OWNER'S MANUAL &
INSTALLATION GUIDE

RETURNS
We thank you for your purchase. Here at Streamline®, our goal is to provide customers
with exceptional bathroom and kitchen products. We understand that things sometimes
don’t work out. If you are unsatisfied with your Streamline® product and would like to
initiate a return, please reach out to [email protected]om . We continue to grow
and want to offer the best customer experience possible, and by reaching out to us prior
to initiating a return, we can ensure that these issues do not continue in the future.
LIMTED WARRANTY EXCLUSION
ALL OTHER WARRANTIES EXPRESS OR IMPLIED INCLUDING ALL IMPLIED
WARRANTIES OF MERCHANTABILITY OF FITNESS FOR A PARTICULAR PURPOSE
ARE HEREBY DISCLAIMED. STREAMLINE IS NOT LIABLE FOR ANY INDIRECT,
INCIDENTAL, CONSEQUENTIAL OR SIMILAR DAMAGES INCLUDING, BUT NOT
LIMITED TO, LOST PROFITS OR REVENUE, INABILITY TO USE THE PRODUCT,
OR ANY OTHER ASSOCIATED EQUIPMENT, THE COST OF SUBSTITUTE EQUIPMENT,
AND ANY CLAIMS BY THIRD PARTIES RESULTING FROM THE USE OF THIS PRODUCT.
This warranty gives you specific legal rights, and you may have other rights that vary
from state to state. Some states do not allow the exclusion or limitation of incidental
or consequential damages, so the limitations or exclusions stated above may not apply.
WHAT IS NOT COVERED UNDER THIS LIMITED WARRANTY
• Normal wear and tear or cosmetic damage.
• Damage due to accidents, misuse, physical force, improper installation or operation,
mishandling, neglect, fire, heat, water, humidity, liquids, insect infestation, or other intrusion.
• Products that have been repaired, altered or modified by anyone other than Streamline®
or its authorized service representative.
• Damage caused by use of non-Streamline® accessories or misapplication.
• Products whose serial numbers have been removed, altered or rendered illegible.
• Products purchased, shipped from, used or serviced outside the United States.
• Damage caused by acts of nature such as, but not limited to, lightning damage.
• Products returned without valid proof of purchase.
DELIVERIES
Immediate inspection is required when receiving Streamline® items. It is important to
notate any damage or carton count discrepancy on the BOL / Proof of Delivery (POD)
receipt when you sign for the delivery, even if the package appears only slightly damaged.
If the driver doesn't allow or won't wait, notate on the BOL / POD "Driver will not allow
inspection." Damages should be reported to Streamline® within 3 calendar days of delivery.
Customers who sign for delivery and do not provide proper detailed description assume
responsibility if merchandise is damaged or missing cartons. If the product itself appears
significantly damaged, you may refuse delivery after you notate it on the POD / BOL
and provide clear pictures to Streamline®. Please notify Streamline® of refusal so we
can anticipate the return and send out a new item.
Please look for the following when checking:
• Carton/Pallet Count
• Crumpled and pushed in areas
• Fork lift punctures
• Holes
• Any additional outside damage to packaging
ESTIMATED SHIPPING & TRANSIT TIME
We do our best to provide you with accurate shipping times for our products. The times
are estimates only. Estimated transit time will not include the time it takes for the item
to be processed. Products that are in stock normally ship from the warehouse within 1-2
business days, however these products are subject to prior sale and availability and lead
times are not guaranteed.
Estimated shipping time is between 2-10 business days (the actual number will depend
on the state and customer availability for delivery). These shipping times are not guaranteed.
If you have a time sensitive project we recommend that you contact a customer service
representative at support@streamlinebath.com.
DAMAGE & DEFECTIVE GOODS POLICY
At Streamline®, we understand that a product may get damaged in transit or, on occasion,
there may be a manufacturer product defect. Rest assured, we will stand behind you
during this process and make sure we do everything we can to bring it to a satisfying and
timely conclusion.
For us to offer this level of service, however, we need a little help from the customer in
the form of a detailed product inspection immediately upon delivery. In this case, it is
important to notate any damage on the BOL or POD when you sign for the delivery.
Also, please provide clear photos of the damages to Streamline®. If the driver doesn't
allow or won't wait notate on the BOL / POD "Driver will not allow inspection." All
damages should be reported to Streamline® within 3 calendar days of delivery.
REPLACEMENT PARTS
Replacement parts are sent at Streamline’s® sole discretion. For us to determine if
replacement parts are necessary, please provide us with a clear description of what the
issue is as well as supplementary photos for us to better serve you and understand the
problem. Whether any additional fees or charges are to be assessed with respect to
replacement parts will be determined on a case by case basis.
INCORRECTLY SHIPPED ITEMS
If the item received was incorrectly shipped or missing any component parts, please
contact us immediately at [email protected]om
DAMAGES & REFUSING A FREIGHT SHIPMENT
If the shipment is damaged, a customer has the option of refusing the shipment. Contact
our customer service representative immediately at support@streamlinebath.com when
and if you refuse a shipment. Also, proper notation must be on the BOL / POD receipt.
Any external evidence of loss or damage that occurred during transit is considered visible
loss or damage and must be noted on the BOL / POD and signed by the carrier's agent
(driver). Failure to adequately describe the visible loss or damage could result in the carrier
delaying or refusing to honor the freight claim.
Any damage that occurred during transit that was not visible at the time of delivery is
considered concealed loss or damage. Due to rough handling in transit it is possible to
damage the contents of a carton without damaging the outer packaging itself. If such a
situation occurs, it is important to contact Streamline® immediately for instructions on
how to handle this.
You must open all received boxes and inspect products for concealed damage within
72 hours (3 calendar days) of delivery and Streamline® must be notified at that time.
After this time frame claims may not be honored.
Streamline® reserves the right to replace any damaged merchandise within 3 calendar
days of notification by the customer. If a replacement item is available for shipping within
that time period, then a refund cannot be issued. If no replacement is available, the
damaged item(s) will be refunded in full if the damage was the fault of freight carrier, and
all return procedures were followed.
Failure to follow return procedure for the damaged item may result in a charge for the
free replacement item.
LIMITED MANUFACTURER’S WARRANTY [BATHTUB]
All parts and finishes of Streamline® bathtubs are warranted to the original consumer
purchaser to be free from defects in material and workmanship for a period of two to
five years [depending on model; please check the product listing or email us at
[email protected]] after the date of original retail purchase. Proof of the
original purchase is required to obtain a remedy under this limited warranty. Streamline®
recommends using a professional plumber for all installation and repair.
Streamline® will replace, free of charge, during the warranty period any part or finish that
proves defective in material and/or workmanship under normal installation, use and service.
Replacement parts may be obtained by emailing us at [email protected]
This warranty is extensive in that it covers replacement of all defective parts and even
finish, but these are the only two things that are covered. Labor charges and/or damage
incurred in installation, repair, or replacement as well as any other kind of loss or damages
are excluded. Proof of purchase (original sales receipt) from the original consumer purchaser
must be made available to Streamline® for all warranty claims. This is the exclusive warranty
by Streamline®, which does not make any other warranty of any kind, including the implied
warranty of merchantability.
This warranty excludes all industrial, commercial and business usage, whose purchasers
are hereby extended a one-year limited warranty from the date of purchase, with all other
terms of this warranty applying except the duration of the warranty.
Any damage to this faucet as a result of misuse, abuse, or neglect, or any use of other
than genuine Streamline® replacement parts will void the warranty.
LIMITED MANUFACTURER’S WARRANTY [FAUCETS]
All parts and finishes of Streamline® faucets are warranted to the original consumer
purchaser to be free from defects in material and workmanship for three years from
date of purchase. Streamline® recommends using a professional plumber for all installation
and repair.
Streamline® will replace, free of charge, during the warranty period any part or finish
that proves defective in material and/or workmanship under normal installation, use and
service. Replacement parts may be obtained by emailing us at support@streamlinebath.com
This warranty is extensive in that it covers replacement of all defective parts and even
finish, but these are the only two things that are covered. Labor charges and/or damage
incurred in installation, repair, or replacement as well as any other kind of loss or damages
are excluded. Proof of purchase (original sales receipt) from the original consumer purchaser
must be made available to Streamline® for all warranty claims. This is the exclusive warranty
by Streamline®, which does not make any other warranty of any kind, including the implied
warranty of merchantability.
This warranty excludes all industrial, commercial and business usage, whose purchasers
are hereby extended a one year limited warranty from the date of purchase, with all other
terms of this warranty applying except the duration of the warranty.
Any damage to this faucet as a result of misuse, abuse, or neglect, or any use of other
than genuine Streamline® replacement parts will void the warranty.
WARRANTY

These products must be installed by a fully insured and licensed plumber only.
Installation of any product by anyone other than fully insured and licensed plumber shall void limited warranty.
We are not responsible for any local code compliance for this product.
Building and plumbing codes may vary state-to-state.
Streamline shall not be held liable for any and all incidental damages or flood caused due to use of this product.
Streamline shall not be held liable for any and all fees stemming from cost of installation, re-installation, removal,
subsequent damage, or transportation in a case of a product defect.
Please note:
Different bathtub models have different drain & clawfeet models. Please see the next page to determine which
drain or clawfoot model applies to the bathtub model that you have purchased.
Silicone
Bathtub
Clawfeet
Adjustable Key Measuring Tape Safety GlassesPencil Level Bar
PRIOR TO INSTALLING
TOOLS REQUIRED
WHAT'S IN THE BOX
Drain
Model: N-DWF-CH
Model: N-DWF-GLD

DRAIN MODEL COMPATIBILITY
FREESTANDING BATHTUB
R-5000-69CICFRD-FM
R-5001-69CICFWH-FM
R-5020-72CICFWH-FM
R-5160-72CICFRD-FM
R-5101-48CICFWH-FM
R-5161-61CICFRD-FM
R-5162-72CICFWH-FM
R-5220-67CICFWH-FM
R-5163-61CICFWH-FM
R-5221-61CICFWH-FM
R-5240-71CICFWH-FM
R-5281-66CICFWH-FM
R-5280-66CICFRD-FM
R-5420-67CICFWH-FM
R-5440-65CICFGR-FM
R-5442-65CICFWH-FMR-5441-65CICFRD-FM
R-5501-66CICFWH-FM
R-5460-53CICFWH-FM R-5500-60CICFWH-FM
R-5060-67CICFPR-FM
R-5061-67CICFWH-FM
R-5100-66CICFWH-FM
N-DWF-CH
N-DWF-GLD

DRAIN DIAGRAMS
No ITEM Qty
1
2
3
4
5
6
7
8
10
11
12
13
14
15
16
17
16
17
9
Cover
Cover gasket
Cartridge
Strainer
Waste upper gasket
Waste lower gasket
Connector
Coupling nut
Nut
Washer
Tee
Pipe
Overflow body
Tapered rubber gasket
Overflow upper gasket
Overflow plate
Pin Bolt
Taic piece
Flange
1
1
1
1
1
1
1
1
1
3
3
1
1
1
1
1
1
1
1
Model: N-DWF-CH
Model: N-DWF-GLD

CLAWFOOT CONFIGURATION
Clawfeet: R-CFL03, R-CFL04, R-CFL06, R-CFL-20 have specific foot placement. Each foot in the set is unique.
Inside each foot is labeled with a letter to help you find the proper location on the tub for installation. Match up the
letters on the clawfeet with the letters on the underside of the tub. The letters on the tub will be the same as what
are on the clawfeet and will match accordingly.

APPLICABLE MODELS
R-CFL01-CH
R-CFL01-WH
R-CFL01-GLD
R-CFL02-CH
R-CFL02-WH
R-CFL02-GLD
R-CFL03-CH
R-CFL03-WH
R-CFL03-GLD
R-CFL04-CH
R-CFL04-WH
R-CFL04-GLD
R-CFL06-CH
R-CFL06-WH
R-CFL06-GLD
R-CFL08-CH
R-CFL08-WH
R-CFL08-GLD
R-CFL10-CH
R-CFL10-WH
R-CFL10-GLD
R-CFL16-CH
R-CFL-20-CHR
R-CFL-20-GLD
R-CFL-20-WH
CLAWFOOT DIAGRAM
ITEMNo.
Qty
Adjustable Feet
Claw Feet
Nut
Washer
Rubber Washer
Bolt
1
2
3
4
5
6
4
1
2
3
4
5
6
4
4
4
4
4

BATHTUB INSTALLATION
1. Ensure that the floor at the installation site has sufficient floor support and is level.
2. Waterproofing the floor is highly recommended.
3. Determine the location of the drainpipe on the floor by taking measurements of the drain and waste
location underneath the unit. Clean the drain hole area in preparation of setting the drain. The area
should be dry & free from any debris.
4. Remove the bathtub from its box. It is recommended that the bathtub is carried by a minimum of
two people. Ensure to carry and set down the bathtub only in the upside-down position.

5. Gently place the bathtub in the upside-down position on a tarp or cardboard sheet in order to avoid
contact with any rough surface.
6. Take (1) adjustable foot [#1], place it through the hole in the clawfoot [#2],
1
5
2
6
7. Place (1) rubber washer [#5] and place it over the bolt [#6]
8. Take the clawfoot [#2] and place it over over the rubber washer [#5] and bolt [#6].
9. Take one washer [#4] and place it over the clawfoot [#2] and bolt [#6].
2
2
6
5
6
4

9. Take (1) nut [#3] and place it over the the washer [#4].
10. Make sure to adjust the clawfoot so that it fits snug with the bolts on the bathtub. This will help to
ensure that the clawfeet are placed correctly and are functioning properly.
10. Tighten the nut [#3] with a wrench and adjust the clawfoot as needed. Repeat for the other 3 clawfeet.
4
3

11. Take the strainer, place silicone sealant around it, and then place it into the drain hole ensuring
a tight connection with the drain ell & gasket. Use silicone sealant. DO NOT use plumbers putty to seal.
Silicone
Sealant
Strainer
Gasket
Drain Ell
12. Insert the tailpiece into the trap inlet using the O-ring, coupling nut, & flange. The tailpiece may
need to be cut for proper fit. 1''-2'' of the tail piece shoudl fit inside the trap. Slip the flange over the tailpiece
and slide down to the floor.
O Ring
Coupling Nut
Flange
Trap Inlet
Tailpiece
13. Assemble the tee section to the tailpiece, overflow, & drain ell using the coupling nuts and O-rings
that are provided.
O Ring
Tee
Coupling Nut

14 . Attach the tapered rubber gasket to the overflow ell. Align the overflow ell with the overflow hole &
secure the drain to the tub with overflow plate and screw provided.
15 . Make sure a watertight seal exists on all bath drain connections.
End home plumbing
Floor
Cover
Drain Pipe
Tapered Rubber Gasket

SINGLE HANDLE FREESTANDING
TUB&SHOWER FAUCET
H-100-TFMSHCH

RECOMMENDED TOOLS
THE TOOLS MIGHT BE APPLIED TO THE FOLLOWING PLACES:
Screwdriver Channel Locks Goggles
Adjustable Wrench Teflon tape Allen key
WARNING:
Please keep the
tool for future use!
Hammer
ATTENTION:
for easy installation, you will need:
1. To read all the installation instruction completely before beginning.
2. To read all the warning, attention and maitenance information.

FAUCET INSTALLATION
2. Align the base with the holes exactly as shown.
1. Drill one hole of 130mmx130mm max and drill 3 holes with 80mm diameter as shown.
3. Insert the expansion anchors into the holes on the base with a hammer, tighten with
adjustable wrench.
80
mm
1
HOT WATER
COLD WATER
MAX 130mm
1
2

4. Tighten the shower holder into faucet body with a screw and Allen key.
INSTALLATION
LOCATION
1
2
3
4
HOT WATER
COLD WATER
5. Connect hot and cold supply lines and test by opening water lines.
6. If there are no leaks, remove the 3 screws (1) with the Allen key (2), then remove plate (3) and
nuts (4) as shown.
1
2
3
4

7. Connect hot water flexible hose(1) and cold water flexible hose(1) to the base (2) correctly as shown.
8. Insert 3 screws (1) into holes on the plate (2), Tighten with allen key (3).
9. Put down cover (1) and complete installation.
1
2
1
2
3
1

CHECKING AND TESTING
2. Check all connections at arrows for leaks, re-tighten it if necessary.
BUT DON'T OVERTIGHTEN
1. Remove the aerator with aerator wrench, take out the o-ring too.Turn the faucet handle all the
way on, turn on hot and cold water supply and flush water lines for one minute.Reinstall aerator
with aerator wrench.
1
2

MAINTENANCE
A. If there is splash or low flow rate,please remove the aerator with the wrench and clean the debris.
B. If faucet leaks from the handle or drips from spout, please replace cartridge following the following
steps:
1. Disassemble the screw with allenkey, take out the handle, then remove the trim cap.
2. Unscrew the cartridge nut with adjustable wrench, then take out the old cartridge.
3. Place a new cartridge in the cartridge seat, then screw the cartridge lock nut and assemble the handle
by securing the screws. Repeat the above steps for the other cartridge if necessary.
1
2
3
4
1
2

CLEANING AND CARE
PARTS LIST
Daily cleaning and care are required in order to keep the product shining and properly working.
1. Clean it with water and dry it with soft cloth.
2. Clean the product with gentle liquid or glass cleaner.
3. Don't use acid cleaner.
4. Don't clean with abrasive material, abrasive paper or knife.
4 6
4 7
1 2
1 3
1 1
1 8
2 3
2 2
2 4
3 2
3 3
3 4
3 1
2 9
2 8
1
2
3
4
5
7
6
8
1 0
9
2 5
2 6
2 7
3 0
-
 1
1
-
 2
2
-
 3
3
-
 4
4
-
 5
5
-
 6
6
-
 7
7
-
 8
8
-
 9
9
-
 10
10
-
 11
11
-
 12
12
-
 13
13
-
 14
14
-
 15
15
-
 16
16
-
 17
17
-
 18
18
-
 19
19
-
 20
20
Streamline RH5501CH-GLD-100 Installation guide
- Category
- Sanitary ware
- Type
- Installation guide
- This manual is also suitable for
Ask a question and I''ll find the answer in the document
Finding information in a document is now easier with AI
Related papers
-
Streamline R5220CH-GLD Installation guide
-
 Streamline K-2088-67FSWHSS-DM Installation guide
-
 Streamline K-2088-67FSWHSS-DM Installation guide
-
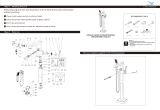 Streamline H-100-TFMSHCH Installation guide
-
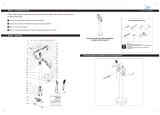 Streamline H-120-TFMSHCH Installation guide
-
Streamline R-5720-26CISWH-1 Installation guide
-
 Streamline N481BL Installation guide
-
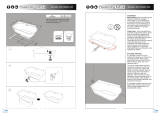 Streamline MH2401-100 Installation guide
-
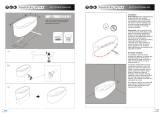 Streamline MH2120-120 Installation guide
-
 Streamline MH2100-120 Installation guide
Other documents
-
Vanity Art VA6610 Operating instructions
-
Lynx LFK Installation guide
-
Roswell 106123-BAF-PC Installation guide
-
Roswell 104123-BAF-PC Installation guide
-
Roswell 105123-BAF-PC Installation guide
-
Roswell 103215-BTF-PC Installation guide
-
Roswell 102215-BTF-PC Installation guide
-
ALFI BRAND AB1796-BM User manual
-
Roswell 104224-BTF-PC Installation guide
-
Westbrass D206B-01 Installation guide


