Page is loading ...

Installation
Everyday cleaning
Please Note : Since manufacturing
of acrylic surface baths takes a great
deal of manual labor especially in
finishing, small irregularities in the
surface are inevitable and inherent to
the chosen product/material.
Shrinkage lines, air holes and casting
marks and blemishes on the
underside of the bath (where they
cannot be seen when the bath is
turned upright) do not adversely
affect performance and should not be
regarded as defects.
It is advised to clean an acrylic
surface bath regularly, to remove any
insoluble products. Warm soapy
water should be used and then the
bath should be wiped. Do not let
cleaners soak in.
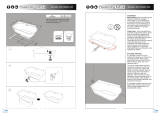
Before fitting:remove packaging and
inspect the bath.We strongly
recommend to use a professional
and qualified plumber and installer.
Instructions must be adhered to as
we cannot accept responsibility for
incorrect installation or damage
during the process.
The surface bath has good
resistance properties to acids, but
should not come into contact with
alkalis or organic solvents, such as
caustic soda, some multi-surface
cleaners, bathroom cleaners,
bleaches, harsh solvents, burning
cigarettes, strong chemicals such as
dry-cleaning fluids, paint strippers,
acetone, citrus based chemicals, and
nail/varnish removers.
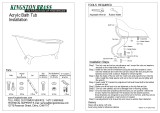
acrylic
It is advised to always run some cold
water before turning on the hot tap.
With hot water temperatures not
exceeding 65 Celsius.
169X80X58
Used drain meets the requirement of ASME
A112.18.2/CSA B125.2 *Always follow the
appropriate plumbing code

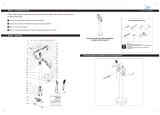
SINGLE HANDLE FREESTANDING
TUB&SHOWER FAUCET
Screwdriver Channel Locks
Adjustable Wrench
RECOMMENDED TOOLS
Attention:
for easy installation, you will need:
1.To read all the installation instruction completely before
beginning.
2.To read all the warning, attention and maitenance
information.
Allen key
WARNING:
Please keep the
tool for future
use!
Goggles
The tools might be applied to the following places:
Teflon tape
Step 4 Cleaning and care
Daily cleaning and care are required in order to keep the product shining and
properly working.
1
2
3
4
Clean it with water and dry it with soft cloth.
Clean the product with gentle liquid or glass cleaner.
Don't use acid cleaner.
Don't clean with abrasive material, abrasive paper or knife.
Step 5 Parts list
Hammer
1
2
3
4
5
6
7
8 9 10
11 12 13 14 15 16 17
18
19
20
21
22
23
24
25
26
27
28
29
30
31
32
33
34
35
36
37
38
39
40
41
42
43
44
45
46
47
48
49
50
51 52 53 54
56
57
H-120-TFMSHCH

1
2
1
Step 2 Checking and testing
Step 1 Faucet installation
1
2
Step 3 Maintenance
B.If faucet leaks from the handle or drips from spout, please replace cartridge following the following steps:
3
4
5
80MM
1
Hot water
Cold water
Drill one hole of 130mmX130mm max and
drill 3 holes with 80mm diameter as shown.
Align the base① with the holes exactly as
shown.
Insert the expansion anchors① into the holes
on the base② with a hammer,tighten with
adjustable wrench.
1
2
2
Check all connections at arrows for leaks,
re-tighten it if necessary.
BUT DON'T OVERTIGHTEN
Remove aerator by coin and open the
hot and cold water supplies. Check for
leaks. Turn on faucet handle for one
minute to flush debris from faucet.
1
A.If there is splash or low flow rate,please remove the aerator with by coin and clean the debris.
1 2 3
Hot water
Cold water
Connect hot and cold supply lines and test by
opening water lines.
If there are no leaks, remove the 3 screws (1)
with the Allen key (2), then remove plate (3)
and nuts (4) as shown.
1
2
3
4
6
7
Connect hot water flexible hose(1) and cold
water flexible hose(1) to the base (2) correctly
as shown.
1
2
Insert 3 screws (1) into holes on the plate(2),
tighten with allen key(3).
1
2
3
Disassemble the screw② with
allenkey①, take out the handle③,
then remove the trim cap④.
1
2
3
4
Unscrew the cartridge nut① with
adjustable wrench, then take out
the old cartridge②.
Place a new cartridge in the cartridge
seat, then screw the cartridge lock nut
and assemble the handle by securing
the screws.Repeat the above steps for
the other cartridge if necessary.
/


