Page is loading ...

P.O. Box 2827
Eugene, OR 97402 USA
Production Code:
VN 08/18
Addison Nightstands
Duet finish
Assembly Instructions
Model #
IMPORTANT NOTES:
Wood can be susceptible to changing color over time when exposed to
strong sunlight. Use window shades, drapes or blinds to protect your
furniture. To help the surface age evenly and avoid dark and light
spots, periodically move items to expose the entire surface to an even
amount of light so it may develop a uniform patina.
For normal household use only. Not recommended for commercial use.
Do not climb, sit or stand on this piece of furniture.
Do not overload the drawers.
Unload items before you move this unit.
WARNING
Drilling, sawing, sanding or machining wood products can expose you to
wood dust, a substance known to the state of California to cause cancer.
Avoid inhaling wood dust or use a dust mask or other safeguards for
personal protection.
For more information go to: www.p65warnings.ca.gov/wood
This product can expose you to chemicals, including formaldehyde,
which are known to the State of California to cause cancer.
For more information go to: www.p65warnings.ca.gov/furniture
DESIGN SUBJECT TO CHANGE WITHOUT NOTICE.
CUSTOMER SERVICE
If you ever have questions about your furniture, please do not hesitate to contact us. In the unlikely event you need a
replacement part; we can make those parts available through an authorized Whittier Wood Furniture dealer. If you
cannot order replacement parts through your dealer, please contact our customer service department.
Hours: Our friendly customer service staff can be reached:
Monday-Friday 8:00 a.m. to 5:00 p.m. (Pacific Time).
You may leave a message 24 hours a day, seven days a week.
Customer Service: 800-653-3336 • Outside the U.S.: 541-687-0213
Fax: 541-687-2060• Email: info@whittierwood.com
1115DUETc
Small 3-Drawer
Addison
Nightstand
1116DUETc
3-Drawer
Addison
Nightstand
Thank you for allowing us to help you furnish your
home. We are certain you will be delighted with
your new furniture for many years to come.

1115DUETc Small 3-Drawer Addison Nightstand
1116DUETc 3-Drawer Addison Nightstand
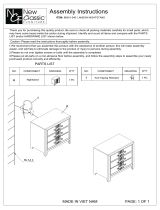
Parts List
1115DUETc_1116DUETc — Page 2 — 08/18
Please identify the parts and check that quantities received match those on this list.
If you need to replace a part, refer to the following letter and part name.
Part
Description
Quantity
1115DUETc
1116DUETc
Ab
Top Assembly (attached)
1
1
Bc
Case
1
1
C
Small Drawer Box (inserted)
1
1
D
Medium Drawer Box (inserted)
1
1
E
Large Drawer Box (inserted)
1
1
F
Small Drawer Face (installed)
1
1
G
Medium Drawer Face (installed)
1
1
H
Large Drawer Face (installed)
1
1
I
Drawer Slides (pre-installed sets)
3
3
J
#6 x 3/4" Philtruss Screw (inserted)
18
18
K
#6 x 1/2" Philtruss Screw (inserted)
18
18
M
#8 x 1" Pan Head Screw (inserted)
6
6
N
#8 x 1-1/4" Pan Head Screw (inserted)
6
6
O
#8 x 7/8" Black Lo-Profile Screw (inserted)
21
21
P
#8 x 1-3/4" Pan Head Screw (inserted)
8
8
Q
#8 x 1-5/8" Machine Screw Tuscan (installed)
6
6
S
1/4" x 20mm Insert Nut (inserted)
4
4
T
5/32" x 10mm Insert Nut (inserted)
6
6
U
Black Walnut Pull (attached)
3
3
V
Small Adjustable Glide (installed)
4
4
W
Base (attached)
1
1
X
#8 x 1-5/8" Black Screw (inserted)
8
8
ZA
#8 x 1-3/8" Lo-Profile Screw (inserted)
10
12
1116 shown in the illustrations.

1115DUETc Small 3-Drawer Addison Nightstand
1116DUETc 3-Drawer Addison Nightstand
Assembly Instructions
1115DUETc_1116DUETc — Page 3 — 08/18
Tool Required: Phillips Screwdriver
1. Remove screws from the plywood supports and side aprons. Recycle or discard. See Figure 1.
2. Place the unit at its final destination. Rotate the Small Adjustable Glides (V) on the bottoms of
the legs until the unit is level. See Figure 2.
Fig. 1
Plywood Supports
Fig. 2
V
V
Fig. 1
/


