01
02 03 04
05 06
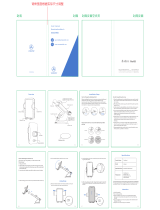
Clamp Arms
Grip Nut
Silicone Pads
Quick Release Button
Adjustable Bottom Tray
Contents / Inhalt / 目次
Ball Joint
3-level Air Vent Clip
3-level Air Vent Clip Lever
Screw Knob
Twist-lock Air Vent Clip
Ball Joint
Attention: To protect
your air vent blade,
please adjust the air
vent clip properly and
do not use the air vent
clip too tight.
horizontal and vertical
non-intensive, circular or special-shaped
Support
Nonsupport
1. Take out the grip nut, assemble it with vent clip.
2. Find a suitable place at your automobile outlet, insert the car
mount.
1. Press the quick release button, the clamp arms automatically
pop open.
3. Place your phone and find the press position (a dent place with
tiny microdots on the clamp arms) to push, tighten up the clamp
arms to hold your phone firmly.
2. If you have a larger size phone, please pull down the adjustable
bottom tray on the car phone holder according to the phone size to
place your phone suitably. Then fix the phone in the same way like
step 3, so that the phone could be clamped firmly.
4. After using, please press the quick release button again to open
the clamp arms and take out the mobile phone as shown in the
picture.
使用説明
Using Steps
05
Overview
01
Installation Steps
03
19
15
17
Installationsschritte
12
Produktübersicht
08
10
Specifications
07
07
Attentions
21
21
14
Spezifikationen
14
Achtung
Schritte zur Nutzung
商品詳細
組付説明
注意事項
商品説明
User manual
Benutzerhandbuch
取扱説明書
www.vanmasslife.com
24h
Overview
The Suitability of Car Air Vent
Installation Steps
Using Steps

07
08
09 10 11
12
13 14 15
16
Product Name
Model
Applicable Place
Package List
Easy Clip Car Mount
CTEZ11
Air Vent
Car Mount ×1,
Air Vent Clip ×2,
User Manual ×1
The parameters above are derived from the laboratory of VANMASS®.
The actual parameters would be different because of products
and other factors. The image shown here is indicative only.
Avoid dropping.
Do not disassemble.
Please install the car mount on a suitable place before
driving, do not operate or adjust the car mount during
driving.
Do not install the car mount in places which interfere with
airbag or driving.
Please do not twist the air vent clip too tight, to protect the
air vent blade.
Keep the car mount away from children.
1.
2.
3.
4.
6.
5.
1.
2.
3.
4.
6.
5.
Klammer
Befestigun-
gsmutter
Silikon-Pad
Entriegelung-Taste
Ziehbare Haltefüße
Kugelkopf
3-Stufen
Lüftungsklammer
3-Stufen Schalter
Spiralknopf
Lüftungsklammer
Kugelkopf
Hinweis: Bitte wählen Sie
den geeignete
Straffheitsgrad
entsprechend der Dicke
der Lüftungsklingen aus.
Ziehen Sie die
Lüftungsklammer nicht
zu fest an, um die
Lüftungsklingen zu
schützen.
horizontale und vertikale Luftauslässe
Kreuze, gebogene und
versankbare Luftauslässe
geeignet
ungeeignet
1. Schrauben Sie die Befestigungsmutter von der Halterung ab.
Montieren Sie sie mit der Lüftungsklammer.
2. Stecken Sie die Halterung auf das Lüftungsgitter ein.
1. Drücken Sie die Öffnungstaste, um den Arm zu öffnen.
3. Bitte legen Sie Ihr Handy in die Halterung, halten Sie die Fingerpo-
sition (die Vertiefung mit winzigen Vorsprüngen) gedrückt und
drücken Sie den Klemmarm, um das Handy festzuklemmen.
2. Falls Ihr Handy sehr groß ist, können Sie die verstellbare Haltefüße
der Halterung entsprechend der tatsächlichen Situation nach unten
ziehen, um das Handy in die richtige Position anzupassen. Befestigen
Sie dann den Handy dieselbe Weise wie in Schritt 3. um sicherzustellen,
dass das Handy festgeklemmt ist.
4. Drücken Sie nach der Verwendung wieder die Taste, um den
Klemmarm zu öffnen und nehmen Sie das Handy wie im Bild
heraus.
Nicht fallen lassen.
Zerlegen Sie das Gerät nicht.
Installieren Sie während der Fahrt nicht. Bitte installieren
Sie die Halterung „vor“ der Fahrt.
Montieren sie die Autohalterung nicht an einem Ort, der die
Funktion des Airbags und die Fahrt beeinträchtigt.
Ziehen Sie die Lüftungsklemmer nicht zu fest an, um die
Luftauslassklingen und der Klemmer zu schützen.
Halten sie die Autohalterung von Kindern fern.
Produktname
Modell
Anwendbare Orte
Produktliste
Auto Handyhalterung
CTEZ11
Lüftungsgitter
Auto Handyhalterung ×1,
Lüftungsklammer×2,
Benutzerhandbuch×1
Die obigen Parameter stammen aus dem Labor von VANMASS®.
Der tatsächliche Parameter würde sich aufgrund von Produkten
und anderen Faktoren unterscheiden. Das Foto ist für referenz,
beziehen Sie sich auf das produkt.
クリップ アーム
固 定ナッツ
シリコ ンマット
サ イドボ タン
伸 縮 ブラ ケット
ボールの先端
3段吹き出し口クリップ
3段階固定スイッチ
螺旋ボタン
吹き出し口クリップ
ボールの先端
注意: 車のエアコン吹き
出し口を損傷しないため
に、吹き出し口の葉の厚
さ に よ っ て 、ふ さ わ し い 段
数 を 選 ん で く だ さ い 。 き
つす ぎな いでくだ さい。
水平および垂直
非集中式、円形または特殊な形状
対応できる
対応できない
Specifications
Attentions
Produktübersicht
Anpassungsfähigkeit der Lüftungsgitter
Installationsschritte
Schritte zur Nutzung
Achtung
Spezifikationen
商品詳細
吹き出し口との交換性

2020.01.18
娄文亭
PANTONE 285 U PANTONE Black 7C
物料编码:VMPI0069A 物料名称: A#Vanmass 好易夹车载支架(出风口版)说明书(新VI)
平
面
部
分
材 质:
成型尺寸:
结构设计:
备 注: 备 注:
印刷颜色:
装订方式:
平面设计:
结构修改: 平面修改:
日 期:
坑 纹:
单 位: mm
刀 线:
压 线:
针 刀 线:
刀线相交:日 期:
105克哑粉纸
70*110
结
构
部
分
1色1专+胶装说明书+双面印刷+封面封底过哑油
骑马钉
17 18 19 20
21
Email: [email protected] www.vanmasslife.com
VANMASS
®
trademark is registered in the USA and other
countries. All rights reserved. Designed in H.K. Made in China.
1.
2.
3.
4.
6.
5.
1. ホルダーでの固定ナットを取り外し、クリップを取り付ける。
2. 車載ホルダーをエアコン吹き出し口の適当な位置に差し込む。
1. サイドボタンを押して、アームが自動的に開きます。
3. スマホを置いて、指は両側のアーム(微小の凸あるところ)
を押してアームが携帯を固定できます。
2. スマホのサイズが大きい場合、実際の状況によって下の方向
に伸縮ブラケットを適応な位置に引いて、その後、手順3と
同じようにスマホを固定して、安定を確保します。
4. 使い終わったら、サイドボタンを押してアームを開けて、図
通りに携帯を取ります。
落 下しな いでくだ さい。
勝手に修理または改造しないでください。
車を起動する前に、車載ホルダーを設置してください。運転中、ホ
ルダーを取り付けることや調節することは一切禁止です。必ず安
全な場所に駐車してから操作してください。
ホルダーを運転操作やエアバックの動きを妨害する位置に設置
しな いでくだ さい。
吹 き 出 し 口 とクリップ を 保 護する た め に、吹 き出し口 クリップ を硬
く締 めないでくだ さい 。
子供の手が届かないところに保管してください。
品 名
型 番
適用場所
パケージ内容
車載ホルダー
CTEZ11
エアコン吹き出し口
車載ホルダー本体×1
エアコン吹き出し口クリップ×2
取扱説明書×1
VMPI0069A
組付説明 使用説明
注意事項
商品説明
/


