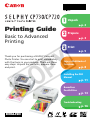
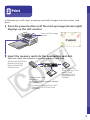
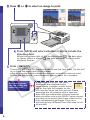
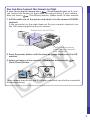
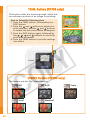
Canon Selphy CP730 is a compact photo printer that allows you to print photos directly from a memory card or a compatible Canon camera. It features a 3.2-inch LCD screen for previewing images, multiple printing modes including borderless printing, and the ability to print index sheets and add date imprints to photos. The printer also supports PictBridge, allowing you to connect a compatible camera directly to the printer for printing without a computer.
Canon Selphy CP730 is a compact photo printer that allows you to print photos directly from a memory card or a compatible Canon camera. It features a 3.2-inch LCD screen for previewing images, multiple printing modes including borderless printing, and the ability to print index sheets and add date imprints to photos. The printer also supports PictBridge, allowing you to connect a compatible camera directly to the printer for printing without a computer.


-
 1
1
-
 2
2
-
 3
3
-
 4
4
-
 5
5
-
 6
6
-
 7
7
-
 8
8
-
 9
9
-
 10
10
-
 11
11
-
 12
12
-
 13
13
-
 14
14
-
 15
15
-
 16
16
-
 17
17
-
 18
18
-
 19
19
-
 20
20


Canon Selphy CP730 Owner's manual
- Type
- Owner's manual
- This manual is also suitable for
Canon Selphy CP730 is a compact photo printer that allows you to print photos directly from a memory card or a compatible Canon camera. It features a 3.2-inch LCD screen for previewing images, multiple printing modes including borderless printing, and the ability to print index sheets and add date imprints to photos. The printer also supports PictBridge, allowing you to connect a compatible camera directly to the printer for printing without a computer.
Ask a question and I''ll find the answer in the document
Finding information in a document is now easier with AI
Related papers
-
Canon SELPHY CP900 User manual
-
Canon Selphy CP800 Owner's manual
-
Canon SELPHY CP810 User manual
-
Canon SELPHY CP760 Owner's manual
-
-
Canon SELPHY CP-730 User manual
-
Canon Selphy CP720 User manual
-
-
-
Canon SELPHY CP1200 User guide
