Page is loading ...


2
Welcome
Thank you for purchasing the Predator VX360. The first fully functional, wearable waterproof digital
video system designed exclusively for adventure and extreme sports. Before using the VX360
please first read the Quick Reference Guide and Warnings & Precautions then the Owner’s
Manual to fully understand all of the functions and operating features. Also read the Software User
Guide if you intend to use the Splitscene video editing tool supplied.
The Quick Reference Guide describes how to prepare the VX360 for use along with instructions on
how to wear and operate the unit and maintain its waterproof integrity correctly. On the reverse of
the Quick Reference Guide there are detailed Warnings & Precautions that need to be read,
understood and adopted before using the VX360. Read the Quick Reference Guide and Warnings
& Precautions first.
o The Software User Guide describes the features and operation of the Splitscene 3 video
editing software.
o The Owner’s Manual describes how to set up and maintain the VX360, record video and
sound and transfer or display the resulting footage onto other electronic devices. The
manual is organised into the following sections.
o The Introduction section provides safety, warranty and product registration information as
well as a table of contents.
o The Overview section provides basic information on the Predator VX360
o The Operation section details how to use the main features of the Predator VX360 and
connect the unit for playback and transfer of recorded footage.
o The Appendix contains additional information on the Predator VX360.
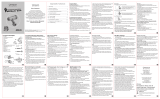
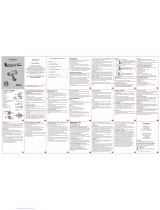
Box Contents:
Main Tray:
1 Eyeball Camera with cable &
connector
1 Eyeball Camera socket mounting
bracket
1 PVR Control Case
1 Control Case strap mounting bracket
1 Neoprene Armstrap
1 Neoprene Headstrap
2 Stick-on Mounting Pads
1 Quick Reference Guide
1 SD Card
Tech Pack:
1 Personal Video Recorder (PVR)
1 Li-ion battery pack
1 PVR remote control unit
1 Mains Charger DC 5V
1 UK & Euro Plug Adaptor
1 PVR to TV cable (RCA)
1 PVR to PC cable (USB)
1 Stereo Earphones

3
Software License Agreement
BY USING THE PREDATOR VX360 YOU AGREE TO BE BOUND BY THE TERMS AND
CONDITIONS OF THE FOLLOWING SOFTWARE LICENSE AGREEMENT. PLEASE READ THIS
AGREEMENT CAREFULLY.
Predator Technology Ltd grants you a limited license to use the software embedded in the
personal video recorder (the ‘Software’) in executable form in the normal operation of the product.
Title, ownership rights and intellectual property rights in and to the software remain with Predator
Technology and/or its component suppliers.
You acknowledge that the Software is property of Predator Technology Ltd and/or its component
suppliers and is protected under United Kingdom copyright laws and international copyright
treaties.
You agree not to decompile, disassemble, modify, reverse assemble, reverse engineer or reduce
to readable form the Software or any part thereof or create any derivative works based on the
Software.
Product Registration
Get better support, upgrades and advice!
By registering your VX360 you can be assured of a better and more prompt service plus many
other benefits. Have your serial number to hand and log onto www.predatorworld.co.uk. Look for
the product registration link and fill in your details.
In case of loss or theft please write your serial number down in the space provide on the Quick
Reference Guide and keep your purchase receipt in a safe place.
License, Product Registration &
Warranty Information
Please register your product and details at
www.predatorworld.co.uk as soon as
possible to receive better product and
software support plus other benefits.

4
Limited Warranty
The Predator VX360 is warranted to be free from defects in materials or workmanship for one year
from the date of purchase. Within this period, Predator Technology Ltd will at its sole option repair
or replace any components that fail in normal use. Such repairs or replacement will be made at no
charge to the customer for parts or labour, provided that the customer shall be responsible for any
transportation costs. This warranty does not cover failures due to disregard of care and
maintenance instructions, abuse, misuse, accident or unauthorised alteration or repairs.
THE WARRANTIES AND REMEDIES CONTAINED HEREIN ARE EXCLUSIVE AND IN LIEU OF
ALL OTHER WARRANTIES EXPRESSED OR IMPLIED OR STATUTORY, INCLUDING ANY
LIABILITY ARISING UNDER ANY WARRANTY OF MERCHANTABILITY OR FITNESS FOR A
PARTICULAR PURPOSE, STATUTORY OR OTHERWISE. THIS WARRANTY GIVES YOU
SPECIFIC LEGAL RIGHTS WHICH MAY VARY FROM COUNTRY TO COUNTRY.
IN NO EVENT SHALL PREDATOR TECHNOLOGY LTD BE LIABLE FOR ANY INCIDENTAL,
SPECIAL, INDIRECT OR CONSEQUENTIAL DAMAGES OR INJURIES, WHETHER RESULTING
FROM THE USE, MISUSE OR INABILITY TO USE THIS PRODUCT OR FROM DEFECTS IN
THE PRODUCT.
RECORDING OF MATERIAL PROTECTED UNDER COPYRIGHT WITHOUT PERMISSION CAN
BE A VIOLATION OF THAT COPYRIGHT. THE USER ASSUMES FULL RESPONSIBLE IN
EVENT OF ANY BREACH OF COPYRIGHT WHEN USING THIS EQUIPMENT.
Predator Technology Ltd retains the exclusive right to repair or replace the product, components of
the product or software, or offer a full refund of the purchase price at its sole discretion. SUCH
REMEDY SHALL BE YOUR SOLE AND EXCLUSIVE REMEDY FOR ANY BREACH OF
WARRANTY.
License, Product Registration &
Warranty Information
Please read this information carefully as it
is important for you to know the extent and
limits of the warranty on the product. Any
questions you have just email:
License & Trademark Notice
‘PREDATOR’ and ‘VX360’ are registered
trademarks of Predator Technology.
Microsoft, Windows and Windows Vista are
trademarks or registered trademarks of
Microsoft Corporation.
All other trademarks and registered
trademarks are of their respective holders.
® and ™Marks may not be consistently
specified in this manual.

5
Warnings and Precautions
WARNING: To reduce the risk of fire, electric shock or product damage:
Do not expose vulnerable product components and accessories (PVR, battery pack,
AC adaptor, AC cable, SD memory card etc.) to rain, moisture, dripping or splashing.
Use only recommended accessories.
Do not open any secure covers. There are no user serviceable parts inside.
WARNING: Risk of fire, explosion or burns. Do not disassemble, heat above 55°C or incinerate.
WARNING: If you choose to use the Predator VX360 during physical activity, sport or pastime, it
is the sole responsibility of the owner or operator of the unit to only operate the device when it is
safe to do so. Failure to pay full attention to the sport or pastime whilst travelling could result in
accident or collision with property damage and personal or third party injury.
PRECAUTION: Use of unit during physical activity
Do not attempt to control the device during times when full physical or mental attention is required to
safely pass along the chosen route, negotiate an obstacle or avoid collisions with static objects or other
participants or onlookers.
PRECAUTION: Indemnity concerning recording content
Predator Technology Ltd shall in no event be liable for the loss of recordings due to malfunction or defect
of this unit, its accessories or recordable media.
PRECAUTION: PVR, camera and SD card temperature
After use and battery charging, the battery may be hot. During normal use the PVR body and SD card
can also become hot. This is normal.
PRECAUTION: LCD monitor
Due to limitations in LCD production technology, there may be some tiny bright or dark spots on the LCD
monitor screen. However, this is not a malfunction and does not affect the recorded picture
Safety Information
For your safety, the safety of others around
you and to avoid damage to equipment and
the environment, please read this section
thoroughly.
DO
Adopt a routine to check the VX360 before
and after use according to the care
instructions provided
DO
Observer all of the care instructions to
maintain and ensure reliable operation
DO
Restrict control of the equipment to before
and after engaging in sporting or
recreational activities
DON’T
Attempt to control the equipment whilst
engaged in sporting or recreational
activities
DON’T
Route the A/V cable around the neck or
other part of the body where accidental
snagging of the cable could result injury or
death
DON’T
Attempt to use an oven, microwave,
hairdryer or other source of direct heat to
dry equipment after use

6
Water Resistance (IMPORTANT)
The Predator VX360 is designed and tested to remain water tight to a depth of 3m for over an hour
and dust tight indefinitely with the lid closed & locked. It is also designed and tested to remain
water tight if dropped into water from up to 1.5m, however the success of the product in these tests
does not guarantee that the unit will not be destroyed or damaged by contact with water and dust.
Observe the precautions in setting up, using and maintaining the VX360 described in this manual
and avoid using the device in water pressures over its recommended limit. The penetration of
water into the unit due to mishandling or misadventure by the user is not covered by the guarantee
given for the unit’s water resistance performance. If water should penetrate the unit, stop using the
unit and consult the reseller from whom you purchased the unit or contact Predator Technology
Ltd directly.
To increase the VX360’s resistance to liquid penetration through direct impact into water or impact
onto other surfaces, there is an Impact Jacket accessory available. If you intent to use the unit in
conditions where there is a risk of direct impact we recommend the use of this accessory. Please
ask your local reseller for further information.
Care Information

7
Before use
o Be sure to set up the unit for use in a dry area with no danger of liquid or particles such as
sand and grit coming into contact with the device.
o Wipe the lid gasket to remove any grit, sand, hair or other particles that could cause the
seal to fail. Use a lint free cloth or a clean, dry finger.
o Check the lid gasket for cracks or breaks. If found do not use unit. Contact Predator
Technology Ltd directly.
o Check corresponding lid moulding for cracks or breaks. If found do not use unit. Contact
Predator Technology Ltd directly.
o Insert the PVR into the control case making sure it is correctly oriented, with the screen
facing up and the arrows located on the front and rear panels of the PVR following the
direction of movement. Don’t force if difficult to insert but remove assess and adjust the
orientation of the PVR according to the instructions and retry.
o Close the control case lid and ensure it is firmly secured by closing and locking the lid
catch.
o Attach the camera to the recording unit via the lead and connector by removing the
protecting caps from both connector and the socket then lining them up so that the
connector can be inserted into the socket. To secure the connection turn the locking ring in
a clockwise direction being careful not to cross thread it on the socket thread.
o Firmly tighten the locking ring using one hand. Do not use any tools to tighten the
connector as over tightening may damage the integral seal permanently and cause the
connector to leak.
o Ensure the filter bezel on the camera’s front face is firmly hand-tighten into the body of the
camera. Do not use any tools to tighten the filter bezel as over tightening may damage the
integral seal permanently and cause the filter bezel to leak.
o Check the function, memory and battery life of the video recording equipment before use. If
any battery or media changes need to be made at this stage it can be done in the safety of
a dry, safe environment.
Care Information
Warning
When connecting the A/V cable, be careful
not to cross thread the locking ring on the
socket thread. If the system is used whilst
cross threaded the waterproof seal will not
be effective and damage may occur to the
threads that will irreversibly affect the
connector’s waterproof properties.
Tip
Before connecting the camera to the
recording unit check both connector
threads for sand, grit or other particles.
Remove any particles and ensure the
threads are clean before attempting to
connect.

8
After Care
o Promptly wipe off any detergent, soap, bath liquids, sun block or sun tan lotion or other
chemicals that splash on the unit. (The unit’s water resistance is only effective in fresh and salt
water).
o Detach straps from mounting devices after use and wash and dry as per their care instructions.
o After use in fresh or salt water rinse the recording unit, eyeball camera, mounting devices and
lead thoroughly in clean fresh water.
o Do not use high pressure water from a tap, squeezed water bottle or hose. Carefully rinse with a
low pressure flow.
o Wipe away all surface and crevice moisture from the unit using an absorbent towel or cloth.
Allow the unit to completely dry by setting it down in a warm shaded place. Do not dry with hot air
or a hair dryer as the excessive heat can distort the casing and degrade the water resistance.
o When opening the lid, removing the filter bezel or detaching the cable ensure that hands,
clothing and hair are drip free to avoid accidental water splashing of internal, exposed
components.
o When handling the removable PVR, removing the SD card, changing the battery or handling any
of the electrical accessories ensure that hands, clothing and hair are dry to avoid accidental
water splashing or transfer of moisture to vulnerable components.
o Wipe moisture from the camera lens filter with a clean soft lens cloth.
Storing the Predator VX360
o Ensure that the VX360 is stored in a dry environment away from direct and prolonged exposure
to sunlight or heat as this will result in irreversible damage.
Replacing waterproof seals
o The waterproof seals in the unit are built to last for an indefinite period however if the seals look
visibly worn, broken or damaged they should be replaced immediately. Contact your local dealer
or Predator Technology Ltd for further advice.
Care Information
Warning
When detaching the cable from the
recording case, rotate the locking ring on
the connector ONLY counter clockwise.
Do not attempt to detach the cable by
turning the whole connector as this may
cause internal damage to the cable.
Tip
Grit, sand and salt crystals can cause
friction between the locking ring and the
main body of the connector so it is
essential to rinse and check this
component after use. Always ensure the
locking ring can rotate freely around the
connector before use.

9
INTRODUCTION
Welcome
2
Box Contents
2
License, Product Registration & Warranty Information
3
Safety
5
Care
6
OVERVIEW
Predator VX360
10
Controls
12
Charging and Installation
14
Product Setup
16
OPERATION
Recording
23
Playback
28
Downloading
32
APPENDIX
System Settings
33
Product Specification
35
Contents
Predator Technology Ltd
PO Box 6792
Dorset. UK
BH18 0AS
Tel: (UK) 08446 360720
email: support@predatortechnology.co.uk
web: www.predatorworld.co.uk

10
Predator VX360
Your wearable, waterproof VX360 digital video system is built to capture the most exciting footage
from the most adventurous of sports. With a convenient strap and headband, the VX360 keeps
you hands free whilst it gets on with the job of recording the ultimate in video footage.
The internal Personal Video Recorder (PVR) is removable to allow connection to computer and
television as well as charging and battery replacement.
The images following describe the control buttons and some of the features of your VX360.
Waterproof Control Case
Predator VX360

11
Camera and Mounting Bracket
Personal Video Recorder (PVR)

12
Video Control Buttons
POWER ON/OFF button:
o Firmly press and hold for 2 seconds then release the button to switch the unit on
o Firmly press and hold to turn the unit off
RECORD button:
o Press and release to start or resume recording
o If the LCD backlight is off before pressing, press any button and release to turn the
backlight on then press record to start recording
o The recording indicator on the LCD Viewing Panel will glow red when recorder is
recording whether the backlight is on or not
PAUSE button:
o Press and release to pause recording
o If the LCD backlight is off press and release to turn the backlight on then press
again to pause
o The recording indicator on the LCD Viewing Panel will flash red when recording is
paused whether the LCD backlight is on or not.
STOP button:
o Press and release to stop recording
o If the LCD backlight is off press and release to turn backlight on then press again to
stop recording
o Also use the stop button to exit or escape menus or video playback and return to
the main system menu.
Controls

13
Setup and Review Buttons
SETUP button:
o Press and release to enter or exit the Program Settings of the recording device
from the main menu, the Video Settings when in video mode or the Playback
Settings when in playback mode.
PLAY/PAUSE button:
o Use to confirm selection on pages and menus
o Use to play or pause footage in video playback mode
UP/DOWN button:
o Use to highlight menu options on pages and menus
o Use to select other video files during video playback
FORWARD/BACK button:
o Use to highlight menu options on pages and menus
o Use to fast forward or rewind during video playback
o Use to slow playback in both directions from paused video playback
Controls

14
Installing the Battery & Charging the VX360
The Predator VX360 uses a single lightweight Lithium Ion battery located in the back of the PVR.
The battery is removable after installation but it is recommended that it is left in the PVR unless a
Predator external rapid battery charger is to be used or it is swapped out or replaced.
Only batteries and chargers supplied by Predator Technology Ltd should be used with the VX360.
Use of any other power or charging source is likely to result in irreparable damage to the camera
and possible injury to the user.
To install the battery
o Remove the PVR Battery Compartment Door
o Place the battery carefully into the compartment so the two metal battery contacts
align with the PVR contacts
o Replace battery compartment door
To charge the battery
o Use the mains charger supplied with the correct adaptor for the common electrical
outlet type of your country.
o Insert the jack from the mains charger into the charging port on the PVR marked
DC 5V In
o When charging the double LED located below the ON/OFF Toggle will glow orange
o When fully charged the LED will go out. Unplug the PVR from the charger before
switching off the mains supply.
The battery should now be charged and ready for use. The battery normally takes about 1 hour to
fully charge. Ensure the battery is fully charged before use. The PVR menu displays the battery
status at the bottom right of the screen when switched on.
Charging & Installation
Disposal of waste batteries and end-
of-life electrical and electronic
equipment. (Applicable in the
European Union and other European
countries with separate collection
systems).
This symbol on the battery,
packaging or product
indicates that the battery or
product shall not be treated
as household waste.
It should be handed to the applicable
collection point for disposal or recycling.
By disposing of the batteries correctly,
you will help prevent environmental
contamination and harm to human
health.
Recycling of the materials will help
conserve natural resources.
For more detailed information about
recycling of this product please contact
your local Civic Office or household
waste disposal service.

15
Installing the SD Card & PVR into the Waterproof Control Case
Before using the VX360, the PVR and SD card must be correctly installed into the protective,
waterproof control case. It is essential that the PVR is oriented correctly when inserted otherwise
the unit will not work and is at risk of being damaged or damaging the control case if forced.
To install the PVR
o Ensure the PVR battery has been fully charged (See Charging the PVR) and SD card has
been installed
o Open the lid of the control case in a clean and dry environment. Follow the instructions given
in the Introduction of this manual under the care & safety before use section, to ensure the
control case is useable
o Remove the plastic pull tab from the battery compartment on the inside of the control case
o Observe the direction of the arrow on the PVR fascia and the PVR battery door and use as
a guide for correct orientation
o Position the PVR at the mouth of the case with the arrows on the PVR pointing in the
direction of insertion and the PVR LCD screen on the same side as the LCD viewing panel
on the control case
o Push the PVR in until the ‘AV In DC 5V Out’ jack engages with the A/V pin at the base of the
control case
o Close the lid of the waterproof control case and engage the catch to secure the lid
The following SD cards can be used in the VX360: 256MB, 512MB, 1GB, 2GB (Class 2 or higher)
The following SDHC cards can be used in the VX360: 4GB & 8GB
Format SD cards to work with this unit only otherwise media may become unusable.
An SD card symbol appears on the bottom right of the PVR screen when the SD card is correctly
installed.
IMPORTANT
When handling SD or SDHC cards, never
touch the terminals on the back of the
card. Prevent water, dirt and foreign
matter from contacting with the terminals.
After use return the SD card to its case
and never leave exposed to heat, light,
static electricity or electromagnetic waves
as this can cause corruption or loss of
data. Always save important data onto a
computer using the supplied USB cable.

16
Attaching the Camera Cable to the Control Case Video Connector
Before using the VX360 it is essential that the camera cable is connected correctly to the video
connector on the waterproof control case. The connection can only be made in a particular
orientation as the male and female components are asymmetric. Familiarise yourself with the
correct orientation by closely examining the two connectors.
o Check both connectors are free of sand, grit, hair or any other particles that could damage
or otherwise compromise the waterproof seal
o Mate the connectors in the orientation determined by their asymmetry and push firmly
together.
o Slide the rotating locking ring on the camera cable connector over the control case video
connector and rotate clockwise onto the thread until tightly connected.
o Do not cross thread. Only use hands to tighten.
o Do not use tools as over tightening will damage the waterproof seal.
Product Setup

17
Setting up the Arm Strap
The VX360 Control Case with inserted PVR can be worn on the upper arm to enable you to carry
it whilst keeping your hands free for other activities. The arm strap in conjunction with the strap
mounting bracket allows for the control case to be attached and removed from the arm without
the need for detaching the arm strap or mounting bracket at the same time.
The VX360 video control buttons are easily accessible if the arm strap and mounting bracket are
attached to the left upper arm.
To attach the strap mounting bracket to the arm strap use the diagram provided and follow the
instructions given below:
o Ensure that the fastening tape surface on the arm strap is facing upwards and the mounting
bracket is also facing upwards with the protruding catch facing towards you
o Insert the curved end of the strap down through the slot between the metal pin and the body
of the bracket in the direction of the arrow shown in the diagram
o Push the strap up and through the other gap on the opposite side of the mounting bracket and
feed the arm strap through the slots on the mounting bracket
o Finish by feeding the protruding webbing tag through the mounting bracket slots until it
appears out from the second slot
o The D-ring on the arm strap and approximately 50mm (2 inches) of webbing should be left
protruding from the left hand side of the bracket.
Product Setup

18
Attaching the arm strap to your arm
o Create a loose loop by threading the curved end of the strap through the D-ring on the
opposite end
o Slide the loop up the left arm ensuring that the mounting bracket catch is facing down the
arm
o Position the strap above the bicep muscle with the mounting bracket on the top or outer
side of the arm and the curved end of the arm strap and the D-ring on the inner side of the
arm
o To secure the strap; pull the curved end further through the D-ring and fasten it to the
fastening tape on the strap (Make sure the strap is comfortable on the arm but tight
enough to avoid slipping)
Product Setup

19
Attaching and Removing the Control Case from the Arm Strap
The control case can be attached and removed independently of the arm strap due to the
inclusion of the mounting rail. This facilitates camera angle set up, reviewing footage and
changing settings without having to remove the arm strap.
To attach the control case
o With the arm strap attached to your left upper arm and your right hand holding the control
case with the video connector facing away from you and the waterproof microphone facing
towards you, line up the rails on the control case at the top end of mounting bracket and
slide the control case smoothly down the mounting bracket until an audible ‘click’ is heard
o Check the union is secure by attempting to move the control case back up the mounting
bracket. It should remain secure with very little movement
To remove the control case
o Depress the mounting bracket catch towards the arm
o Simultaneously slide the control case up the mounting bracket
Tip
Before you set off, detach the control case
from the arm strap and mounting rails,
switch on and set to preview mode. Hold
the screen at arm’s length in front of you at
head level. You will now be able to see the
cameras’ true field of view. This allows you
to make any final adjustments to the
camera angle. Replace the control case
securely to the arm strap.
Product Setup

20
Attaching the Eyeball Camera to the Socket Mounting Bracket
The VX360 Eyeball Camera can be worn on the head to enable you to carry it whilst keeping your hands
free for other activities. The Head Strap in conjunction with the Socket Mounting Bracket provides a secure,
rugged and lightweight method of shooting video without impacting on personal performance. The bracket
also allows the camera angle to be altered in all three planes of movement: up and down, side to side and
rotating around its own axis, providing the ultimate control over your footage.
To attach the Eyeball Camera to the Socket Mounting Bracket:
o Push the rear of the camera into the front of the bracket until it sits comfortably in the
socket.
o Adjust the camera angle to capture the required field of view.
Tip
Getting the camera angle correct is one
of the most important ways in which you
can improve the quality and content of
your footage. Much like photography it is
important to get the subject in the frame
as often as possible. Use the flexibility of
the VX360 rotatable camera to set up a
good videoing angle, keeping the horizon
maintained and the field of view
unobstructed.
Product Setup
/