Page is loading ...

Metra. The World’s Best Kits.® MetraOnline.com © COPYRIGHT 2018 METRA ELECTRONICS CORPORATION REV. 7/30/18 INST70-7307
Metra. The World’s Best Kits.® MetraOnline.com © COPYRIGHT 2018 METRA ELECTRONICS CORPORATION REV. 7/30/18 INST70-7307
INSTRUCCIONES DE INSTALACIÓN
INSTALLATION INSTRUCTIONS
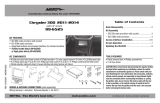
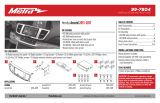
70-7307
70-7307
CAUTION!
All accessories, switches, climate
controls panels, and especially air bag indicator
lights must be connected before cycling the
ignition. Also, do not remove the factory radio
with the key in the on position, or while the
vehicle is running.
TOOLS REQUIRED
• Crimping tool and connectors, or solder gun,
solder, and heat shrink
• Tape • Wire cutter • Zip ties
HERRAMIENTAS REQUERIDAS
•
Herramienta de engarzado y conectores, o pistola
de soldadura, soldadura y termocontracción
• Cinta • Cortacables • Zip lazos
TABLE OF CONTENTS
Connections ............................................................2
INDICE
Conexiones .............................................................2
Hyundai/Kia Wiring Harness (with Base radio)
2017-up*
Hyundai/Kia Arnés de Cableado
(con radio Base)
2017 y mas*
*Visit MetraOnline.com for up-to-date vehicle specific applications.
* Visite MetraOnline.com para aplicaciones específicas de vehículos actualizadas.
¡PRECAUCIÓN! Todos los accesorios, interruptores,
paneles de controles de clima y especialmente las
luces del indicador de las bolsas de aire deben estar
conectados antes ciclar la ignición. Además, no
quite el radio de fábrica con la llave en la posición o
de encendido ni con el vehículo funcionando.
APLICACIONES
APPLICATIONS
Hyundai
Accent† 2018 y mas
Kia
Rio / Rio 5-door† 2018 y mas
Sedona† 2017 y mas
Soul† 2017 y mas
Hyundai
Accent† 2018-up
Kia
Rio / Rio 5-door† 2018-up
Sedona† 2017-up
Soul† 2017-up
† Solo para modelos con radio base “sin pantalla táctil”
† Only for models with a Base “non-touchscreen” radio
CARACTERÍSTICAS DEL ARNÉS
• Arnés de cableado para la instalación de una radio no original
• Proporciona potencia y cuatro altavoces
• Retiene el balance y la intensidad
• Proporciona salidas de NAV (freno de mano, reversa, silencio,
sensor de velocidad)
• Arnés ASWC-1 precableado (el ASWC-1 se vende por separado)
• Retiene la conector AUX-IN de fábrica
• Retiene la cámara de reversa de fábrica
•
Retiene USB de fábrica
HARNESS FEATURES
• Wiring harness for installation of an aftermarket radio
• Provides power and four speakers
• Retains balance and fade
• Provides NAV outputs (parking brake, reverse, speed sense)
• Pre-wired ASWC-1 harness (ASWC-1 sold separately)
• Retains the factory AUX-IN jack
• Retains the factory backup camera
• Retains the factory USB
OPTIONAL ACCESSORIES (sold separately)
Steering Wheel Control Interface: ASWC-1
12V TO 6V Step-Down: AX-CAM6V
ACCESORIOS OPCIONALES (se vende por separado)
Interfaz de control en volante: ASWC-1
12V a 6V de bajada: AX-CAM6V

Metra. The World’s Best Kits.® MetraOnline.com © COPYRIGHT 2018 METRA ELECTRONICS CORPORATION REV. 7/30/18 INST70-7307
Metra. The World’s Best Kits.® MetraOnline.com © COPYRIGHT 2018 METRA ELECTRONICS CORPORATION REV. 7/30/18 INST70-7307
INSTRUCCIONES DE INSTALACIÓN
INSTALLATION INSTRUCTIONS
70-7307
70-7307
CONEXIONES
CONNECTIONS
Desde el arnés 70-7307 al radio de mercado secundario:
•
Conecte el cable
negro
, y también el cable
negro
con la etiqueta “Camera Ground”,
al cable de tierra
.
• Conecte el cable amarillo con el cable de la batería.
• Conecte el cable rojo con el cable de accesorios.
• Conecte el cable rojo con la etiqueta “Camera Power 6V” al cable azul/rojo del AX-CAM6V
(se vende por separado).
• Conecte el cable azul con el cable de encendido de la antena.
• Conecte el cable anaranjado con el cable de iluminación, si aplica.
• Conecte el cable gris con la salida positiva de la bocina derecha delantera.
• Conecte el cable gris/negro con la salida negativa de la bocina derecha delantera.
• Conecte el cable blanco con la salida positiva de la bocina izquierda delantera.
• Conecte el cable blanco/negro con la salida negativa de la bocina izquierda delantera.
• Conecte el cable verde con la salida positiva de la bocina izquierda trasera.
• Conecte el cable verde/negro con la salida negativa de la bocina izquierda trasera.
• Conecte el cable púrpura con la salida positiva de la bocina derecha trasera.
• Conecte el cable púrpura/negro con la salida negativa de la bocina derecha trasera.
From the 70-7307 harness to the aftermarket radio:
•
Connect the Black wire, and also the Black wire labeled “Camera Ground”, to the ground wire
.
• Connect the Yellow wire to the battery wire.
• Connect the Red wire to the accessory wire.
• Connect the Red wire labeled “Camera Power 6V” to the Blue/Red wire from the AX-CAM6V
(sold separately).
• Connect the Blue wire to the power antenna turn-on wire.
• Connect the Orange wire to the illumination wire, if applicable.
• Connect the Gray wire to the right front positive speaker wire.
• Connect the Gray/Black wire to the right front negative speaker wire.
• Connect the White wire to the left front positive speaker wire.
• Connect the White/Black wire to the left front negative speaker wire.
• Connect the Green wire to the left rear positive speaker wire.
• Connect the Green/Black wire to the left rear negative speaker wire.
• Connect the Purple wire to the right rear positive speaker wire.
• Connect the Purple/Black to the right rear negative speaker wire.
The following (3) wires are only for multimedia/navigation radios that require these wires.
• Conecte el cable verde claro al cable de freno de mano
• Conecte el cable azul/rosa al cable VSS/sensor de velocidad.
• Conecte el cable verde/púrpura al cable de reversa.
• Si retener el enchufe AUX-IN de fábrica, conecte los conectores RCA rojo y blanco a las tomas
AUX-IN de audio de la radio de fábrica.
•
Conecte la conector amarilla RCA al conector designado para una entrada de cámara de respaldo
.
• Si desea conservar el USB de fábrica, conecte el cable USB a la entrada USB.
Arnés ASWC-1 precableado de 12 pins:
• Este arnés se debe usar junto con el ASWC-1 opcional (no incluido) para retener los controles
de audio en el volante. Si no se usará el ASWC-1, ignore este arnés. Si se va a utilizar,
consulte las instrucciones de ASWC-1 para las conexiones del radio y la programación.
Ignore el arnés que viene con el ASWC-1.
The following (3) wires are only for multimedia/navigation radios that require these wires.
• Connect the Light Green wire to the parking brake wire.
• Connect the Blue/Pink wire to the VSS/speed sense wire.
• Connect the Green/Purple wire to the reverse wire.
• If retaining the factory AUX-IN jack is desired, connect the Red & White RCA jacks to the
AUX-IN jacks.
• Connect the Yellow RCA jack to the jack designated for a backup camera input.
• If retaining the factory USB is desired, connect the USB cable to USB input.
12-pin pre-wired ASWC-1 harness:
This harness is to be used along with the ASWC-1 (sold separately) to retain steering wheel
audio controls. If the ASWC-1 is not being used, disregard this harness. If it is to be used,
please refer to the ASWC-1 instructions for radio connections and programming. Disregard the
harness that comes with the ASWC-1.

Metra. The World’s Best Kits.® MetraOnline.com © COPYRIGHT 2018 METRA ELECTRONICS CORPORATION REV. 7/30/18 INST70-7307
Metra. The World’s Best Kits.® MetraOnline.com © COPYRIGHT 2018 METRA ELECTRONICS CORPORATION REV. 7/30/18 INST70-7307
INSTRUCCIONES DE INSTALACIÓN
INSTALLATION INSTRUCTIONS
70-7307
70-7307
CAUTION!
All accessories, switches, climate
controls panels, and especially air bag indicator
lights must be connected before cycling the
ignition. Also, do not remove the factory radio
with the key in the on position, or while the
vehicle is running.
TOOLS REQUIRED
• Crimping tool and connectors, or solder gun,
solder, and heat shrink
• Tape • Wire cutter • Zip ties
HERRAMIENTAS REQUERIDAS
•
Herramienta de engarzado y conectores, o pistola
de soldadura, soldadura y termocontracción
• Cinta • Cortacables • Zip lazos
TABLE OF CONTENTS
Connections ............................................................2
INDICE
Conexiones .............................................................2
Hyundai/Kia Wiring Harness (with Base radio)
2017-up*
Hyundai/Kia Arnés de Cableado
(con radio Base)
2017 y mas*
*Visit MetraOnline.com for up-to-date vehicle specific applications.
* Visite MetraOnline.com para aplicaciones específicas de vehículos actualizadas.
¡PRECAUCIÓN! Todos los accesorios, interruptores,
paneles de controles de clima y especialmente las
luces del indicador de las bolsas de aire deben estar
conectados antes ciclar la ignición. Además, no
quite el radio de fábrica con la llave en la posición o
de encendido ni con el vehículo funcionando.
APLICACIONES
APPLICATIONS
Hyundai
Accent† 2018 y mas
Kia
Rio / Rio 5-door† 2018 y mas
Sedona† 2017 y mas
Soul† 2017 y mas
Hyundai
Accent† 2018-up
Kia
Rio / Rio 5-door† 2018-up
Sedona† 2017-up
Soul† 2017-up
† Solo para modelos con radio base “sin pantalla táctil”
† Only for models with a Base “non-touchscreen” radio
CARACTERÍSTICAS DEL ARNÉS
• Arnés de cableado para la instalación de una radio no original
• Proporciona potencia y cuatro altavoces
• Retiene el balance y la intensidad
• Proporciona salidas de NAV (freno de mano, reversa, silencio,
sensor de velocidad)
• Arnés ASWC-1 precableado (el ASWC-1 se vende por separado)
• Retiene la conector AUX-IN de fábrica
• Retiene la cámara de reversa de fábrica
•
Retiene USB de fábrica
HARNESS FEATURES
• Wiring harness for installation of an aftermarket radio
• Provides power and four speakers
• Retains balance and fade
• Provides NAV outputs (parking brake, reverse, speed sense)
• Pre-wired ASWC-1 harness (ASWC-1 sold separately)
• Retains the factory AUX-IN jack
• Retains the factory backup camera
• Retains the factory USB
OPTIONAL ACCESSORIES (sold separately)
Steering Wheel Control Interface: ASWC-1
12V TO 6V Step-Down: AX-CAM6V
ACCESORIOS OPCIONALES (se vende por separado)
Interfaz de control en volante: ASWC-1
12V a 6V de bajada: AX-CAM6V

Metra. The World’s Best Kits.® MetraOnline.com © COPYRIGHT 2018 METRA ELECTRONICS CORPORATION REV. 7/30/18 INST70-7307
Metra. The World’s Best Kits.® MetraOnline.com © COPYRIGHT 2018 METRA ELECTRONICS CORPORATION REV. 7/30/18 INST70-7307
INSTRUCCIONES DE INSTALACIÓN
INSTALLATION INSTRUCTIONS
70-7307
70-7307
CONEXIONES
CONNECTIONS
Desde el arnés 70-7307 al radio de mercado secundario:
•
Conecte el cable
negro
, y también el cable
negro
con la etiqueta “Camera Ground”,
al cable de tierra
.
• Conecte el cable amarillo con el cable de la batería.
• Conecte el cable rojo con el cable de accesorios.
• Conecte el cable rojo con la etiqueta “Camera Power 6V” al cable azul/rojo del AX-CAM6V
(se vende por separado).
• Conecte el cable azul con el cable de encendido de la antena.
• Conecte el cable anaranjado con el cable de iluminación, si aplica.
• Conecte el cable gris con la salida positiva de la bocina derecha delantera.
• Conecte el cable gris/negro con la salida negativa de la bocina derecha delantera.
• Conecte el cable blanco con la salida positiva de la bocina izquierda delantera.
• Conecte el cable blanco/negro con la salida negativa de la bocina izquierda delantera.
• Conecte el cable verde con la salida positiva de la bocina izquierda trasera.
• Conecte el cable verde/negro con la salida negativa de la bocina izquierda trasera.
• Conecte el cable púrpura con la salida positiva de la bocina derecha trasera.
• Conecte el cable púrpura/negro con la salida negativa de la bocina derecha trasera.
From the 70-7307 harness to the aftermarket radio:
•
Connect the Black wire, and also the Black wire labeled “Camera Ground”, to the ground wire
.
• Connect the Yellow wire to the battery wire.
• Connect the Red wire to the accessory wire.
• Connect the Red wire labeled “Camera Power 6V” to the Blue/Red wire from the AX-CAM6V
(sold separately).
• Connect the Blue wire to the power antenna turn-on wire.
• Connect the Orange wire to the illumination wire, if applicable.
• Connect the Gray wire to the right front positive speaker wire.
• Connect the Gray/Black wire to the right front negative speaker wire.
• Connect the White wire to the left front positive speaker wire.
• Connect the White/Black wire to the left front negative speaker wire.
• Connect the Green wire to the left rear positive speaker wire.
• Connect the Green/Black wire to the left rear negative speaker wire.
• Connect the Purple wire to the right rear positive speaker wire.
• Connect the Purple/Black to the right rear negative speaker wire.
The following (3) wires are only for multimedia/navigation radios that require these wires.
• Conecte el cable verde claro al cable de freno de mano
• Conecte el cable azul/rosa al cable VSS/sensor de velocidad.
• Conecte el cable verde/púrpura al cable de reversa.
• Si retener el enchufe AUX-IN de fábrica, conecte los conectores RCA rojo y blanco a las tomas
AUX-IN de audio de la radio de fábrica.
•
Conecte la conector amarilla RCA al conector designado para una entrada de cámara de respaldo
.
• Si desea conservar el USB de fábrica, conecte el cable USB a la entrada USB.
Arnés ASWC-1 precableado de 12 pins:
• Este arnés se debe usar junto con el ASWC-1 opcional (no incluido) para retener los controles
de audio en el volante. Si no se usará el ASWC-1, ignore este arnés. Si se va a utilizar,
consulte las instrucciones de ASWC-1 para las conexiones del radio y la programación.
Ignore el arnés que viene con el ASWC-1.
The following (3) wires are only for multimedia/navigation radios that require these wires.
• Connect the Light Green wire to the parking brake wire.
• Connect the Blue/Pink wire to the VSS/speed sense wire.
• Connect the Green/Purple wire to the reverse wire.
• If retaining the factory AUX-IN jack is desired, connect the Red & White RCA jacks to the
AUX-IN jacks.
• Connect the Yellow RCA jack to the jack designated for a backup camera input.
• If retaining the factory USB is desired, connect the USB cable to USB input.
12-pin pre-wired ASWC-1 harness:
This harness is to be used along with the ASWC-1 (sold separately) to retain steering wheel
audio controls. If the ASWC-1 is not being used, disregard this harness. If it is to be used,
please refer to the ASWC-1 instructions for radio connections and programming. Disregard the
harness that comes with the ASWC-1.
/